Blog

  • RAG vs MCP Integration for AI Systems: Key Differences & Benefits

    RAG vs MCP Integration for AI Systems: Key Differences & Benefits

    Introduction to RAG and MCP

    In AI development, two primary approaches for working with large language models (LLMs) are Retrieval-Augmented Generation (RAG) and Model Context Protocol (MCP). This article compares these methods to help you decide the best option for your particular use case.

    RAG and MCP represent two distinct but complementary approaches for incorporating LLMs into AI workflows. RAG improves an LLM’s ability to generate responses by using a document repository, anchoring the model’s outputs in existing knowledge to ensure that the answers are both relevant and traceable. The process starts by indexing a knowledge base, such as manuals or documents, and encoding them in a searchable format. When a query is made, the system searches the indexed content, retrieves relevant documents, and uses them to enhance the LLM’s input. This allows the model to offer responses that combine both its trained knowledge and the retrieved data.

    In contrast, MCP allows the LLM to interact with external systems, databases, and tools in real time. MCP integrates external interactions, such as API calls or database queries, into the model’s decision-making process. The model uses defined tools to perform tasks, passing necessary arguments to retrieve live data or perform specific actions. The results are then sent back to the model, where they are incorporated into the response.

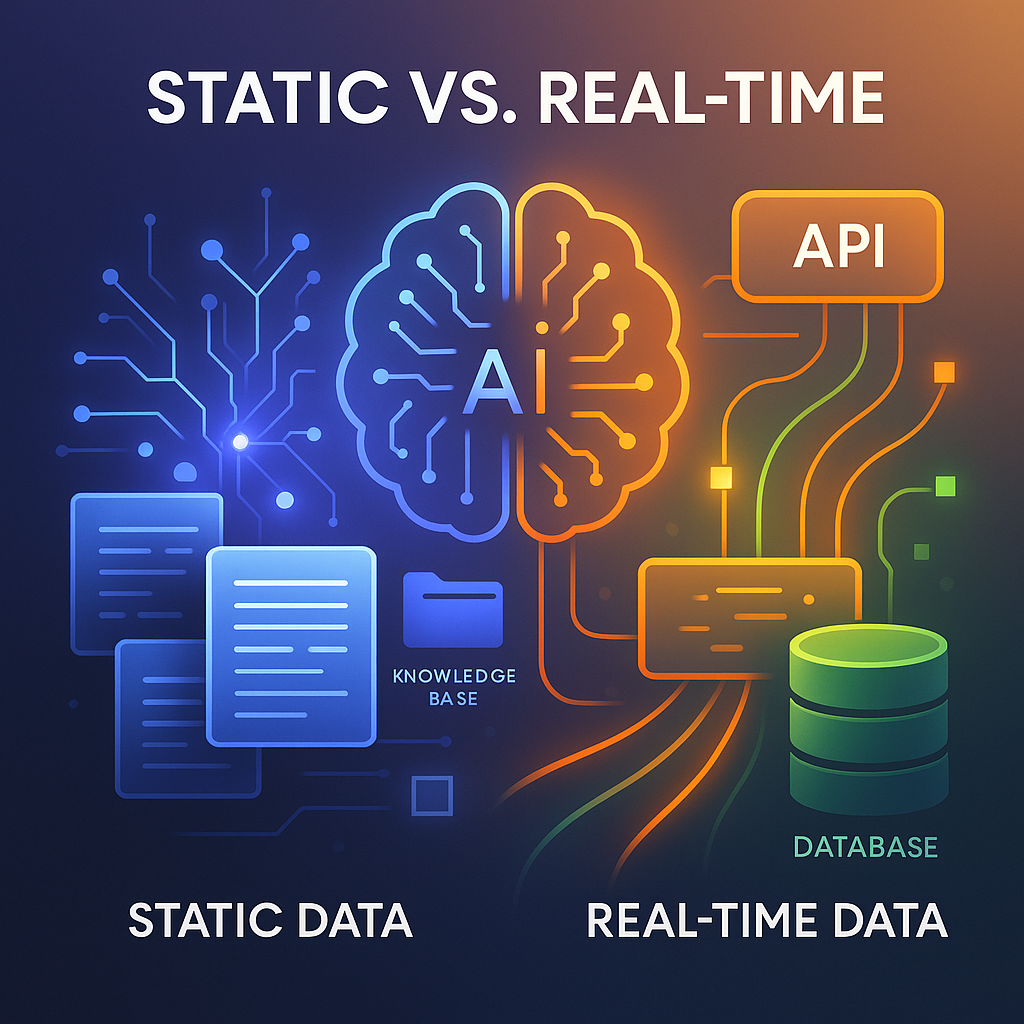
    While RAG is optimal for static knowledge scenarios, such as answering policy questions or referencing manuals, MCP is more effective when live data or real-time actions are needed, like querying real-time inventory or executing workflows. Many systems use both RAG and MCP, relying on RAG for knowledge retrieval and MCP for real-time interactions.

    Understanding Retrieval-Augmented Generation (RAG)

    RAG is a technique that enhances AI responses by combining information retrieval with generative models. Its main concept is to use existing documents or databases to provide context before generating a response. This is particularly helpful when specific, verifiable information must be included to ensure the response’s accuracy.

    RAG operates by indexing a collection of knowledge, such as articles or manuals, and using retrieval to identify the most relevant content. This information is then provided as context to the LLM, allowing it to generate an informed and relevant response that is rooted in factual content.

    Embeddings are key to RAG, as they allow documents and queries to be represented in vector spaces. These embeddings capture meaning, enabling retrieval that goes beyond simple keyword matching. Techniques such as vector search or TF-IDF are used to quickly find relevant content.

    RAG is highly effective in situations that require static, well-documented knowledge. For example, customer support systems can use RAG to retrieve policy documents or troubleshooting guides, ensuring responses align with official documentation. Likewise, academic research tools can use RAG to fetch research papers relevant to user queries.

    Though RAG is excellent for static knowledge, it has limitations, especially regarding the quality and freshness of the indexed content. If the knowledge base is outdated or incomplete, the system might return inaccurate responses. Regular updates are crucial for maintaining the effectiveness of RAG systems.

    Exploring Model Context Protocol (MCP)

    MCP is a robust framework that enables external tools, APIs, and databases to be integrated into AI systems. Unlike RAG, which uses static data, MCP processes real-time data and manages dynamic interactions. MCP allows AI models to access external systems and execute tasks based on live data, offering far more interactivity than RAG.

    In MCP, the model communicates with external tools through structured requests. These tools are registered within the system, each with clear input/output specifications, names, and descriptions. When a task requires live data—like querying a database for current stock levels or calling an API for weather information—the model selects the appropriate tool and sends the necessary parameters. The system runs the tool, retrieves the result, and sends it back to the model for further processing.

    MCP is particularly valuable for tasks that need real-time information, such as in e-commerce, financial services, or customer support systems. For example, if a customer asks about product stock levels, MCP will query the live inventory database. Similarly, if an AI assistant needs to update a user profile, MCP can interact with the relevant API to perform the update.

    MCP supports multi-step workflows, allowing the model to plan and sequence tool calls based on incoming data. This makes MCP highly flexible for dynamic tasks, setting it apart from RAG, which is best at retrieving static data. MCP is ideal for applications involving decision-making and real-time actions.

    Choosing Between RAG and MCP

    When choosing between RAG and MCP, consider the task’s nature and the type of data involved. RAG is better suited for retrieving information from a structured knowledge base, making it perfect for static information that doesn’t change often, like company policies, product specifications, or academic papers. RAG excels at retrieving relevant content and grounding responses in documented facts.

    MCP, on the other hand, is more suited for tasks requiring live data, dynamic actions, or interaction with external systems. For instance, retrieving current stock levels, processing user requests, or calling APIs for live data are tasks that MCP handles well. By integrating external tools and APIs, MCP offers more interactive, action-driven responses than RAG.

    In many cases, combining RAG and MCP is the best approach. A typical workflow involves using RAG to retrieve static knowledge and MCP to manage real-time actions. For example, in customer support, RAG might retrieve a product policy, MCP could trigger an order replacement, and RAG would then explain the policy based on the retrieved information.

    The decision ultimately comes down to whether the task needs static knowledge retrieval or dynamic, real-time interaction. Using both RAG for knowledge retrieval and MCP for actions offers a comprehensive solution.

    Pitfalls and Challenges of RAG and MCP

    Both RAG and MCP present challenges that should be considered when designing effective AI systems. The main issue with RAG is the reliance on outdated or missing content. If the indexed documents are outdated, the retrieval process may fail to find accurate information, which can hurt response quality. RAG systems break documents into smaller chunks for indexing, and if relevant information is split or phrased differently, the retriever might miss it. Regular updates and better chunking strategies can help resolve this problem.

    Another issue with RAG is prompt overload. Retrieving too many chunks, especially irrelevant ones, can overload the model’s context window, lowering the accuracy of the responses. Limiting the number of retrieved chunks and focusing on the most relevant content can help mitigate this issue.

    MCP also faces challenges, especially when external tools are poorly defined. If tools lack clear input/output specifications or descriptions, the model may have difficulty using them correctly, resulting in failures when performing actions. To solve this, tools need to have well-defined specifications and input/output schemas.

    Security risks also arise with MCP, especially when the model has the ability to perform actions. Ensuring that proper authentication and authorization measures are in place can help prevent misuse and secure the system.

    Hybrid Workflows: Combining RAG and MCP

    Combining RAG and MCP offers an effective solution for AI systems that need both contextual grounding and real-time actions. Many real-world applications require both retrieving static information and interacting with dynamic data or performing actions. By combining both methods, developers can create workflows that leverage the strengths of each approach.

    In a hybrid workflow, RAG retrieves relevant information from a knowledge base, providing the model with context to answer queries. Then, MCP can be used to interact with APIs, databases, or external tools, managing real-time data and making the system responsive to dynamic conditions. Once the action is completed, RAG can be used again to explain the result or offer a detailed response, ensuring it’s grounded in retrieved knowledge.

    For instance, in customer support, RAG could fetch the return policy, while MCP checks the return status via an API. After obtaining the return status, RAG can explain the policy’s implications based on the current return status.

    Hybrid workflows are especially valuable for applications that require both accurate, traceable responses and real-time actions. They allow AI systems to automate processes, manage data, and interact with external systems, making them more efficient and capable.

    Conclusions

    RAG and MCP each offer unique benefits for different task types. RAG is ideal for retrieving traceable information from static sources, while MCP excels at handling live data and real-time actions. Combining both approaches in a hybrid workflow can provide the most effective solution.

    For AI systems that require both static and dynamic data handling, integrating cloud servers can provide the necessary flexibility. Cloud infrastructure can scale dynamically as data needs change, ensuring that RAG and MCP processes are supported with the proper resources. Whether hosting a knowledge base for RAG or providing computing power for real-time MCP actions, cloud services can ensure that both processes run smoothly, securely, and with minimal downtime.

    How to Leverage Cloud Servers:

    Step 1: Deploy a cloud server in a region close to your user base (e.g., Frankfurt for EU users or São Paulo for Brazilian audiences) to ensure low latency for both RAG and MCP tasks. Choose a region that best fits your data needs.

    Step 2: Choose an operating system like Ubuntu or Alma Linux and select necessary add-ons such as MySQL for database management or VPN servers for secure connections.

    Step 3: Set up a knowledge base for RAG or integrate APIs for MCP to ensure smooth interaction with your dynamic workflows. With scalable infrastructure, you can add or remove resources as needed, making it adaptable to your project’s requirements.

    Benefit of Cloud Servers: Cloud servers offer a flexible, scalable, and secure infrastructure solution that supports both static and dynamic workflows for AI systems, ensuring reliable performance and cost-effective resource management.

    Official Documentation

    .faq-container {
    margin: 20px auto;
    padding: 15px 20px;
    background: #fafafa;
    border-radius: 12px;
    box-shadow: 0 4px 10px rgba(0,0,0,0.05);
    box-sizing: border-box;
    }
    .faq-item {
    border-bottom: 1px solid #ddd;
    }
    .faq-item:last-child {
    border-bottom: none;
    }
    .faq-question {
    margin: 0;
    padding: 15px;
    color: #2c3e50;
    cursor: pointer;
    background: #f0f0f0;
    border-radius: 8px;
    transition: background 0.3s;
    display: flex;
    align-items: center;
    justify-content: space-between;
    }
    .faq-question:hover {
    background: #e0e0e0;
    }
    .faq-text {
    flex: 1;
    text-align: left;
    }
    .faq-icon {
    flex-shrink: 0;
    margin-left: 12px;
    color: #555;
    transition: transform 0.3s ease;
    }
    .faq-item.active .faq-icon {
    transform: rotate(90deg);
    }
    .faq-answer {
    max-height: 0;
    overflow: hidden;
    transition: max-height 0.4s ease, padding 0.3s ease;
    padding: 0 15px;
    color: #555;
    line-height: 1.6;
    }
    .faq-item.active .faq-answer {
    max-height: 500px;
    padding: 10px 15px;
    }

    @media (max-width: 600px) {
    .faq-container {
    padding: 10px 15px;
    }
    .faq-question {
    padding: 12px;
    }
    }

    What is Retrieval-Augmented Generation (RAG) and how does it work?

    RAG enhances LLMs by retrieving relevant documents from external sources before generating responses. It involves indexing a knowledge base, performing a search to find pertinent information, and incorporating this data into the model’s prompt to ground its output in factual content. This approach is ideal for tasks requiring up-to-date or domain-specific information.

    What is Model Context Protocol (MCP) and how does it differ from RAG?

    MCP is an open standard that enables LLMs to interact with external systems, APIs, and tools in real-time. Unlike RAG, which retrieves static documents, MCP allows dynamic interactions, such as querying databases or executing functions, providing LLMs with live data and capabilities to perform actions beyond text generation.

    When should I use RAG over MCP?

    Use RAG when your application requires grounding responses in static, authoritative documents like manuals, policies, or research papers. It’s suitable for scenarios where the information doesn’t change frequently and needs to be referenced accurately.

    When is MCP the better choice over RAG?

    Opt for MCP when your application needs to perform real-time actions, such as querying live databases, interacting with APIs, or executing workflows. It’s ideal for dynamic tasks that require up-to-date information and system interactions.

    Can RAG and MCP be used together in a single system?

    Yes, combining RAG and MCP allows for a hybrid approach where RAG retrieves static knowledge to ground responses, and MCP handles real-time interactions and actions. This integration provides both accurate information and dynamic capabilities in AI systems.

    What are the security considerations when implementing MCP?

    MCP implementations should ensure robust security by adopting practices like ephemeral authentication, avoiding static secrets, and enforcing least privilege access controls. Identity fragmentation can lead to vulnerabilities, so a unified identity management approach is recommended to mitigate risks.

    How can I structure my data for optimal RAG performance?

    For effective RAG, structure your data by breaking documents into manageable chunks, indexing them using appropriate embeddings, and organizing them in a vector database. Regularly update the knowledge base to maintain the relevance and accuracy of the retrieved information.

    What are common pitfalls in RAG implementations?

    Common issues in RAG include outdated or incomplete knowledge bases, improper chunking strategies leading to irrelevant information retrieval, and prompt overload from excessive context. Regular updates, careful chunking, and limiting retrieved content can help mitigate these problems.

    What are the scalability considerations for MCP deployments?

    Scalability in MCP deployments can be achieved by containerizing services, utilizing orchestration tools, and ensuring modular architecture. This approach allows for efficient scaling of components to handle varying loads and maintain performance.

    How do RAG and MCP impact the reliability of AI systems?

    RAG enhances reliability by providing grounded, factual information, reducing the likelihood of hallucinations. MCP improves reliability by enabling real-time interactions and actions, ensuring that AI systems can respond accurately to dynamic queries and perform necessary tasks.

    document.querySelectorAll(‘.faq-question’).forEach(q => {
    q.addEventListener(‘click’, () => {
    const item = q.parentElement;
    item.classList.toggle(‘active’);
    });
    });

  • Parakeet v3: NVIDIA’s ASR Model Competing with Whisper

    Parakeet v3: NVIDIA’s ASR Model Competing with Whisper

    Introduction to Parakeet v3

    Three years ago, OpenAI’s Whisper suite transformed the Audio Speech Recognition (ASR) field, especially with Whisper Large, which set new standards for high-quality transcription. Whisper Large became the benchmark for low word-error-rate (WER) transcriptions and seamless usability. Since its release, Whisper has maintained dominance, evolving through updates like Whisper Large v3 and serving as the foundation for many open-source projects, web apps, and enterprise solutions. However, NVIDIA’s Parakeet v3 has emerged as a strong competitor, providing an alternative that in some instances surpasses Whisper’s capabilities. Parakeet v3 represents a significant upgrade from Parakeet v2, now supporting 25 European languages, marking a substantial advancement in multilingual ASR technology. The parakeet-tdt-0.6b-v3 model features a 600-million-parameter architecture, enabling efficient, high-quality speech-to-text transcription across multiple languages. Parakeet v3 sets itself apart by automatically detecting the language of the audio, removing the need for manual language selection. This feature makes it a versatile ASR tool, improving transcription accuracy for videos and audio clips in various languages.

    Parakeet v3 has shown superior performance compared to Whisper Large v3 and other leading models, like Seamless M4T, particularly in terms of WER in multiple European languages. Recent benchmark tests indicate that Parakeet v3 consistently outperforms Whisper in crucial areas, especially for transcription tasks requiring high precision. These improvements make Parakeet v3 an excellent choice for video transcription, translation, and captioning, delivering both accuracy and efficiency at a low compute cost. Parakeet v3 is also easy to implement, making it accessible for a wide range of applications, from content creation to ASR research and development.

    Understanding Parakeet v3’s Performance

    Three years ago, OpenAI’s Whisper suite, particularly Whisper Large, dramatically reshaped the Audio Speech Recognition (ASR) field. Whisper Large v3 quickly became the industry standard for transcription accuracy, word-error-rate (WER), and ease of implementation. It dominated the ASR landscape, gaining widespread adoption among developers and businesses. But now, NVIDIA’s Parakeet v3 presents a strong competitor, matching or even exceeding Whisper Large v3 and other models, like Seamless M4T, in key performance indicators such as WER for English transcription tasks.

    Parakeet v3 excels due to its outstanding transcription accuracy, especially in multilingual contexts. A major advantage of this model is its flexibility and efficiency, making it ideal for various use cases, including video transcription and enterprise applications. The 600-million-parameter Parakeet-tdt-0.6b-v3 model improves transcription capabilities and supports 25 European languages, including Spanish, French, German, Russian, and Ukrainian, among others. Parakeet v3’s ability to automatically detect and transcribe multiple languages sets it apart from other models, eliminating the need for manual language input.

    Performance benchmarks consistently demonstrate that Parakeet v3 surpasses Whisper Large v3 and Seamless M4T in terms of WER across diverse language datasets. This shows that Parakeet v3 not only delivers superior accuracy but also improves transcription efficiency. The combination of excellent performance and seamless multilingual support makes Parakeet v3 a powerful tool for transcription tasks. Its ease of use and cost-effectiveness further enhance its standing as a leading ASR model for developers, researchers, and content creators seeking scalable solutions for video captioning, transcription, and translation.

    How Parakeet AutoCaption Works

    Parakeet AutoCaption uses the advanced features of Parakeet v3 to automatically generate high-quality, timestamped captions for videos. The core functionality is based on three key steps: audio extraction, transcription, and subtitle generation.

    The process starts by extracting audio from the video file. The application, powered by MoviePy, separates the audio from the video and saves it in a format suitable for transcription. To meet Parakeet v3’s requirements, the audio is then processed, ensuring it is mono and resampled to 16 kHz, a critical step for maintaining transcription quality. Without proper audio preprocessing, transcription accuracy may be affected.

    Once the audio is prepared, Parakeet v3 takes over. The model transcribes the audio, automatically detecting the language and generating accurate transcriptions with timestamps. These timestamps indicate when each word or segment is spoken. The application uses this timestamped transcription data to generate an intermediate CSV file, containing the text along with the start and end times for each segment.

    The next step involves converting the CSV file into a standard .srt subtitle file. A custom function maps the timestamps to the SRT format, ensuring the subtitles are correctly aligned with the video. This ensures the captions are synchronized with the video, making them easy to follow.

    Finally, MoviePy overlays the subtitles onto the video. The subtitles are rendered on top of the video, with customizable text clips that can be styled to meet user preferences. The final result is a video with synchronized captions, ready for playback or export. Parakeet v3 guarantees high transcription accuracy, low latency, and minimal computational overhead, making the Parakeet AutoCaption web application efficient and user-friendly.

    Conclusions

    Parakeet v3 provides an efficient, cost-effective solution for multilingual video captioning. With its simple integration and impressive performance, Parakeet AutoCaption is changing the ASR space. This tool offers fast and accurate transcription, translation, and subtitle generation, making it an ideal choice for developers, content creators, and researchers.

    As the need for seamless video captioning increases, using the right infrastructure is essential. For large video datasets or scaling transcription services, robust cloud infrastructure is necessary. Caasify’s VPS (Virtual Private Servers) deliver the performance and flexibility required for resource-heavy applications like Parakeet AutoCaption. By selecting the appropriate server resources, you can ensure efficient, secure, and scalable transcription workflows.

    How to Leverage Caasify’s VPS for Parakeet AutoCaption

    Step 1: Visit the Caasify Cloud VPS page and choose a region with low latency for optimal video transcription performance.

    Step 2: Select an OS compatible with Parakeet AutoCaption, such as Ubuntu or Debian, and ensure you have necessary add-ons like a web server and MySQL for full application deployment.

    Step 3: Configure CPU and RAM according to your expected video processing load. For high-volume content, choose higher specs to ensure fast, consistent performance.

    Step 4: Deploy your VPS and follow the installation instructions to set up Parakeet AutoCaption. Once setup is complete, scale resources as necessary to handle increasing video processing demands.

    Benefit of Caasify: Caasify’s cloud VPS services offer the performance and scalability needed to run Parakeet AutoCaption efficiently without overcommitting resources.

    Learn more about NVIDIA NeMo

  • RF-DETR: Real-Time Object Detection with Speed and Accuracy

    RF-DETR: Real-Time Object Detection with Speed and Accuracy

    Understanding RF-DETR and its Architecture

    RF-DETR’s design is marked by the seamless integration of transformers and lightweight detection heads, offering a highly efficient solution for real-time object detection. At the core of this design is the DINOv2 backbone, a pre-trained vision transformer that greatly enhances the model’s ability to generalize across diverse datasets. This backbone is key to RF-DETR’s efficiency, as it processes visual data more effectively than traditional convolutional neural networks (CNNs). Pre-training on millions of images enables the model to quickly identify patterns, even with limited domain-specific data, facilitating rapid adaptation to new tasks. RF-DETR’s innovative use of multi-resolution training further enhances its flexibility, ensuring the model can handle images of different sizes and qualities. This is especially important for real-world deployments where devices may vary in computational power. Multi-resolution training also allows users to modify the resolution during inference without retraining the model, balancing speed and accuracy across devices from powerful servers to resource-limited edge devices. Another key feature of RF-DETR’s design is its direct prediction of object outcomes, removing the need for post-processing steps like those used in traditional models like YOLO. This reduces complexity and improves runtime efficiency. Unlike YOLO, which uses Non-Maximum Suppression (NMS) to refine predictions, RF-DETR provides cleaner, more accurate results immediately, enhancing real-time performance. These design innovations make RF-DETR an excellent choice across various industries, including aerial imagery, industrial inspection, and medical imaging, where both speed and adaptability are crucial.

    The Importance of Real-Time Performance and Accuracy

    Real-time performance is critical in modern object detection applications, especially in fields such as autonomous driving, industrial inspections, and video surveillance, where quick decisions are necessary. RF-DETR’s ability to deliver rapid inference without sacrificing accuracy distinguishes it in a competitive landscape where both speed and precision matter. Many models struggle with high latency or low accuracy, particularly in real-time scenarios. However, RF-DETR overcomes these issues by combining the efficiency of transformer architecture with a pre-trained backbone, enabling it to process images quickly while maintaining high detection quality. On standard benchmarks like COCO, RF-DETR achieves an impressive 60+ mAP, setting a new standard for real-time object detection. This score highlights the model’s ability to detect a broad range of objects in significantly less time than traditional models. Additionally, RF-DETR excels on the RF100-VL benchmark, which includes datasets from real-world applications such as aerial imagery, industrial inspections, and medical scans. By performing well across these diverse domains, RF-DETR shows that speed and accuracy can coexist. The architecture of RF-DETR plays a key role in this achievement. By removing the need for NMS, commonly used in models like YOLO to refine predictions, RF-DETR simplifies the detection process, reducing computational load and speeding up inference without compromising accuracy. Moreover, RF-DETR’s multi-resolution training allows the model to adjust to various input sizes, ensuring optimal performance based on available computational resources, whether on a cloud server or an edge device. This ability to maintain both speed and accuracy makes RF-DETR ideal for time-sensitive applications, where every millisecond counts.

    Domain Adaptability and Versatility of RF-DETR

    One of RF-DETR’s standout features is its impressive adaptability to different domains, which sets it apart from traditional object detection models. The model’s design incorporates the DINOv2 pre-trained backbone, which enables it to quickly adapt to new domains, whether in aerial imagery, medical imaging, or industrial inspections. Unlike many traditional models that require extensive retraining to handle new datasets, RF-DETR excels at transferring its learned features to new domains. The DINOv2 backbone, pre-trained on a diverse range of images, provides RF-DETR with a strong foundation for recognizing complex visual patterns. In aerial imagery, RF-DETR can identify objects such as buildings, roads, and vegetation with exceptional accuracy, even in challenging conditions like low resolution or cluttered backgrounds. In medical imaging, RF-DETR adapts to the specific characteristics of X-rays or MRIs, accurately detecting anomalies like tumors or fractures. This capability is vital, as medical datasets are often smaller than those in standard benchmarks, and RF-DETR’s transfer learning ensures strong performance even with limited data. In industrial applications, RF-DETR shows its versatility by identifying specific components or defects in a variety of environments. Whether monitoring production lines, inspecting machinery, or overseeing packaging, RF-DETR can quickly adapt to new objects and settings without needing retraining. This flexibility is essential in industries where factors like lighting, scale, and perspective frequently change. Ultimately, RF-DETR’s ability to generalize across different domains allows it to outperform traditional models, which often struggle with varying conditions in different applications. By leveraging its DINOv2 backbone and transformer architecture, RF-DETR maintains high accuracy while easily adapting to new challenges, making it an effective tool for real-world applications.

    How RF-DETR is Changing the Game for Edge and Cloud Deployment

    RF-DETR is designed to perform efficiently in both cloud and edge environments, thanks to its multi-resolution training and the flexibility of different model sizes. This enables real-time object detection applications across a wide range of hardware, from powerful cloud systems to resource-constrained edge devices like smartphones and cameras. The key feature driving RF-DETR’s adaptability is its multi-resolution training, which allows it to perform inference at varying input resolutions. This gives users the ability to find the right balance between speed and accuracy without retraining the model for each deployment scenario. For instance, when running on a high-performance cloud server, the model can process high-resolution images for maximum accuracy. On the other hand, when deployed on edge devices with limited computational power, RF-DETR can work with lower-resolution inputs to maintain fast processing speeds while minimizing any loss of accuracy. RF-DETR also offers multiple model sizes, from the lightweight RF-DETR-nano to the more powerful RF-DETR-large, accommodating different hardware and performance needs. Larger variants are ideal for cloud-based systems with significant computational power, while the smaller versions are perfect for edge devices that require low latency and reduced memory usage. The model’s efficient architecture allows it to sustain fast inference speeds without needing post-processing steps like NMS, which further simplifies the detection pipeline and reduces latency. This ability to deploy RF-DETR effectively in both cloud and edge environments makes it a versatile solution for a wide range of use cases, offering scalability to meet the demands of various applications.

    Training RF-DETR: A Step-by-Step Guide

    Real-time object detection is essential in modern computer vision, particularly in areas like autonomous vehicles, medical imaging, and edge AI. RF-DETR stands out as an advanced model that combines high speed with accuracy while offering adaptability across various domains. As the first real-time model to exceed 60 mAP on COCO, RF-DETR has established a new benchmark. It also excels on RF100-VL, a benchmark that spans 100 diverse datasets from real-world applications such as aerial imagery, industrial inspection, and environmental studies. RF-DETR is available in two versions: RF-DETR-base (29M parameters) and RF-DETR-large (129M parameters), offering reliable performance across different environments, from cloud platforms to low-latency systems or large-scale production deployments. The evolution of object detection models has seen major improvements, but the COCO benchmark, last updated in 2017, often fails to reflect real-world complexities. RF-DETR addresses this gap by not only competing on COCO but also focusing on domain adaptability and real-time performance. Its evaluation covers three key dimensions: COCO mAP for standard benchmarking, RF100-VL mAP for testing across diverse real-world datasets, and inference speed, ensuring relevance in today’s AI challenges. Leading research labs at companies like Apple, Microsoft, and Baidu have adopted RF100-VL for its comprehensive dataset, further validating RF-DETR’s adaptability and speed. RF-DETR’s design integrates advanced detection transformers and efficient pre-training techniques, enabling it to generalize more effectively across various domains. By building on multi-scale attention mechanisms from Deformable DETR, RF-DETR offers faster and more practical transformer-based detection. Unlike models like YOLO, which require NMS for post-processing, RF-DETR generates final predictions directly, simplifying the pipeline and improving runtime efficiency. Its multi-resolution training and lightweight architecture ensure excellent performance across a wide range of devices, from cloud systems to edge devices, without sacrificing speed.

    Real-World Applications of RF-DETR in Various Industries

    RF-DETR is transforming real-time object detection across multiple industries, offering both speed and accuracy for critical applications. In autonomous vehicles, RF-DETR’s ability to detect objects in real time with high precision is crucial for ensuring safety and enabling quick decisions. The model can identify pedestrians, vehicles, and obstacles with outstanding accuracy, allowing for rapid responses to dynamic road conditions. Its efficiency reduces latency, which is vital for high-speed driving and navigating unpredictable traffic situations. In medical imaging, RF-DETR’s adaptability is invaluable in identifying abnormalities like tumors or fractures in X-rays, MRIs, or CT scans. Its high accuracy ensures the detection of even subtle abnormalities, improving diagnostic capabilities and reducing human error. The ability to process images quickly aids radiologists by reducing scan analysis times, leading to more timely treatment decisions. In industrial automation, RF-DETR’s strengths are clear in quality control and defect detection on production lines. The model’s real-time processing allows continuous monitoring, rapidly identifying flaws like scratches, missing parts, or incorrect assembly. RF-DETR’s capacity to handle complex industrial imagery while running efficiently on resource-limited devices is vital for maintaining production quality and minimizing downtime. Smart city applications also benefit from RF-DETR, particularly in tasks like traffic monitoring, crowd analysis, and surveillance. Its quick inference and high precision make it perfect for processing video feeds in real time, detecting vehicles, pedestrians, and unusual activity that may require immediate attention. Whether for traffic management or public safety, RF-DETR’s flexibility and efficiency make it indispensable for enhancing urban living and security.

    Conclusions

    RF-DETR marks a breakthrough in real-time object detection, offering unrivaled speed, flexibility, and efficiency. Its ability to balance high accuracy with fast inference makes it suitable for a variety of domains, from autonomous systems to medical imaging. With its adaptable architecture, RF-DETR is set to shape the future of computer vision.

    As industries increasingly depend on real-time object detection for vital applications, deploying scalable and flexible infrastructure becomes crucial. The ability to adjust resources according to performance requirements is key to ensuring efficient object detection. Whether handling complex datasets in the cloud or deploying on edge devices, reliable and adaptable infrastructure can greatly improve overall performance.

    How to Leverage Caasify for RF-DETR Deployment

    Step 1: Choose a cloud server or VPS that suits your workload. For instance, using a strong VPS near your target audience (e.g., Frankfurt for European users) will minimize latency when running RF-DETR on large datasets.

    Step 2: Select a system with sufficient storage and bandwidth. RF-DETR performs best with high-speed data access, which Caasify’s VPS solutions offer. Start with a basic server and scale up as necessary.

    Step 3: If integrating RF-DETR with a web app or API, Caasify’s managed web hosting can simplify environment setup. With DirectAdmin hosting, you can easily control your server and manage dependencies.

    Step 4: For secure remote access, use Caasify’s VPN services to maintain a stable connection to your cloud resources while working on the model.

    Benefit of Caasify: With Caasify’s scalable cloud infrastructure and flexible services, you can optimize your RF-DETR deployments for both speed and reliability.

    Official Docker Documentation

  • How to Manage MySQL Users: Creating, Assigning Permissions, and Securing Access

    How to Manage MySQL Users: Creating, Assigning Permissions, and Securing Access

    Table of Contents

    Understanding MySQL User Management

    Managing MySQL users effectively is key to ensuring database security and administrative control. It allows database administrators to control who can access the database and the actions they are authorized to perform. Proper user permission management helps keep your MySQL database secure while granting users the appropriate rights to complete their tasks. Without this management, the database may be exposed to unauthorized access or accidental data changes.

    The core of MySQL user management is built around authentication and permissions. MySQL uses user accounts, each consisting of a username, password, and a designated host that defines where the user can connect. After a successful login, users are assigned various privileges, such as creating databases, querying data, inserting records, and more.

    The MySQL root user has full control over the database, providing unrestricted access to all databases and full authority over user accounts and their permissions. However, it’s recommended not to use the root account for regular database tasks, as this increases the likelihood of accidental or malicious changes. Administrators should create other user accounts with more defined roles to reduce these risks.

    MySQL employs authentication plugins to verify a user’s identity. The default plugin, caching_sha2_password, offers strong encryption and is typically the recommended choice for most use cases. MySQL also supports additional plugins, like auth_socket, which uses the operating system for identity verification. Selecting the right authentication method is vital for maintaining a proper balance between security and functionality.

    Setting Up a MySQL User

    To create a new MySQL user, you can use the CREATE USER statement. The command syntax is as follows:

    CREATE USER 'username'@'host' IDENTIFIED WITH authentication_plugin BY 'password';

    Here, username is the name of the user you want to create, and host specifies the location from which the user can connect. Use localhost for local connections and % for any host to enable remote access.

    Choosing the correct authentication_plugin is essential when setting up a user. By default, MySQL uses the caching_sha2_password plugin for secure password management. To create a user with this plugin, use the following command:

    CREATE USER 'sammy'@'localhost' IDENTIFIED BY 'password';

    If you’re using older versions of MySQL or specific PHP applications, the mysql_native_password plugin may be necessary for compatibility. In this case, the CREATE USER statement will look like this:

    CREATE USER 'sammy'@'localhost' IDENTIFIED WITH mysql_native_password BY 'password';

    Alternatively, MySQL can be configured to use the auth_socket plugin, which doesn’t require a password and instead uses the operating system’s user identity for authentication. This is a more secure choice for local servers. The statement for creating a user with the auth_socket plugin is:

    CREATE USER 'sammy'@'localhost' IDENTIFIED WITH auth_socket;

    When choosing an authentication method, take both security and compatibility into account. For most situations, caching_sha2_password offers the best security, but for older systems or applications, mysql_native_password or auth_socket might be better choices.

    Once the user is created, the next step usually involves granting them the appropriate permissions, which will be discussed in the next section.

    Granting MySQL User Permissions

    To grant permissions, you can use these commands:

    GRANT PRIVILEGE ON database_name.table_name TO 'username'@'host';
    GRANT SELECT ON database_name.* TO 'username'@'localhost';
    GRANT ALL PRIVILEGES ON *.* TO 'username'@'localhost';
    GRANT SELECT, INSERT ON database_name.* TO 'username'@'localhost' WITH GRANT OPTION;

    Modifying and Revoking MySQL User Permissions

    To modify user permissions or change authentication methods, use these commands:

    ALTER USER 'sammy'@'localhost' IDENTIFIED WITH mysql_native_password BY 'new_password';
    GRANT SELECT, INSERT, DELETE ON database_name.* TO 'sammy'@'localhost';
    REVOKE SELECT ON database_name.* FROM 'sammy'@'localhost';
    SHOW GRANTS FOR 'sammy'@'localhost';

    Managing Remote Access and Security

    To enable remote access with specific privileges, use commands like these:

    GRANT ALL PRIVILEGES ON *.* TO 'sammy'@'%' IDENTIFIED BY 'password';
    GRANT ALL PRIVILEGES ON *.* TO 'sammy'@'192.168.1.100' IDENTIFIED BY 'password';

    Also, ensure the MySQL server is configured to listen on all interfaces by setting:

    bind-address = 0.0.0.0

    After that, restart MySQL with the following command:

    sudo systemctl restart mysql

    Troubleshooting Common MySQL User Issues

    If you’re facing issues with user permissions or authentication, you can check for common problems using these commands:

    GRANT ALL PRIVILEGES ON *.* TO 'username'@'%' ;
    SELECT * FROM mysql.user WHERE User = 'username';
    DROP USER 'username'@'localhost';

    Conclusions

    By following this guide, you’ve learned how to securely create MySQL users, assign the appropriate permissions, and manage user access effectively. Proper MySQL user management is critical for maintaining both security and optimal database performance. As your project grows, you will need to consider scalability, performance, and flexibility when managing MySQL users and access.

    If you’re aiming to scale your infrastructure as your MySQL database grows, a cloud solution like Caasify can offer considerable benefits.

    How to Leverage Caasify:

    Step 1: Choose a Caasify Cloud VPS (Virtual Private Server) to host your MySQL database. Caasify’s VPS offers full control over resources and supports various operating systems, including Ubuntu and AlmaLinux, for seamless MySQL hosting.

    Step 2: Set up your MySQL server on the chosen OS after configuring your VPS. This setup lets you create, modify, and manage user accounts with full administrative privileges, and you can also configure automatic backups to ensure data security.

    Step 3: If you’re managing multiple websites, you might want to consider using Caasify’s web hosting with DirectAdmin or cPanel to simplify site and MySQL user management. The hosting integrates smoothly with databases and provides an intuitive interface to monitor and update server configurations.

    Benefit of Caasify: With Caasify’s versatile cloud services, you can scale your infrastructure as required, ensuring that your MySQL database and web applications perform efficiently while keeping full control over security and resources.

    MySQL Official Documentation

    .faq-container {
    margin: 20px auto;
    padding: 15px 20px;
    background: #fafafa;
    border-radius: 12px;
    box-shadow: 0 4px 10px rgba(0,0,0,0.05);
    box-sizing: border-box;
    }
    .faq-item {
    border-bottom: 1px solid #ddd;
    }
    .faq-item:last-child {
    border-bottom: none;
    }
    .faq-question {
    margin: 0;
    padding: 15px;
    color: #2c3e50;
    cursor: pointer;
    background: #f0f0f0;
    border-radius: 8px;
    transition: background 0.3s;
    display: flex;
    align-items: center;
    justify-content: space-between;
    }
    .faq-question:hover {
    background: #e0e0e0;
    }
    .faq-text {
    flex: 1;
    text-align: left;
    }
    .faq-icon {
    flex-shrink: 0;
    margin-left: 12px;
    color: #555;
    transition: transform 0.3s ease;
    }
    .faq-item.active .faq-icon {
    transform: rotate(90deg);
    }
    .faq-answer {
    max-height: 0;
    overflow: hidden;
    transition: max-height 0.4s ease, padding 0.3s ease;
    padding: 0 15px;
    color: #555;
    line-height: 1.6;
    }
    .faq-item.active .faq-answer {
    max-height: 500px;
    padding: 10px 15px;
    }

    @media (max-width: 600px) {
    .faq-container {
    padding: 10px 15px;
    }
    .faq-question {
    padding: 12px;
    }
    }

    How do I create a new MySQL user with a password?

    Use the CREATE USER 'username'@'host' IDENTIFIED BY 'password'; statement. Replace 'username' with the desired username, 'host' with the host from which the user will connect (e.g., 'localhost'), and 'password' with a strong password. Ensure the host matches the user’s connection source to avoid access issues.

    What are the default authentication plugins in MySQL?

    As of MySQL 8.0.27, the default authentication plugin is caching_sha2_password. For compatibility with older applications, mysql_native_password can be used. Choose the appropriate plugin based on your application’s requirements and compatibility.

    How can I grant specific privileges to a MySQL user?

    Use the GRANT statement: GRANT SELECT, INSERT ON database_name.* TO 'username'@'host'; Replace 'database_name' with the target database, and 'username' and 'host' with the user’s credentials. Always follow the principle of least privilege.

    How do I revoke privileges from a MySQL user?

    Use the REVOKE statement: REVOKE SELECT ON database_name.* FROM 'username'@'host'; This removes the specified privileges. After revoking privileges, execute FLUSH PRIVILEGES; to apply changes immediately.

    How can I check the privileges of a MySQL user?

    Use the SHOW GRANTS FOR 'username'@'host'; statement. This will display all privileges granted to the specified user. Ensure you’re logged in with an account that has sufficient privileges to view this information.

    What should I do if a MySQL user cannot connect?

    Verify the user’s credentials and host permissions. Ensure the user exists with SELECT User, Host FROM mysql.user;. Check for any host restrictions or IP address mismatches. Also, confirm that the MySQL server is configured to accept connections from the user’s host.

    How do I delete a MySQL user?

    Use the DROP USER 'username'@'host'; statement to remove a user. Ensure that the user is not connected to the database before deletion. After dropping the user, execute FLUSH PRIVILEGES; to apply changes.

    What is the principle of least privilege in MySQL user management?

    The principle of least privilege involves granting users only the permissions they need to perform their tasks. This minimizes the risk of accidental or malicious data manipulation. Regularly audit user privileges and adjust them as necessary.

    How can I manage MySQL user roles?

    In MySQL 8.0 and later, use the CREATE ROLE statement to define roles, and GRANT to assign privileges to these roles. Assign roles to users with GRANT 'role_name' TO 'username'@'host'; This simplifies privilege management and enhances security.

    document.querySelectorAll(‘.faq-question’).forEach(q => {
    q.addEventListener(‘click’, () => {
    const item = q.parentElement;
    item.classList.toggle(‘active’);
    });
    });

  • Docker system prune: how to clean up unused resources

    Docker system prune: how to clean up unused resources

    Table of Contents

    Docker makes application deployment easier by bundling services into lightweight containers, but unused images, containers, and volumes can build up over time, eating up disk space. This guide lays out a structured way to clean Docker environments with practical commands, helping IT professionals keep systems fast, tidy, and efficient.

    Understanding Docker Cleanup Basics

    Docker setups naturally gather unused resources because of how images, containers, and volumes are created and managed. Each time you build an image, run a container, or mount a volume, Docker adds objects to the host filesystem. Many of these are temporary but stay until manually removed. For instance, image builds generate intermediate layers, stopped containers leave inactive instances, and anonymous volumes may stick around without an active container. Likewise, orchestration can leave behind unused networks even after related containers are gone.

    Leaving unused Docker resources unchecked can have serious effects. On servers with small storage, dangling images and orphaned volumes can quickly fill space. Because Docker keeps its data in the root directory—usually /var/lib/docker on Linux—these files compete with system and app data. Low storage can cause slower performance, longer builds, or even outages if the disk fills. Clutter also makes it harder for admins to tell active resources from obsolete ones, which raises the chance of mistakes.

    Docker uses a layered filesystem for images, where each Dockerfile instruction creates a new layer. This speeds up caching and builds, but unused layers pile up. Containers add writable layers on top of images, and when stopped, their data remains unless explicitly deleted. Volumes, meant for persistent storage, can hang around as dangling objects after container removal. Similarly, unused networks stay until manually pruned.

    Routine cleanup is essential to keep Docker environments stable and efficient. By regularly pruning unused objects, IT teams free disk space, reduce maintenance effort, and maintain predictable setups that support Docker’s portability and lightweight design.

    Using Docker System Prune for Automatic Cleanup

    The docker system prune command gives a quick way to automatically remove unused Docker resources. By default, it clears stopped containers, dangling images, unused volumes, and orphaned networks. When run, Docker shows a preview of what will be deleted and asks for confirmation unless you use a force flag. This balance makes it safe for frequent use but requires caution if you’re unsure about your environment.

    Adding flags changes how it works. The -a (or –all) flag deletes all images not tied to running containers, which can free up lots of space but risks removing images you’ll need later. The -f (or –force) flag skips confirmation, useful in scripts but risky if used manually.

    Examples show how these options matter. Running docker system prune without flags is great for routine cleanups after testing. The docker system prune -a option fits disposable environments like CI/CD pipelines or temporary servers where you can safely remove unused images. Adding -f helps in automated cleanup but should only be used when you’re confident about the system’s state.

    The command’s output usually shows the resource categories removed and the total space reclaimed, giving admins immediate feedback on efficiency gains.

    Removing Docker Images Effectively

    Cleaning Docker images means knowing the difference between tagged, untagged, and dangling images. Tagged images are labeled with repositories and versions. Untagged images lose tags when new builds replace them. Dangling images are leftover intermediate layers with no references, usually from repeated builds without tagging.

    To list images, run docker images -a, which shows all images, including intermediate ones. You can delete specific images with docker rmi followed by the ID or tag. If a container still uses an image, you’ll need to stop or remove the container first or force removal with -f if it’s safe.

    For dangling images, run docker images -f dangling=true and clear them with docker image prune. To delete images by name patterns, use grep and awk with docker rmi. For a full cleanup, docker rmi $(docker images -a -q) removes all images in one go.

    Troubleshooting may be required. For example, if Docker blocks image removal because of stopped containers, check with docker ps -a, remove the containers, and try again. Doing tasks in the right order ensures smooth cleanup.

    Managing and Removing Containers

    Managing containers is key to keeping Docker environments efficient. Containers can be running, exited, or created. The docker ps -a command lists them all, while filters like docker ps -a -f status=exited help target specific ones.

    To delete containers, use docker rm with IDs or names. You can remove several at once by listing IDs or combining grep and awk to match names. This is useful when handling many temporary containers.

    Bulk cleanup can be automated with commands like docker rm $(docker ps -a -f status=exited -q) to remove all exited containers. For a complete reset, stop and remove all containers with docker stop $(docker ps -a -q) && docker rm $(docker ps -a -q).

    To avoid leftover containers, add the –rm flag to temporary runs, so they’re deleted automatically when finished. If you try to remove a running container, Docker throws an error; you’ll need to stop it first or use docker rm -f to force removal.

    Cleaning Up Volumes and Networks

    Volumes and networks often last longer than the containers they support. Volumes store persistent data but stay after containers are deleted, and networks connect containers but remain unless removed.

    Check volumes with docker volume ls and delete them using docker volume rm. To safely remove unused volumes, run docker volume prune. Since volumes may store important data, always confirm they’re no longer needed before deleting them.

    Networks follow the same pattern. List them with docker network ls, delete specific ones with docker network rm, or clean unused ones with docker network prune. This only deletes networks without active connections, so it’s a safe maintenance step.

    Knowing the difference between named and unnamed volumes is key. Named volumes are explicitly defined and often hold databases, while unnamed volumes are automatically created and usually safe to delete once containers are gone.

    Debugging and Best Practices for Docker Cleanup

    Common cleanup problems often involve shared volumes across multiple containers. To prevent sync issues or data loss, use named volumes and enforce app-level file locks. For multi-container projects, Docker Compose manages volumes and dependencies consistently.

    Image inefficiency is another frequent issue. Each RUN or COPY command in a Dockerfile adds a layer, which can slow builds. The docker history command helps spot inefficiencies. Best practices include reducing RUN commands and using multi-stage builds to shrink image size.

    Preventing clutter is better than cleaning reactively. Consistent tagging prevents dangling images, while docker-compose down cleans up after development. Scheduling regular prune commands keeps environments manageable. Combining these habits with optimized Dockerfiles ensures stable and predictable operations.

    Conclusions

    Docker provides strong tools for cleaning up unused resources, keeping environments efficient and organized. By mastering pruning commands and sticking to disciplined practices, IT teams can reclaim space, speed up builds, and run reliable workflows. Good maintenance benefits both dev and production setups.

    In production, you need to balance resource efficiency with reliable hosting. Local containers work well for dev, but scalable infrastructure is needed for large-scale performance. Managed cloud setups offer automated scaling and tuned hosting for Docker workloads. With Caasify’s cloud servers, IT pros can run Docker workloads close to users, automate cleanup, and pause idle servers to save money.

    How to Leverage Caasify

    Step 1: Launch a Caasify VPS in the region closest to your users, and pick a Linux OS like Ubuntu for Docker support.

    Step 2: Install Docker and set up automated cleanup with scheduled docker system prune or docker image prune commands.

    Step 3: Use persistent storage volumes only when needed, and monitor them with Docker commands. With Caasify’s pause-on-stop billing, test or staging servers can scale down cost-effectively.

    Step 4: For client-facing or multi-tenant setups, add DirectAdmin hosting to the VPS to manage web apps and Docker services from one control panel.

    With Caasify’s platform, IT teams can keep Docker environments clean while ensuring uptime, scalability, and low latency—delivering dependable cloud performance without overspending. Learn more at Caasify.

    Learn more at Docker’s official documentation

    .faq-container {
    margin: 20px auto;
    padding: 15px 20px;
    background: #fafafa;
    border-radius: 12px;
    box-shadow: 0 4px 10px rgba(0,0,0,0.05);
    box-sizing: border-box;
    }
    .faq-item {
    border-bottom: 1px solid #ddd;
    }
    .faq-item:last-child {
    border-bottom: none;
    }
    .faq-question {
    margin: 0;
    padding: 15px;
    color: #2c3e50;
    cursor: pointer;
    background: #f0f0f0;
    border-radius: 8px;
    transition: background 0.3s;
    display: flex;
    align-items: center;
    justify-content: space-between;
    }
    .faq-question:hover {
    background: #e0e0e0;
    }
    .faq-text {
    flex: 1;
    text-align: left;
    }
    .faq-icon {
    flex-shrink: 0;
    margin-left: 12px;
    color: #555;
    transition: transform 0.3s ease;
    }
    .faq-item.active .faq-icon {
    transform: rotate(90deg);
    }
    .faq-answer {
    max-height: 0;
    overflow: hidden;
    transition: max-height 0.4s ease, padding 0.3s ease;
    padding: 0 15px;
    color: #555;
    line-height: 1.6;
    }
    .faq-item.active .faq-answer {
    max-height: 500px;
    padding: 10px 15px;
    }

    @media (max-width: 600px) {
    .faq-container {
    padding: 10px 15px;
    }
    .faq-question {
    padding: 12px;
    }
    }

    What does docker system prune remove by default?

    By default, docker system prune removes stopped containers, dangling images, and networks not used by any container. It does *not* remove unused volumes unless you add the --volumes flag. Be careful: using -a or --all increases removal risk by including all unused images, not just dangling ones. Common pitfall: accidental deletion of images you expect to reuse. :contentReference[oaicite:0]{index=0}

    How can I safely delete unused Docker volumes without losing important data?

    First run docker volume ls and inspect names and labels of volumes. Then use docker volume prune to remove volumes not used by any containers (only anonymous by default). If you need to remove named unused volumes, use docker volume prune --all (or --filter with labels). Always backup volumes containing critical data. Version-pending behavior: Docker ≥ 23 changed defaults around named volumes. :contentReference[oaicite:1]{index=1}

    What’s the difference between dangling, untagged, and unused Docker images?

    Dangling images are those intermediate layers or unreferenced files with no tag (orphaned by builds). Untagged images are images whose tag was removed or never assigned. Unused images are any images not used by a running container. To remove dangling images: docker image prune; to remove all unused images: docker image prune -a. Beware: -a can delete images you plan to reuse. :contentReference[oaicite:2]{index=2}

    How do I schedule Docker cleanup to avoid disk space issues in production?

    Use a cron job or scheduler to run prune commands during off-peak hours. For example: docker system prune --volumes -af --filter "until=24h". Also monitor with docker system df to see reclaimable space. Automate with alerts when disk usage passes thresholds. Pitfalls: running aggressive prune in production may accidentally remove needed images or volumes; always test your prune script and exclude important labels. :contentReference[oaicite:3]{index=3}

    Why might docker volume prune not remove certain volumes after upgrading Docker?

    Since Docker version 23.0.0, docker volume prune by default removes only anonymous volumes not used by containers; named unused volumes are preserved unless you use --all (or --filter all=1). If you upgraded from older versions, some volumes you expect to be pruned remain because of this behavior change. :contentReference[oaicite:4]{index=4}

    How can I inspect what space can be reclaimed before running prune commands?

    Use docker system df to see how much disk space is used vs reclaimable for images, containers, volumes, and build cache. Also list stopped containers (docker ps -a -f status=exited), dangling images (docker images -f dangling=true), unused volumes/networks (docker volume ls and docker network ls). This helps avoid surprises in what gets cleaned. :contentReference[oaicite:5]{index=5}

    How do build caches contribute to Docker disk usage and how can I clean them?

    Build cache stores intermediate image build layers to speed up subsequent builds. Over time, cache can grow large. Use docker builder prune or docker system prune with appropriate flags to clear build cache. If using BuildKit, check specific builder caches. Pitfall: removing build cache may slow down next builds, especially in CI/CD pipelines if cache isn’t persisted. :contentReference[oaicite:6]{index=6}

    What precautions should I take before using -f or force flags in pruning commands?

    Force flags (e.g. -f or --force) skip confirmation prompts and are helpful in automated scripts. However, use them only when you’re sure of what you’re deleting. Common mistakes include deleting running containers or volumes with important data. Always test commands manually first, and restrict force usage to controlled environments. :contentReference[oaicite:7]{index=7}

    How to clean up Docker networks safely without affecting application connectivity?

    List unused networks with docker network ls, identify those not connected to any running container. Remove with docker network prune or docker network rm <network>. In orchestrated setups (Docker Compose / Swarm / Kubernetes), networks may be recreated, so ensure you know which ones are auto-managed. Misdeleting a network that other containers expect causes communication failures. :contentReference[oaicite:8]{index=8}

    Why are Docker image builds slow and large, and how cleanup practices help improve both?

    Slow or large builds often stem from inefficient Dockerfiles: too many layers, large base images, including unused dependencies, lack of caching discipline, etc. Cleanup practices like pruning dangling images, removing unused build cache, using multi-stage builds, and employing .dockerignore all reduce image size. Smaller images download/push faster and consume fewer resources. Common pitfall: over-pruning cache during development can degrade incremental build performance. :contentReference[oaicite:9]{index=9}

    document.querySelectorAll(‘.faq-question’).forEach(q => {
    q.addEventListener(‘click’, () => {
    const item = q.parentElement;
    item.classList.toggle(‘active’);
    });
    });

  • All in One: Hetzner, DigitalOcean, Vultr, and Linode WHMCS Module by Caasify

    All in One: Hetzner, DigitalOcean, Vultr, and Linode WHMCS Module by Caasify


    In today’s competitive hosting market, web providers are constantly seeking ways to expand their offerings without heavy investment. The All-in-One Hetzner, DigitalOcean, Vultr, and Linode WHMCS module by Caasify delivers exactly that: a single WHMCS integration to resell multiple cloud VPS providers. This unified module lets you offer high-quality VPS services from several major platforms under your own brand, all through one client portal. Early tests show Caasify’s approach simplifies operations by removing the need for separate modules for each provider . In this post, we’ll explain why web hosting companies should consider Caasify for reselling VPS, outline the key benefits (pay-as-you-go billing, multi-provider support, global reach), and compare it with alternative WHMCS solutions.

    All in one Hetzner, DigitalOcean, Vultr, and Linode WHMCS module by Caasify

    Caasify’s module brings multiple cloud VPS brands into one place.  Instead of installing separate modules for each provider (Hetzner, DigitalOcean, Vultr, Linode, etc.), a hosting company can deploy Caasify’s free module and immediately support all of them.  Under the hood, Caasify acts as an aggregation layer: you fund your Caasify account and then use the module to offer VPS to clients from any integrated provider. For customers, this means they see one shop, one order process, and one control panel – even though the resources come from different clouds .

    Modern data centers house racks of servers that power cloud VPS offerings worldwide. With Caasify’s module, hosting companies can leverage this existing infrastructure without owning hardware . The image above shows a typical server farm – a glimpse of the global network behind these services. Caasify connects your WHMCS directly to top providers’ APIs (Hetzner, DigitalOcean, Vultr, Linode and more), so you can provision, manage, and bill VPS instances seamlessly in one interface .

    Key features of Caasify’s all-in-one module include: no licensing fees, pay-as-you-go billing, and support for 81+ data centers worldwide . In practice, this means you only pay for the cloud resources your customers consume. You set your own markup and billing cycle (hourly or monthly) within WHMCS, keeping all profit above Caasify’s base price . Because the module supports multiple brands, you can diversify your VPS catalog (from low-cost Linode $5 droplets to high-performance Hetzner servers) without integrating each API yourself .

    Key Benefits for Hosting Resellers

    Web hosting companies that adopt Caasify’s WHMCS module can enjoy several advantages:

    • Unified Multi-Provider Sales: Offer Hetzner, DigitalOcean, Vultr, Linode (and more) VPS through one WHMCS product catalog. Your clients choose servers from different clouds, but they purchase them via a single order form and billing process . This reduces complexity – no need to maintain separate “Hetzner VPS” and “DigitalOcean Droplet” products, for example.
    • No License Fees: Unlike many third-party WHMCS modules, Caasify’s integration is completely free for hosting partners . You don’t pay monthly or annual fees to Caasify – you just pay the cloud provider prices when your customers use resources . This means higher margins on every VPS sale, as there’s no software license cutting into profits.
    • Pay-As-You-Go Pricing: The module supports hourly billing and utility-style metering . Your clients can be billed by the hour or by month for their VPS usage. This flexibility lets you offer burstable, on-demand VPS plans or conservative flat-rate plans as you see fit. Caasify provides transparent base costs and hourly rates, so you have full control over pricing and profit margins .
    • Global Infrastructure: Through Caasify, you gain access to servers in 81+ data centers around the world . Want to sell a New York VPS one day and a Singapore VPS the next? No problem – simply pick from the available regions of each cloud brand. This global reach allows you to cater to customers requiring specific locations or high availability. All of this is managed via WHMCS rather than juggling multiple supplier portals.
    • Automated Provisioning & Management: The WHMCS module automates VPS creation, resource upgrades, OS reinstalls, and server reboots. When a customer orders a new VPS, Caasify’s system calls the provider’s API and creates the instance automatically. Clients can manage their virtual servers (start, stop, reboot, view usage stats) right in the WHMCS client area. Behind the scenes, Caasify handles all API calls and meterings, as explained in their documentation .
    • White-Label and Brandable: All services provisioned via Caasify can be sold under your own brand. Customers see your WHMCS branding and have no clue that Caasify is the underlying vendor. This maintains your company’s professional image. Caasify even allows customization of server templates and control panel branding to match your business.
    • No Infrastructure Hassles: Since Caasify uses existing cloud providers, you avoid buying or managing any servers yourself . No data center costs, no hardware failures, and no network maintenance – all that is handled by providers like Hetzner and DigitalOcean. You focus on sales, marketing, and customer support. Caasify essentially manages the backend cloud orchestration and billing collection, so your overhead stays minimal.

    How Caasify Compares to Other WHMCS Modules

    Many hosts might ask: why not just use separate modules like those from ModulesGarden or WHMCSModule.net? The key difference is integration and cost.

    Traditional WHMCS modules usually target a single provider. For example, ModulesGarden offers “Hetzner WHMCS Module”, “DigitalOcean WHMCS Module”, “Vultr WHMCS Module” and “Linode WHMCS Module” as separate add-ons. Each must be purchased (often at $50–$250 per year) and installed independently. In contrast, the Caasify module is free and multi-provider . You don’t need a new module or license to add Linode or Vultr – support is built-in.

    FeatureCaasify WHMCS ModuleTraditional Provider Modules
    PriceFree (no license fees)Paid (monthly or annual)
    Billing ModelHourly / Pay-as-you-goTypically fixed monthly rates
    Supported VPS ProvidersHetzner, DigitalOcean, Linode, Vultr, … (all in one)Usually one provider per module
    Global Locations81+ data centers worldwideLimited to the provider’s regions (e.g. Hetzner only in DE/FI/US)
    AutomationUnified via Caasify APISeparate automations per module
    MaintenanceOne module to updateMultiple modules to update

    This comparison shows that Caasify’s solution can replace multiple paid modules. It also bundles multi-cloud support and hourly billing – features that would require extra work if using separate integrations. Caasify essentially built an “aggregator” model: they partner with cloud brands and handle the API complexity, then give you one simple panel.

    For example, Caasify’s free Hetzner module page highlights exactly this advantage: “sell Hetzner VPS alongside other major providers like DigitalOcean, Vultr, and Linode — all managed in one place through your WHMCS system.” . They also emphasize that unlike modules from ModulesGarden or WHMPress (which charge fees and cover only one provider), Caasify’s module lets you resell dozens of cloud providers with no license costs . This means you keep more revenue and avoid juggling multiple products.

    From a technical standpoint, setup is straightforward. After installing Caasify’s WHMCS module, a simple step is to add a small initial deposit (e.g. €5) to your Caasify account . Then you can configure default regions or templates in WHMCS. Your customers, in turn, can go to the client portal and create new VPS servers of any supported type. They’ll see options like choosing Ubuntu or CentOS, selecting the number of CPUs, RAM, and SSD space, and picking regions (Germany, USA, etc.) – all drawn from the provider catalog. Caasify’s backend manages the provisioning and billing automatically, as described by their documentation .

    Building Your VPS Reselling Business with Caasify

    Integrating Caasify’s module means your hosting company can instantly start selling cloud VPS without heavy setup. Key advantages include:

    • Fast Market Launch: No need to sign contracts with each cloud vendor. Through Caasify, you gain instant access to major clouds. Most customers report having the module up and running in minutes . This speed is crucial if you want to quickly expand your portfolio or respond to market demand for additional services.
    • Control and Customization: Since Caasify is white-labeled, you can craft custom VPS plans, add-ons (like backups or extra IPs), and promotions within WHMCS. You remain in full control of pricing, product naming, and billing cycles.
    • Support and SLA: Caasify guarantees service quality. If there are provider outages or issues, Caasify offers credit back for downtime (up to a year’s worth in severe cases) . This safety net adds confidence for you and your customers when selling outsourced VPS.
    • Scalability: As your customer base grows, you can simply increase your Caasify balance to provision more VPS. There’s no limit – your growth is essentially unlimited because the capacity comes from the partner clouds. Plus, you can tap new regions anytime by configuring the module (for instance, if Caasify adds more providers beyond the initial four).

    By using Caasify, web hosts can focus on what they do best – marketing, support, and bundling – without worrying about the underlying cloud operations. For example, as one Caasify announcement notes, a reseller needs only “WHMCS license, a domain, hosting, marketing skills, and basic Linux knowledge” to start reselling. Everything else (cloud provisioning, billing, automation) is handled out-of-the-box.

    Try Caasify’s WHMCS Module Today

    If you’re running a web hosting business and want to offer cloud VPS without heavy R&D or hardware costs, Caasify’s WHMCS module deserves a look. It unifies Hetzner, DigitalOcean, Vultr, and Linode into one platform, saving you time and money . Many hosts find that this simplicity and flexibility quickly justifies adopting Caasify.

    As experts in WHMCS integrations and cloud hosting solutions, our team can help you get set up and advise on pricing strategies. Contact us today to explore how Caasify can expand your VPS reselling program. We can provide a demo of the Caasify module, guide you through installation, and ensure a smooth launch so you can start selling multi-provider VPS under your own brand.