Category: Uncategorized

  • Boost Transformer Efficiency with FlashAttention, Tiling, and Kernel Fusion

    Boost Transformer Efficiency with FlashAttention, Tiling, and Kernel Fusion

    Introduction

    FlashAttention is transforming how we optimize Transformer models by improving memory efficiency and computation speed. As the demand for more powerful AI models grows, addressing the scalability issues in attention mechanisms becomes crucial. FlashAttention achieves this by using advanced techniques like tiling, kernel fusion, and making the softmax operation associative, all of which reduce memory bandwidth usage. In this article, we’ll dive into how these innovations make it possible to process longer sequences in Transformer models while maintaining high performance and lower memory consumption.

    What is ?

    Designing Hardware-Aware And Memory-Efficient Algorithms

    Modern hardware accelerators, like GPUs, are super important for making deep learning models work better and faster. But, even though GPUs have a lot of power, they still hit a wall when it comes to memory bandwidth—that’s basically how fast data can move between the GPU’s memory and its processing units. To make sure GPUs are used to their fullest potential for heavy tasks, like deep learning, we need algorithms that are smart about how they use the hardware and memory. These algorithms should be designed to make the best use of available resources, including memory setup and how fast the hardware can do math operations. FlashAttention does just that! It’s a perfect example of how using memory-smart techniques can really ramp up the performance of attention mechanisms in Transformer models. It reduces unnecessary memory access, balances the load, and makes the most of GPU memory bandwidth, so it can handle longer sequences much faster.

    FlashAttention (2022)

    FlashAttention, launched in 2022, is a game-changer when it comes to optimizing the attention mechanism in Transformer models. Normally, attention mechanisms struggle with a scaling issue—basically, as the sequence length increases, memory usage and computation time grow really fast. FlashAttention solves this by cutting down on memory bottlenecks and reducing unnecessary computation. The algorithm is designed to be hardware-aware, meaning it’s made to work smoothly with the unique architecture of modern GPUs. This design lets FlashAttention handle longer input sequences with way less memory and a much faster processing time, which means it speeds up both training and inference for Transformer models. By cutting out redundant memory reads and writes, and optimizing how the GPU processes data, FlashAttention makes big improvements over standard attention mechanisms.

    GPU Memory: HBM & SRAM

    In FlashAttention, understanding the types of GPU memory is super important. There are two main types: High Bandwidth Memory (HBM) and Static Random-Access Memory (SRAM). HBM is like the GPU’s global memory—it has a bigger storage capacity but is slower when it comes to moving data. On the other hand, SRAM is faster and located directly on the chip, meaning data can be accessed quickly during computation. FlashAttention takes advantage of both memory types, streamlining how data flows to avoid slow HBM access as much as possible. By storing critical data in the faster SRAM, FlashAttention dramatically reduces slow memory access, making things quicker and more efficient. This setup lets FlashAttention work with larger sequences while still keeping performance high.

    Computing Attention

    The attention mechanism is at the heart of Transformer models, and it works by figuring out how different parts of the input sequence are related to each other. This is done through a series of calculations involving three key pieces: Query (Q), Key (K), and Value (V). The query matrix represents the current element, and it’s compared to the other elements in the sequence using the key matrix. This comparison gives a similarity score, which is then used to adjust the attention weight applied to the value matrix to produce the final output. FlashAttention takes these calculations and makes them faster and more memory-efficient. By reducing unnecessary data movements between memory types and reorganizing the attention calculation, FlashAttention speeds up the process, allowing the model to handle much bigger sequences without using up too much memory.

    FlashAttention is IO-aware

    A big innovation in FlashAttention is its IO-awareness. Traditional attention mechanisms do a lot of reading and writing between global memory (HBM) and on-chip memory (SRAM), which can slow things down big time. FlashAttention solves this problem by reorganizing its computation so that fewer of these slow memory operations are needed. By using techniques like tiling, kernel fusion, and other memory-smart tricks, FlashAttention reduces the time spent on memory I/O. This makes FlashAttention able to process longer sequences faster, without choking the GPU’s memory bandwidth. By optimizing both the computations and the data transfers, FlashAttention stays efficient even as the model size increases.

    Kernel Fusion

    Kernel fusion is a key trick that FlashAttention uses to improve performance. Normally, in a typical implementation, attention calculations are split into several stages, each requiring separate calls to the GPU. But these calls can be pretty inefficient, especially when you’re dealing with large datasets. FlashAttention fixes this by fusing several calculation steps into a single kernel. This not only reduces the overhead from launching multiple kernels but also cuts down on time spent accessing memory. Kernel fusion really helps improve the overall speed of the algorithm, so it processes things faster without sacrificing the accuracy of the attention mechanism. However, getting this right wasn’t easy—FlashAttention had to carefully optimize the fused kernels to make sure the on-chip memory wasn’t overloaded.

    Tiling

    Tiling is another trick in FlashAttention’s playbook that helps manage memory bandwidth. Tiling breaks the input data into smaller blocks, called “tiles,” which can be processed in parallel on the GPU. Each tile is designed to fit into the on-chip memory (SRAM), which cuts down on the need to access slower global memory (HBM). This technique lets FlashAttention process huge amounts of data more efficiently, as each tile can be handled independently, reducing the total memory bandwidth needed. Tiling is especially helpful for operations like matrix multiplication, where the calculations are associative and can be reordered without messing things up. But FlashAttention had to get creative to make sure the softmax operation could work with tiling, since softmax doesn’t usually play nice with reordering.

    Making Softmax Associative

    One of the challenges FlashAttention had to overcome was making the softmax operation associative. The softmax function, which helps normalize attention scores, isn’t naturally associative—this means the order in which the calculations are done actually matters. In traditional setups, this can be a pain for memory optimization, because it means you need to store intermediate matrices that can get expensive to read and write. FlashAttention came up with an innovative solution called the “online softmax trick.” This technique lets the softmax operation be done incrementally, breaking the data into blocks and calculating the softmax reduction step by step. By doing this, FlashAttention avoids storing the intermediate matrices in global memory and instead does everything in the faster SRAM. This makes softmax both memory-efficient and faster, keeping the overall speed gains that FlashAttention promises.

    Recomputation in the Backward Pass

    FlashAttention also uses a clever recomputation strategy during the backward pass to reduce memory usage even more. Normally, traditional attention mechanisms need to store intermediate matrices, like similarity scores (S) and attention probabilities (A/P), for the backward pass. But that takes up a lot of memory, especially when working with long sequences. FlashAttention avoids this by recomputing these matrices during the backward pass instead of storing them. It only keeps the final output and the softmax normalization stats. During the backward pass, FlashAttention uses these stats to recompute the necessary matrices as needed, cutting down on memory usage. This trick helps FlashAttention handle bigger sequences without hogging memory, keeping everything efficient.

    For more insights on optimizing deep learning models, check out this detailed guide on FlashAttention and Transformer Model Optimization.

    Conclusion

    In conclusion, FlashAttention revolutionizes the efficiency of Transformer models by addressing critical scalability issues related to time and memory complexity. Through innovations like tiling, kernel fusion, and an optimized softmax operation, FlashAttention reduces memory bandwidth usage and accelerates computation. These breakthroughs make it possible to handle longer sequences without sacrificing performance, offering a promising solution for improving Transformer model efficiency. As we look ahead, expect continued advancements in algorithms like FlashAttention to further push the boundaries of AI performance and memory optimization.

    Unlock YOLOv12: Boost Object Detection with Area Attention, R-ELAN, FlashAttention

  • nodemon, node.js, express

    nodemon, node.js, express

    Introduction

    When developing with Node.js and Express, managing application restarts can quickly become a hassle. That’s where nodemon comes in. This powerful tool automatically restarts your server whenever changes are made to your project files, saving you time and improving your development workflow. By using nodemon with Node.js and Express, you can focus more on writing code and less on manual restarts. In this article, we’ll walk you through how to install and configure nodemon for your Node.js applications, including how to integrate it seamlessly with an Express project.

    What is Nodemon?

    Nodemon is a tool that automatically restarts a Node.js application whenever changes are made to the code. This eliminates the need for manual restarts during development, saving time and improving workflow efficiency.

    Step 1 — Installing Nodemon

    Alright, first things first, you’ll need to install nodemon on your machine. Nodemon is a super handy tool that will automatically restart your Node.js app every time a file changes, saving you from manually restarting the server each time you tweak your code. Pretty neat, right?

    You can install nodemon in two ways: globally or locally. Whether you choose to install it globally or locally depends on your needs. If you want to use it across all your projects, you should go for a global installation. But if you just want it for a specific project, then the local installation is the way to go.

    Global Installation

    If you want to install it globally so that it’s available in any project, you can do so with npm by running this command:

    $ npm install nodemon –global

    Or if you prefer yarn as your package manager, you can run:

    $ yarn global add nodemon

    Once installed globally, you can use nodemon from anywhere on your system, which is pretty convenient when jumping between different projects.

    Local Installation

    Now, let’s say you only want to use nodemon in one project. In that case, you can install it locally, which keeps it confined to a single project. To install nodemon locally with npm, run:

    $ npm install nodemon –save-dev

    Alternatively, if you’re using yarn, the command would be:

    $ yarn add nodemon –dev

    This is ideal for keeping your project environments isolated and not affecting any other projects you might have on your machine.

    What’s the Catch with Local Installation?

    One thing to keep in mind with local installations is that you won’t be able to run the nodemon command directly from the terminal. Instead, you’ll need to reference it from the node_modules/.bin directory inside your project. If you try running nodemon directly, you might run into an error like:

    command not found: nodemon

    But don’t worry, it’s an easy fix! Instead of running just nodemon, you can specify the full path like this:

    $ ./node_modules/.bin/nodemon.js [your node app]

    This will allow you to run nodemon from the local installation. And the best part is, you can also use it inside npm scripts or even with npx if that’s more your style. This flexibility helps keep things tidy, while still giving you the awesome power of automatic restarts with nodemon.

    So whether you go global or local, nodemon is here to make your development process smoother and save you time by handling those restarts for you. Enjoy coding without the manual restart hassle!

    For more information on automating development tasks with tools like nodemon, check out this comprehensive guide on Nodemon package documentation.

    Step 2 — Setting Up an Example Express Project with Nodemon

    Once you’ve installed nodemon, it’s time to bring your project to life. Let’s start by setting up a simple Express server. Now, if you haven’t heard of Express before, it’s a minimal and flexible Node.js web application framework that’s perfect for building web apps and APIs quickly. Imagine this: you’re working on an app, and you’ve got a server.js file that holds the core logic of your server. With nodemon by your side, you won’t have to manually restart your server each time you tweak the code. Nodemon will automatically restart the server the moment it detects any changes. So, let’s get started!

    First, you’ll need to create a new project directory. Once you’re in your terminal, navigate to that directory and initialize a new Node.js project by running this command:

    $ npm init -y

    This creates a package.json file, which helps manage all your project’s dependencies. Now that that’s set up, you’ll need to install Express by running:

    $ npm install express

    Once the installation is done, create a server.js file inside your project folder. This file is going to be the entry point for your Express server. Here’s a basic example of what your server.js file might look like:

    const express = require(‘express’);
    const app = express();
    const port = 3000;app.get(‘/’, (req, res) => {
        res.send(‘Dolphin app listening on port ‘ + port + ‘!’);
    });app.listen(port, () => {
        console.log(`Dolphin app listening on port ${port}!`);
    });

    This simple code sets up an Express server that listens on port 3000. When you visit the root URL (/), the server responds with “Dolphin app listening on port 3000!”.

    Now that your server is ready, let’s bring in the magic of nodemon. To run your server with nodemon, all you need to do is type this command in your terminal:

    $ nodemon server.js

    And here’s where nodemon shows off. When you run this command, nodemon starts your Express server and automatically watches for changes in your project files. This means that as soon as you make any changes to the server.js file, nodemon will detect those changes and restart the server.

    For example, let’s say you update the server.js file to change the message that the server displays, like this:

    app.get(‘/’, (req, res) => {
        res.send(‘Shark app listening on port ‘ + port + ‘!’);
    });

    After saving the file, nodemon will notice the change, restart the server, and you’ll see the new message pop up: “Shark app listening on port 3000!”. The beauty of this is that you don’t have to manually stop and restart the server. Nodemon handles it all for you.

    This automatic restart is a game-changer during development. It saves time and removes the need to worry about restarting your server every time you update your code.

    And if you want to take it even further, nodemon lets you pass in arguments. For example, you can specify a different port number in the command like this:

    $ nodemon server.js 3006

    Now, your server will listen on port 3006 instead of the default port 3000. Nodemon makes implementing these changes super easy, allowing you to focus on coding rather than managing server restarts.

    And just like that, you’ve got an Express server running with nodemon watching over your files. Now you can make tweaks to your app and see the changes live, without any interruptions. Enjoy the seamless development process!

    For further guidance on building and deploying Express applications, refer to this helpful Express Installation Guide.

    Step 3 — Nodemon Options

    Once you’ve set up nodemon and have your Node.js application running smoothly, you may realize that you want more control over how nodemon behaves. This is where the real magic of nodemon comes in with its various configuration options. By using these options, you can customize how nodemon monitors your project, what it restarts, and even the way your application runs. Let’s dive into some of the most useful options that nodemon offers.

    –exec

    The --exec option lets you specify a different binary to run when a file change is detected. This is especially handy if you need to run a specific tool or script instead of the default node command.

    For example, let’s say you’re working with TypeScript and you want to use ts-node to run your TypeScript files. Instead of typing ts-node every time you want to run your app, you can simply tell nodemon to use it automatically with this command:

    $ nodemon –exec ts-node server.ts

    Now, every time there’s a change in your project, nodemon will run ts-node to execute server.ts, keeping you in your development flow without needing to type extra commands.

    –ext

    The --ext option is a life-saver when you want to specify the exact types of files nodemon should watch. By default, nodemon looks for changes in .js, .mjs, .json, .coffee, and .litcoffee files. But what if you’re working with TypeScript and want to track .ts files as well? With the --ext option, you can easily include those file types:

    $ nodemon –ext js,ts server.js

    Now, nodemon will monitor both .js and .ts files for changes. You get the flexibility to include the file types that are important to your project.

    –delay

    Sometimes, you might want to delay the restart process after a file change. By default, nodemon waits for one second before restarting, but you can customize this to your needs using the --delay option.

    For example, if your application is slow to start, or if you want to avoid rapid restarts while you’re making multiple changes, you can set a longer delay:

    $ nodemon –delay 3.5 server.js

    This tells nodemon to wait 3.5 seconds after detecting a file change before restarting the process. It’s perfect for avoiding those unnecessary restarts during fast editing.

    –watch

    The --watch option allows you to tell nodemon exactly which files or directories to focus on. By default, it watches the current directory and all subdirectories. But if you want to optimize things and only watch specific files or folders, you can use --watch.

    Let’s say all your code lives in a folder called src, and you only want to monitor that folder. You can do this:

    $ nodemon –watch src server.js

    If you have multiple directories you want to watch, you can specify them with additional --watch flags:

    $ nodemon –watch src –watch config server.js

    Now, nodemon will watch both the src and config directories for changes.

    –ignore

    At times, you might not want certain files or directories to trigger a restart when they’re modified. This is where the --ignore option comes in handy. For example, you might have test files or log files that don’t require the server to restart when updated.

    If you want to ignore .test.js files, for instance, you can add this to your command:

    $ nodemon –ignore *.test.js server.js

    This ensures that nodemon won’t restart when .test.js files are modified.

    –verbose

    If you ever find yourself needing more detailed information about what’s happening under the hood, the --verbose option is exactly what you need. It gives you more detailed output in the terminal, letting you see exactly which files were modified to trigger the restart. To enable verbose mode, just add --verbose to your command:

    $ nodemon –verbose server.js

    This is especially useful when you’re troubleshooting an issue with your nodemon setup or just want to keep track of exactly what’s happening.

    Combining Options

    The cool thing about nodemon is that you can mix and match all these options to create a development environment that suits you perfectly. For example, if you’re working with TypeScript, want to watch both .js and .ts files, and prefer a 3-second delay before the server restarts, you can use this command:

    $ nodemon –exec ts-node –ext js,ts –delay 3 server.ts

    This command sets everything up for a seamless TypeScript development experience, while nodemon handles all the behind-the-scenes work. You can combine these options any way you like, giving you total control over your development workflow.

    With all these nodemon options at your disposal, you can fine-tune your development setup to fit your exact needs. Whether it’s choosing specific files to watch, controlling how and when your server restarts, or ignoring certain files altogether, nodemon gives you the tools to keep things running smoothly and efficiently.

    For more information on optimizing your development environment with various command-line options, check out this detailed Nodemon Options Guide.

    Step 4 — Nodemon Configurations

    At some point, you might find yourself running into the problem of repeatedly adding the same options when you start your server. That’s where configuration files like nodemon.json or the package.json file come in. These configuration files save you time by letting you set up your settings once, and then nodemon automatically picks them up each time you run it.

    One major benefit of using a configuration file is that it makes sharing your setup with others super easy. Everyone working on the project will have the same nodemon settings, which keeps things consistent. Let’s explore how you can set up your own nodemon configuration to make your development process a bit more seamless and efficient.

    Using nodemon.json

    The first option is creating a nodemon.json file in your project’s root directory. This is a nice, clean way to keep your settings separate from your other project files, and it makes it easy to update those settings without having to tweak the command line every time you start nodemon.

    For example, let’s say you want nodemon to watch specific directories, use TypeScript, and add a little delay before restarting. You can do that by creating a nodemon.json file with the following content:

    {
    “watch”: [
    “server”
    ],
    “ext”: “ts”,
    “ignore”: [
    “*.test.ts”
    ],
    “delay”: “3”,
    “execMap”: {
    “ts”: “ts-node”
    }
    }

    Here’s what each part of this configuration does:

    • watch: This tells nodemon to watch changes in the server directory.
    • ext: This specifies that .ts (TypeScript) files should be monitored.
    • ignore: This ensures that files ending in .test.ts don’t trigger a restart.
    • delay: This adds a 3-second delay before restarting after a change is detected.
    • execMap: This tells nodemon to use ts-node to run TypeScript files.

    This setup is super helpful if you often need to tweak how nodemon behaves.

    Using package.json for Configuration

    If you prefer to keep everything in one place and avoid dealing with multiple configuration files, you can add your nodemon settings directly to your package.json. This is especially handy for smaller projects where you don’t need to manage a separate file for just the nodemon config.

    Here’s how you can add the same configuration from the nodemon.json example to your package.json:

    {
    “name”: “nodemon-example”,
    “version”: “1.0.0”,
    “description”: “”,
    “nodemonConfig”: {
    “watch”: [
    “server”
    ],
    “ext”: “ts”,
    “ignore”: [
    “*.test.ts”
    ],
    “delay”: “3”,
    “execMap”: {
    “ts”: “ts-node”
    }
    },
    “scripts”: {
    “start”: “nodemon server/server.ts”
    }
    }

    Here’s a breakdown of the key parts:

    • nodemonConfig: This section is where you define all the same settings as you would in the nodemon.json file.
    • scripts: This section includes a start command, which tells nodemon to start the server with the specified script.

    By putting your configuration in the package.json file, you keep everything in one place. This is a great option when managing dependencies or working on projects where you prefer not to have multiple configuration files.

    Benefits of Configuration Files

    Having a configuration file for nodemon comes with a lot of perks:

    • Consistency: You don’t have to remember to add the same options every time you start the server. The settings are applied automatically.
    • Portability: If you’re working in a team, everyone will have the same configuration without needing to set up their environment manually.
    • Flexibility: You can easily tweak your settings whenever needed—whether it’s adjusting the delay, adding directories to watch, or changing which files get executed.

    By using a configuration file, you ensure that your development environment stays the same across all machines and platforms, which means you don’t have to deal with complicated setups each time you start a new project.

    Additional Configuration Options

    We’ve covered some of the basic configuration options, but nodemon offers a lot more flexibility. If you’re curious about all the available options, you can always check them out by running:

    $ nodemon –help

    This command will show you a list of all the options you can use, allowing you to fine-tune how nodemon works for your particular needs.

    To explore more about how to configure and manage nodemon efficiently, check out this comprehensive guide on Nodemon Configurations.

    Conclusion

    In conclusion, using nodemon with Node.js and Express is a game-changer for developers looking to streamline their workflow. By automatically restarting your server whenever changes are made, nodemon eliminates the need for manual restarts, saving valuable time and effort during development. Whether you’re installing nodemon globally or locally, its configuration options make it easy to integrate into any Node.js project. As development environments continue to evolve, tools like nodemon will remain essential in speeding up the development process, allowing developers to focus more on coding and less on administrative tasks. With its simple setup and flexibility, nodemon is an indispensable tool for modern web development.Looking ahead, we can expect even more powerful integrations and enhancements to nodemon, further simplifying development processes in Node.js and Express applications.

    Docker system prune: how to clean up unused resources (2023)

  • Master Monocular Depth Estimation: Enhance 3D Reconstruction, AR/VR, Autonomous Driving

    Master Monocular Depth Estimation: Enhance 3D Reconstruction, AR/VR, Autonomous Driving

    Introduction

    Monocular depth estimation has revolutionized how we approach 3D reconstruction, AR/VR, and autonomous driving. With the Depth Anything V2 model, accurate depth predictions from a single image are no longer a challenge. By incorporating advanced techniques like data augmentation and auxiliary supervision, this model enhances depth accuracy, even in complex environments with transparent or reflective objects. In this article, we’ll explore how Depth Anything V2 is reshaping industries by delivering precise monocular depth estimation and enabling cutting-edge applications in 3D modeling, self-driving technology, and immersive digital experiences.

    What is Monocular Depth Estimation?

    Monocular depth estimation is a technology that allows a computer to figure out how far away objects are in a picture taken with just one camera. It analyzes visual clues in the image, like the size and position of objects, to estimate their distance. This solution is useful for applications such as self-driving cars, virtual reality, and robots, where understanding the depth of objects is important for navigation and interaction.

    So, let’s dig into how monocular depth estimation (MDE) has been growing over the years. Imagine you’re looking at a photo, and somehow, the computer knows exactly which objects are closer to you and which ones are farther away. Pretty neat, right? That’s exactly what MDE is all about. But here’s the cool part—it’s been getting even better recently with something called zero-shot relative depth estimation. Instead of calculating precise distances, the model predicts the order of objects in a scene. It’s like guessing the lineup of people, but you don’t actually know how tall they are. Sounds simple, but it’s really powerful. And it gets even better. With tools like Stable Diffusion, we can now clean up the depth data. Basically, it gets rid of any fuzziness, making the depth predictions much clearer and more accurate. All of this has really improved the quality of depth estimates from just one image.

    Now, let’s talk about some of the big players in this field. MiDaS and Metric3D are two of the key models that have been working hard to solve the problem of scaling datasets. They’ve gathered millions of labeled images to help train models that can handle all kinds of real-world scenarios. Think about it like teaching a model how to recognize depth in every kind of photo: indoors, outdoors, in the rain, in the sun—you name it. But, as useful as labeled data is, it does have its limits. Depth predictions can sometimes miss the mark, especially if we rely too much on labeled data. That’s where Depth Anything V1 stepped in and shook things up. Instead of just using labeled images, it made use of an incredible 62 million unlabeled images. Yep, you heard that right—unlabeled images. And, guess what? This huge pile of unlabeled data actually made depth estimation even better. Turns out, more data (even without labels) can be a huge advantage.

    But Depth Anything didn’t stop there. It went even further by realizing that synthetic data could fill in the gaps. See, while real-world images are great, they come with their own set of challenges—like weird lighting, different object sizes, and unpredictable settings. To get around these problems, Depth Anything V1 started blending real-world images with synthetic ones. The result? A more adaptable model that could work in a lot of different scenarios, making depth predictions even more accurate. By combining synthetic and real data, Depth Anything also used a cool technique called pseudo-labeling, where the model actually labels the real images on its own. This helped the model figure out how to work with both types of data.

    Next, let’s jump into something called semi-supervised learning, where things get really interesting. Instead of manually labeling thousands of images, the model learns from massive amounts of unlabeled data. Think of it like this: instead of a human labeling each image, the model teaches itself. And here’s the best part: the process is enhanced with knowledge distillation. This is when a big, powerful teacher model transfers its knowledge to a smaller, more efficient student model. It’s like having an experienced mentor guide an intern through complex tasks. The intern (the smaller model) ends up much better at handling tough challenges like monocular depth estimation.

    In the end, combining large-scale unlabeled data with powerful teacher models has proven to be a winning combination. It allows the model to generalize better, meaning it can handle a wider variety of situations, and it leads to more robust depth estimation. So, as we continue to fine-tune these models, the future of depth estimation is looking brighter than ever. This approach will continue to improve performance in areas like 3D reconstruction, and it’ll also make a big impact in autonomous driving and AR/VR.

    Depth Anything: Exploring Unlabeled and Synthetic Data in Depth Estimation

    Strengths of the Model

    Imagine this: you’re standing in a room full of objects, and you need to figure out how far apart they are—not just from each other, but from you, too. Sounds tricky, right? Well, with monocular depth estimation (MDE), we can actually do just that—using only one camera! That’s the magic behind the model we’re talking about. The goal of this research was to create a strong, adaptable benchmark for relative monocular depth estimation, one that can handle all kinds of environments, from tiny rooms to huge outdoor scenes. The real challenge is figuring out precise depth relationships, where the model estimates how far each object is from the camera—critical for things like autonomous driving and 3D reconstruction.

    Now, why is all this so important? Think about all the situations where you need to know not just what’s in front of you, but how far away it is—whether it’s a self-driving car trying to avoid a pedestrian or a 3D designer building a virtual world. That’s where this model shines. It’s built to handle all kinds of environments and settings. Whether it’s a cozy indoor room or a huge outdoor landscape, it ensures that the depth predictions are accurate and reliable. And that’s where the model’s high-resolution image processing comes in. It’s essential for modern applications that need clear and detailed visuals—because, let’s be honest, blurry images won’t cut it when precision is the key.

    But wait, there’s more. One of the standout features of this model is its ability to tackle complex scenes with ease. Imagine trying to figure out the depth of objects in a room full of mirrors, glass, or water—sounds tough, right? Not for this model. It’s specifically designed to handle tricky reflective surfaces and transparent objects that often throw off traditional models. And it’s not just about handling the basics—this model captures the finest details in its depth maps. We’re talking about precision so sharp it can detect tiny objects like chair legs, small holes, or even those little details that would otherwise get lost in a cluttered environment. This level of detail is what makes it really stand out—offering accuracy comparable to top-tier methods like Marigold.

    But precision and complexity aren’t the only things that make this model special. It’s also built to be scalable and efficient, meaning it can work in a wide range of environments, whether that’s a cloud server packed with processing power or a low-power edge device. Its ability to adapt to different hardware setups makes it super flexible. And when it comes to speed, this model doesn’t disappoint. Its efficient processing capabilities ensure that it can handle large datasets or run in real-time applications without breaking a sweat.

    The model’s flexibility doesn’t end there—it’s also highly adaptable for transfer learning. This means it can be easily fine-tuned with just a little extra training to handle specific tasks. For example, Depth Anything V1 has been the go-to pre-trained model for top teams in the Monocular Depth Estimation Challenge (MDEC)—a clear sign of how reliable and effective it is in real-world applications. What makes it even better is that this adaptability allows the model to keep improving as new challenges and technologies emerge in monocular depth estimation. This ensures that, no matter how the field evolves, the model stays ahead of the curve.

    In the end, the strength of this model lies not just in its depth—pun intended—but in its versatility and efficiency, making it a vital tool for everything from autonomous driving to AR/VR and beyond.

    For more details, refer to the study on monocular depth estimation and its innovations.Monocular Depth Estimation: Challenges and Innovations

    What is Monocular Depth Estimation (MDE)?

    Imagine this: you’re looking at a photo, and in a second, you can tell which objects are right in front of you and which ones are farther away—without needing any fancy equipment. That’s the magic of monocular depth estimation (MDE), a technique that helps us figure out the distance of objects in a photo taken with just one camera. Yes, just one camera. It’s kind of like getting a 3D map of a scene from a single 2D picture. Think of it like solving a puzzle where all the pieces are in one frame, and MDE helps you figure out where each piece goes.

    Here’s the thing: MDE uses smart computer algorithms to look at visual clues in an image. These clues include things like the size of objects, how they overlap, and where they are in the scene. From these details, MDE works out the relative distances between the objects. Pretty clever, right? This technology is a total game-changer in areas like autonomous driving, virtual reality (VR), and robotics. For self-driving cars, it’s critical to understand how far away objects around them are. The car needs to know how far pedestrians, traffic signs, and other cars are to move safely. In VR and robotics, having accurate depth perception lets users interact with digital environments in a way that feels real—like reaching out and touching something in a virtual world.

    By creating a 3D understanding from just a 2D image, monocular depth estimation opens up a ton of possibilities for new applications that need precise spatial data. But there’s more than one way to handle this depth estimation challenge, and it boils down to two main approaches.

    Absolute Depth Estimation

    Absolute Depth Estimation is one approach, and it’s all about precision. This is also called metric depth estimation, and it focuses on giving you exact measurements of depth. These models create depth maps that show the distances between objects in real-world units like meters or feet. So, if you’re using it for something like 3D reconstruction, mapping, or even autonomous navigation, you get the exact numbers needed to understand the environment. Think of it like measuring the distance between two points on a map—super useful when accuracy is key.

    Relative Depth Estimation

    On the other hand, Relative Depth Estimation doesn’t give you exact numbers. Instead, it shows the order of objects—like a ranked list of which ones are closer and which ones are farther away. This is helpful in situations where the exact size of the scene doesn’t matter as much, but understanding how the objects are spaced out does. For example, in object detection or scene understanding for VR, relative depth estimation helps the system figure out the layout of the objects, even if it doesn’t know the exact distances.

    Both of these depth estimation techniques are important, depending on how precise you need to be for your application. Whether it’s measuring exact distances for autonomous driving or figuring out how things are laid out for AR/VR, MDE is changing how we interact with both the physical and digital worlds.

    Monocular Depth Estimation Research

    Model Framework

    Let’s take a step back and walk through how the Depth Anything V2 model is trained. Imagine it like building a house—each step is essential to lay down a solid foundation that’ll ensure it’s sturdy, reliable, and built to last. The process starts with a teacher model, which is trained on high-quality synthetic images. Think of this teacher like an apprentice learning all the best techniques, but with ideal, perfectly curated data. The DINOv2-G encoder powers this teacher model, and its job is to understand the ins and outs of monocular depth estimation and then pass that knowledge on to the next stage.

    Once the teacher model is up to speed, the second stage begins. Here, the focus is on generating pseudo-depth information. Now, this sounds complicated, but really, it’s just the teacher model labeling a massive batch of unlabeled real-world images. These images don’t have any labels on them—no one’s telling the model what’s what. But thanks to everything the teacher learned, it can make its best guess about the depth of the objects in these images. This huge batch of “pseudo-labeled” data is then passed on to the next model, which is the student. And this is where things start to get really interesting. The student model, trained on this pseudo-labeled data, learns how to generalize from what it’s been shown. So, even when it encounters new images it’s never seen before, it’s ready to predict depth accurately.

    Let’s break it down into simpler terms. First, you train a teacher (using clean, synthetic images) to understand depth. Then, you let this teacher label real-world images on its own. These labeled images are used to train the student, who then learns from the teacher’s work and becomes better at predicting depth across a variety of images—whether they’re new or not.

    When it comes to the model architecture, Depth Anything V2 doesn’t just use any basic design. It employs the Dense Prediction Transformer (DPT) as its depth decoder, built on top of the DINOv2 encoder. The DPT is the powerhouse here, allowing the model to make efficient and accurate depth predictions, even in complex, fast-changing scenes.

    How does the model deal with the variety of images it’s given? Well, it’s pretty simple. Every image is resized so its shortest side is 518 pixels. Then, the model takes a random 518×518 crop to make sure the input size stays the same across all training data. This helps the model handle images that vary in size or resolution.

    Now, let’s look at the training specifics. In the first stage, the teacher model is trained on synthetic images. Here’s how that goes:

    • Batch Size: The model works with 64 images at a time.
    • Iterations: It runs through 160,000 iterations to really refine those depth predictions.
    • Optimizer: The Adam optimizer is used to adjust the model’s weights as it trains.
    • Learning Rates: The encoder’s learning rate is set to 5e-6, and the decoder’s rate is set to 5e-5—this ensures that both parts of the model learn at the right pace.

    Once the teacher model finishes its work, the third stage begins. Here, the model is trained using pseudo-labeled real images generated by the teacher. This stage involves:

    • Batch Size: The batch size increases to 192 images to handle the more complex task.
    • Iterations: The model goes through 480,000 iterations to make sure it learns from the real data.
    • Optimizer: The same Adam optimizer is used here to maintain consistency.
    • Learning Rates: The learning rates remain the same as in the first stage.

    During both stages of training, the datasets—both synthetic and real-world images—are simply combined. They aren’t tweaked to match each other’s proportions, ensuring the model learns from all kinds of image types and doesn’t get stuck in a particular niche.

    One important part of the training process is how the model deals with loss functions. Depth Anything V2 uses a 1:2 weighting ratio between the self-supervised loss (Lssi) and the ground truth matching loss (Lgm). This means the Lgm, which is based on real-world data, gets twice as much importance during training. This strategy makes sure the model’s predictions are grounded in reality, while also benefiting from the flexibility of self-supervised learning.

    Finally, to evaluate how well Depth Anything V2 performs, it’s been tested against Depth Anything V1 and MiDaS V3.1 across five different test datasets. Here’s how the results turned out:

    • Depth Anything V2 outperforms MiDaS when it comes to overall depth estimation accuracy, which is great news.
    • However, it’s still slightly behind Depth Anything V1 in some areas. While V2 has made huge improvements in generalization and robustness, there are still a few places where V1 holds the upper hand.

    And that’s the exciting part—Depth Anything V2 is still improving, and it’s already pushing the boundaries of what’s possible in monocular depth estimation.

    Depth Anything V2: Advancing Monocular Depth Estimation

    Model Comparison

    Let’s set the stage. The Depth Anything V2 model is ready for its big moment, and to really test its performance, it’s been put up against two of the top competitors in the field of depth estimation: Depth Anything V1 and MiDaS V3.1. Picture it like a race, with each model going up against the others across five different test datasets, each designed to challenge them in various real-world scenarios. The goal? To see how well each model can estimate depth from just a single image, which we call monocular depth estimation.

    The results were pretty exciting. Depth Anything V2 took the lead when compared to MiDaS, providing more accurate and reliable depth estimates. It’s like watching a seasoned athlete outrun their competitor in a race—the V2 model showed it could handle monocular depth estimation with precision, no problem. But, as with any good competition, there’s always a twist. When Depth Anything V2 faced off against its predecessor, Depth Anything V1, the results weren’t as straightforward. While V2 definitely showed it could generalize across a wide range of image types and settings, there were still a few areas where V1 had the edge. It was like seeing a new version of your favorite app that’s almost perfect but still needs a couple of tweaks to match the smoothness of the old one.

    Why’s that? Well, V1 has some specific optimizations that give it an edge in certain areas—optimizations that V2 hasn’t fully picked up on yet. It’s like the first version of a gadget—solid and reliable—while the newer version might still be polishing some features. That’s not to say V2 isn’t impressive. In fact, it’s a huge step forward, especially in its ability to handle a wider variety of environments and image types, thanks to its data augmentation and auxiliary supervision. These abilities make it much more adaptable, but there’s always room for a bit more refinement.

    So, what does this all mean? Simply put, while Depth Anything V2 has already outperformed MiDaS and shown huge progress in generalization and depth prediction accuracy, it still has some work to do to catch up to Depth Anything V1 in terms of precision. But that’s the exciting part! As V2 continues to develop, there’s every reason to believe it will soon surpass V1’s performance, especially with more fine-tuning. The fact that it’s already doing so well in so many areas suggests we’re headed toward even more powerful models for things like autonomous driving, 3D reconstruction, and AR/VR.

    This comparison is super important because it not only shows us what Depth Anything V2 can do now, but also highlights the areas where it can improve. It gives us a roadmap for what to expect from future versions. In real-world applications, this evolution will be crucial to ensuring the technology keeps improving and delivering top-notch depth estimations across all kinds of environments.

    Psychology of Depth Perception in Technology

    Demonstration

    Imagine being able to see the world in 3D, not just with your eyes, but through the lens of a computer model. That’s what Depth Anything does, and it does it effortlessly, using something called monocular depth estimation. This model is like a magician, trained on a huge dataset—1.5 million labeled images and over 62 million unlabeled ones! This diverse collection of data helps the model generalize across different environments, so it can work in almost any setting you throw at it, from busy city streets to quiet forest paths. This model is all about flexibility, adjusting and adapting to a wide range of use cases, whether it’s autonomous driving or 3D reconstruction.

    Now, let’s talk about how you can use this model. To get started, we recommend using a powerhouse like the NVIDIA RTX A4000 graphics card. Think of it as the engine behind the whole process. It’s built specifically for demanding tasks like 3D rendering, AI, and data visualization. With 16GB of GDDR6 memory, 6144 CUDA cores, and 192 third-generation tensor cores, it’s a heavy hitter in any field that requires fast, accurate data processing. Whether you’re in architecture, media production, or scientific research, this card can handle the workload, allowing you to run Depth Anything at full speed.

    Before you start the magic, let’s make sure the GPU is set up correctly. A quick command like this:

    !nvidia-smi

    will do the job. Once everything’s in the green, you’re good to go!

    Now, you’ll need to clone the Depth Anything repository and import the required libraries. Just follow the steps below, and you’re almost there:

    from PIL import Image
    import requests
    !git clone https://github.com/LiheYoung/Depth-Anything
    cd Depth-Anything

    Next, you’ll want to install all the dependencies listed in the requirements.txt file. This ensures everything runs smoothly:

    !pip install -r requirements.txt

    Now comes the fun part: running the depth estimation model. To get started, just type this command, adjusting the image path to your specific project:

    !python run.py –encoder vitl –img-path /notebooks/Image/image.png –outdir depth_vis

    This command comes with a few key arguments:

    • --img-path: Here, you specify the path to the images you want to process. You can either provide a directory with all your images, a single image, or even a text file listing the image paths.
    • --pred-only: This option saves only the depth map, without showing the original image next to it. If you want to see both side by side, leave it out.
    • --grayscale: This option saves the depth map in grayscale. If you don’t use it, a color palette will be applied to the depth map, making it easier to visualize the depth information.

    Want to process a video instead of just a still image? No problem! You can run Depth Anything on videos with this command:

    !python run_video.py –encoder vitl –video-path assets/examples_video –outdir video_depth_vis

    And, if you’re into interactive demos, you can easily run the Gradio demo locally with this simple command:

    !python app.py

    If you hit a little snag and see a KeyError: 'depth_anything', don’t worry—it just means you need to update the transformers library. Here’s how you can fix it:

    !pip install git+https://github.com/huggingface/transformers.git

    Now, let’s talk about results. Depth Anything isn’t just a cool model; it’s one that delivers, providing detailed and accurate depth estimations from a wide variety of images. It’s been tested in different real-world applications, showcasing its ability to handle complex environments and produce results that you can trust. Whether you’re working on autonomous driving, AR/VR, or any other project requiring accurate depth perception, Depth Anything has yo

    Features of the Model

    Let’s take a walk through the magic behind the Depth Anything model. Imagine you’re standing on a busy city street, and you need to know exactly how far away each car, pedestrian, and streetlight is from you. But here’s the twist: all you have is a single image. No fancy 3D sensors, no multiple cameras—just one photo. This is where monocular depth estimation comes in, and Depth Anything makes it look easy. The model can figure out the depth, or the distance, of objects in any image, helping it understand how everything is arranged in space. This capability is crucial for applications like object detection, autonomous driving, and even 3D reconstruction—basically, it helps us navigate and understand the world around us with just a snapshot.

    But how does it do all this? Well, for metric depth estimation—you know, when you need exact measurements like “this object is 5 meters away”—Depth Anything doesn’t just guess. It fine-tunes itself using detailed datasets, like NYUv2 and KITTI. These datasets provide the ground truth, allowing the model to learn not just the “general idea” of depth but how to estimate the exact distances. This fine-tuning helps the model perform well in two key scenarios: in-domain, where it’s tested on data similar to what it was trained on, and zero-shot, where the model faces new, unseen data without any extra training. The result? A model that’s incredibly adaptable, capable of handling a wide variety of real-world environments and conditions.

    But it doesn’t stop there. Depth Anything has a secret weapon—depth-conditioned ControlNet. This is like upgrading the model’s brain, giving it the power to produce even more accurate depth maps. The new version, built on Depth Anything’s outputs, is far more precise than the previous MiDaS-based version. And it doesn’t just sit there looking pretty. This upgraded ControlNet can be easily integrated into platforms like ControlNet WebUI or ComfyUI’s ControlNet, which means developers can use it in real-time applications. Whether you’re working with still images or video data, the model’s ability to generate realistic depth maps is truly invaluable, making it easier to work with anything from a single frame to a continuous video feed.

    What’s even more impressive? The Depth Anything encoder isn’t just limited to estimating depth. Nope, it can also be fine-tuned for high-level perception tasks like semantic segmentation. Imagine the model looking at an image and being able to recognize and label each pixel—knowing exactly which pixel belongs to the sky, which to a car, and which to the sidewalk. This process is key for understanding more complex scenes. For example, when it was put to the test on the Cityscapes dataset, a popular benchmark for semantic segmentation, the model achieved an impressive 86.2 mIoU (mean Intersection over Union). It also scored 59.4 mIoU on ADE20K, another challenging dataset. These numbers showcase how robust the model is, capable of tackling intricate tasks that require not just depth perception but also semantic understanding.

    With these abilities under its belt, Depth Anything isn’t just a tool for basic depth estimation; it’s a powerhouse for real-time depth-conditioned synthesis, complex segmentation, and much more. Whether you’re building a 3D reconstruction, navigating the world with autonomous driving, or diving into AR/VR,

    Applications of Depth Anything Model

    Picture this: you’re looking at a single image, but it’s not just a flat picture to you anymore. Thanks to monocular depth estimation, a model like Depth Anything can tell you exactly how far away each object is. Now, that might sound like something out of a sci-fi movie, but in reality, this ability is transforming industries in a big way. Depth Anything isn’t just about creating cool visuals—it’s about solving real-world problems by understanding the distance between objects in a single image. Let’s explore some of the amazing ways it’s being used.

    One of the most powerful applications of this technology is in 3D reconstruction. Imagine being able to take a flat 2D image and turn it into a detailed 3D model. That’s exactly what Depth Anything does, and it’s a game-changer for industries like architecture, gaming, and virtual reality (VR). Architects can now visualize entire buildings in 3D from a single photo, game developers can create immersive environments more efficiently, and VR creators can craft realistic worlds that are built on real-world spatial data.

    But it doesn’t stop at 3D. Monocular depth estimation is also a game-changer for navigation systems. Think about autonomous drones or robots that need to move around obstacles—how do they know which objects are too close, or how far they need to move to avoid collisions? That’s where Depth Anything comes in. By accurately calculating the depth of surrounding objects, it ensures that these systems can safely navigate in dynamic environments. It’s like giving a robot the ability to understand the world around it—no different than how you’d judge the distance between you and a chair in your path.

    Now, let’s talk about one of the biggest revolutions that’s happening right now: autonomous driving. For self-driving cars, knowing the depth and distance of objects on the road is absolutely vital. Whether it’s pedestrians, cyclists, or other vehicles, Depth Anything helps vehicles make split-second decisions by generating accurate depth maps. These maps allow the car to understand its surroundings, detect obstacles, and avoid accidents—making it an indispensable part of the autonomous transportation landscape.

    But the magic of Depth Anything doesn’t end with real-world navigation. It’s also pushing the boundaries of AI-generated content. The model is particularly suited for creating images, videos, and even 3D scenes through artificial intelligence. Imagine an AI that can understand the depth of objects in a digital scene and create media that looks realistic—this opens up endless possibilities for film production, gaming, and digital art. You could create more lifelike virtual environments, or generate AI-driven content that feels natural, no matter how complex the scene.

    What sets Depth Anything v2 apart is its ability to capture fine details in even the most complex scenes. Let’s say you’re dealing with transparent objects like glass, or reflective surfaces like mirrors or water—these can be tricky for traditional models. But Depth Anything v2 handles these with ease, helping it interpret intricate layouts and provide depth data that other models might miss. This is particularly useful for autonomous driving or AR/VR, where precise depth estimation is crucial for creating realistic experiences.

    And let’s not forget efficiency. Depth Anything v2 is designed to perform real-time depth estimation, which is absolutely essential for fast-paced applications like live video processing or autonomous driving. Think about it: for a self-driving car, waiting for depth data is not an option—it needs to make decisions instantly, based on accurate, up-to-date information. With this model, you get the precision you need, in real-time, without slowing down the process.

    Finally, one of the best features of Depth Anything v2 is its transferability across different domains. Whether you’re in autonomous driving, robotics, AR/VR, or even AI-generated content, the model can be easily fine-tuned for a wide variety of tasks. This means Depth Anything v2 isn’t just valuable today—it’s a flexible tool that will continue to evolve as new technologies emerge, opening up new possibilities for anything that relies on depth estimation.

    So, whether you’re building a virtual world, designing a self-driving car, or creating a robotic system, Depth Anything is a powerful tool that will help you see the world more clearly, one image at a time.

    Depth Anything: Monocular Depth Estimation with Deep Learning (2023)

    Conclusion

    In conclusion, Depth Anything V2 is setting a new standard in monocular depth estimation by providing precise depth predictions from a single image, even in complex environments. Its advanced techniques, including data augmentation and auxiliary supervision, ensure accurate results across various applications like 3D reconstruction, autonomous driving, and AR/VR. This model’s ability to handle intricate scenes, including transparent and reflective objects, makes it a versatile tool for future innovations. As the technology continues to evolve, we can expect even more refined depth estimation models to enhance industries that rely on spatial data. Whether you’re working on autonomous vehicles or immersive digital environments, Depth Anything V2 opens doors to more realistic and accurate simulations in the world of AI.Snippet for search engines: Depth Anything V2 revolutionizes monocular depth estimation for applications like 3D reconstruction, autonomous driving, and AR/VR with enhanced accuracy and versatility.

    Boost Object Detection with Data Augmentation: Master Rotation & Shearing (2025)

  • Boost Anime Image Quality with APISR Super-Resolution Techniques

    Boost Anime Image Quality with APISR Super-Resolution Techniques

    Introduction

    If you’re passionate about anime and want to improve image quality, APISR super-resolution techniques are a game-changer. This novel approach focuses on preserving the unique characteristics of anime, such as intricate hand-drawn lines and vibrant colors, while enhancing image resolution. By tackling compression artifacts and optimizing resizing, APISR offers a more efficient solution compared to traditional methods. In this article, we explore how APISR’s advanced techniques are revolutionizing the way anime images are restored, delivering sharper, more visually faithful results.

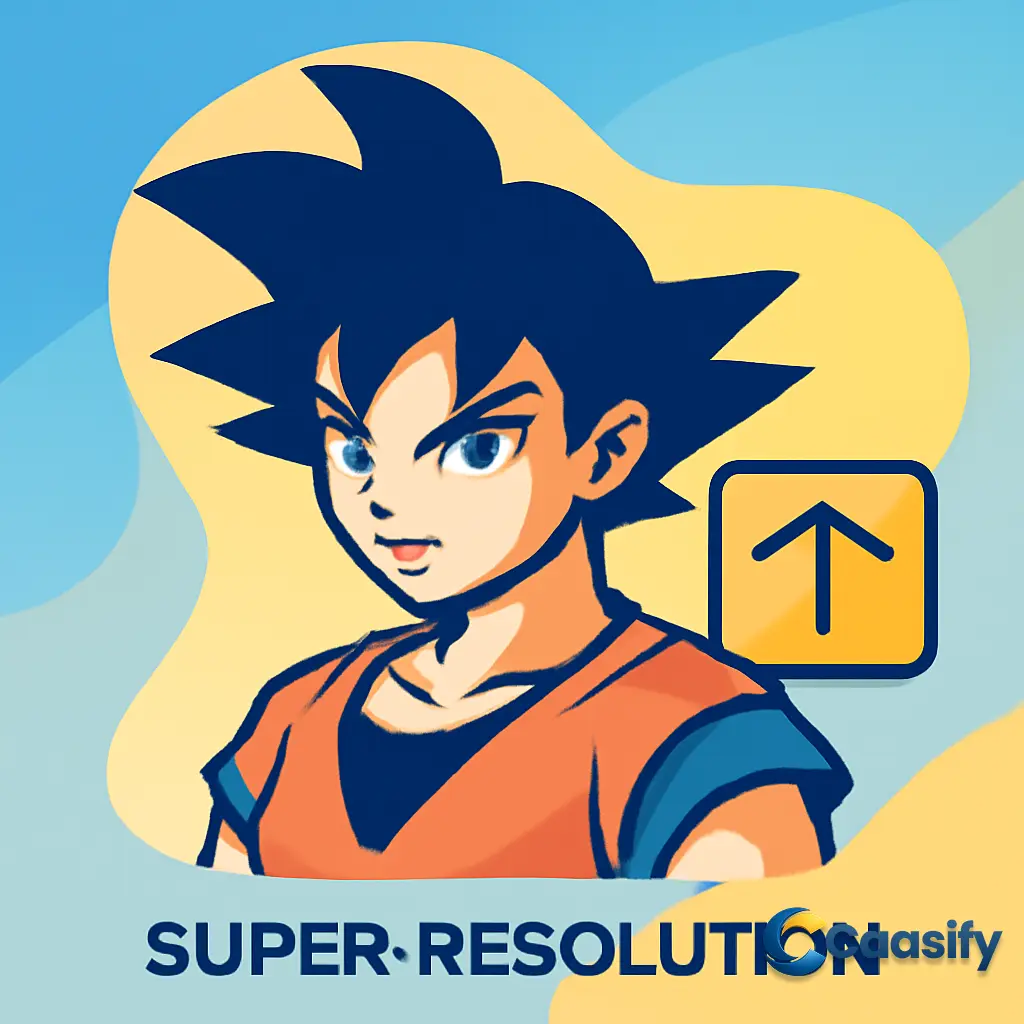
    What is Anime Super-Resolution (SR)?

    This solution improves the quality of older, low-resolution anime images by enhancing their details and clarity without losing the unique artistic features like hand-drawn lines and vibrant colors. It upscales the images to fit modern screen sizes and resolutions, ensuring the content looks good across all devices. The method uses AI to address issues such as compression artifacts and blurry lines, offering a more efficient and effective way to restore anime images compared to previous techniques.

    Prerequisites

    Alright, before we dive into the fun stuff, let’s make sure you’ve got everything you need to get started with the techniques I’m about to walk you through. First up, a solid foundation in Python is going to be your best friend here. You don’t need to be a Python expert, but you should at least be comfortable with its syntax. You’ll need to manage Python packages, work with loops, and handle data structures. Don’t worry, though – once you’re familiar with the basics, you’ll be navigating through the code like a pro, making everything come together smoothly.

    Next, let’s talk about PyTorch and CUDA. Now, this one’s important – PyTorch is the powerhouse behind building deep learning models, and if you’re working with anime images, you’ll need to make sure PyTorch is running with GPU support. Why? Because CUDA-enabled devices use the power of your graphics card to speed things up, making everything run much faster. Super-resolution tasks, especially when it comes to anime, can really stress your system, so trust me when I say that having a CUDA-compatible GPU will save you a lot of time and frustration. Without it, things can get slow. So, get that GPU ready!

    Now, let’s talk image processing libraries. You’ll need some heavy-hitters like OpenCV and PIL (Python Imaging Library). These are your go-to tools for all things image manipulation—resizing, filtering, and of course, enhancing image quality. OpenCV is especially popular for computer vision tasks, helping you with everything from detecting objects to processing images at lightning speed. PIL, on the other hand, makes working with different image formats a breeze. You’ll be opening, saving, and editing images like it’s second nature.

    Finally, to really kick things into high gear, you’re going to want to download the APISR pre-trained models. These models are specifically crafted for enhancing anime images, so they’re already optimized to bring out the best in hand-drawn lines and those vibrant, colorful styles that anime is known for. The great thing here is that these models have already been trained on huge datasets, which means you don’t have to go through the time-consuming training process yourself. Instead, you get to work with cutting-edge pre-trained models and start applying them right away.

    Methodology

    Imagine you’re tasked with restoring a beloved anime series from the past, but the original content is in poor quality—blurry, pixelated, and full of compression artifacts. Seems like a big challenge, right? Well, that’s exactly what this research paper is all about: improving the super-resolution (SR) process to bring those classic anime images back to life. The goal? To restore the distorted hand-drawn lines and fix the mess caused by compression, all while keeping those unique stylistic elements that make anime so special.

    Here’s the thing: improving SR for anime takes a careful balance. Traditional methods might work fine for regular images, but anime has these little details—like sharp hand-drawn lines and vibrant colors—that normal techniques struggle with. This is where these fresh enhancements step in. They focus on processing images in a way that not only sharpens the resolution but also preserves the art style. It’s all about making those anime images look crisp and high-quality, without losing the original charm.

    Prediction-Oriented Compression

    Now, let’s talk compression. We’ve all seen those dreaded JPEG artifacts, right? When an image is compressed too much, it turns into this blurry, pixelated mess that looks nothing like the sharp, clean version we want. Traditional SR methods often rely on JPEG compression, where each part of the image is compressed separately, without considering how pixels relate to each other. While this method works somewhat, it usually leads to important details being lost. Let’s be honest, the results aren’t always pretty.

    But here’s where it gets exciting. Instead of using the traditional method, the proposed approach uses something a lot smarter—video compression. Video compression takes into account the similar pixel content across different frames and only compresses the differences between them. This helps keep the integrity of the image intact. The cool twist here? The model applies this video compression technique to still images, simulating how video compression works. It compresses each frame separately using something called intra-prediction and trains the network to restore those compression artifacts. The result? A cleaner, higher-quality image with fewer imperfections.

    Shuffled Resize Module

    Alright, we’ve tackled compression, but there’s still the issue of resizing. You might think resizing an image is a simple task, but when it comes to super-resolution datasets, it’s a whole different story. Real-world images degrade in complex ways, and resizing them the usual way can introduce issues like blurring or noise. Traditional resizing methods are often too rigid to handle the full range of real-world distortions.

    This is where the paper introduces something new: the shuffled resize module. Instead of resizing images in a fixed order like usual, this method randomly arranges the resize operations in the degradation model. Imagine tossing the rulebook and letting the model figure out the best way to resize the images. This randomness mimics the unpredictable nature of real-world image degradation, which makes the SR process more effective at restoring those high-quality results.

    Anime Hand-Drawn Lines Enhancement

    Now, let’s focus on one of the most important features in anime: the hand-drawn lines. These lines are the heart and soul of anime art, but they often get lost or distorted during the SR process. Traditional methods often make the mistake of applying changes to the entire image, treating everything equally. But this approach can blur those delicate lines that are so crucial to anime style. So how do we keep those lines sharp and clear?

    The solution is a more focused approach. Instead of sharpening everything at once, the method extracts sharpened hand-drawn line information and merges it with the original ground truth (GT) to create something called a pseudo-GT. This allows the network to focus on improving just the lines during training. The best part? No need for extra neural network modules or post-processing steps. Even better, instead of using a traditional sketch extraction model (which can distort the lines or add unwanted elements like shadows), this method uses XDoG, an advanced pixel-by-pixel Gaussian-based method. Sure, XDoG can sometimes produce noisy maps with fragmented lines, but don’t worry—outlier filtering and custom passive dilation smooth out those rough edges, giving you the sharpest, clearest hand-drawn lines possible.

    Balanced Twin Perceptual Loss

    Finally, let’s talk about the secret sauce: the Balanced Twin Perceptual Loss. If you’re a fan of anime, you know how important it is to preserve that unique style—vibrant colors, sharp lines, and that overall “anime look.” But traditional SR methods often can’t capture those subtle details. That’s where this technique steps in, cleverly balancing two perceptual loss functions to preserve those anime features while improving overall image quality.

    The first loss function is Anime-Specific Loss, which uses a ResNet50 model trained on a huge anime dataset to enhance those iconic anime features—like hand-drawn lines and rich color palettes. The second function, Photorealistic Loss, uses a VGG model trained on a general dataset (ImageNet) to make sure the image stays true to its overall structure and quality. By balancing these two loss functions, the model avoids the color artifacts that other models, like AnimeSR and VQD-SR, often produce. What you get is an image that remains faithful to its anime roots, while also being sharper, cleaner, and more vibrant than ever.

    For more details on these techniques, check out the original research paper.
    Anime Image Restoration Techniques

    Prediction-Oriented Compression

    Let’s imagine you’re working on a project to improve an image, but it’s a bit blurry and compressed. You know the deal—JPEG compression has done its thing, and now you’ve got those ugly pixelated spots all over the place, right? Well, that’s where traditional super-resolution (SR) methods come in, using JPEG compression to try and reduce file sizes. It’s like packing a suitcase—if you throw everything in without much care, you might fit it all, but it’s going to look messy and you’ll lose some important details in the process.

    These traditional methods work by compressing each part of the image separately, without really considering how all the pieces fit together. This can leave you with less-than-ideal results when you try to upscale the image. Sure, your file is smaller, but the image quality suffers.

    Now, let’s kick things up a notch. Video compression—yep, the kind used in movies—takes a smarter approach. Instead of looking at each image piece individually, it uses prediction algorithms to compare pixels across different frames. Think of it like predicting what’s coming next in a movie based on earlier scenes—it doesn’t try to recreate everything from scratch, just the differences. This drastically reduces the amount of data needed (which is just a fancy way of saying it makes things simpler while still keeping important details) and helps the image retain more of its original quality. But, as with most clever tricks, it’s not perfect—sometimes the predicted differences don’t line up exactly with the original data, which causes little mistakes or artifacts in the image.

    Here’s where the real magic happens: this method introduces something called a prediction-oriented compression module. You can think of it as a super-sleuth that works with each frame on its own. It uses a technique called intra-prediction, where the system compresses the image based on its own content, instead of relying on outside information. This helps maintain the integrity of each frame during compression and keeps everything neat and tidy. It’s like having a team of experts who know exactly what to do with each part of the image, without having to guess what’s next.

    And here’s the really cool part: by mimicking the effects of multi-frame video compression, this model doesn’t just restore the image—it learns to undo the compression artifacts that happen in the first place. So, when the image is enhanced, it’s not just clearer but also more accurate. The SR network learns how to effectively fix those complicated compression issues, letting it handle everything much more efficiently. What you end up with is an image that’s not only higher in resolution but also more refined and true to the original. The finer details—like those delicate edges or vibrant colors in anime images—are now preserved, giving you a result that’s both true to the original and visually stunning.

    Prediction-Oriented Compression: A New Approach

    Shuffled Resize Module

    Imagine you’re working on enhancing an image—let’s say an anime frame—that’s gone through some tough compression, leading to blurring, noise, and distortions. These issues aren’t just random; they’re natural side effects of how images degrade when they’re compressed or transmitted. We’ve all seen it, right? You try to blow up an image, and suddenly, it looks like a pixelated mess. But here’s the thing: while we can simulate and fix most of these artifacts, resizing an image is a whole different beast.

    When we talk about super-resolution (SR), resizing plays a key role, but it’s also one of the trickiest parts. See, resizing isn’t something that just happens naturally in the world—images aren’t born with a set size; they adapt to whatever’s needed. Usually, resizing is used to adjust images to a specific resolution, but this can sometimes introduce new problems, especially if we rely on traditional methods. Traditional fixed resize modules apply a set sequence of resizing operations, and while they’re predictable, they don’t do a great job at mimicking the real-world complexity of how images degrade.

    Here’s the deal: when you’re working with real-world images, they don’t just get resized in one predictable, fixed way. Depending on how the image is processed or what the task requires, resizing could happen in any number of different ways. Think of it like trying to organize a bookshelf by putting the books in a random order each time. Traditional methods would insist on placing the books in a fixed sequence, but that wouldn’t really reflect how you might stack them in real life. That’s a big issue for SR tasks, where such rigidity could lead to inaccurate results.

    So, to solve this problem, the paper introduces a game-changer: the shuffled resize module. Instead of sticking to a fixed sequence of resizing steps, this method adds a bit of unpredictability to the process. Every time an image is resized, the sequence changes. It’s like shuffling the cards before dealing them—you never know what the next one will be, but the randomness makes it feel more real. In the real world, images go through resizing in different patterns, depending on what needs to be done, and this randomness helps reflect that.

    By adding this variability, the SR model becomes much more flexible. It learns how to handle resizing complexities more effectively, simulating real-world conditions with more accuracy. This, in turn, helps the model restore images better. Not only does it improve the realism of the degradation model, but it also makes the super-resolution process more effective. Now, the SR model can handle a wider range of image distortions, from the smallest blur to the most complex resizing issues, resulting in more accurate and higher-quality restored images. Ultimately, this means you get a restored image that truly represents the original content, with all Shuffled Resize Module for Image Restoration.

    Anime Hand-Drawn Lines Enhancement

    Imagine you’re sitting down to restore a classic anime frame. It’s a beloved scene—full of intricate, hand-drawn lines that make the artwork stand out. But as you start, you realize those once-vibrant lines are now faint and hard to see. So, how do you make them pop again, without losing the charm of the original art? That’s where things get interesting.

    You might think about using global methods that sharpen or enhance everything in the image, but that’s a problem when it comes to anime. Anime relies on those beautiful hand-drawn lines, which are the heart of its unique style. If you treat the entire image the same way, you risk over-processing those fine details, turning them into something that doesn’t look like the original artwork anymore. It’s like coloring in a detailed sketch with broad strokes—you might make the colors brighter, but you lose the delicate details that made the sketch special in the first place. And that’s not what we want, right?

    Instead, this approach takes a much more focused path. The first step is to extract just the sharpened hand-drawn lines from the image. These lines are then combined with the original ground truth (GT) of the image to create something called a pseudo-GT. Why “pseudo-GT”? Because it acts like the original image but with sharper lines, giving the system a better understanding of what needs to be enhanced during the super-resolution (SR) process. This method allows the network to focus purely on sharpening the lines, and that’s it—no need to add extra neural networks or post-processing steps. It’s a simple yet effective solution that keeps things straightforward while still getting us the results we want: clearer, more defined lines.

    Now, here’s where the magic happens. Instead of relying on traditional sketch extraction models, which can distort the hand-drawn lines or even add random shadows or CGI edges, this method uses something called XDoG. XDoG is a pixel-by-pixel Gaussian-based method that’s specifically designed to extract edge maps from the sharpened GT. It’s really good at isolating the hand-drawn details—those delicate lines we’re trying to preserve—but like anything, it’s not perfect. Sometimes, the XDoG maps can come out a bit noisy, with stray pixels or fragmented lines that just don’t belong. Imagine cleaning up a beautiful painting but accidentally smearing a bit of paint outside the lines. Not ideal, right?

    To fix that, the paper introduces a couple of techniques: outlier filtering and custom passive dilation. Outlier filtering is like cleaning up those smudges. It removes unnecessary, irrelevant pixels that can mess up the final look. Meanwhile, passive dilation smooths things over, helping the lines connect more naturally and flow better. Together, these two methods work like a dynamic duo to make the lines cleaner, sharper, and more visually appealing.

    The beauty of this method is that it doesn’t just sharpen the lines—it makes sure the original hand-drawn essence is preserved. You end up with a refined, more accurate representation of the artwork, with the lines standing out clearly while keeping their original style. The result is an image that stays true to the anime’s heart and soul, while still being sharp and high-quality—just Enhanced Hand-Drawn Lines in Anime Restoration

    Balanced Twin Perceptual Loss

    Picture this: you’re working on improving an anime image, but it’s not an easy task. The delicate hand-drawn lines, the vibrant colors, and the unique style are all at risk of being lost in the super-resolution (SR) process. Traditional methods, while great for regular images, often struggle to preserve these key anime features. It’s like trying to clean a watercolor painting with a pressure washer—you’ll clean the surface, but all the fine details will be washed away. So, how do you keep the magic of anime while still improving image quality?

    That’s where Balanced Twin Perceptual Loss comes in. Think of it as a perfectly tuned tool made just for anime images. This technique doesn’t just focus on improving resolution; it’s all about respecting the art. It tackles two big challenges—keeping anime’s unique artistic qualities and ensuring that the image still looks natural and realistic as it’s enhanced. By balancing these two approaches, the technique ensures nothing important gets lost in the process.

    The first perceptual loss function here is Anime-Specific Loss. Picture a model that’s been trained on thousands of anime images—this is what the ResNet50 model, trained on the Danbooru anime dataset, does. It zooms in on those unique aspects that define anime: the hand-drawn lines, the bright colors, and the stylized shading that make anime so visually appealing. The Anime-Specific Loss focuses on these features, ensuring that while the resolution improves, the essence of the artwork remains untouched. It’s like having a skilled artist sharpen the lines, making them clearer and crisper without losing that signature anime feel.

    But here’s the twist—while Anime-Specific Loss focuses on the artistic side, we also need to consider the structure of the image. That’s where the second perceptual loss function, Photorealistic Loss, comes in. Using a VGG model trained on the ImageNet dataset, this function makes sure the image keeps its natural textures, depth, and lighting. It’s like adding depth to a painting—keeping it real without overshadowing the art style. Photorealistic Loss also deals with unnatural artifacts, which can pop up during the enhancement process. It keeps the image grounded, making sure the changes don’t turn it into something overprocessed or cartoonish.

    By balancing these two different loss functions, the SR model achieves the perfect mix of both worlds—improving anime’s unique features while keeping the overall image quality intact. It’s not just about making the image look better; it’s about making it feel right, keeping the visual soul of the artwork while boosting resolution and detail. The result? A much more effective enhancement process that’s perfect for anime content, ensuring the original artwork’s visual integrity is maintained.

    Balanced Twin Perceptual Loss: Preserving Art in Image Enhancement

    Comparison with the SOTA Model

    Let’s set the scene: imagine a race where the APISR model is competing against some of the top super-resolution (SR) techniques out there. It’s like a showdown between the best of the best. The APISR model is up against Real-ESRGAN, BSRGAN, RealBasicVSR, AnimeSR, and VQD-SR—these are the heavyweights in the world of image and video enhancement. Each one has its strong points, but the big question is, which one can give the sharpest, most accurate, and visually faithful anime images?

    To really figure this out, the study didn’t just throw these models together and hope for the best. Nope, they did a thorough, two-part comparison—both quantitative and qualitative—to get deep into how each model performed. The quantitative part was all about the numbers. The researchers used well-established metrics to measure how each model handled the important aspects of image quality: resolution, accuracy, and how well they could cut down on the annoying artifacts that tend to pop up in compressed images. It’s like comparing how fast each car in a race can go, with clear rules to track their performance.

    But of course, numbers alone don’t tell the full story. The qualitative side added a more personal touch. The researchers took a close, subjective look at the images each model produced. They focused on things like how well the fine details were kept, how clear and sharp the hand-drawn elements were, and how true the final image stayed to the original, especially with anime-specific features like those vibrant colors and intricate lines that make anime so unique. It’s the kind of thing you can’t always measure with metrics but can definitely appreciate when you see it.

    So, what did the comparison show? Well, the APISR model really stood out in a few key areas. When it came to preserving those important anime details—things like the sharpness of hand-drawn lines and the richness of colors—it was ahead of the pack. While other models might have produced great images, the APISR model was particularly good at handling the unique style of anime, ensuring that the original artistic features stayed intact throughout the enhancement process.

    This comparison didn’t just prove that the APISR model was competitive—it highlighted its ability to push the limits of what’s possible with super-resolution, especially for anime content. The results were clear: APISR isn’t just another model; it’s a powerful tool designed to take anime image enhancement to the next level.

    For further details, you can refer to the original research paper: Comparing the Performance of Super-Resolution Models for Anime Images

    Quantitative Comparison

    Picture this: You’re standing at the starting line of a super-resolution (SR) race, and next to you are some of the top models in the field, each with its own set of strengths. But there’s one big question on everyone’s mind: which one can take a blurry, low-quality image and turn it into a high-quality masterpiece, all while keeping things sharp, smooth, and true to the original artwork? That’s where the APISR model steps in. This model isn’t just participating; it’s built to win.

    Following the proven standards set by previous SR research, APISR went through a tough series of tests. The goal was clear: see how well it could upscale low-quality images into high-quality versions, and do so with accuracy. Instead of relying on the usual metrics, which would require a “ground truth” for comparison (and, let’s be honest, that’s not always possible in real-life situations), the tests used no-reference metrics. This made the whole process a lot more objective, allowing the researchers to measure improvements in image quality directly, without getting caught up in complicated comparisons. They set a scaling factor of 4, essentially blowing up the images four times their original size, and wanted to see how well the model could maintain quality throughout.

    The real standout here was the AVC-RealLQ dataset. This isn’t just any image collection. It’s the only dataset specifically designed to test SR models on real-world anime content. We’re talking 46 video clips, each containing 100 frames, filled with the types of real-world compression artifacts you’d usually see in anime. This made it a tough but perfect test for APISR’s capabilities. It’s not just about pixel-perfect quality; it’s about keeping the special elements of anime intact—those vibrant colors, the intricate lines, and the overall artistic style.

    Now, here’s the impressive part: even though APISR only has 1.03 million parameters, it beat out other top models across every evaluation metric. To put it in perspective—1.03 million parameters is pretty small compared to other models, which usually have millions more. But here’s the thing—size isn’t everything. It’s all about how efficiently you use that power. APISR’s secret weapon is its prediction-oriented compression model, which mimics how multi-frame video compression works. By doing this, it can reverse compression artifacts more accurately, bringing back image quality like never before.

    But wait, there’s more. APISR also uses something called an explicit degradation model. This means it doesn’t need to go through the lengthy process of training a separate degradation model. It’s like skipping a few steps in a recipe that normally takes hours to make. By cutting down on unnecessary complexity, APISR works faster, with less computing power, and still delivers top-notch results. With its efficient network design, advanced compression techniques, and streamlined training process, the APISR model shows that you don’t need a huge network to beat the competition. In fact, it proves that sometimes, less really is more—especially when it comes to restoring anime and enhancing image quality in real-world situations.

    APISR: A High-Quality Image Restoration Method for Anime (2023)

    Qualitative Comparison

    Imagine you’ve got a cherished anime image that’s been through a lot—compression, resizing, and the usual image degradation. Now, you need to restore it to its former glory, but you want to do it right. Enter the APISR model, which steps in like a superhero ready to save the day. Visually, it’s a game-changer. When you compare it to other super-resolution (SR) methods, the difference is obvious. APISR doesn’t just improve image quality—it completely transforms it. While traditional methods might leave you with a blurry mess or visible distortions, APISR works its magic by reducing common issues like blurring and noise, making sure the final result looks much more like the original content.

    But that’s not all. Here’s where things get really interesting. One of the standout features of the APISR model is its ability to enhance those delicate hand-drawn lines—arguably the heart and soul of anime art. Anyone who loves anime knows that these lines are what give the characters their life and energy. Traditional SR methods often overlook or distort these fine details, leaving anime images feeling flat and lifeless. APISR, however, brings these lines into sharp focus, making them denser, clearer, and more defined. It’s like giving a high-definition makeover to your favorite anime scene, where even the tiniest details—those fine lines that define each character’s expression—are restored with precision.

    But let’s face it, in anime, the quality of the lines is just the beginning. The real challenge comes with handling those pesky distortions that always seem to pop up. You know, the twisted lines and shadow artifacts that ruin the overall look of an image. It’s frustrating, right? But APISR doesn’t shy away from these challenges. Thanks to its advanced image degradation model, it tackles these issues head-on. It can correct those complex distortions that often happen when images are compressed, leaving you with a smoother, more faithful restoration of the original content. It’s like a master artist who can fix the little mistakes that no one else notices, but once fixed, you can’t help but admire the improvements.

    A big part of what makes APISR so effective is its balanced twin perceptual loss technique. This is like a secret weapon that lets the model balance two distinct focuses. One focuses on preserving anime-specific features—those little details that make anime what it is—while the other keeps the overall image quality in check. This balance is crucial, especially when you compare APISR to models like AnimeSR and VQD-SR. While those models do a decent job with anime, they sometimes struggle with color fidelity, leading to unwanted color artifacts that can make the final image look unnatural. APISR solves this by keeping the colors vibrant and accurate, ensuring that the final result not only looks sharp but feels true to the original.

    At the end of the day, what sets APISR apart is its ability to address the specific challenges that come with anime content. It doesn’t just enhance the resolution; it preserves what makes anime unique—the hand-drawn lines, the complex details, and the vivid colors. APISR stands out in the world of super-resolution, offering an approach that both improves image quality and respects the original art style.

    For more details, refer to the APISR: Advanced Image Restoration for Anime Art paper.

    Demo

    Alright, picture this: you’re about to dive into the world of super-resolution (SR) and experience firsthand how the APISR model works its magic on anime images. And how are we going to do this? Well, we’ve got a secret weapon—the NVIDIA A100 Tensor Core GPU, which is like the superhero of GPUs. It’s powered by the NVIDIA Ampere Architecture and is designed to tackle some of the most demanding tasks out there, like AI, data analytics, and high-performance computing (HPC). With memory bandwidth that exceeds a mind-blowing two terabytes per second (TB/s), this GPU can handle massive, complex models with ease. It’s perfect for our task, supercharging the APISR model to handle all those heavy lifting processes when it comes to restoring anime images.

    Now, we’ve got the power, but let’s bring it to life. First, we fire up the machine and get the Jupyter notebook environment ready. It’s like setting up your workspace before starting a new project—only this project is pretty exciting! Next, we’ll use some simple commands to get everything rolling. All you need to do is copy and paste the following lines of code into the notebook and hit “run.” This will kick off the process and, voila! You’ll have a Gradio web app link ready to go. This link is your easy-to-use interface where you can start testing out the APISR model and see the magic unfold.

    %cd /notebook
    !git clone -b dev https://github.com/camenduru/APISR-hf
    %cd /notebook/APISR-hf
    !pip install -q gradio fairscale omegaconf timm
    !apt -y install -qq aria2
    !aria2c –console-log-level=error -c -x 16 -s 16 -k 1M https://huggingface.co/camenduru/APISR/resolve/main/2x_APISR_RRDB_GAN_generator.pth -d /content/APISR-hf/pretrained -o 2x_APISR_RRDB_GAN_generator.pth
    !aria2c –console-log-level=error -c -x 16 -s 16 -k 1M https://huggingface.co/camenduru/APISR/resolve/main/4x_APISR_GRL_GAN_generator.pth -d /content/APISR-hf/pretrained -o 4x_APISR_GRL_GAN_generator.pth
    !python app.py

    Once the commands are all set and run, they’ll install the necessary dependencies, download the pre-trained APISR models, and launch the application. When it’s all done, the Gradio web app will be live, giving you the perfect interface to upload anime images and boost their quality using the APISR model.

    And now the fun begins! You can experiment with different anime images, watching as the SR model improves resolution, removes those annoying compression artifacts, and restores the beautiful hand-drawn details that make anime so special. It’s a fantastic way to see how the model works, and you’ll get to enjoy your favorite characters in stunning detail. The demo even features some cool examples, like a restored image of Tom and Jerry, a whimsical scene of a cat playing a banjo with its date, and an old anime image that gets a dramatic enhancement. These demos show just how powerful the APISR model is at enhancing image quality while keeping the artistic magic intact.

    By the end of it all, you’ll have a deeper appreciation for how the APISR model can breathe new life into older, lower-resolution anime images, preserving every fine detail while improving the overall visual experience.

    Make sure to check the GPU specs before starting for the best performance!
    NVIDIA Volta GPUs

    Conclusion

    In conclusion, APISR super-resolution techniques offer a groundbreaking solution for enhancing anime images, focusing on preserving the art’s unique qualities like hand-drawn lines and vibrant colors. By tackling common issues such as compression artifacts, resizing challenges, and line clarity, APISR outshines traditional methods, providing a more efficient and effective approach to image restoration. Whether you’re working with older anime content or seeking to improve image quality, APISR ensures that the final result remains true to the original artwork while enhancing resolution. Moving forward, as anime content continues to evolve, APISR promises to be a key tool for achieving higher-quality images without sacrificing artistic integrity.For those looking to improve image quality in anime, APISR offers a promising, future-proof solution.

    APISR: A High-Quality Image Restoration Method for Anime (2023)

  • Optimize TinyLlama Performance: Leverage RoPE, Flash Attention 2, Multi-GPU

    Optimize TinyLlama Performance: Leverage RoPE, Flash Attention 2, Multi-GPU

    Introduction

    To optimize TinyLlama’s performance, it’s essential to leverage advanced techniques like RoPE, Flash Attention 2, and multi-GPU configurations. TinyLlama, a 1.1B parameter language model, is designed to deliver efficient performance for natural language processing tasks, outperforming models like OPT-1.3B and Pythia-1.4B. By utilizing cutting-edge optimizations, TinyLlama offers fast training speeds and reduced resource consumption, making it ideal for mobile and lightweight applications. In this article, we’ll explore how these innovations improve computational efficiency and help TinyLlama excel in a variety of AI tasks, enabling researchers and practitioners to maximize its potential.

    What is TinyLlama?

    TinyLlama is a compact language model designed to perform various natural language processing tasks efficiently. It has been trained on a massive dataset to improve its understanding and problem-solving abilities. Despite its smaller size, TinyLlama outperforms other models of similar size, making it a great tool for developers and researchers looking for a powerful yet lightweight model. It is open-source, which means it is accessible for further research and experimentation, especially for applications on mobile devices.

    Prerequisites

    Alright, so you’re all set to dive into the world of TinyLlama—awesome choice! But before you get started and see it in action, there are a few things we need to set up. Don’t worry, it’s super easy, and I’ll walk you through it step by step. First, you need to make sure that your pip (the Python package manager) is up to date. Think of pip as your helper that fetches and installs everything you need to run TinyLlama. If it’s outdated, you might run into compatibility problems later on. So, let’s give it a little refresh. Just type this command into your terminal:

    $ pip install –upgrade pip

    Now that your pip is all set, let’s talk about the GPU (this part is optional, but highly recommended if you want top performance). You can run TinyLlama on any system, but if you really want to get the most out of it—especially for training or testing the model—having a machine with an NVIDIA GPU and CUDA support will really make a difference. A GPU will make everything run a lot faster and more efficiently, which is especially helpful for larger tasks. You can check if your system supports CUDA (NVIDIA’s tech for working with GPUs) by running this command:

    $ nvidia-smi

    This will give you a nice overview of your GPU’s details and let you know if CUDA is available. If everything looks good and it’s all green, you’re all set to go! Next, we’ll need a few Python libraries to make everything work smoothly. These are the essential tools you need:

    • torch: This is the core library for all things deep learning. TinyLlama relies on PyTorch, and PyTorch needs torch. To install it, run:

    $ pip install torch

    • transformers: This is where the magic happens. The transformers library from Hugging Face provides pre-trained models, including TinyLlama, and all the tools you need to work with them. You can install it by running:

    $ pip install transformers

    • gradio: Now, here’s the fun part. Gradio helps you turn your machine learning models into interactive demos. This is perfect for testing out TinyLlama’s abilities through a simple, user-friendly web interface. To get started with Gradio, run:

    $ pip install gradio

    Once all these tools are installed, you’re ready to jump into the TinyLlama Gradio demo. These setups will make sure you have everything you need to run and explore TinyLlama for tasks like natural language processing and more. Once everything’s in place, we can start setti

    Gradio App Demo of TinyLlama

    Let’s take a fun little journey with TinyLlama. Imagine you’ve got this amazing language model, but instead of dealing with complicated settings and environments, you can interact with it using an easy, friendly web interface. That’s where Gradio steps in—think of it as your trusty bridge to TinyLlama. It makes it super easy to show off and test out models like TinyLlama, allowing anyone (yep, even you!) to see its full power right in your browser, without all the hassle of complex setups. You can just jump in, interact with the model, and watch it work.

    Alright, let’s roll up our sleeves and get to work. First thing’s first, we need to import the libraries you’ll need to run TinyLlama. To start, we’ll bring in torch, the magic behind TinyLlama, since it relies on PyTorch to make all the computations happen at lightning speed. Here’s a simple way to check if your system is ready for action—especially if you want to speed things up using a GPU. GPUs are absolute lifesavers for model training and inference—they’ll make everything faster and smoother. So, let’s check for GPU availability:

    import torch
    # Check available GPUs
    device = torch.device("cuda" if use_cuda else "cpu")
    print("Device: ", device)
    # Check if CUDA (GPU support) is available
    use_cuda = torch.cuda.is_available()
    if use_cuda:
       print('__CUDA VERSION:', torch.backends.cudnn.version())
       print('__Number CUDA Devices:', torch.cuda.device_count())
       print('__CUDA Device Name:', torch.cuda.get_device_name(0))
       print('__CUDA Device Total Memory [GB]:', torch.cuda.get_device_properties(0).total_memory / 1e9)

    This little snippet is your first step in making sure your system is all set to run TinyLlama smoothly. If you’ve got an NVIDIA GPU and CUDA support (and you probably do, if you want things to run efficiently), this will give you some important details, like the version of CUDA and how much GPU memory you’ve got available.

    For example, if you run it, you might see something like this:

    __CUDNN VERSION: 8401   __Number CUDA Devices: 1   __CUDA Device Name: NVIDIA RTX A4000   __CUDA Device Total Memory [GB]: 16.89124864

    If everything checks out and looks good, you’re ready to put that GPU to work for training TinyLlama. Now let’s jump into a little code magic with TensorFlow to see how you can use the GPU. Let’s say you’re setting up a basic model to get things rolling:

    # Example: Training a simple model on GPU
    model = tf.keras.Sequential([
       # Define layers here, e.g., Dense layers, Dropout, etc.
    ])
    # Compile the model
    model.compile(optimizer='adam', loss='sparse_categorical_crossentropy', metrics=['accuracy'])
    # Train the model with training data and labels
    model.fit(train_data, train_labels, epochs=5, validation_data=(val_data, val_labels))

    This code sets up a simple model using TensorFlow, compiles it with an optimizer (Adam) and a loss function (sparse categorical cross-entropy), then trains it using some data for 5 epochs. In machine learning lingo, epochs refer to how many times the model gets to see the full training dataset, and 5 epochs is a good place to start.

    The best part about using Gradio with TinyLlama is that it lets you quickly see how the model works. You’ll get to watch it handle different inputs, process them, and generate outputs—just like it would in the real world. The cherry on top is that with GPU support, TinyLlama’s full power is unlocked, making it faster and more efficient. Whether you’re working with a simple dataset or a more complex one, TinyLlama will perform at its best, all thanks to the power of multi-GPU setups and advanced features like Flash Attention 2 and RoPE.

    In short, this setup makes it easy for you to experiment, learn, and see exactly what TinyLlama can do—without the headaches of complex setups. You can test things out, tweak the outputs on the fly, and interact with the model, all through the Gradio interface. How cool is that? And with GPU power behind it, everything runs faster and more smoothly, giving you the perfect playground to explore TinyLlama, OPT-1.3B, Pythia-1.4B, and all the other exciting models out there.

    <a href="https://arxi

    Pretraining and Model Architecture

    Picture this: TinyLlama, a cutting-edge language model, is all set to take on various natural language tasks, from generating text to solving tricky problems. But before it could do any of that, it had to go through some serious training. The team behind TinyLlama fed it a huge and diverse set of data—everything from natural language data from SlimPajama to code data from Starcoderdata—so it could learn everything from basic grammar to more advanced coding patterns. Think of it like a student getting handed a giant textbook with everything they need to know to ace an exam. This training process is what lets TinyLlama handle all sorts of tasks.

    At its core, TinyLlama’s setup is based on a transformer model, which is similar to Llama 2, a popular design in the world of large language models (LLMs). But TinyLlama doesn’t just copy what others are doing; it has its own tricks that make it stand out.

    Model Architecture Overview

    One of the cool features of TinyLlama is RoPE (Rotary Positional Embedding). You might be thinking, what’s that all about? Well, RoPE helps the model understand where each word is in a sentence. Imagine trying to read “The cat sat on the mat” without knowing the order of the words—hard to make sense of, right? That’s where RoPE helps, by tracking where each word should be and how it connects with the others. It’s used in other big models like PaLM, Llama, and Qwen too. RoPE helps TinyLlama scale better, letting it handle huge datasets without slowing down.

    But wait, there’s more. To keep TinyLlama from tripping up during its training, it uses RMSNorm. Think of RMSNorm as a safety net. When you train deep models, there’s a risk of things getting messed up, like when numbers get too big or too small to handle properly. RMSNorm keeps everything under control, so TinyLlama can stay stable and learn without any issues.

    When it comes to activation functions, TinyLlama does something a little different. Instead of the usual ReLU (which is like the standard fuel for neural networks), it uses SwiGLU, a mix of Swish and Gated Linear Units. This move, borrowed from Llama 2, helps TinyLlama’s learning process flow more smoothly, which is super helpful when training a deep network.

    Now, if you’ve ever trained a machine learning model, you know how precious memory is. TinyLlama gets this too, so it uses grouped-query attention. This means it has 32 attention heads working together, but they share information in groups of four. It’s like a team of workers passing around a pile of papers, so they can all read and make notes without wasting time. This method helps save memory while keeping TinyLlama’s performance strong—win-win!

    One of the most impressive features of TinyLlama’s setup is the use of Fully Sharded Data Parallel (FSDP). This is a real game-changer. FSDP helps TinyLlama split its work across multiple GPUs and nodes, making the training process way faster. If you’ve ever tried to train a model on just one machine, you know how slow it can be. FSDP distributes the workload, making everything quicker and letting TinyLlama scale up efficiently.

    But TinyLlama doesn’t stop there. It also uses Flash Attention 2, a faster and more efficient attention mechanism. Flash Attention 2, introduced by Dao in 2023, speeds up the attention process while cutting down on memory use. It’s like upgrading TinyLlama’s brain to a faster, more efficient engine, letting it process information even quicker.

    In addition to all these amazing features, TinyLlama also swaps out the xFormers SwiGLU module for the original SwiGLU, which reduces its memory usage even more. This change allows the model, despite having 1.1 billion parameters, to run comfortably within 40GB of GPU RAM—a huge improvement over previous models that needed even more memory.

    So, what’s the result of all these upgrades? TinyLlama now trains at an impressive 24,000 tokens per second per A100-40G GPU. Let’s put that into perspective. Compared to other models of similar size, like Pythia-1.0B and MPT-1.3B, TinyLlama is incredibly fast. For example, to train on 300 billion tokens, TinyLlama only needs 3,456 A100 GPU hours. In comparison, Pythia takes 4,830 hours, and MPT takes 7,920 hours. So, TinyLlama doesn’t just perform faster than its competitors, but it also saves you valuable time and resources when scaling up training.

    TinyLlama’s smart design—from RoPE to Flash Attention 2—lets it tackle huge datasets and complex tasks easily, all while running efficiently on multi-GPU systems. It’s like having a race car engine in a high-performance sports car—fast, efficient, and built to handle anything that comes its way.

    TinyLlama: Fast and Efficient Transformer Models

    Code Demo

    Alright, let’s jump into how you can use TinyLlama for generating text! But before we get started, there’s one important thing you need to do: make sure you have transformers version 4.31 or higher installed. This is crucial for everything to run smoothly. Don’t worry, I’ll guide you through the whole process, and you’ll have TinyLlama up and running in no time.

    Install the Necessary Packages

    First things first, we need to get the right libraries installed. Think of these libraries like the tools you need to interact with TinyLlama. To install accelerate, transformers, and gradio, just run these commands:

    $ pip install accelerate
    $ pip install transformers==4.36.2
    $ pip install gradio

    Once the packages are installed, don’t forget to restart your kernel. This is like giving your environment a quick refresh, ensuring that all the new libraries are ready to go.

    Import the Necessary Libraries

    Next up, let’s bring in the libraries we need to get TinyLlama up and running. We’ll start by importing AutoTokenizer from transformers and torch, which is the core engine behind TinyLlama. Here’s how you can set it up:

    from transformers import AutoTokenizer
    import transformers
    import torch

    This is the foundation for everything. The AutoTokenizer will help us convert the text into a format that TinyLlama can understand, and torch will handle all the heavy computation.

    Initialize the Model and the Tokenizer

    Now, it’s time to get TinyLlama ready for action. To do this, we’ll load the TinyLlama-1.1B-Chat-v0.1 model, which is specifically designed for text generation. The tokenizer will take the text you give it and convert it into a format that TinyLlama can process and respond to. Here’s the code to do that:

    model = “PY007/TinyLlama-1.1B-Chat-v0.1”
    tokenizer = AutoTokenizer.from_pretrained(model)

    This is where the magic begins. The tokenizer helps TinyLlama understand and work with the text you give it.

    Pipeline Initialization

    Next, let’s initialize the pipeline. This is a simple yet powerful tool that tells TinyLlama what task to perform—in this case, text generation. The pipeline also takes care of things like precision and whether to use your CPU or GPU. Here’s how to set it up:

    pipeline = transformers.pipeline(
    “text-generation”,
    model=model,
    torch_dtype=torch.float16,
    device_map=”auto”
    )

    This tells TinyLlama, “Hey, I want you to generate some text!” We also set torch_dtype to float16, which helps speed things up and saves memory. The device_map=”auto” setting lets the pipeline decide whether to use your CPU or GPU, depending on what’s available.

    Provide the Prompt

    Now comes the fun part—you get to interact with TinyLlama! You need to provide a prompt, or a question, for the model to respond to. For example, you could ask it, “What are the values in open source projects?” Here’s how to set up the prompt:

    prompt = “What are the values in open source projects?”
    formatted_prompt = f”### Human: {prompt}### Assistant:”

    This format helps TinyLlama understand that the “Human” is asking a question, and the “Assistant” should provide the response. It’s like setting up a conversation!

    Generate the Text

    Now for the exciting part—generating the response! With the pipeline set up, we can pass the prompt to TinyLlama and let it do its thing. Here’s the code that generates the text, using some cool techniques to make sure the response is varied and interesting:

    sequences = pipeline(
    formatted_prompt,
    do_sample=True,
    top_k=50,
    top_p=0.7,
    num_return_sequences=1,
    repetition_penalty=1.1,
    max_new_tokens=500
    )

    Here’s what’s going on in this code:

    • do_sample=True tells TinyLlama to randomly sample responses, so you get different answers each time.
    • top_k=50 and top_p=0.7 control how varied the responses are by limiting the number of possible token choices.
    • num_return_sequences=1 means we’ll get just one response. You can change this number if you want more answers!
    • repetition_penalty=1.1 ensures that the model doesn’t repeat the same phrases too much.
    • max_new_tokens=500 sets a limit on how long the response can be.

    Print the Result

    Finally, you’ll want to see what TinyLlama comes up with. Here’s how you can print the generated text:

    for seq in sequences:
    print(f”Result: {seq[‘generated_text’]}”)

    This will show you the model’s response to your prompt. You’ll now be able to see TinyLlama’s understanding of your question and how it generates a relevant and coherent answer. Whether you’re working on a small project or experimenting with more complex text generation, this demo gives you a simple, interactive way to explore the power of TinyLlama.

    And that’s it! With these steps, you’re ready to start generating impressive text using TinyLlama, Opt-1.3B, Pythia-1.4B, and all the cool features like Flash Attention 2 and multi-GPU setups.

    Hugging Face Transformers Documentation

    Results

    After putting TinyLlama through some thorough testing, here’s what we found. The model does an awesome job when it comes to question-and-answer (Q&A) tasks. If you’re looking for a conversational assistant to help you generate text, answer questions, or give insights on a variety of topics, TinyLlama is definitely your go-to. It’s quick, reliable, and smooth in those areas. But there’s a little catch—TinyLlama isn’t made for complex calculations or handling tasks that need exact numerical precision. While it’s fantastic at understanding and generating natural language, math-heavy or highly precise tasks might not be its strongest suit. That’s totally expected though—TinyLlama, like many language models, is designed to work well with natural language tasks, not number crunching.

    Understanding the Model’s Language Understanding and Problem-Solving Capabilities

    Let’s dive into how TinyLlama handles problem-solving. We gave it some tough tests using different benchmarks to see how well it performs on various natural language challenges. One of the benchmarks we used was InstructEval. This test measures how well the model can follow a range of instructions. Think of it like giving TinyLlama a homework assignment, but instead of just one subject, the tasks vary in difficulty—from answering questions to solving problems. InstructEval really shows how flexible TinyLlama is and how well it handles different types of instructions.

    Then, we decided to test TinyLlama even further with the Massive Multitask Language Understanding (MMLU) task. This is where TinyLlama shows off its knowledge across several fields—science, history, literature, and more. In this test, the model was given five examples to learn from and then asked to solve new problems based on that information. It’s like giving TinyLlama a study guide with five problems and then seeing how well it can handle new questions using what it learned. This 5-shot setup lets TinyLlama show how well it can generalize and apply its knowledge to unfamiliar tasks.

    But we didn’t stop there. Next, we put TinyLlama through the BIG-Bench Hard (BBH) task. This task has 23 tough sub-tasks, designed to test how well the model can follow more complex, multi-step instructions. If MMLU was TinyLlama’s time to show off its wide-ranging knowledge, BBH put its ability to follow intricate instructions to the test. We used a 3-shot setup here, meaning TinyLlama got three examples to learn from before taking on the challenges. It’s like teaching someone a new skill by letting them practice three times, then seeing how well they perform without much help. This test really put its ability to understand complicated instructions to the test.

    Now, we wanted to see how TinyLlama would handle reasoning with numbers and logic, so we gave it the Discrete Reasoning Over Paragraphs (DROP) task. This task asks TinyLlama to think through paragraphs of text with numerical data and solve problems that require math operations. In this case, the model got three examples to learn from (a 3-shot setup) and was asked to solve similar problems. It’s like giving a math test with word problems—you’re testing how well TinyLlama can understand and work with numerical data in a natural language context.

    Finally, we tested TinyLlama on the HumanEval task, which focuses on its ability to generate code from plain language instructions. This one’s pretty interesting because it’s a zero-shot task. That means TinyLlama had never seen the exact examples it was given before. Instead, it had to generate programming code based purely on the instructions in front of it. It’s like giving a programmer a vague description of a task and asking them to write the code without any prior examples. This task helped us evaluate TinyLlama’s programming knowledge and how well it could tackle coding challenges without much context.

    So, what did all these tests show about TinyLlama? Well, they give a pretty clear picture of where it shines and where it might need some help. TinyLlama is a real pro when it comes to understanding language and solving problems. It excels at tasks that require generating clear text, understanding broad concepts, and following complex instructions. However, when it comes to heavy math reasoning or programming without context, it might not be the best tool. Still, for general language understanding, problem-solving, and text generation, TinyLlama is fast, reliable, and efficient—a solid choice for your needs.

    Massive Multitask Language Understanding Benchmark (MMLU)

    Understanding the Model’s Language Understanding and Problem Solving Capabilities

    Imagine this: you’re sitting down with TinyLlama, a powerful model that’s been trained to understand and solve problems across a wide range of topics. It’s been through some tough tests to show what it can do, and now we’re about to see how well it actually performs. These tests show how TinyLlama handles complex instructions, reasons through tricky problems, and uses its knowledge to understand the world. Think of it like TinyLlama going through a marathon of challenges to prove it can handle whatever you throw its way.

    One of the first big tests TinyLlama faces is the InstructEval benchmark. This test is all about putting TinyLlama through a series of tasks that check how well it follows and carries out instructions. Picture it like a game show where TinyLlama has to answer a range of questions, each one getting a bit harder. It’s not just about answering questions—it’s about taking instructions and turning them into action. This gives us a peek into how good TinyLlama is at problem-solving and how adaptable it is to different kinds of prompts. It’s a bit like following a recipe with multiple steps or instructions.

    But that’s just the start. To really test its knowledge, TinyLlama faces the Massive Multitask Language Understanding (MMLU) task. This one’s tough—it checks TinyLlama’s knowledge across different subjects like science, history, and literature. Here’s the twist: the model has to learn from five examples before it can start solving new problems. It’s like giving TinyLlama a mini quiz before letting it take the real exam, and then seeing how well it can apply what it learned to new questions. This setup makes TinyLlama not just a jack-of-all-trades, but also someone who can apply what they know to handle a wide range of topics.

    Next up, we wanted to really test TinyLlama’s limits with the BIG-Bench Hard (BBH) task. This set of 23 tough sub-tasks from the bigger BIG-Bench benchmark pushes TinyLlama to its edge. Think of it like a puzzle where TinyLlama needs to figure out complex, multi-step instructions that require a lot of careful thinking. TinyLlama gets three examples to learn from in a 3-shot setting before it’s asked to solve the puzzle itself. It’s like practicing a bit before a big game, then going into the match to handle a set of challenges that require both understanding and logic.

    Then we wanted to see how TinyLlama would handle numbers, so we tested it with the Discrete Reasoning Over Paragraphs (DROP) task. This task checks if TinyLlama can reason with numerical data hidden in text—kind of like reading a math problem buried in a paragraph. TinyLlama has to use its reasoning and math skills to figure out what’s going on and solve the problem. The challenge here is applying logic to numbers that are mixed in with natural language, which is no easy task. Like BBH, this task is also 3-shot, so TinyLlama gets a few examples to learn from before tackling similar questions.

    Lastly, we tested TinyLlama’s ability to handle programming tasks with the HumanEval test. This one’s a bit more technical: TinyLlama has to generate programming code based only on text descriptions. No previous examples—just the instructions it’s given on the spot. This is a zero-shot test, meaning TinyLlama has to come up with the right code without any previous exposure to that specific task. It’s like asking a coder to write a program with no sample code to look at, just a description of what it should do. This test checks TinyLlama’s ability to handle coding challenges based purely on understanding the task at hand.

    By now, you can see that TinyLlama isn’t just a one-trick pony—it’s been tested in lots of ways that really push its limits. The InstructEval, MMLU, BBH, DROP, and HumanEval benchmarks show off TinyLlama’s abilities. From understanding complex instructions to solving math problems and even generating code, TinyLlama has proven it can handle almost any task you throw at it. It might not be perfect at everything (like doing super precise calculations), but its ability to handle all these different challenges makes it a real powerhouse in the world of language models.

    BIG-Bench: A Benchmark for Testing General-Purpose Language Models

    Conclusion

    In conclusion, TinyLlama stands out as a powerful, compact language model that efficiently handles a wide range of natural language processing tasks. By leveraging advanced techniques like RoPE, Flash Attention 2, and multi-GPU optimizations, TinyLlama outperforms other models such as OPT-1.3B and Pythia-1.4B, offering superior computational efficiency, speed, and reduced resource consumption. Its open-source nature and compact design make it an accessible and valuable tool for researchers and developers working on mobile and lightweight AI applications. Looking ahead, as language models like TinyLlama continue to evolve, we can expect even greater performance improvements and broader adoption in diverse AI fields.Snippet: “TinyLlama combines cutting-edge techniques like RoPE, Flash Attention 2, and multi-GPU optimizations for enhanced efficiency and performance in AI tasks.”

    Boost Efficiency with TinyLlama: Unlock Llama 2, Flash Attention 2, SwiGLU (2025)

  • Boost Efficiency with TinyLlama: Unlock Llama 2, Flash Attention 2, SwiGLU

    Boost Efficiency with TinyLlama: Unlock Llama 2, Flash Attention 2, SwiGLU

    Introduction

    TinyLlama, built on Llama 2’s architecture, is revolutionizing the AI landscape with its compact yet powerful design. This language model, pre-trained on an impressive 1 trillion tokens, offers exceptional computational efficiency while outperforming similar-sized models. With advanced optimizations like Flash Attention 2 and SwiGLU, TinyLlama ensures faster training speeds and reduced memory usage. For developers and researchers working in resource-limited environments, TinyLlama offers a scalable and efficient solution, making it an ideal candidate for both mobile and lightweight applications. In this article, we’ll explore how TinyLlama is setting new standards in AI performance and accessibility.

    What is ?

    Prerequisites

    Alright, before you dive into the awesome world of TinyLlama and start having fun with the Gradio demo, there are a couple of things you’ll want to set up first to make sure everything runs smoothly.

    1. pip: The first thing you’ll need to do is update pip—yes, that handy tool for installing Python packages. You don’t want to be stuck with an old version, right? So, go ahead and run this simple command in your terminal to grab the latest version:

    $ pip install –upgrade pip

    Updating pip makes sure you won’t run into any issues installing packages later on. Trust me, it’s definitely worth doing!

    GPU (Optional): Now, let’s talk performance. If you want TinyLlama to work its best, especially when dealing with large models, you’ll want a machine with an NVIDIA GPU and CUDA support. It’s not strictly necessary, but if you’ve got a powerful GPU, it’ll definitely speed up the model’s training and response times. So, quicker results when you interact with TinyLlama? Yes, please!

    For those of you who don’t have a GPU, no worries—TinyLlama will still work just fine. But if you’re aiming for faster performance, that GPU setup will definitely help!

    Dependencies: Now, let’s get to the core of the setup—installing the essential Python packages. These are the building blocks that will let you run the TinyLlama demo without any hiccups. You’ll need packages like torch for deep learning, transformers for working with transformer models like Llama 2, and gradio for creating that user-friendly interface.

    So, run these commands in your terminal to install all the necessary dependencies:

    $ pip install torch

    $ pip install transformers

    $ pip install gradio

    Once these packages are installed, you’re almost good to go! With everything set up like this, you’ll be able to interact with TinyLlama seamlessly and dive straight into exploring all the cool things it can do.

    With everything in place, you’ll be ready to explore the magic of TinyLlama, from Llama 2’s architecture to advanced features like Flash Attention 2 and SwiGLU. So, let’s get started and see how TinyLlama can help solve all kinds of problems, faster than ever!

    Llama 2: Open Foundation Models (2023)

    Gradio App Demo of TinyLlama

    Let’s dive into TinyLlama, a sleek and compact language model that’s small in size but big on performance. Even though it’s lighter than other models, it doesn’t compromise on how well it works. And here’s the fun part: you get to try TinyLlama yourself through a Gradio app. Gradio is a fantastic tool that makes it super easy to interact with machine learning models. It’s like giving your model a shiny, simple web interface that anyone can use, even if they’re not familiar with complex coding or the command-line world. Developers, researchers, or even newcomers to machine learning can jump in and start experimenting with TinyLlama in no time.

    Thanks to Gradio, TinyLlama goes from being a powerful but somewhat tricky-to-access model to something that anyone can play with. It lets you test the model’s capabilities and experiment with its functions—all through an easy-to-use interface with no complicated setup. It’s like chatting with the model instead of writing endless lines of code. That’s a win, right? Machine learning just got a whole lot more approachable!

    Importing Necessary Libraries

    Alright, now let’s get into the fun part and start working with TinyLlama. First, we need to import the libraries into your Python environment. The big one here is PyTorch, which powers most deep learning tasks, including working with TinyLlama. Here’s how you can import PyTorch and check if your system is set up correctly with the right GPU to run things smoothly:

    import torch

    Checking Available GPUs

    Before you get started, you’ll want to check if your machine has a GPU available—especially an NVIDIA GPU with CUDA support. GPUs are like rocket fuel for machine learning—they make everything run faster, which means quicker results when you interact with TinyLlama. To check for GPU availability, run this snippet:

    device = torch.device(“cuda” if use_cuda else “cpu”)
    print(“Device: “, device)
    use_cuda = torch.cuda.is_available()
    if use_cuda:
       print(‘__CUDA VERSION:’, torch.backends.cudnn.version())
       print(‘__Number CUDA Devices:’, torch.cuda.device_count())
       print(‘__CUDA Device Name:’, torch.cuda.get_device_name(0))
       print(‘__CUDA Device Total Memory [GB]:’, torch.cuda.get_device_properties(0).total_memory / 1e9)

    When you run this, you’ll see details about your GPU: the CUDA version, how many devices are available, the GPU model, and the total memory. Here’s an example of what you might see:

    __CUDNN VERSION: 8401
    __Number CUDA Devices: 1
    __CUDA Device Name: NVIDIA RTX A4000
    __CUDA Device Total Memory [GB]: 16.89124864

    This is really helpful because it shows that your setup is ready to run TinyLlama efficiently. Imagine trying to run a race with a car that doesn’t have enough fuel—you definitely don’t want that! So checking this first ensures you’re good to go.

    Example: Training a Simple Model on GPU

    Now that your environment is set up, let’s take a look at a simple example of training a model on the GPU. This becomes especially useful when you work with larger models like TinyLlama, where a GPU can make a big difference in how quickly the model trains. Let’s say you’re training a basic model using TensorFlow (TF) on your GPU. Here’s how you do it:

    model = tf.keras.Sequential([…])   # Define your model
    model.compile(optimizer=’adam’, loss=’sparse_categorical_crossentropy’, metrics=[‘accuracy’])
    model.fit(train_data, train_labels, epochs=5, validation_data=(val_data, val_labels))

    In this example, we’re using the Adam optimizer and sparse categorical cross-entropy loss, which are popular choices for machine learning tasks. We then train the model for 5 epochs, with validation data to track its performance. By setting everything up this way, you’re making use of your GPU to speed up training. This is especially helpful when working with more resource-heavy models like TinyLlama. With Gradio, PyTorch, and your GPU in place, you’re all set to unlock the full potential of TinyLlama and explore its features in a fast, easy-to-use environment. It’s like having the power of a supercomputer at your fingertips, but in a way that’s easy to use and understand!

    Make sure your system has CUDA-enabled GPUs for maximum performance.TinyLlama Model AI Performance

    Pretraining and Model Architecture

    Imagine a team of engineers working hard on a model that’s not just smart but also efficient. That’s exactly what TinyLlama is—a small, powerful language model that’s been trained on a huge amount of data. It uses data from places like SlimPajama for natural language and Starcoderdata for code, combining both to create something pretty special. This gives TinyLlama the ability to handle all kinds of tasks, from understanding complex language to generating meaningful responses. It’s like having a model ready to handle anything, whether it’s writing a poem or solving a technical issue. But here’s the cool part: TinyLlama isn’t just any regular language model. It’s built on the same transformer-based architecture as Llama 2, but with a few extra tweaks to make sure it works well without using too much of your system’s resources.

    Model Architecture Overview

    Let’s break down what’s happening inside TinyLlama’s brain. One of its standout features is RoPE (Rotary Positional Embedding). This technique is commonly used in big language models like PaLM and Llama to help the model understand the order of words in a sentence. Think of it like giving the model a map to figure out where each word belongs in the bigger picture of a sentence, which is super important for language processing.

    To make sure everything runs smoothly during training, TinyLlama uses RMSNorm. This is like a safety net that helps stabilize the model’s learning process. It smooths out the rough patches (the gradients) to make training faster and more consistent. Essentially, it ensures things don’t get stuck, making everything run more efficiently.

    Now, when it comes to activation functions, TinyLlama replaces the standard ReLU with SwiGLU (Swish and Gated Linear Unit). This was introduced in Llama 2 and is a game-changer. SwiGLU combines the strengths of two activation functions, improving performance on various natural language tasks. It’s like giving the model a turbo boost, allowing it to work even better in language-based tasks.

    Memory and Efficiency Optimizations

    TinyLlama doesn’t just rely on fancy tricks to work faster—it’s also really smart when it comes to memory usage. One way it keeps memory usage low is with grouped-query attention. This technique organizes the attention heads into groups—32 heads for query attention, to be specific—and splits the key-value heads into four smaller groups. By sharing key and value representations, it can carry more in its “backpack” without making it heavier. Pretty neat, right?

    Another important piece is Fully Sharded Data Parallel (FSDP). This is where TinyLlama uses multiple GPUs and nodes to spread out the workload. It helps TinyLlama train faster by distributing the tasks more efficiently. This is especially helpful when dealing with large models that need a lot of computing power. Thanks to FSDP, TinyLlama doesn’t take forever to finish training; it speeds things up significantly.

    But wait, there’s even more! TinyLlama also uses Flash Attention 2, an optimized attention mechanism that reduces memory usage while still maintaining excellent performance. This lets TinyLlama train even faster, making it possible to run larger models without taking up all your GPU’s resources.

    And here’s the cherry on top: TinyLlama uses the original SwiGLU module, which further cuts down its memory footprint. This small change makes it possible for TinyLlama’s 1.1B parameters to fit easily within just 40GB of GPU RAM—super important for smooth training.

    Training Efficiency and Speed

    Thanks to all these smart optimizations, TinyLlama is fast. It can process an impressive 24,000 tokens per second on an A100-40G GPU. That’s really fast for a model of this size. To put that into perspective, let’s compare it to some other models. The TinyLlama-1.1B model only needs 3,456 GPU hours to train on 300 billion tokens. On the other hand, Pythia-1.0B needs 4,830 GPU hours, and MPT-1.3B takes 7,920 hours to train. So, not only is TinyLlama faster, but it’s also more efficient. By reducing the time it takes to train, TinyLlama saves a lot of resources, which is a big deal when you’re working with large-scale models.

    These optimizations make TinyLlama not only faster but also more scalable. It’s a model that can handle the demands of both researchers pushing the boundaries of machine learning and practitioners looking to deploy powerful NLP models quickly and efficiently. With its mix of speed, efficiency, and advanced features like Flash Attention 2 and SwiGLU, TinyLlama is ready to take on whatever task you throw at it.

    TinyLlama: Efficiency and Performance

    Comparison of the Training Speed

    Let’s set the scene: TinyLlama, a super-efficient language model, has just made a huge leap in training speed, thanks to some smart changes and advanced improvements. Picture this: TinyLlama can handle an incredible 24,000 tokens per second on an A100-40G GPU. That’s a lot of text moving through the system in no time! And this isn’t just some random number—it’s the result of all the clever techniques built into TinyLlama, which makes it a powerful tool for dealing with large datasets quickly and efficiently. Its design is so streamlined that processing huge amounts of data feels like a breeze.

    But here’s where it gets really interesting: let’s compare TinyLlama to other similar models. When we stack TinyLlama up against others like Pythia-1.0B and MPT-1.3B, it’s clear who’s in the lead. Let’s break it down: the TinyLlama-1.1B model only needs 3,456 GPU hours to train on 300 billion tokens using the A100-40G GPU. Now, if you compare that to Pythia-1.0B, which needs 4,830 GPU hours, and MPT-1.3B, which takes a whopping 7,920 GPU hours for the same task, it’s like watching TinyLlama zoom ahead in a race—faster, more efficient, and saving a lot of time.

    This drop in training time isn’t just a nice bonus—it’s a total game-changer. Cutting down on GPU hours directly saves both time and resources. For anyone working with large, complex models, this is huge. Instead of spending countless hours training, researchers and practitioners can now use their resources more wisely, speeding up development. TinyLlama makes it possible to build and refine models faster, while still keeping performance and accuracy at top levels.

    And here’s the best part: by cutting down on training time, TinyLlama also offers a more budget-friendly approach to model development. So not only are you getting a powerful tool, but you’re also saving valuable resources—whether you’re running a massive research project or just exploring the power of advanced language models. Thanks to TinyLlama’s optimizations, it hits the sweet spot where high performance and efficiency meet, making it the perfect choice for anyone diving into AI and machine learning.

    TinyLlama: Optimized Language Model Efficiency

    Code Demo

    Now, let’s get our hands dirty and dive into a fun demo of how to use TinyLlama for text generation. But before we jump in, here’s a quick heads-up: make sure you’ve got the right version of the transformers library installed—specifically version 4.31 or higher. This is important to make sure everything runs smoothly.

    Step 1: Install the Necessary Packages

    Alright, let’s kick things off by installing the packages we need. These libraries are the backbone of our TinyLlama demo, making sure we can run the model, handle the data, and show the results. You’ll need these three essential packages: accelerate to speed things up, transformers to work with TinyLlama, and gradio to make everything interactive.

    Just run these commands in your terminal:

    $ pip install accelerate
    $ pip install transformers==4.36.2
    $ pip install gradio

    Once you’ve installed these, be sure to restart your kernel. This step makes sure everything is loaded and ready for action.

    Step 2: Import the Necessary Libraries

    Now that the packages are in place, it’s time to import them into your Python script. These libraries are the tools that will let us interact with TinyLlama. First, we’ve got transformers to help us with the model and tokenizer, and then we’ve got torch, which powers the calculations behind the scenes. Here’s the code to bring these libraries into your workspace:

    from transformers import AutoTokenizer
    import transformers
    import torch

    Step 3: Initialize the Model and Tokenizer

    Now, here comes the fun part: initializing TinyLlama. We need to load the model and the tokenizer. Think of the tokenizer as a translator—it’s responsible for turning your text into a format the model can understand. Once that’s done, the TinyLlama model will be ready to generate text based on the input you give it. Here’s how to load TinyLlama and the tokenizer:

    model = “PY007/TinyLlama-1.1B-Chat-v0.1”
    tokenizer = AutoTokenizer.from_pretrained(model)

    Step 4: Pipeline Initialization

    Now that the model and tokenizer are loaded, it’s time to set up the pipeline. The pipeline is like the road that takes your input, passes it through the model, and gives you back the result. The transformers.pipeline function does all the hard work for us, allowing us to interact with TinyLlama in a much simpler way.

    Here’s how you set up the pipeline for text generation:

    pipeline = transformers.pipeline(
        “text-generation”, model=model, torch_dtype=torch.float16, device_map=”auto”,
    )

    In this setup, the pipeline is configured to run a text generation task. We’re also setting it up to use hardware acceleration with float16 for the model weights and letting the system handle the device placement automatically for better performance.

    Step 5: Provide the Prompt

    With the pipeline ready, let’s give TinyLlama something to work with—a prompt! The prompt is what guides the model to generate a response. In this case, let’s ask, “What are the values in open source projects?” This will give us an interesting look at what TinyLlama can do.

    Here’s how you format the prompt for TinyLlama:

    prompt = “What are the values in open source projects?”
    formatted_prompt = f”### Human: {prompt}### Assistant:”

    Step 6: Generate the Text

    Now that the prompt is ready, it’s time to use the pipeline to generate text. We’ll configure the pipeline to sample from different possible responses and adjust settings like top_k and top_p to make the output more varied. We’ll also set a maximum token limit to avoid the response being too long.

    Here’s how you set everything up:

    sequences = pipeline(
        formatted_prompt, do_sample=True, top_k=50, top_p=0.7, num_return_sequences=1, repetition_penalty=1.1, max_new_tokens=500,
    )

    This configuration lets TinyLlama generate a text sequence based on the prompt, ensuring the response is both coherent and diverse.

    Step 7: Print the Result

    Finally, let’s print out the result. The sequences variable holds the text generated by TinyLlama, so now we just need to extract and display it.

    Here’s the code to display the generated response:

    for seq in sequences:
        print(f”Result: {seq[‘generated_text’]}”)

    And there you go! This will show you the generated text, giving you a glimpse of how TinyLlama responds to prompts like a pro.

    By following these simple steps, you can easily interact with TinyLlama and tap into its powerful text generation abilities. This demo is a great way to explore TinyLlama’s potential for all sorts of natural language tasks, whether you’re building chatbots or experimenting with creative writing.

    Note: Don’t forget to install the correct version of transformers (4.31 or higher) to avoid compatibility issues.
    ACL 2023: Advances in Natural Language Processing

    Results

    After putting TinyLlama through some testing, we’ve got a pretty clear idea of what it can and can’t do. Think of it like taking a shiny new sports car for a spin. It’s fast, smooth, and handles most tasks like a pro—but there are still things it just can’t do, no matter how much you push it.

    Let’s start with the good news: TinyLlama is a real pro when it comes to general question-and-answer tasks. Throw a question at it, and it’s got a quick, sharp answer ready to go. Whether you’re asking it to summarize an article, generate text, or handle a conversational AI interaction, TinyLlama nails it every time. It’s like having a friendly assistant who always understands you and can create human-like text without breaking a sweat.

    But, and here’s the catch, TinyLlama does have its limits. As impressive as it is with language tasks, it struggles when it comes to complex calculations or anything that requires precise number-crunching. Imagine asking your assistant to solve a tricky math problem—it’s like asking a poet to write code. It’s just not going to perform as well. And that’s totally fine, because TinyLlama, like many other large language models, wasn’t made for those types of tasks. Its real strength lies in natural language processing, not in solving complex math problems or deep logical reasoning.

    So, while TinyLlama excels at things like text generation and understanding language, it’s not quite up to the task when you need to handle numbers or more complicated logic. It’s a bit like having a linguist who’s great at storytelling but doesn’t quite know how to solve math problems.

    In short, TinyLlama is the go-to model when it comes to anything that involves understanding language or generating text. It’s perfect for conversational AI, text-based tasks, and general language understanding. But if you need to dive deep into math or tricky logic, it’s not quite the right tool. Still, for what it was built for, TinyLlama performs impressively well, making it a great choice for anyone needing smooth, efficient language-based interactions.

    Link to study

    Understanding the Model’s Language Understanding and Problem-Solving Capabilities

    Let’s imagine TinyLlama as a prodigy—a language model that’s been tested and trained to handle a variety of tasks, but how exactly does it perform when faced with different challenges? Well, TinyLlama’s journey starts with a series of well-known, tough exams designed to push its limits. And believe me, this isn’t just a casual walk in the park—these benchmarks are serious business.

    First up, we have InstructEval, a benchmark that tests how well TinyLlama can follow instructions and solve problems. Think of it as a series of puzzles that require more than just simple answers. TinyLlama isn’t just repeating answers; it’s following multi-step instructions to complete a task, simulating real-world situations where you need to think and follow directions, just like when you’re assembling that tricky piece of IKEA furniture. If TinyLlama can handle these tasks well, then you know it’s the real deal.

    But that’s not all. There’s also the Massive Multitask Language Understanding (MMLU) benchmark. Now, this is where things get really interesting. MMLU tests TinyLlama’s ability to apply its world knowledge across a wide range of subjects. And to make it even tougher, TinyLlama isn’t given a bunch of examples. It’s put in a 5-shot setting, meaning it gets just a few examples before it has to answer real questions on its own. This is like being asked to work on a project about a topic you haven’t studied much—yet TinyLlama does it, pulling from its vast knowledge and improving its answers with every task.

    Next, we throw TinyLlama into the BIG-Bench Hard (BBH) challenge, which is just as intense as it sounds. This task includes 23 complex, mind-bending problems that need deep reasoning. TinyLlama is given just 3 examples before it’s expected to follow intricate instructions and finish tasks on its own. It’s like getting a model airplane kit with only a few pieces of the manual—you’ve got to think on your feet, adapt quickly, and get it right the first time. TinyLlama doesn’t back down from this challenge; it rises to the occasion.

    But what about math? You might be wondering if TinyLlama can handle numbers. Here comes Discrete Reasoning Over Paragraphs (DROP), a task designed to test TinyLlama’s ability to solve math problems hidden in paragraphs. It’s a 3-shot challenge where TinyLlama gets just a couple of examples before it’s asked to perform complex math operations. This task is a real test of its reasoning skills, showing that it can handle both words and numbers. It’s like asking a skilled linguist to solve problems that involve more than just syntax—they’ve got to think mathematically, too.

    And because we’re pushing TinyLlama to its limits, we finish off with the HumanEval task. Here’s the kicker: in this task, TinyLlama isn’t given any examples. It’s asked to solve programming challenges in a zero-shot setting. Zero-shot means TinyLlama has to generate working code from scratch, with no hints or examples. It’s a test of how well it can understand and generate code just based on what you give it—impressive, right? Think of it like a new coder being thrown into a coding competition with no practice runs.

    Together, these challenges—InstructEval, MMLU, BBH, DROP, and HumanEval—give us a full picture of TinyLlama’s abilities. It’s not just a language model that can string words together; it’s a powerful tool for problem-solving, math reasoning, and even programming. These evaluations show that TinyLlama isn’t just a one-trick pony. It’s a versatile, adaptable model that’s ready to take on anything from understanding language to solving coding challenges. So, whether you’re using it for te AI Benchmarking and Problem-Solving Challenges

    Conclusion

    In conclusion, TinyLlama emerges as a highly efficient and powerful language model, built on the Llama 2 architecture and optimized with cutting-edge techniques like Flash Attention 2 and SwiGLU. Its compact size and impressive performance make it an ideal choice for developers and researchers, especially in environments with limited computational resources. By reducing memory usage and accelerating training speed, TinyLlama positions itself as a game-changer for mobile and lightweight AI applications. As AI continues to evolve, TinyLlama’s efficiency and open-source nature will likely drive further advancements in natural language processing, offering new opportunities for innovation across industries. Keep an eye on future updates, as TinyLlama and similar models pave the way for smarter, more accessible AI solutions.

    Optimize LLMs with LoRA: Boost Chatbot Training and Multimodal AI