Category: Uncategorized

  • Train LoRA Models with Stable Diffusion XL: Optimize with AUTOMATIC1111 and ComfyUI

    Train LoRA Models with Stable Diffusion XL: Optimize with AUTOMATIC1111 and ComfyUI

    Introduction

    Training LoRA models with Stable Diffusion XL (SDXL) has become a game-changer for personalized text-to-image synthesis. By leveraging tools like the AUTOMATIC1111 Web UI and ComfyUI, users can fine-tune models to generate high-quality, customized images that reflect unique styles or subjects. In this article, we’ll guide you through the process of setting up the environment, selecting and captioning images, and testing your model using these powerful interfaces. Whether you’re a beginner or an experienced user, this tutorial will help you harness SDXL’s advanced capabilities to create stunning visuals with ease.

    What is LoRA model training with Stable Diffusion XL?

    This solution allows users to train custom models that capture specific subjects or styles using Stable Diffusion XL. By selecting and captioning images, users can fine-tune the model to generate images based on specific prompts. The process involves training a smaller, efficient model called LoRA, which can then be used with the full Stable Diffusion XL model for improved image generation. The solution is designed to be user-friendly, with tools to simplify the setup and training process.

    1: Hardware Requirements

    To get started with training the LoRA model using Stable Diffusion XL, it’s important to have a GPU that’s up for the task. You’ll want one with enough VRAM—at least 16 GB, to handle the intense processing demands of training these models. Along with that, your system should have a good amount of RAM—32 GB or more is recommended. This will help keep things running smoothly during both training and when you’re using the model later on. The combination of a solid GPU and plenty of memory will give you the power you need to handle big models and large datasets without any hiccups.

    2: Software Requirements

    For the software side, you’ll need Python version 3.7 or higher. This is necessary for running the libraries and frameworks that support model training. The deep learning libraries, such as PyTorch and Transformers, are pretty much essential to get things up and running. On top of that, you’ll need the LoRA library (like PEFT) to implement low-rank adaptation. This is what allows you to fine-tune models like Stable Diffusion, making them smaller and more efficient while still getting the results you want. It’s crucial to make sure all the necessary software is installed properly to avoid any hiccups down the road.

    3: Low-Rank Adaptation (LoRA) Models

    LoRA, or Low-Rank Adaptation, is a pretty handy technique that lets you use smaller models to fine-tune larger diffusion models like Stable Diffusion. Basically, you take an existing, pre-trained model and adapt it for a specific task, like generating a certain character, style, or concept. One of the best things about LoRA is that it lets you tweak models without requiring massive computing power, so it’s easier on your system. After training your LoRA model, you can export it, making it easy to share with others or use in other projects. When you combine LoRA with Stable Diffusion, you can create more affordable models that can generate pretty much anything you want, using a smaller, tailored version of the full model.

    4: Fast Stable Diffusion

    The Fast Stable Diffusion project, created by GitHub user TheLastBen, is a great way to access Stable Diffusion models with an optimized interface. This project is designed to make your hardware work harder and faster, shortening the time it takes to generate images without cutting corners on quality. The Fast Stable Diffusion setup is perfect for users with different skill levels, as it gives you the tools to generate images quickly, even if your system’s specs aren’t the latest. Right now, it works with both the AUTOMATIC1111 Web UI and ComfyUI, so you can pick whichever interface you prefer. If you’re looking to save time and get efficient results, Fast Stable Diffusion is definitely worth checking out.

    5: Demo

    In this section, we’ll walk through a demo that shows how to set up Stable Diffusion using a Jupyter Notebook. The cool part? This process is automated through an IPython notebook, which means that all the necessary model files will be automatically downloaded to a cache. The best part is that the cache doesn’t count against your storage limit, so you don’t have to worry about using up space. After you have everything set up, we’ll go over best practices for selecting and taking images for training. The images you pick are super important because they affect how well the model works. Once you’ve got your images, we’ll cover the captioning process, which is crucial for training the LoRA model. Finally, we’ll show how to generate images using the LoRA model that was trained on the author’s own face, just to give you a clear example of how the whole process works.

    6: Setup

    To kick things off, you’ll need to set up your Jupyter Notebook environment. Once that’s ready, go ahead and run the first two code cells. The first one will take care of installing all the necessary package dependencies, and you’ll notice a folder called ‘Latest_Notebooks’ appearing in your working directory. This folder is pretty useful because it gives you access to updated versions of the notebooks included in the project. After that, move on to the second cell to download the model checkpoints from HuggingFace—these are required to start the training process. Once that’s done, you’re all set to move on to selecting images and training your model.

    7: Image Selection and Captioning

    Selecting the right images is a really important step when you’re training a LoRA model. The images you pick will play a big role in determining the quality of the output images. Ideally, your training dataset should have a mix of images that feature the subject or style you’re focusing on, across different settings, lighting conditions, and angles. This variety is key because it helps your LoRA model stay flexible and generate outputs in different scenarios. For example, in this tutorial, we’ll be training a LoRA model for Stable Diffusion XL using images of the author’s face. While this is just one example, the same approach works for stylistic LoRA models too. When selecting images, here’s what to focus on:

    • Single Subject or Style: Pick images where the focus is on a single subject or style. Avoid complicated compositions with multiple entities.
    • Different Angles: Ensure the subject is captured from multiple angles. This helps the model avoid overfitting to just one perspective.
    • Settings: Try not to use too many images from the same setting. A variety of backgrounds will help the model stay adaptable. If you’re using a neutral background, that can also work well.
    • Lighting: While lighting isn’t the most important factor, varying lighting setups can make your model even more versatile.

    Once you’ve picked your images, upload them and get them ready for captioning. Properly captioning your images is crucial because it gives the LoRA model the context it needs to understand which features to focus on during training.

    8: Training the LoRA model

    Training the LoRA model requires you to set up a few parameters that control how the model learns and adapts to the data you provide. These are the key parameters you’ll be working with:

    • Resume_Training: This decides whether the model continues training from where it left off. If you’re not happy with the previous result, just set this to True, and it’ll resume training.
    • Training_Epochs: This refers to how many times the model will process each image in the dataset. A typical number of epochs is 50, but you can adjust this depending on how complex the task is.
    • Learning_Rate: This controls how quickly the model adjusts its settings during training. A common learning rate for LoRA models is between 1e-6 and 6e-6.
    • External_Captions: If you’ve got pre-generated captions for each image, you can load them from a file by setting this to True.
    • LoRA_Dim: This controls the size of the LoRA model. Most people go with a size between 64 and 128, but 128 is usually better for performance.
    • Resolution: This sets the resolution of the images used for training. The default is 1024×1024, but you can tweak this based on your needs.
    • Save_VRAM: This option helps save VRAM during training. If you choose a smaller LoRA dimension (like 64), it’ll save VRAM, but your training will be slower.

    Once you’ve set these parameters, run the training script and let the model learn from the data. After the training finishes, the model checkpoint will be saved and ready to use with the ComfyUI or the AUTOMATIC1111 Web UI.

    9: Running the LoRA model with Stable Diffusion XL

    Once the training is done, it’s time to put your LoRA model to work. You can use either the ComfyUI or Stable Diffusion Web UI to run your model. This lets you generate images based on your trained model and test how well it performs. If needed, you can add credentials to your Gradio interface to make the process smoother. To get started, you’ll need to configure the system to download the Stable Diffusion XL model by running the right configuration script. Once everything is set up, launch the web UI and go to the LoRA dropdown menu. Select your newly trained LoRA model, and then use a test prompt to generate some images. This will let you check that your LoRA model is working as expected and help you fine-tune the training process if necessary.

    For more detailed insights on image synthesis and model training, check out this comprehensive guide on Stable Diffusion XL Setup and Optimization.

    Conclusion

    In conclusion, training LoRA models with Stable Diffusion XL (SDXL) using interfaces like the AUTOMATIC1111 Web UI and ComfyUI offers an innovative way to create customized text-to-image models. This process allows users to fine-tune models based on specific styles or subjects, making it easier to generate high-quality, personalized images. By following the steps in this tutorial, you can harness SDXL’s powerful features and train models tailored to your needs. As AI image synthesis continues to evolve, mastering tools like LoRA and Stable Diffusion XL will become increasingly valuable for creators and developers seeking to push the boundaries of digital art.

    Optimize LLMs with LoRA: Boost Chatbot Training and Multimodal AI

  • Forward Logs to OpenSearch Using Fluent Bit: A Complete Guide

    Forward Logs to OpenSearch Using Fluent Bit: A Complete Guide

    Introduction

    Forwarding logs to OpenSearch using Fluent Bit is an essential process for managing and analyzing system logs efficiently. Fluent Bit, a powerful log processor, can seamlessly collect and forward logs from your server to OpenSearch for real-time analysis. This guide will walk you through the necessary steps to configure Fluent Bit, including using the tail input plugin for log collection and the OpenSearch output plugin for forwarding logs. Additionally, we’ll cover troubleshooting tips to ensure smooth connectivity and optimal data ingestion. By the end of this tutorial, you’ll be equipped with the knowledge to streamline your log management with Fluent Bit and OpenSearch.

    What is Fluent Bit?

    Fluent Bit is a tool that helps collect and forward system logs from different sources to other services for analysis. It processes logs and sends them to destinations where they can be reviewed, helping to understand and troubleshoot server performance.

    Step 1 – Installing Fluent Bit

    Fluent Bit is a super handy open-source tool that’s all about processing and forwarding logs quickly and efficiently. It’s a lightweight log processor, meaning it’s designed to gather logs and data from all sorts of sources, transform them if needed, and then send them to wherever they need to go. This makes it a must-have tool for managing log data in today’s server setups. The best part? Fluent Bit works across various platforms, giving you flexibility whether you’re working with different kinds of systems or environments.

    To install Fluent Bit on a cloud server, whether it’s running Ubuntu, Debian, Redhat, or CentOS, all you need to do is run this command in your server’s terminal:

    $ curl https://raw.githubusercontent.com/fluent/fluent-bit/master/install.sh | sh

    This script will automatically download and install Fluent Bit on your system. Just a heads up, make sure your cloud server meets the necessary system requirements and has the proper permissions in place so that the installation goes off without a hitch.

    If you need a bit more help, or if you’re using a different operating system, the official Fluent Bit documentation has everything you need. It’ll walk you through the installation process on different Linux distributions, and it’s great for troubleshooting too, giving you the right advice for different platforms like Ubuntu, Debian, Redhat, and CentOS.

    For more details on installing and configuring Fluent Bit, check out this comprehensive guide on Fluent Bit Installation on Linux.

    Step 2 – Configuring FluentBit to Send Logs to OpenSearch

    By default, Fluent Bit configuration files are found in the /etc/fluent-bit/ directory. To make Fluent Bit send logs to OpenSearch, you need to modify the fluent-bit.conf file. This file controls how Fluent Bit processes and sends log data. It includes input and output settings, which tell Fluent Bit where to collect logs from and where to send them.

    Fluent Bit Inputs

    Fluent Bit offers a bunch of input plugins that help it collect log and event data from different sources. Since we’re working with log files here, we’ll use the tail input plugin. This one’s great because it watches file paths and grabs new log entries as they’re written. It’s perfect for keeping tabs on logs in files like /var/log/auth.log or /var/log/syslog. You’ll be adding this configuration to the fluent-bit.conf file under the [INPUT] section.

    Here’s the configuration to add to your file to define the input path:

    [INPUT]
        name tail
        Path /var/log/auth.log,/var/log/syslog,/var/log/journal/*.log

    This tells Fluent Bit to look at the logs from those files. If you have other logs you want to monitor, you can easily change the paths to fit your needs. For example, you might want to track logs from other services or directories on your server.

    If you need more info on how to configure different input plugins or how to tweak your log collection setup, the official Fluent Bit documentation on input plugins will help. It’s a great resource if you want to explore more complex logging setups.

    Fluent Bit Outputs

    Besides input plugins, Fluent Bit also has output plugins that let you send your processed logs to different destinations. Since we’re setting it up to send logs to OpenSearch, we’ll use the OpenSearch Output Plugin. This plugin needs some key details, like the host address, port, and your login credentials.

    To set up the OpenSearch output plugin, add the following to the [OUTPUT] section of your fluent-bit.conf file:

    [OUTPUT]
        Name opensearch
        Match *
        Host <OpenSearch_Host>
        port 25060
        HTTP_User doadmin
        HTTP_Passwd <OpenSearch_Password>
        Index ubuntu
        tls On
        Suppress_Type_Name On

    In this setup, make sure to replace <OpenSearch_Host> with your OpenSearch server’s hostname, and <OpenSearch_Password> with your OpenSearch password. The Index setting determines where your logs will be stored in OpenSearch, so you can adjust it to your needs. For example, you might choose a different index name depending on the type of logs or services you’re working with. The tls On part ensures that the connection between Fluent Bit and OpenSearch is secure.

    Once you’ve updated the configuration, you’ll need to start the Fluent Bit service to get it up and running. You can do that with these commands:

    $ systemctl enable fluent-bit.service
    $ systemctl start fluent-bit.service
    $ systemctl status fluent-bit.service

    These commands ensure Fluent Bit starts automatically when your system boots up, begins collecting logs, and allows you to check the service status to make sure everything’s working smoothly.

    For more guidance on configuring Fluent Bit to forward logs to OpenSearch, refer to the official documentation at Fluent Bit OpenSearch Output Configuration.

    Troubleshooting

    Check Connectivity

    To make sure that Logstash can connect to your OpenSearch instance, you can test the connection with this command:

    $ curl -u your_username:your_password -X GET “https://your-opensearch-server:25060/_cat/indices?v”

    In this command, replace your-opensearch-server with the hostname of your OpenSearch server. Also, swap out your_username and your_password with your actual OpenSearch login details. This will check if the connection is working by retrieving the available indices. If everything’s good, you’ll see a list of the indices stored in OpenSearch.

    Data Ingestion

    To double-check that your data is being correctly ingested into OpenSearch, you can run this command to see the status of your data:

    $ curl -u your_username:your_password -X GET “http://your-opensearch-server:25060/<your-index-name>/_search?pretty”

    Just like before, replace your-opensearch-server with your OpenSearch server’s hostname, and update your_username and your_password with your OpenSearch login details. Also, make sure to replace <your-index-name> with the name of the index you want to query. This will return the documents in the specified index. If everything’s set up right, you should see your indexed data in the search results.

    Firewall and Network Configuration

    Make sure that the firewall settings and network configuration on both the server running Fluent Bit and the OpenSearch server are set up properly. This is super important, especially because it allows traffic to flow between Fluent Bit and OpenSearch, particularly over the necessary port (25060 in this case). Check that the firewall ports are open for communication and make sure there are no network issues that could block data transfer.

    Check Fluent Bit Logs

    Fluent Bit logs by default are written to the system log, and you can check these logs for any issues. To view the logs for Fluent Bit, run this command:

    $ sudo journalctl -u fluent-bit

    This will display the logs for Fluent Bit. Checking the logs is a good idea when you want to identify any errors or configuration issues that might be causing Fluent Bit to not process and forward logs correctly.

    Validate Configuration

    To ensure your Fluent Bit configuration is set up correctly and doesn’t have any syntax errors, you can run this command to validate the configuration file:

    $ /opt/fluent-bit/bin/fluent-bit -c /etc/fluent-bit/fluent-bit.conf –dry-run

    This command will check the syntax of the fluent-bit.conf file without actually starting the Fluent Bit service. It’s a quick way to catch any configuration issues that need fixing before Fluent Bit can start processing and forwarding logs as it should.

    For additional troubleshooting tips and techniques, explore the detailed guide at Fluent Bit Troubleshooting Guide.

    Conclusion

    In conclusion, configuring Fluent Bit to forward logs to OpenSearch is a powerful way to streamline log management and analysis. By following the steps outlined in this guide, you can easily install and configure Fluent Bit on your cloud server, set up the tail input plugin for log collection, and use the OpenSearch output plugin to forward logs seamlessly. With the troubleshooting tips provided, you’ll be able to ensure smooth data ingestion and reliable service management. As the demand for effective log management grows, tools like Fluent Bit and OpenSearch will continue to play a critical role in helping organizations monitor and analyze their systems efficiently. Keep an eye on future updates to these tools for even more advanced features and integrations.

    Configure Nginx Logging and Log Rotation on Ubuntu VPS

  • Boost Deep Learning Training: Master Momentum, RMSProp, Adam, SGD

    Boost Deep Learning Training: Master Momentum, RMSProp, Adam, SGD

    Introduction

    Optimizing deep learning training is crucial for building efficient and accurate models. In this article, we dive into the role of advanced optimization algorithms, including Momentum, RMSProp, Adam, and Stochastic Gradient Descent (SGD). While SGD is widely used, its limitations in handling complex loss landscapes—particularly in regions of pathological curvature—can slow down convergence. To address these challenges, we explore how methods like Momentum and RMSProp incorporate gradient history and adaptive learning rates for faster and more stable training. Additionally, we’ll touch on the importance of Batch Normalization and Residual Connections in achieving better generalization in deep learning models.

    What is Momentum?

    Momentum is a technique used to improve the speed and stability of optimization algorithms. It helps by not only considering the gradient of the current step but also the gradients from previous steps. This allows the algorithm to move more smoothly towards the minimum by reinforcing the direction of the previous steps and reducing oscillations. In practice, this results in faster convergence and more efficient training, especially in scenarios where the gradient updates are zig-zagging or oscillating.

    Pathological Curvature

    Let’s take a look at this loss contour. We start the optimization process at random, which leads us into a ravine-like area shown in blue. The colors in this contour plot show how much the loss function changes at each point—red means the highest values, and blue means the lowest. The ultimate goal is to reach the minimum (or the “valley” in the plot), but we have to navigate through this ravine to get there. This area with the steep, narrow curvatures is what we call pathological curvature. Let’s dive into why we use the term “pathological” here. When we zoom in on this area, we begin to see the issues that come with it.

    Now, gradient descent is the optimization method we use, but it struggles in this tricky environment. The optimization bounces along the ridges of the ravine, making much slower progress toward the minimum. This happens because the surface at the ridge is highly curved in the direction of the weight parameter w1. Imagine a point A on the surface of the ridge. Here, the gradient breaks into two components: one in the w1 direction and another in the w2 direction. The gradient in the w1 direction is way larger due to the steepness of the loss function. So, instead of pointing toward w2 (where the minimum is), the gradient heads mostly in the direction of w1.

    We could try to fix this by simply using a slower learning rate, like we talked about earlier with gradient descent. But here’s the thing—it creates problems. Slowing down the learning rate when we’re close to the minimum makes sense, right? We want to ease into it smoothly. But once we’re in the pathological curvature region, there’s a long way to go to reach the minimum, and this slow learning rate can make everything take way too long.

    One study even found that using super slow learning rates to avoid the oscillations (that “bouncing” along the ridges) can make the loss function look like it’s not improving at all. This creates the illusion that the model isn’t getting better, which could cause practitioners to give up on the training process altogether. Plus, if the only directions in which the loss decreases significantly are those with low curvature, the optimization can become incredibly slow. Sometimes, it might even seem to stop completely, giving the false impression that the model has already reached a local minimum—when in fact, it hasn’t even gotten close!

    So, how do we fix this? We need a way to guide the optimization into the flat area at the bottom of the pathological curvature, and once we’re there, we can speed up the search toward the true minimum. One solution could be using second derivatives to better understand the curvature and fine-tune the step size for gradient descent.

    For a deeper dive into optimization techniques and overcoming issues like pathological curvature, check out this detailed guide on Understanding Pathological Curvature in Deep Learning Optimization.

    Newton’s Method

    So, here’s the thing about gradient descent: it’s what we call a First Order Optimization Method. What that means is, it only looks at the first order derivatives of the loss function. But it doesn’t take into account the higher-order derivatives. In simpler terms, gradient descent can tell us if the loss is going down and how fast, but it can’t understand the curvature of the loss function. It can’t tell whether the curve is flat, curving up, or curving down. That’s because gradient descent only works with the gradient, which is the same at a certain point on different curves that share the same gradient value.

    Now, to fix this problem, we can use the second derivative of the loss function. This second derivative gives us info about how the gradient itself is changing. Basically, it tells us whether the slope of the loss function is getting steeper or flattening out, and that’s super helpful for understanding the curvature. One of the most common techniques that use second-order derivatives is Newton’s Method. Don’t worry, I won’t dive too deep into the math behind Newton’s Method, but the core idea is pretty easy to get.

    Newton’s Method helps us find the ideal learning rate by adjusting the step size based on the direction of the gradient. It uses info about the curvature of the loss surface to fine-tune the step size. This ensures we don’t overshoot the minima, especially in tricky areas with pathological curvature. The method does this by computing something called the Hessian Matrix, which is basically a big matrix of second-order derivatives of the loss function with respect to all the combinations of weights.

    Now, let’s break down what “combinations of weights” really means. In the Hessian Matrix, this refers to how all pairs of weights interact with each other. The Hessian Matrix collects these gradients and forms a large matrix, which helps us estimate how curved the loss surface is at any given point.

    A loss surface might have positive curvature, meaning it gets less steep as we move further. Or it could have negative curvature, where the surface gets steeper. When the curvature is negative, the optimization can just keep going with an arbitrary step size or fall back to the regular gradient descent approach. That’s because the gradient is getting bigger, so we don’t need to adjust the step size for diminishing returns in the direction of the gradient.

    But if the curvature becomes positive (meaning the surface is flattening out), that’s where Newton’s Method really shines. It adjusts the learning rate based on how quickly the surface flattens. Essentially, the more the surface flattens, the smaller the step size becomes. This allows the algorithm to take more careful steps as it gets closer to the minimum. This dynamic adjustment of the learning rate is a huge improvement over the basic gradient descent method, making it more efficient in complex scenarios.

    To explore more about advanced optimization techniques like Newton’s Method, check out this informative article on Understanding Newton’s Method for Machine Learning.

    Momentum

    Momentum is a technique that’s widely used with Stochastic Gradient Descent (SGD) to speed up the optimization process. Here’s the thing: basic gradient descent only uses the gradient from the current step to figure out where to go next. But momentum does something a little extra. It pulls in the gradients from past iterations, which helps the optimizer build speed in the direction of the minimum. This makes the optimization path smoother and prevents it from bouncing around too much.

    The main idea behind momentum is to gather the gradients from previous steps and mix them in with the current gradient. The equations for gradient descent change a bit to account for this. The first equation breaks down into two parts: the gradient from previous steps and a factor called the “Coefficient of Momentum.” This coefficient decides how much of the old gradient you keep from the last iteration. For example, if we start with an initial value of 0 (v = 0) for the retained gradient, and set the momentum coefficient to 0.9, the equation will update with this older gradient multiplied by the momentum coefficient. This means that the most recent gradients will have more say in the current update, while the older gradients will have less impact. If you look at it mathematically, this turns into an exponential average of all the gradients so far.

    The cool thing about this is that it helps smooth out the zig-zagging that happens when gradient descent keeps jumping back and forth, especially when it’s trying to find the minimum. Sometimes, the optimizer’s path has components along multiple directions—let’s say w1 and w2 directions. The components along w1 might cancel each other out, but the ones along w2 will get a boost. This leads to a more focused search, pointing the optimizer toward the minimum much more efficiently.

    Imagine this: if you break a gradient update into two parts (w1 and w2), the momentum trick will pump up the size of the gradient update along w2. That’s going to make the optimizer get closer to the best minimum faster. On the flip side, the w1 components are reduced or even neutralized, which stops the optimizer from bouncing back and forth too much. This is why we often say that momentum “dampens oscillations” while it’s searching for that sweet spot.

    In practice, the momentum coefficient usually starts off smaller, like 0.5, and then gradually increases to something like 0.9 as the training progresses. This helps the momentum build up gradually, making sure it’s steady and doesn’t overshoot the minimum. Momentum really speeds up how quickly the algorithm converges, especially when the gradient is changing slowly or there’s a lot of noise in the process.

    That said, momentum can sometimes cause the optimization to overshoot the minimum, particularly if the gradient is steep or unstable. To handle that, we can use tricks like simulated annealing, where the learning rate gets smaller as we get closer to the minimum, which helps stop overshooting. So, in a nutshell, momentum is a solid and powerful tool for speeding up gradient-based optimization. It not only helps with convergence but also keeps you from hitting roadblocks like oscillations and slow progress on the way to the minimum.

    To dive deeper into optimization methods like Momentum, check out this insightful article on Momentum in Machine Learning: A Comprehensive Guide.

    RMSProp

    RMSprop, which stands for Root Mean Square Propagation, has a pretty cool backstory—it was introduced by the legendary Geoffrey Hinton during a Coursera class. He created it to tackle some of the issues found in traditional gradient descent and momentum methods. It’s a great solution for dampening oscillations in the optimization process, but it does this in a way that’s a bit different from momentum. One of RMSProp’s biggest advantages is that it automatically adjusts the learning rate, so you don’t have to manually tweak it all the time. And on top of that, RMSProp adjusts the learning rate for each parameter individually, which makes it super effective when you’re working with complex optimization landscapes.

    So how does RMSProp actually work? Well, it computes an exponential average of the squared gradients over time. This is a big deal because, unlike traditional gradient descent, where the same learning rate is applied to all parameters, RMSProp changes things up based on the past gradients. Let’s break this down step by step. In the first equation used by RMSProp, we calculate the exponential moving average of the squared gradient for each parameter. The gradient at time step ?, which we’ll call ??, represents the component of the gradient along the direction of the parameter we’re updating.

    To compute this exponential moving average, we use a hyperparameter (usually represented by the Greek letter ?) to decide how much weight we give to the previous moving average. Then, the squared gradient of the current step is multiplied by (1 − ?), and this is added to the previous moving average, which gives us a weighted average of all past gradients. What’s cool here is that we’re giving more weight to the recent gradients, much like momentum, where newer gradients have a bigger influence than older ones. The term “exponential” comes into play because the weight of past terms drops exponentially with each update—like the most recent term gets a weight of ?, the next one gets ?², then ?³, and so on.

    Now, let’s think about the practical effects of this method. Imagine the gradients along one direction, like ?₁, are way bigger than the gradients along another direction, like ?₂. When we square and sum these gradients, the contribution from ?₁ will be much larger than from ?₂, so the exponential average will be dominated by the bigger gradients. This means the learning rate will be adjusted for each parameter individually, giving us better control over the optimization process.

    Next, RMSProp takes things further by adjusting the step size. In traditional gradient descent, the learning rate stays the same the entire time, but with RMSProp, it changes depending on the moving average of squared gradients. Here’s how it works: we divide the initial learning rate ? by the exponential average of the squared gradients. If the average gradient in the ?₁ direction is much bigger than in the ?₂ direction, the learning rate for ?₁ will be smaller, and the learning rate for ?₂ will be larger. This helps ensure the optimizer doesn’t overshoot the minima or bounce between ridges in the optimization landscape.

    Finally, the update step in RMSProp involves applying this learning rate adjustment to the gradients for each parameter. The hyperparameter ?, often set to 0.9, is used during this adjustment, and you might need to tune it based on the task at hand. Also, a small constant ? (typically 1e−10) is added to avoid division by zero when the moving average of the gradients is really small.

    Another neat feature of RMSProp is that it implicitly performs something called simulated annealing. What this does is slow down the optimization process as it gets closer to the minima. This means that as the optimizer nears the minimum, the steps in the gradient direction get smaller, which prevents it from overshooting. This is super helpful when large gradient steps could cause instability or slow convergence. Thanks to its ability to adjust the step size on the fly, RMSProp is a robust and efficient optimization algorithm, especially in cases where other methods might struggle because of big fluctuations in the gradients.

    To further explore advanced optimization techniques like RMSProp, check out this detailed guide on RMSProp Optimization Algorithm Explained.

    Adam

    So far, we’ve explored the differences between RMSProp and Momentum, both of which have their own unique ways of helping with optimization. Momentum helps speed up the journey towards the minimum by using past gradients, while RMSProp tries to reduce oscillations by adjusting the learning rate dynamically for each parameter. Adam, or Adaptive Moment Estimation, is like the best of both worlds—it takes key ideas from both Momentum and RMSProp and combines them to create a super efficient optimizer that adapts the learning rate based on the first and second moments of the gradient.

    Adam does this by calculating the exponential moving average of both the gradient and the squared gradient for each parameter. Let’s break it down with the key equations of Adam:

    In the first equation, we calculate the exponential average of the gradient, which we call ?? (this helps capture the momentum information). In the second equation, we calculate the exponential moving average of the squared gradient, ??, which helps us adjust the learning rate based on how big the gradients are.

    In the third equation, the learning rate is adjusted by multiplying it by the ratio of the exponential average of the gradient (just like Momentum does) and dividing it by the square root of the exponential average of the squared gradients (similar to how RMSProp works).

    The step update in Adam is then calculated by combining these two elements. The learning rate gets adjusted dynamically to match the landscape of the optimization process. This dual approach makes sure that Adam remains stable and efficient no matter what problem it’s working on.

    Now, to fine-tune this process, Adam uses two hyperparameters, ?₁ and ?₂, that control the decay rates for the moment estimates of the gradient and squared gradient. By default, ?₁ is set to 0.9, which means it gives more weight to recent gradients when calculating momentum. ?₂, on the other hand, is usually set to 0.99, which focuses on the moving average of the squared gradients. You can tweak these values based on your specific task, and they can really affect how the optimization works.

    To make sure everything runs smoothly, Adam also includes a small constant, ? (epsilon), which is typically set to 1e−10. This little term is crucial because it helps avoid division by zero errors when the moving averages of the gradient or squared gradient get really small. Adding this constant keeps the learning process stable and prevents any weird hiccups along the way.

    All in all, Adam is pretty special because it takes the best features from both Momentum and RMSProp and mixes them together. It doesn’t just adjust the learning rate based on the size of the gradient but also takes the direction of the gradient into account. This makes it an incredibly effective and widely used optimization algorithm, especially for deep learning tasks. Its stability and efficiency help it work well with a wide variety of datasets and architectures.

    For a deeper dive into adaptive optimization techniques like Adam, check out this comprehensive guide on Adam Optimization Algorithm.

    Conclusion

    In conclusion, optimizing deep learning training is essential for achieving efficient and accurate models. While Stochastic Gradient Descent (SGD) serves as a foundational algorithm, methods like Momentum, RMSProp, and Adam provide key advantages by addressing the challenges of slow convergence and oscillations in complex loss landscapes. These adaptive optimizers incorporate gradient history and adjust learning rates dynamically to speed up training and improve stability. However, for even better performance and generalization, advancements in deep learning architecture, such as Batch Normalization and Residual Connections, remain crucial. As deep learning continues to evolve, staying up to date with these optimization methods and architectural strategies will help you maintain competitive and efficient models.

    Master Gradient Boosting for Classification: Enhance Accuracy with Machine Learning (2023)

  • Master Gradient Boosting Regression in Python

    Master Gradient Boosting Regression in Python

    Introduction

    Gradient Boosting Regression (GBR) in Python offers a powerful way to tackle regression tasks by combining multiple weak models, usually decision trees, into one robust predictive model. GBR leverages gradient descent to minimize loss, iteratively improving prediction accuracy. This technique stands out for its high accuracy, flexibility, and minimal data preprocessing requirements, making it ideal for real-world applications. In this article, we dive into how GBR works, explore key hyperparameters like learning rate and the number of estimators, and guide you through its implementation and evaluation in Python.

    What is Gradient Boosting Regression?

    Gradient Boosting Regression is a method used to make accurate predictions for continuous values, like prices or weights, by combining many simple decision trees into one strong model. It works by learning from its mistakes step by step—each new tree focuses on fixing the errors made by the previous ones. This approach improves prediction accuracy over time while handling missing data and requiring little data preparation. It’s widely used because it provides reliable results and flexibility across different types of problems.

    Prerequisites

    So, before you jump into this article, it’s best if you already have a bit of experience with Python programming and at least a beginner-level grasp of Machine Learning ideas. That background will make it way easier to understand the examples, code bits, and overall workflow we’ll go through together. We’re assuming you’re using a computer with enough power to handle the code without hiccups, since model training and visualizations can use up a fair amount of system resources.

    Before we get into the fun part, make sure your Python setup is good to go for Machine Learning work. You’ll need to have key libraries like NumPy, pandas, scikit-learn, and Matplotlib installed, because they’re going to pop up all over the examples here. If you’re not totally sure how to set things up, no worries. You can check out a basic Python environment setup tutorial that walks you through installing Python, creating virtual environments, and keeping your dependencies in order.

    Once your system’s all set, it’s a great idea to go over a few beginner-friendly Machine Learning tutorials. They’ll help refresh some of the key concepts like training data, target variables, and evaluation metrics. Trust me, once you’ve got those basics down, connecting the theory behind Gradient Boosting Regression with the hands-on implementation in this guide will feel a lot smoother.

    Read more about setting up a Python environment for machine learning Setting Up Python for Machine Learning: A Step-by-Step Guide

    Comparison of Gradient Boost with Ada Boost

    You know, both Gradient Boost and Ada Boost kind of do the same dance when it comes to using decision trees as their base models, but the way they go about building and tuning them is pretty different.

    In Gradient Boosting, the trees tend to be bigger and more detailed compared to the ones in Ada Boost. That’s because Gradient Boosting keeps adding new trees in a way that directly fixes the mistakes made by the earlier ones using something called gradient descent. Each new tree learns from the leftover errors, or what we call residuals, which are basically the gaps between what the model predicted and what actually happened. Over time, this process keeps refining the model until it becomes really accurate and reliable.

    Now, Ada Boost, which stands for Adaptive Boosting, takes a slightly different route. It also uses a bunch of weak learners, usually smaller decision trees, but the way it combines them is unique. After each round of training, Ada Boost looks at which data points it got wrong and adjusts their importance for the next round. In simple terms, the points that were hard to predict correctly get more attention in the next iteration. It’s like saying, “Hey, these tricky cases need more focus next time.” That way, the model gradually gets better at handling the tough stuff.

    Even though both methods follow the same general idea of boosting, which means stacking a bunch of weak models together to make one strong predictive model, they differ in how they scale their trees during training. Gradient Boost scales every tree by the same amount, keeping things nice and consistent so that each tree contributes equally to the final model. Ada Boost, on the other hand, likes to mix it up. It gives different weights to trees based on how well each one performs, meaning that some trees get more influence over the final result than others.

    So, to wrap it up, both algorithms rely on decision trees as their building blocks, but their personalities are different. Gradient Boosting tends to grow larger, more complex trees that keep chipping away at the loss using gradient descent, while Ada Boost puts its energy into adjusting weights and shining a light on the tough-to-predict data points. Because of this, Gradient Boosting usually works better for regression and continuous prediction problems, whereas Ada Boost is a favorite for classification tasks where you want to fine-tune predictions based on previous mistakes.

    Read more about boosting algorithms and their differences Understanding Gradient Boosting and AdaBoost: Key Differences Explained

    Advantages of Gradient Boosting

    Better accuracy

    You know what’s really cool about Gradient Boosting Regression? It usually delivers much better accuracy compared to a lot of other regression techniques out there. When you stack it up against something like Linear Regression, Gradient Boosting Regression almost always comes out on top as the stronger choice.

    The reason it’s so good is that it keeps learning from its mistakes, step by step, fixing the parts that didn’t quite hit the mark before. Each new model in the sequence focuses on the spots where earlier ones slipped up, which makes the final result super polished and precise. That’s why you’ll often see Gradient Boosting Regression show up in data science contests and online hackathons where everyone’s chasing that top accuracy score.

    Less pre-processing

    Let’s be honest, data preprocessing can feel like the longest and most exhausting part of machine learning. If it’s not done right, it can really mess up your model’s performance. The great thing about Gradient Boosting Regression is that it doesn’t make you jump through a ton of preprocessing hoops. It’s pretty forgiving and can work well with minimal prep.

    That means you can get your model up and running faster without getting lost in endless cleaning and formatting. Of course, if you do take the time to tidy up your data—like dealing with outliers, scaling your features, or encoding categorical values—it can make your model even better. So while it’s not mandatory, a bit of extra effort here can still give you stronger results without adding too much complexity.

    Higher flexibility

    One of the nicest things about Gradient Boosting Regression is how flexible it is. You can tweak and tune it to fit your exact problem, kind of like adjusting the knobs on a radio until you get the perfect sound. It comes with a bunch of hyperparameters you can customize, like the number of estimators, the learning rate, and how deep each tree goes.

    Plus, it supports several different loss functions—like least squares, least absolute deviation, and Huber loss—so you can pick whichever works best for your dataset. This flexibility means it’s great for everything from predicting continuous numbers like prices or sales to tackling more complicated regression problems with tricky non-linear relationships.

    Missing data

    Here’s the thing—missing data is one of those annoying problems that everyone runs into when building models. Most algorithms make you fix missing values manually by either filling them in or dropping them, which can mess with your data or make you lose valuable information. But Gradient Boosting Regression? It’s smart enough to handle that all on its own.

    Instead of treating missing values like errors, it actually treats them as possible sources of insight. While building its trees, it figures out where those missing values should go—left branch or right branch—based on which choice helps reduce the overall error the most. This clever approach saves you time and keeps your model strong and accurate even when your data isn’t perfect. So yeah, Gradient Boosting Regression doesn’t just give great results, it also makes life easier when you’re dealing with messy, real-world data.

    Read more about the advantages of machine learning techniques in boosting models Understanding the Advantages of Gradient Boosting in Machine Learning

    Gradient Boosting parameters

    Let’s talk about a few key parameters that really make Gradient Boosting Regression tick. These parameters are super important to get right because they have a big impact on how well and how efficiently your model learns. Each one controls a specific part of how the algorithm figures things out from your data, and when you fine-tune them properly, you can squeeze out some seriously good performance while keeping things nice and balanced.

    Photo by Drew Patrick Miller / Unsplash

    Number of Estimators

    You’ll usually see this one written as n_estimators. By default, it’s set to 100. Think of it as the total number of boosting stages, or basically, the number of trees your model is going to grow one after another to build the final ensemble. Each new tree is built to fix the mistakes made by the ones before it, helping the model get better little by little. More trees can often mean your model learns more complex stuff, which can make it more accurate. But, of course, there’s a catch. Too many trees mean more computation and longer training times. And if you go overboard, your model might start memorizing the training data instead of learning from it, which is what we call overfitting. The trick is to find that sweet spot where n_estimators gives you great accuracy without wasting time or resources.

    Maximum Depth

    This one’s known as max_depth, and it controls how deep each tree in the model can grow. The default setting is 3, which actually works well for a lot of regression problems, but it’s adjustable depending on how complicated your data is. A deeper tree can dig into more detailed relationships between features, but it can also start clinging too tightly to the training data. On the other hand, a shallower tree might miss out on important patterns, which can lead to underfitting. The best depth really depends on your dataset—how many features you’ve got, how noisy it is, and how much variation there is in it. Usually, it’s a good idea to test a few different depths and use cross-validation to see which one works best.

    Learning Rate

    Ah, the learning_rate parameter—this one’s like the throttle of your model. It decides how much each new tree contributes to the final prediction. By default, it’s set to 0.1. A smaller learning rate means your model learns more carefully, taking smaller steps toward improvement, which can lead to better accuracy in the long run. But the trade-off is that it takes more trees (and more time) to get there. A larger learning rate makes the training faster, but it risks skipping over the best solution and might leave your model underperforming. So you’ve got to balance it carefully with n_estimators to keep training time and accuracy in harmony.

    Criterion

    The criterion parameter is what decides how good each split in your trees is. By default, it uses something called friedman_mse, which stands for Mean Squared Error. Basically, this helps the algorithm figure out whether a split is helping or hurting the model’s accuracy. It’s a key part of making sure each tree zeroes in on areas where predictions can improve. The cool thing about friedman_mse is that it’s tailored for boosting—it makes the whole process faster and more stable by working nicely with how Gradient Boosting updates its trees.

    Loss

    This one’s called loss, and it tells the model which loss function to optimize while training. The default option, ls (least squares regression), is super common for regression tasks. But you’ve got a few others to choose from too, like lad (least absolute deviation) and huber. LAD focuses on minimizing absolute errors, which makes it great if your data has a lot of outliers. Huber, on the other hand, mixes the best of both worlds—it behaves like least squares for smaller errors but switches to absolute deviation for larger ones. Picking the right loss function really depends on the nature of your problem and how your data behaves.

    Subsample

    Here’s a fun one—subsample. It decides how much of your dataset is used to train each tree. The default value is 1.0, which means every single data point is used each time. But if you set it lower, like 0.8 or 0.9, each tree gets a slightly different random subset of the data. This randomness helps reduce variance, prevents overfitting, and can actually make your model more robust—kind of like the way Random Forests work. Just be careful not to set it too low, because then your model might start missing important patterns and make less accurate predictions.

    Number of Iteration No Change

    This one’s written as n_iter_no_change, and it’s your model’s built-in safety check to stop training when things stop improving. By default, it’s turned off (set to None), but when you enable it, it starts watching your validation score. If that score doesn’t get better after a certain number of rounds, training stops early to save time and keep the model from overfitting. This parameter works together with validation_fraction, which controls how much of your data is set aside to check for improvements during training. It’s a super handy feature that helps you train smarter, not harder.

    All of these parameters work together to give you fine control over how your Gradient Boosting Regression model behaves. Once you understand what each one does, you can start tweaking them to get that perfect balance between accuracy, speed, and generalization. With a bit of experimenting and patience, you can tune these settings to handle almost any regression problem and end up with a model that’s both powerful and reliable.

    Read more about Gradient Boosting and its parameters in this detailed guide Understanding Gradient Boosting Parameters in Machine Learning

    Getting the data

    Before we jump into building the model, the first big step is getting and understanding the dataset we’re going to use for training and testing the Gradient Boosting Regression model. I’ve already uploaded a sample dataset that you can grab and run locally on your own machine, so you can follow along easily. Working with the same dataset makes it way easier to see how each step fits together and what’s really happening as we go.

    The dataset here is pretty simple, which is perfect for showing how Gradient Boosting Regression works. There’s also a little screenshot of the data description to give you a quick peek at what we’re dealing with. You’ll notice there are just two main variables: x and y. The x variable is your independent variable, also known as the feature or predictor. The y variable is your dependent variable, or in plain terms, the value we’re trying to predict.

    The goal of this whole regression thing is to figure out a math relationship between x and y so we can make good predictions when new x values come in.

    In this case, we’re going to fit the data to a simple line equation that looks like y = mx + c. Here’s the breakdown: m is the slope of the line, and it shows how much y changes every time x changes by one unit. Then c is the y-intercept, which is just the value of y when x equals zero. It’s like the starting point of the line on a graph. This little formula helps you see how x and y are related in a straight-line kind of way.

    Even though this dataset is small and straightforward, it’s actually a great way to get familiar with how Gradient Boosting Regression learns and improves. Because the data’s simple, you can really see how the algorithm gradually reduces errors and tweaks the model to make predictions that are closer and closer to the real values. Once you’re comfortable with this example, you can take the same process and apply it to bigger, more complex datasets that have multiple features and non-linear relationships.

    By starting with this simple dataset, we’re building a solid foundation. Once you get these basics down, you’ll be ready to dive into more advanced and exciting applications of Gradient Boosting Regression later on.

    Read more about how to efficiently handle and process data for machine learning tasks in this comprehensive guide Data Preprocessing for Machine Learning

    Training the GBR model

    Alright, it’s time to roll up our sleeves and actually build the Gradient Boosting Regression (GBR) model. This is the fun part where all that theory we talked about earlier turns into something real with code. As you’ll see in the example below, we start by setting up the key parameters that control how the model learns from your data. These are n_estimators, max_depth, learning_rate, and criterion. Each one plays a big part in deciding how accurate the model is, how fast it trains, and how well it handles new, unseen data.

    For this demo, we’ll use the following values: n_estimators = 3, max_depth = 3, learning_rate = 1, and criterion = mse. We’ll store these in a variable called params, which is a handy way to pass all the hyperparameter settings to the model in one go. Defining these values yourself gives you a clearer sense of how changing each one affects the training process. For example, n_estimators tells the model how many boosting stages, or trees, to build. The max_depth decides how detailed each tree can get. The learning_rate sets how big each step should be as the model tries to fix its errors, and the criterion is what the model uses to measure how good each tree’s splits are.

    Next, we bring in the ensemble module from the sklearn (scikit-learn) library. From there, we’ll use the GradientBoostingRegressor class, which is tailor-made for building gradient boosting models for regression problems. We’ll then create an instance of this class called gradient_boosting_regressor_model and pass in our params dictionary. This step gets the model ready with all our chosen settings before we start training it.

    Once that’s done, we call the .fit() method on our model and feed it the input features (your independent variables) and the target values (your dependent variable). This is where the magic happens — the .fit() method kicks off the learning process. The model builds one tree at a time, and each new tree learns from the mistakes made by the ones before it. With every round, it keeps getting better at predicting and reduces the overall error bit by bit.

    When training wraps up, you’ll see the fully built GradientBoostingRegressor model printed out in the output. It’ll list all its attributes, including both the default and customized parameters you set — things like alpha, criterion, init, learning_rate, loss, max_depth, max_features, max_leaf_nodes, min_impurity_decrease, min_impurity_split, min_samples_leaf, min_samples_split, min_weight_fraction_leaf, n_estimators, n_iter_no_change, presort, random_state, subsample, tol, validation_fraction, verbose, and warm_start. Each of these knobs and switches changes how the model behaves while training or predicting. For instance, subsample controls how much of your data is used in each round, while random_state keeps things consistent every time you run it.

    Getting comfortable with these parameters will really help you fine-tune your model for different regression tasks. Adjusting them carefully lets you find the right balance between training speed, accuracy, and avoiding overfitting.

    By following this process, you’re laying down the groundwork for implementing Gradient Boosting Regression in Python using scikit-learn. Once you’ve got this version working, you can start exploring bigger datasets, more advanced parameter tuning, or even plugging it into a larger machine learning workflow.

    Read more about how to implement machine learning models in Python and optimize performance with practical guides Understanding Gradient Boosting Algorithm in Machine Learning

    Evaluating the model

    Now that we’ve trained our Gradient Boosting Regression model, it’s time to check how well it actually performs. This step is all about evaluating how effectively the model has learned from the data. Doing this not only tells us how accurate our model is, but it also gives us clues about where it could still use a little fine-tuning.

    Before jumping straight into the numbers, it’s always a good idea to take a look at what the model’s doing visually. Seeing the results on a plot helps you get an instant feel for how closely the model’s predictions match the actual data. To do this, I’ve plotted the feature variable (x_feature) against the predicted values, as shown in the figure below. This visualization gives you a clear picture of how tightly the model’s predictions follow the real trend in the data. When the points and the regression line are hugging each other closely, that’s your sign that the model has picked up the pattern really well.

    From the plot, you can clearly see that the model fits the data quite nicely. The predicted points line up almost perfectly with the actual ones, showing that the model has learned the trend without going too far into overfitting or underfitting. Getting this kind of visual confirmation is a good sanity check before you start crunching numbers. It shows that your algorithm is behaving as expected.

    To make this plot, we’re using the Pyplot module from the matplotlib library, which is great for building quick and easy visualizations. Here’s what happens step by step:

    1. First, we set the figure size using the figsize parameter so the plot is large enough to see everything clearly.
    2. Next, we use the title() function to give the plot a name that explains what it shows — in this case, the relationship between the feature and the predicted target values.
    3. Then, we plot the scatter points using scatter(), where we pass both the feature and target values. These dots show the actual data, so you can compare them to what the model predicts.
    4. Finally, we use plot() to draw the regression line for the predicted values. We feed in the feature values along with their corresponding predictions and pick a color that helps tell the line apart from the scatter points.

    With this plot, you can quickly see how well the Gradient Boosting Regression model captures the relationship between input and output values.

    After we’ve looked at things visually, it’s time to back it up with numbers — this is where we measure just how accurately the model fits the data. Thankfully, scikit-learn (sklearn) gives us a bunch of handy evaluation metrics that make this super easy. These metrics check how close the model’s predictions are to the actual values, giving us a clear, numerical picture of its performance.

    In our example, the model’s fitment score — also known as the R² score — comes out to around 98.90%. That means our model explains about 98.9% of the variation in the target variable, which is pretty impressive. Only a tiny bit of the variation is left unexplained. A score that high tells us the Gradient Boosting Regression model is performing with excellent accuracy.

    This level of performance isn’t surprising, since Gradient Boosting models are known for being great at finding and learning complex, nonlinear patterns in data by combining several weak models into one strong ensemble. Even though these results look amazing, it’s still a smart idea to validate the model further — maybe by testing it on unseen data or using cross-validation — just to make sure it performs just as well outside the training set.

    By blending both visual and numerical checks, we get the best of both worlds. The visualization helps us understand how well the model predicts in a way that’s easy to see, while the metrics give us solid statistical proof of its accuracy. Together, they confirm that the Gradient Boosting Regression model did a fantastic job fitting the data and reaching a high level of predictive power.

    Read more about how to evaluate machine learning models effectively and ensure high performance with detailed metrics and visual analysis How to Evaluate Machine Learning Models

    Conclusion

    In conclusion, Gradient Boosting Regression (GBR) is a powerful machine learning technique that excels at predicting continuous values by combining multiple decision trees to form a robust predictive model. By using gradient descent to minimize loss, GBR effectively enhances prediction accuracy while maintaining flexibility and minimizing the need for extensive data preprocessing. Key hyperparameters like the number of estimators, learning rate, and maximum depth significantly impact the model’s performance, offering users a wide range of customization options. As GBR continues to gain traction in machine learning applications, mastering its implementation in Python will equip you with a versatile tool for solving complex regression tasks.

    Looking ahead, future developments in GBR may bring even more advanced optimization techniques, allowing for improved model performance on larger datasets with even less data preprocessing. Stay tuned as Gradient Boosting continues to evolve!

    Master Gradient Boosting for Classification: Enhance Accuracy with Machine Learning

  • Master TypeScript Project Setup with JavaScript and GTS

    Master TypeScript Project Setup with JavaScript and GTS

    Introduction

    Setting up a project with TypeScript, JavaScript, and Google TypeScript Style (GTS) is the foundation for building cleaner, more maintainable code. This guide walks you through configuring TypeScript from scratch, compiling it into JavaScript, and integrating GTS for consistent, high-quality code formatting. By mastering this workflow, developers can streamline their setup process, enhance linting precision, and follow best practices for scalable TypeScript projects.

    What is Google TypeScript Style (GTS)?

    Google TypeScript Style, or GTS, is a tool that helps developers write clean and consistent TypeScript code. It combines a code style guide, a linter, and an automatic code fixer into one package. This means it checks your code for errors, enforces good formatting, and can automatically fix small issues. GTS makes it easier to start new TypeScript projects by providing ready-to-use settings, so developers can focus on building rather than configuring tools.

    Step 1 — Starting the TypeScript Project

    Alright, let’s get your typescript project rolling! The first thing you’ll want to do is create a new folder that’s going to be home to everything you build. Think of it like setting up a workspace where all your files, configurations, and compiled javascript code can live happily together.

    Open your terminal and run this command:

    $ mkdir typescript-project

    Once that’s done, go ahead and jump into that directory with:

    $ cd typescript-project

    This simple move ensures that everything you install or configure will stay neatly inside this one folder instead of spreading across your whole computer. Trust me, keeping things scoped here saves you headaches later.

    Now that your workspace is ready, it’s time to install TypeScript. This step gives you all the tools you need to write and compile your TypeScript code into JavaScript. Run this command:

    $ npm i typescript –save-dev

    Here’s the thing, that --save-dev flag might look small, but it’s pretty important. What it does is tell your system that TypeScript is a development dependency, meaning it’s only needed while you’re coding—not when your app goes live. This keeps your final deployment light and efficient but still gives you everything you need to code like a pro during development.

    Once TypeScript is up and running, it’s time to officially initialize your project. Think of this as flipping the switch that tells your system, “Hey, we’re doing TypeScript here!” You can do that with this command:

    $ npx tsc –init

    Now, npx is like your handy assistant that comes built into npm. It lets you run executables right from your project without needing to install them globally. It’s especially great when you’re juggling multiple projects that might need different versions of tools.

    The tsc part stands for “TypeScript Compiler,” and that’s the magic command that turns your TypeScript files (.ts) into JavaScript files (.js).

    When you add the --init flag, this command automatically creates a file called tsconfig.json inside your project folder. This file is super important because it tells the compiler how to behave. It includes options for where your compiled code should go, what version of JavaScript to target, and even how your modules should be resolved. Having this file keeps your build process predictable, no matter which computer or teammate is working on it.

    Want to peek inside and see what’s happening? Open it up in your favorite text editor:

    $ nano tsconfig.json

    When you open it, you’ll see a bunch of options, many of them commented out. Don’t worry, that’s totally normal. The file is designed to give you flexibility without overwhelming you right away. Here’s a little sneak peek of what it looks like:

    typescript-project/tsconfig.json
    {
      “compilerOptions”: {
        /* Visit https://aka.ms/tsconfig.json to read more about this file */
        /* Projects */
        // “incremental”: true,                                    /* Enable incremental compilation */
        // “composite”: true,                                         /* Enable constraints that allow a TypeScript project to be used with project references. */
        // “tsBuildInfoFile”: “./”,                                         /* Specify the folder for .tsbuildinfo incremental compilation files. */
        // “disableSourceOfProjectReferenceRedirect”: true, /* Disable preferring source files instead of declaration files when referencing composite projects */
        // “disableSolutionSearching”: true,                                                       /* Opt a project out of multi-project reference checking when editing. */
        // “disableReferencedProjectLoad”: true,                                                       /* Reduce the number of projects loaded automatically by TypeScript. */
        …
      }
    }

    Each of those lines does something specific. For example, turning on incremental makes your recompilations faster because TypeScript remembers what it did before. The composite option is super handy if you’re dealing with multiple projects that depend on one another.

    You can also tweak a few things to make your setup feel more your own. One helpful tip is to uncomment the outDir option and set it to "./build". That way, when your TypeScript compiles into JavaScript, all those generated files land neatly in a separate folder instead of mixing with your source files. Keeping your .ts files separate from your .js files keeps everything cleaner and easier to manage.

    Once you’ve got TypeScript installed and your tsconfig.json ready, you’ve officially built the foundation of your project. You can start writing code in .ts files and then compile it into JavaScript whenever you’re ready.

    Quick note before you move on: later in Step 3, you’ll get to use something called Google TypeScript Style (gts). It’s a neat tool that helps you follow best practices and applies standardized settings automatically. Think of it as your friendly code coach that keeps everything neat and consistent while you focus on the fun part—building cool stuff.
    Read more about content best practices TypeScript Handbook: Getting Started with TypeScript (2025)

    Step 2 — Compiling the TypeScript Project

    Alright, time to dive into some real typescript action! You can now start coding your typescript project using the setup you created in the previous step. This part is where you’ll finally write your first file, compile it into javascript, and see how the typescript compiler works its magic to turn your code into something browsers and servers can actually run.

    So, here’s what you’ll do. Open up your favorite code editor and create a brand-new file called index.ts. This little file is going to be the heart of your project—it’s your starting point where all the fun begins. Go ahead and drop in this code:

    typescript-project/index.ts

    const world = ‘world’;
    export function hello(who: string = world): string {
        return `Hello ${who}! `;
    }

    Pretty simple, right? Yet, it’s powerful. This short but clever snippet shows off typescript’s ability to use type annotations and default parameter values. Basically, the hello function can take an argument named who that’s always expected to be a string. But here’s the neat part—if you don’t pass anything in, it’ll just default to 'world'. The function then gives you a cheerful greeting using template literals, which makes your code cleaner and easier to read. You could say this little piece of code is a great example of typescript’s love for type safety and readability. It helps keep your code neat, less buggy, and easy to understand for anyone who works with it later.

    Once your typescript code is saved, it’s showtime! Now your project is ready to be compiled. Compilation might sound fancy, but it’s basically just turning typescript files (those .ts ones) into javascript files (the .js ones) so that browsers or Node.js can understand them. To get this rolling, open your terminal and run this command:

    $ npx tsc

    When you hit enter, the typescript compiler will look inside your tsconfig.json file to see how you’ve set things up. It’ll then transform your .ts files into .js and save the results wherever your configuration says they should go. If earlier you set the outDir in your config to ./build, then you’ll see your brand-new compiled files appear right there in that folder.

    Now, what does the compiler actually give you? Two handy files:

    • An index.js file, which contains your javascript code ready to run.
    • And an index.js.map file, which helps you debug your original typescript while working with your compiled javascript.

    This source map is like a translator that points you back to the exact TypeScript line when something goes wrong.

    Let’s take a look at what your compiled javascript might look like:

    typescript-project/build/index.js

    “use strict”;
    Object.defineProperty(exports, “__esModule”, { value: true });
    exports.hello = void 0;
    const world = ‘world’;
    function hello(who = world) {
        return `Hello ${who}! `;
    }
    exports.hello = hello;

    Not too scary, right? This is your typescript code transformed into a form that javascript environments understand perfectly. The "use strict"; line ensures that your code runs in strict mode, which is a safety feature in javascript that catches sneaky bugs early on. The exports lines at the bottom? Those make your hello function reusable, meaning you can import it into other files whenever you want. It’s a great example of how typescript keeps your code modular and organized while smoothly converting it into usable javascript.

    But let’s be honest—running the compiler manually every time you tweak a file can get tiring pretty quickly. No one wants to retype npx tsc fifty times a day. Luckily, typescript has your back with something called “watch mode.” This handy feature automatically keeps an eye on your files and recompiles them whenever you make changes. To turn it on, just run:

    $ npx tsc -w

    Once watch mode is active, typescript will quietly monitor your source files in the background. Every time you save a change, it instantly recompiles the updated code. It’s like having a super-efficient assistant who’s always on duty making sure your code is up to date. This little trick makes development way smoother and helps you focus more on building rather than babysitting your compiler.

    So now, you’ve learned how the typescript compiler works, how to turn your .ts files into working javascript, and how to use features like source maps and watch mode to keep things flowing. By the way, this setup is already efficient, but we can make it even better.

    At this stage, your typescript project is running smoothly and ready for the next level. To make it even more professional, you’ll soon bring in a linter. Think of it as your friendly code coach that automatically checks for small mistakes, weird formatting, or anything that breaks consistency. Adding a linter (like the one that comes with google typescript style, known as gts) helps you catch errors before they become real problems and keeps your code clean, reliable, and easy to maintain as your project grows.

    Read more about content best practices TypeScript Handbook: Compiler Options and Configuration (2025)

    Step 3 — Using Google TypeScript Style to Lint and Correct Your Code

    Alright, let’s talk about something that might sound a bit technical but is actually super helpful for keeping your TypeScript projects clean and professional. Using a linter when you’re coding is like having a friendly proofreader for your code. It helps you spot typos, weird spacing, or little mistakes before they turn into actual bugs. It’s also great for keeping your code readable, consistent, and easy for others to understand.

    You see, a linter is basically a tool that scans your code for potential problems, such as syntax errors or formatting issues. It’s like that colleague who gently taps you on the shoulder and says, “Hey, you missed a semicolon there.” By adding a linter to your workflow, you can fix issues before they sneak into your app and cause headaches later.

    Now, there’s also something called a style guide, and it works hand in hand with your linter. Think of it like a shared rulebook for how your team’s code should look—how it’s spaced, how variables are named, and how functions are structured. This is especially important when multiple people are working together on the same project because it keeps everything looking neat and uniform. Plus, having a consistent TypeScript code style makes your life way easier when you come back months later and try to remember what you were doing.

    One of the most popular tools to manage all this is ESLint. You might’ve heard of it—it’s basically the linter superhero for modern development. ESLint works beautifully with most IDEs, meaning as you type your TypeScript code, it gives you real-time hints, warnings, and even automatic fixes. It’s like spellcheck for your programming life.

    So, now that your TypeScript project is all set up and humming along, you can take things to the next level by bringing in more tools to simplify your workflow. Rather than fiddling with configurations and rules inside tsconfig.json, you can use something that does the heavy lifting for you—Google TypeScript Style, also known as gts.

    Google TypeScript Style (gts) is like a one-stop shop for keeping your code sharp. It’s a style guide, linter, and formatter rolled into one handy package. It was created to help developers quickly launch new TypeScript projects while still sticking to industry best practices. The great thing about gts is that it takes care of the boring setup work for you so you can spend more time actually writing cool stuff instead of getting lost in configurations.

    One of the things that makes gts so awesome is that it comes with its own ready-made configuration. It’s what’s called “opinionated,” which just means it has a strong set of default rules based on years of developer experience. You don’t have to start from scratch or tweak much at the beginning—it just works right out of the box. And if you ever want to fine-tune it later, you totally can.

    To get gts installed, open your terminal and run:

    $ npm i gts –save-dev

    That’s it! This command adds gts to your development environment, giving you access to all of its linting and formatting tools. Once that’s done, initialize it by typing:

    $ npx gts init

    When you run that, gts sets everything up for you automatically. It creates all the important configuration files, like tsconfig.json, a linting setup, and even a package.json if you don’t already have one. It’s basically like pressing the “easy button” for your project setup.

    Even better, once you’ve initialized it, gts adds handy npm scripts to your package.json file. These scripts make it super easy to do common tasks, such as compiling your code or checking for linting errors. For example, to compile your project, you can run:

    $ npm run compile

    And to check for linting issues or formatting mistakes, just run:

    $ npm run check

    These little commands save time and keep your workflow consistent. No more typing long commands or remembering complex setups—just quick and simple shortcuts that work every time.

    It’s a good idea to install TypeScript before you install gts. This ensures compatibility and access to the latest features.

    Sometimes gts might lag behind TypeScript updates a bit, so it might suggest you downgrade your version. If that happens, don’t panic—you can tell gts to leave your setup as is. It’s usually fine, especially if you’re using newer features.

    Also, gts uses ESLint under the hood, and the ESLint plugin for TypeScript supports a specific range of TypeScript versions. So, if you happen to be using a newer version that’s not officially supported yet, ESLint might show a small warning. Most of the time, everything will still work perfectly. But if something weird happens, you can always downgrade to a version that’s guaranteed to play nicely. For example, you can install a specific version like this:

    $ npm i [email protected] –save-dev

    Once that’s sorted, gts will be fully integrated into your TypeScript project. You’ll now have a professional-grade linting and formatting system built right in. It’s like having a personal assistant who keeps your code tidy and error-free while you focus on building cool stuff.

    And here’s the best part—when you use gts for your future TypeScript projects, you won’t have to redo all that setup ever again. You can just run the same commands and boom, everything’s ready to go. It’s fast, efficient, and keeps your codebase in tip-top shape.

    Now, even though gts is mostly automatic, you’re still in control. If you ever feel like adjusting some of its built-in rules to fit your own project or team preferences, it’s super easy. Just create a file called .eslintrc in your project folder and extend the existing Google TypeScript Style configuration like this:

    extends:
      – ‘./node_modules/gts’

    This setup lets you tweak the default Google TypeScript Style rules however you like. Maybe you prefer different indentation, naming conventions, or spacing—it’s all up to you. You’re still following best practices but with your own flavor on top.

    So, to wrap this up, using Google TypeScript Style with gts gives you a big productivity boost. You get automatic linting, consistent formatting, and built-in coding standards—all without needing to mess around with complex configurations. It keeps your TypeScript and JavaScript projects looking sharp, working smoothly, and ready for teamwork.

    Read more about content best practices Google TypeScript Style Guide (GTS) on GitHub (2025)

    Conclusion

    Mastering TypeScript, JavaScript, and Google TypeScript Style (GTS) gives developers full control over how they build, compile, and maintain clean, consistent code. By learning how to manually configure and initialize a TypeScript project, you gain the flexibility to customize every part of your setup—from directory structure to linting rules—without depending on starter templates or frameworks.

    With GTS integrated, your workflow becomes smoother, ensuring standardized formatting, powerful linting, and long-term scalability for any TypeScript-based application. As modern development continues to evolve, staying familiar with these tools and practices will help you write better code, collaborate more effectively, and adapt to new TypeScript and JavaScript trends in the years ahead.

    In short, mastering GTS-driven TypeScript setup today sets the foundation for cleaner, more efficient JavaScript development tomorrow.

    Add JavaScript to HTML: Optimize with External .js Files and Defer Attribute (2025)

  • Nodemon: How to Auto-Restart Node.js Apps on Save

    Nodemon: How to Auto-Restart Node.js Apps on Save

    Introduction

    nodemon is a CLI utility that watches files and restarts your Node.js process on save. Set it up with npm, add package.json scripts, and tune watch, ignore, and delay flags for a tighter dev loop. This article walks through installation, setup, and configuration with examples using Express, plus cross-platform terminals on Linux, macOS, and Windows.

    What is ?

    Prerequisites

    If you want to follow along with this article, you will need Node.js installed on your own machine, so you can try everything right where you work.

    To set this up without relying on another guide, download the official installer for your operating system or use a package manager to install Node.js and create a local development environment that includes npm and the Node.js runtime. Common options include:

    • apt on Ubuntu
    • Homebrew on macOS
    • Chocolatey on Windows

    After installation, confirm everything is ready by running simple version checks such as node -v and npm -v.

    $ node -v $ npm -v

    I tested this tutorial with Node.js v17.1.0, npm v8.1.2, nodemon v2.0.15, and express v4.17.1, so that is the baseline I used.

    Component Version tested
    Node.js v17.1.0
    npm v8.1.2
    nodemon v2.0.15
    express v4.17.1

    These specific versions show the setup used during testing; newer stable versions usually work as well, but checking your local versions helps make sure behavior stays consistent while you follow the steps.

    These steps work for the most recent releases of Ubuntu:

    • Ubuntu 24.04
    • Ubuntu 22.04
    • Ubuntu 20.04

    If you are on Ubuntu version 18.04 or older, I recommend you upgrade to a newer release, since the older versions no longer get support.

    Rather than linking to another set of upgrade instructions, keep in mind that moving to a supported release helps you keep receiving security updates and compatibility with modern tools; you can perform the upgrade using your distribution’s standard release upgrade tools or by following the official Ubuntu upgrade workflow appropriate to your current version.

    Learn more in the Official Node.js Installation Guide.

    Install nodemon

    Step 1: Installing Nodemon

    First, you will need to install nodemon on your machine, because that is a simple way to get going quickly on your own setup. Install the utility either globally or locally on your project using npm or yarn, and pick the option that feels right for how you like to work.

    Global Nodemon Installation

    You can install nodemon globally with npm:

    $ npm install nodemon –global

    so it is available everywhere on your system without extra setup. Or with yarn:

    $ yarn global add nodemon

    if you prefer using yarn for your tools.

    Local Nodemon Installation

    You can also install nodemon locally, which keeps it right inside your project so it travels with your code. When performing a local installation, you can install nodemon as a dev dependency with --save-dev (or --dev), which helps keep it out of production builds while you develop.

    Install nodemon locally with npm:

    $ npm install nodemon –save-dev

    when you want to use npm and keep things consistent. Or with yarn:

    $ yarn add nodemon –dev

    when yarn is your go to package manager.

    With a local install you will not be able to use the nodemon command directly at first.
    command not found: nodemon

    You can execute the locally installed package:

    $ ./node_modules/.bin/nodemon.js [your node app]

    which runs the project scoped binary directly without needing a global install. You can also use it in npm scripts or with npx, which is handy for keeping commands short and easy to remember.

    Choosing Between Global and Local

    To add clarity when choosing between installation methods: a global installation makes the nodemon command available system-wide, which can be convenient for quick experiments across multiple projects, however, it ties your workflow to a single machine level version. A local installation, by contrast, keeps nodemon inside your project’s dependencies, ensuring teammates and CI environments use the exact same version, which improves reproducibility and avoids “works on my machine” issues, and that seems like a big win for team projects.

    Troubleshooting PATH and Verifying Installation

    After a global install, if the nodemon command is still not recognized, open a new terminal session so your shell reloads its PATH, or check that the global package directory is included in your environment’s PATH variable, just in case that path update did not stick. You can confirm availability at any time by running a quick version check such as nodemon -v, this helps make sure that your shell can find the executable before you proceed, which can save you a bit of head scratching later.

    Everyday Development

    When working with a local install, the provided direct path invocation (./node_modules/.bin/nodemon.js [your node app]) guarantees that the project scoped binary runs even if the global command is unavailable, which is a nice safety net. For everyday development, it is often more convenient to call the local binary through package scripts, for example, by defining a dev script in package.json that invokes nodemon, or to rely on npx to resolve and execute the locally installed version automatically, which keeps your workflow smooth. Both approaches keep commands short while maintaining consistency across different environments, and they help everyone on the team run the same setup without extra effort.

    What Nodemon Does

    Finally, remember that nodemon itself does not change your application code or Node.js, it simply monitors your files and restarts your process when changes are detected, which is exactly what you want during active development. Ensuring that it is properly installed, discoverable by your shell, and version aligned with your team’s setup will make the rest of your workflow smoother and more predictable, and you will feel the difference as you iterate faster.

    Explore installation methods, usage commands, and configuration in the nodemon official documentation.

    Set up Express project with nodemon

    Step 2, Setting Up an Example Express Project with nodemon, just so we are moving together with a clear plan.

    You can use nodemon to start a Node script, and you will see it feels straightforward once you try it yourself.

    In practice, nodemon works like a small helper that sits on top of the Node runtime: it launches your script, it keeps an eye on the file system for any changes, and it automatically restarts the process whenever a watched file is edited, which saves you from stopping and starting the app by hand over and over again.

    For example, if you have an Express server set up in a server.js file, you can start nodemon and watch for changes like this:

    $ nodemon server.js

    and you can think of this as flipping on live monitoring for your app.

    This command should run from your project’s root directory (where server.js lives), and nodemon will invoke Node under the hood to execute that file while enabling live reload behavior so your edits show up fast.

    You can pass in arguments the same way as if you were running the script with Node:

    $ nodemon server.js 3006

    and that keeps the experience familiar. This means any additional values you include after the script name are forwarded to your application and can be accessed via process.argv inside your code, which is handy when you need quick flags or ports.

    If you later add nodemon specific flags, remember that script arguments and nodemon options are different; nodemon forwards only the extra values that appear after the script path to your program, so keep that order in mind.

    Every time you make a change to a file with one of the default watched extensions (.js, .mjs, .json, .coffee, or .litcoffee) in the current directory or a subdirectory, the process will restart, and that is the magic that keeps your feedback loop tight.

    This default behavior covers most Node.js back end use cases; if you organize your code into nested folders, nodemon continues to monitor those subdirectories recursively, ensuring edits to route handlers, utility modules, or configuration files immediately trigger a restart.

    Let’s write an example server.js file that outputs the message: Dolphin app listening on port ${port}!, and you will see the log message pop up when things are wired correctly.

    const express = require(‘express’) const app = express() const port = 3000 app.listen(port, ()=> console.log(Dolphin app listening on port ${port}!))

    This minimal server creates an Express application, binds it to a specific port, and prints a confirmation message once the app begins listening for incoming HTTP requests, so you know it is alive.

    Run the example with nodemon:

    $ nodemon server.js

    and give it a try to see the automatic restarts in action. When you execute this command, nodemon starts your Node process and keeps it running in the foreground, watching for changes so you can iterate quickly without breaking your flow.

    The terminal output will display the following output:

    Output

    [nodemon] 2.0.15 [nodemon] to restart at any time, enter rs [nodemon] watching path(s): . [nodemon] watching extensions: js,mjs,json [nodemon] starting node server.js Dolphin app listening on port 3000!

    Each line in this output shares useful status information: the installed nodemon version, the explicit hint for manual restarts using rs, the set of path patterns and file extensions being observed, the exact command nodemon is running behind the scenes, and finally the application’s own startup log confirming that your server is active, which is reassuring.

    While nodemon is still running, let’s make a change to the server.js file, and we will watch what happens next. Change the output to a different message: Shark app listening on port ${port}!, and save the file to trigger a restart.

    The terminal output will display the following output:

    Output

    [nodemon] restarting due to changes… [nodemon] starting node server.js Shark app listening on port 3000!

    This shows the automatic reload cycle at work: after you save the file, nodemon detects the change, it restarts the Node process cleanly, and your updated log line appears, which confirms the new code path is live without any extra commands. The terminal output from the Node.js app is displaying the new changes, so you can be pretty sure your edit landed.

    You can restart the process at any time by typing rs and hitting ENTER, which is a quick way to reset things on demand. This manual trigger is helpful when you change environment variables or want to reset state without editing a file, and rs tells nodemon to perform an immediate, clean restart so you can get back to testing.

    Alternatively, nodemon will also look for a main file specified in your project’s package.json file:

    { // … “main”: “server.js”, // … }

    which gives it a clear entry point even if you do not pass a file on the command line. Here, the main field indicates the entry point of your application; if nodemon starts without an explicit file and it finds this field, it will use the specified path as the default script to run, which keeps things simple.

    If a main file is not specified, nodemon will search for a start script:

    package.json

    { // … “scripts”: { “start”: “node server.js” }, // … }

    and that is another common and friendly convention. In this configuration, the scripts.start entry defines how your app is usually launched with the package manager; nodemon can notice this convention and use it to figure out the correct entry script when none is provided on the command line, which helps keep commands short.

    Once you make the changes to package.json, you can then call nodemon to start the example app in watch mode without having to pass in server.js, which tidies things up. This makes your workflow more concise: running nodemon from the project root is enough, and it will figure out the right file to execute based on the main field or start script, letting you focus on coding rather than on typing the launch command each time, which feels nicer.

    For a quick Express setup and hello world example, visit the Express Hello World guide.

    Nodemon options and usage

    Step 3, nodemon Options, you can change the configuration settings available to nodemon. This means you can shape how nodemon watches your project files, how it restarts your app, and which runner it uses to execute your code, all while leaving your actual application logic alone so you can focus on building. Let’s go over some of the main options, and we will keep it simple and clear.

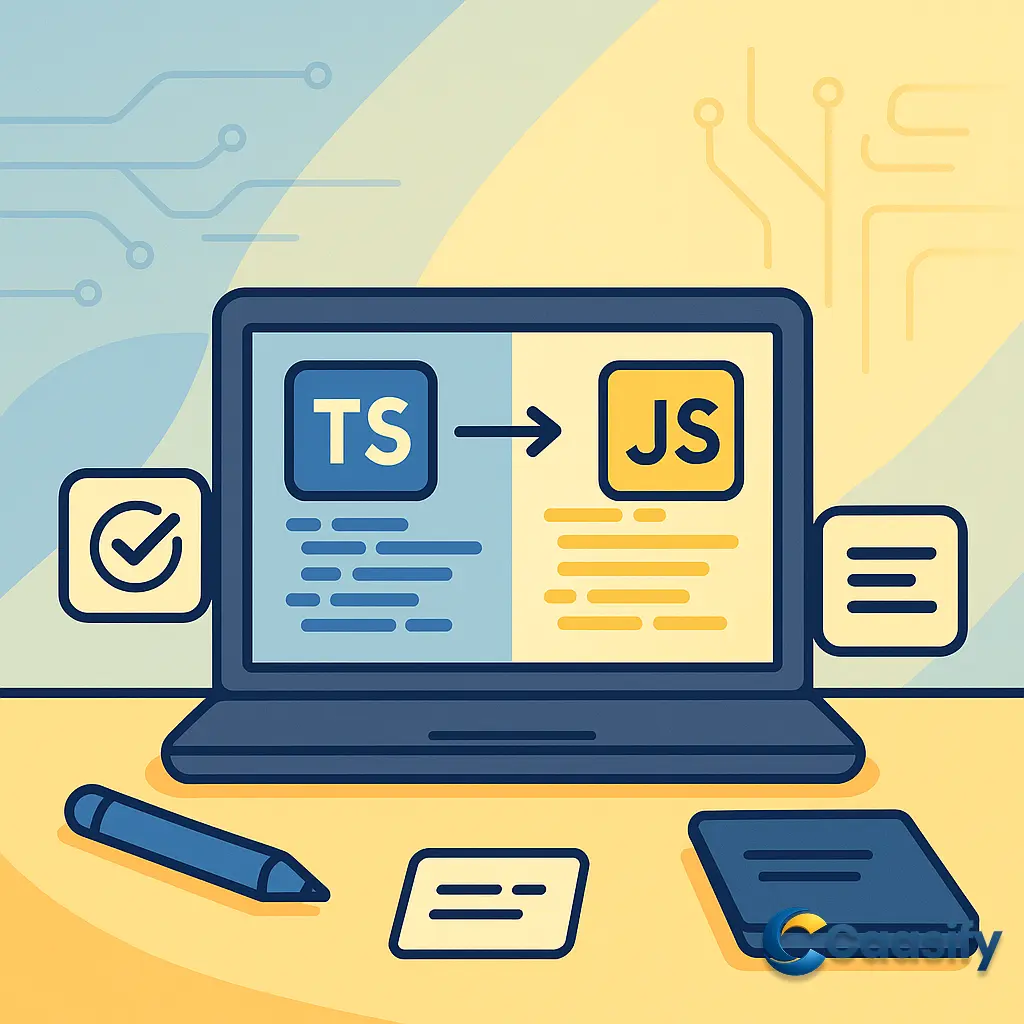
    • --exec: Use the --exec switch to point to a binary that should run the file. For example, when you pair it with the ts-node binary, --exec becomes handy to watch for changes and run TypeScript files without extra steps. In practical terms, --exec swaps the default Node runtime for another compatible command, making sure that every automatic restart uses the exact toolchain you want, for example a TypeScript runtime during development.

    • --ext: Specify different file extensions to watch. For this switch, provide a comma separated list of file extensions, for example --ext js,ts. Customizing extensions helps when your project includes multiple source types, and by listing them clearly, you make sure nodemon restarts only when relevant files change, which boosts performance and cuts down on unnecessary restarts.

    • --delay: By default, nodemon waits for one second to restart the process when a file changes, but with the --delay switch, you can pick a different wait time. For example:

      $ nodemon –delay 3.2

      for a 3.2 second delay. A delay helps debounce rapid, successive file writes, for example those triggered by code formatters or build tools, so your server restarts once per change set instead of many times in quick bursts.

    • --watch: Use the --watch switch to specify multiple directories or files to watch. Add one --watch switch for each directory you want to watch. By default, the current directory and its subdirectories are watched, so with --watch you can narrow that to only specific subdirectories or files. Targeted watching is especially useful in monorepos or larger projects where you want to limit restarts to a small set of paths, which keeps the feedback loop fast.

    • --ignore: Use the --ignore switch to skip certain files, file patterns, or directories. Leaving out paths such as temporary build outputs or large dependency folders prevents needless restarts and helps reduce CPU usage during active development.

    • --verbose: A more detailed output with information about what file or files changed to trigger a restart. Verbose mode is helpful for figuring out why nodemon restarted, and it helps you check that your ignore and watch patterns are set up correctly.

    You can view all the available options with the following command:

    $ nodemon –help

    When you run this help command, nodemon prints a comprehensive, version specific list of flags and defaults so you can quickly check behavior without leaving your terminal.

    Using these options, let’s create the command to satisfy the following scenario, watching the server directory, specifying files with a .ts extension, ignoring files with a .test.ts suffix, executing the file (server/server.ts) with ts-node, waiting for three seconds to restart after a file changes,

    $ nodemon –watch server –ext ts –exec ts-node –ignore ‘.test.ts’ –delay 3 server/server.ts

    In this single command, --watch server limits observation to the server folder, --ext ts makes sure only TypeScript source changes trigger restarts, --exec ts-node runs the program with a TypeScript aware executor, --ignore '.test.ts' stops unit test updates from restarting the app, and --delay 3 slows restarts by three seconds to avoid thrashing during rapid edits.

    The terminal output will display the following output,

    [nodemon] 2.0.15 [nodemon] to restart at any time, enter rs [nodemon] watching path(s): server [nodemon] watching extensions: ts [nodemon] starting ts-node server/server.ts

    This output confirms the active configuration, it shows the installed nodemon version, it reminds you that typing rs forces a manual restart, it lists the exact paths and extensions being monitored, and it displays the precise command nodemon is running on each start.

    This command combines --watch, --ext, --exec, --ignore, and --delay options to meet the conditions for our scenario. Bringing these options together gives you a predictable development loop where only meaningful changes in the specified TypeScript sources trigger controlled restarts, which improves productivity and keeps your runtime steady during development.

    Explore flags, watch patterns, ignores, delays, and workflows in the Nodemon Usage and CLI Options.

    Nodemon configuration (nodemon.json or package.json)

    Step 4, nodemon Configurations, in the previous example, adding configuration switches when you run nodemon can get a bit tedious, you know. Repeatedly typing long command line flags increases the chance of typos, makes scripts harder to remember, and can lead to small differences between people’s environments that are easy to miss.

    A better fix for projects that require complicated configurations is to define these options in a nodemon.json file so everything stays in one clear place. This file can live at the root of your project, it is easy to commit to version control, and it allows every teammate and any automation environment to rely on the same behavior without extra setup, which helps a lot.

    For example, here are the same configurations as the previous command line example, but placed in a nodemon.json file:

    {
      “watch”: [“server”],
      “ext”: “ts”,
      “ignore”: [“*.test.ts”],
      “delay”: “3”,
      “execMap”: {
        “ts”: “ts-node”
      }
    }

    This JSON mirrors the corresponding command line flags one to one: "watch" limits which folders trigger restarts, "ext" defines the file types to observe, "ignore" excludes patterns that would otherwise cause unnecessary reloads, and "delay" debounces rapid edits so restarts happen in a controlled way.

    Take note of the use of execMap instead of the --exec switch, just to keep the idea clear. execMap lets you specify binaries for certain file extensions, which is helpful and straightforward. In practice, this means you can associate ".ts" files with a TypeScript-friendly executor such as "ts-node" so that any TypeScript entry point runs through the correct runtime during development, without having to remember to pass the --exec flag each time, which is a nice time saver.

    This approach is especially helpful when different teams work with mixed file types since the execution mapping is captured in configuration rather than in ad hoc shell commands, which keeps things simple.

    Alternatively, if you would rather not add a nodemon.json config file to your project, you can add these configurations to the package.json file under a nodemonConfig key:

    {
      “name”: “nodemon-example”,
      “version”: “1.0.0”,
      “description”: “”,
      “nodemonConfig”: {
        “watch”: [“server”],
        “ext”: “ts”,
        “ignore”: [“*.test.ts”],
        “delay”: “3”,
        “execMap”: {
          “ts”: “ts-node”
        }
      },
      // …
    }

    Keeping configuration inside package.json can simplify project maintenance by centralizing settings in a single file that most developers already edit regularly, and that makes life easier. It also ensures your nodemon behavior travels with the project wherever package.json goes, for example in shared repositories or continuous integration systems, so everyone stays in sync.

    Be sure that the JSON remains valid and that commas and brackets are correctly placed, since malformed JSON will prevent tools from reading it properly, and that can slow you down.

    Once you make the changes to either nodemon.json or package.json, you can then start nodemon with the desired script:

    $ nodemon server/server.ts

    nodemon will pick up the configurations and use them, and you can check that quickly in the output. This way, your configurations can be saved, shared, and repeated to avoid copy and pasting or typing errors in the command line, which helps keep things tidy.

    In practical day-to-day use, this means you launch nodemon with a short, memorable command while still benefiting from all the custom behavior defined in your configuration files; as your project grows, you can update these settings in one place to refine watch paths, add or remove extensions, or adjust delays without rewriting your CLI commands.

    Learn how to structure nodemon.json and package.json settings in the Nodemon Config Files reference.

    Conclusion

    Nodemon makes local development faster by auto-restarting Node.js apps on save, and you now know how to install it, launch projects, and fine-tune watch, ignore, and delay settings through package.json or nodemon.json. Use nodemon to auto-restart Node.js on save for a faster dev loop.

    Keep configurations versioned with your code, and adjust them as your stack evolves with TypeScript, ESM, and test runners. For larger services, consider pairing watch mode with logs, environment variables, and CI to keep feedback quick and reliable. As Node.js tooling advances, expect lighter file watchers and smarter reloads to make nodemon even more seamless in modern workflows.

    Install and Use Yarn Package Manager with Node.js for Efficient Development (2025)