Category: Uncategorized

  • Hypixel IP Address: The Ultimate Guide to Connecting Smoothly

    Hypixel IP Address: The Ultimate Guide to Connecting Smoothly

    Evaluating Your Options: Which Connection Method Suits Your Setup?

    When it comes to connecting to the Hypixel Minecraft server, the method you choose can have a significant impact on your gameplay experience. Whether you’re playing on a PC, console, or mobile device, understanding how to connect properly to the Hypixel IP address is essential for optimizing your connection and avoiding frustrating lag or disconnects. In this section, we’ll explore different connection methods, including direct connections and third-party services, as well as how network stability and device setup can affect your Hypixel experience. By the end of this guide, you’ll have the knowledge to choose the connection method that best suits your needs.

    Direct Connection vs. Third-Party Servers

    When connecting to the Hypixel server, you have two main options: connecting directly or using third-party services such as a VPN or proxy. Each of these methods has its own advantages and disadvantages.

    • Direct Connection: This is the simplest and most straightforward way to connect to Hypixel. By using the official Hypixel IP address, mc.hypixel.net, you are directly accessing the server without any intermediaries. This method usually provides the best performance in terms of speed and stability because there are no additional hops between you and the server. For most players, a direct connection is the best option to reduce latency and avoid unnecessary complications.

      Example: To connect directly, open Minecraft, go to the “Multiplayer” menu, click “Add Server,” and enter the Hypixel IP address: mc.hypixel.net. Once you click “Done,” you’ll be able to connect directly to the server.

    • Third-Party Servers: Using a third-party service, like a VPN or proxy, can be beneficial in certain cases, such as bypassing geographic restrictions or optimizing routing for better connection quality. However, third-party services can sometimes introduce extra latency, which could affect your gameplay experience. The trade-off is that these services might provide better connections if you’re located far from the Hypixel servers, especially if you’re using a VPN with a server near Hypixel’s network infrastructure.

      Example: If you are located far from the Hypixel server and experience high ping, you can use a VPN service like NordVPN. Choose a server close to a Hypixel data center to reduce your latency. After connecting to the VPN, follow the same steps as the direct connection to enter mc.hypixel.net.

    In general, unless you have specific reasons to use a third-party service, connecting directly to Hypixel is the preferred method for most players.

    Wired vs. Wireless Connections for Optimal Performance

    When it comes to your device’s connection to the internet, you can choose between wired and wireless methods. Each has its own benefits and drawbacks that can affect your Hypixel gameplay.

    • Wired Connection: A wired Ethernet connection is typically more stable and faster than a wireless connection. If you’re looking for the best performance with the least amount of lag, using an Ethernet cable is your best bet. This type of connection minimizes interference, which is especially important when playing multiplayer games like Minecraft where low latency is crucial.

      Example: To connect with a wired connection, plug one end of an Ethernet cable into your router and the other into your device. Once connected, you should see a stable internet connection that will help reduce lag while playing on Hypixel.

    • Wireless Connection: A wireless (Wi-Fi) connection is more convenient, especially if you’re playing on a device that doesn’t have an Ethernet port or if you’re moving around frequently. However, Wi-Fi connections are more susceptible to interference from other devices, walls, and distance from your router. This can lead to higher ping and more frequent disconnections.

      Example: To connect wirelessly, simply connect to your Wi-Fi network by selecting it from the available networks list on your device. While convenient, be aware that the further you are from your router, the more likely you are to experience connection issues.

    If you’re serious about your Hypixel performance and want the best connection, a wired Ethernet connection is the way to go. However, if you value flexibility and convenience, a wireless connection is still a viable option.

    Evaluating Server Stability and Uptime

    A key factor in enjoying smooth gameplay on Hypixel is ensuring that the server you’re connecting to is stable and has minimal downtime. Hypixel is generally known for its reliable uptime, but there are occasional maintenance periods or unexpected outages. Understanding how to check the server’s status can help you troubleshoot issues and avoid frustration.

    • Hypixel’s Status Page: Hypixel provides an official status page where you can check real-time server uptime and performance. This is a great resource if you’re experiencing connectivity issues and want to see if the server is the cause. You can access this page at Hypixel Status, which shows if there are any ongoing problems or scheduled maintenance.
    • Third-Party Tools: You can also use third-party services like MineChecker to monitor Hypixel’s server availability and latency. These tools provide real-time data on the server’s status and can help you determine whether the problem is on Hypixel’s end or yours.

      Example: If you’re experiencing high ping or frequent disconnects, visit MineChecker at MineChecker Hypixel Status. This tool will display the current latency and status of the Hypixel server, helping you identify if the issue is related to Hypixel’s server or your connection.

    Checking server status can save you time when troubleshooting. If Hypixel’s server is down, there’s nothing you can do, but if it’s stable and you’re still having issues, the problem may lie with your network or connection settings.

    Choosing a Cloud Provider for Low-Latency Hypixel Connectivity

    Cloud providers can play a role in improving your connection to Hypixel by reducing latency. While this may not apply directly to players connecting to Hypixel’s public servers, it becomes crucial if you are hosting your own Minecraft server or using cloud-based tools to optimize your Hypixel gameplay.

    • Cloud Providers for Low Latency: Using a cloud service like Amazon Web Services (AWS) or Cloudflare can help reduce latency by hosting your server closer to Hypixel’s infrastructure or by offering faster routing. These providers typically have servers in multiple geographic regions, allowing you to select the one closest to Hypixel’s data centers.

      Example: If you’re hosting your own Minecraft server for friends or a community, you might choose AWS’s EC2 instances or Cloudflare’s services to minimize latency. Both services have data centers around the world, allowing you to select one near Hypixel’s network to ensure your server maintains a low-latency connection.

    For most players connecting to Hypixel directly, using a cloud provider is unnecessary. However, if you’re a server admin or looking to reduce lag while hosting a Minecraft server, cloud providers can help improve performance.


    In conclusion, choosing the best connection method to the Hypixel server depends on your specific needs and setup. Direct connections are generally the best choice for most players, but using a VPN or proxy can help if you’re facing geographic restrictions. Wired connections offer the most stable and fastest speeds, while wireless connections provide convenience at the cost of potential performance. Keeping track of server stability and uptime through Hypixel’s status page or third-party tools can help you troubleshoot connection issues. If you’re hosting your own server or optimizing your connection, consider using cloud providers to further reduce latency. Whatever method you choose, understanding the strengths and limitations of each option will help you enjoy a better Hypixel experience.

    Choosing the Best Network Setup for Hypixel Connection

    To ensure a smooth connection to the Hypixel Minecraft server, it’s essential to configure your network settings correctly. The Hypixel IP address is the gateway to one of the most popular multiplayer servers, but network issues like high latency or connection drops can hinder gameplay. Optimizing your router, DNS settings, server region, and understanding how cloud infrastructure can help can drastically improve your Hypixel experience. In this guide, we’ll walk through the necessary steps to set up the best network configuration for a seamless connection to Hypixel.

    How to Configure Your Router for Optimal Connection

    The first step in optimizing your Hypixel connection settings is configuring your router to prioritize your gaming traffic. This ensures that your network resources are allocated effectively, reducing the chance of lag or interruptions during gameplay.

    1. Accessing Your Router Settings

    To get started, you’ll need to access your router’s settings. This is typically done by entering the router’s IP address in a web browser. Most routers have a default address like 192.168.1.1 or 192.168.0.1. Check your router’s manual for the exact IP address if these don’t work.

    • Open your browser and enter the router’s IP address (e.g., 192.168.1.1).
    • Log in with your admin credentials (usually found on the back of the router or in the manual).

    2. Opening Necessary Ports for Minecraft

    For Minecraft to communicate smoothly with Hypixel, you need to ensure the correct ports are open. The default Minecraft port is 25565.

    Steps to open the port:

    1. In the router’s settings, find the Port Forwarding section.
    2. Add a new rule that forwards TCP traffic to port 25565 (for Minecraft).
    3. Save your changes and reboot the router if necessary.

    This ensures that your Minecraft client can communicate directly with the Hypixel server without being blocked by your router’s firewall.

    3. Enabling Quality of Service (QoS)

    Some routers offer a Quality of Service (QoS) feature, which allows you to prioritize gaming traffic. By setting Minecraft as a high-priority application, you can minimize lag during high network demand.

    • In your router’s settings, find the QoS section.
    • Set Minecraft or your gaming device (e.g., PC, console) as high priority.
    • Save the settings and restart the router.

    By prioritizing Minecraft traffic, you’ll reduce the chances of lag or packet loss, especially when multiple devices are using the same network.

    Adjusting DNS Settings for Better Connectivity

    DNS (Domain Name System) settings play a crucial role in how quickly your device can resolve server addresses, including Hypixel server address. Using a custom DNS provider can significantly improve your latency and reduce the time it takes to connect to the server.

    1. Changing DNS on Windows

    To change your DNS on Windows, follow these steps:

    1. Open Control Panel and go to Network and Sharing Center.
    2. Click Change adapter settings.
    3. Right-click your active network connection and select Properties.
    4. Select Internet Protocol Version 4 (TCP/IPv4) and click Properties.
    5. Select Use the following DNS server addresses and enter a custom DNS address, such as:
      • Google DNS: 8.8.8.8 and 8.8.4.4
      • Cloudflare DNS: 1.1.1.1 and 1.0.0.1
    6. Click OK to apply the settings.

    By using a custom DNS like Google DNS or Cloudflare, you can potentially lower the ping and improve connection stability when connecting to the Hypixel server IP.

    2. DNS Configuration on macOS and Consoles

    • macOS: Go to System Preferences > Network > Advanced > DNS and add a custom DNS provider (e.g., Cloudflare or Google DNS).
    • Consoles: Check the network settings in the console’s menu and find the DNS configuration option. Enter the DNS servers mentioned above.

    Using custom DNS providers will help ensure that your connection to the Hypixel server is as fast as possible.

    Selecting the Right Server Region for Lower Latency

    Choosing the optimal server region is essential for reducing latency when connecting to Hypixel. Minecraft’s global player base is supported by multiple Hypixel server regions. Selecting the right one can make a significant difference in reducing lag and ensuring a smooth gaming experience.

    1. Why Server Region Affects Latency

    The closer your server region is to your physical location, the lower your ping will be. Latency is the delay between your actions and what you see in the game, so reducing this delay can significantly improve your gameplay experience.

    • A low-latency connection results in smoother gameplay, fewer lag spikes, and faster response times.
    • A high-latency connection leads to noticeable delays in actions and can result in frustrating gameplay.

    2. How to Select a Server Region in Minecraft

    To select the best server region in Minecraft, you’ll need to follow these steps when joining Hypixel:

    1. Open Minecraft and go to the Multiplayer menu.
    2. Click on Add Server and enter the Minecraft Hypixel server IP (mc.hypixel.net).
    3. The game will automatically connect to the best server region based on your location.

    If you’re looking for more precise control, you can select a specific region from the list of Hypixel servers, which is available through the Hypixel server menu in Minecraft. The closer you are to a region, the better your latency will be.

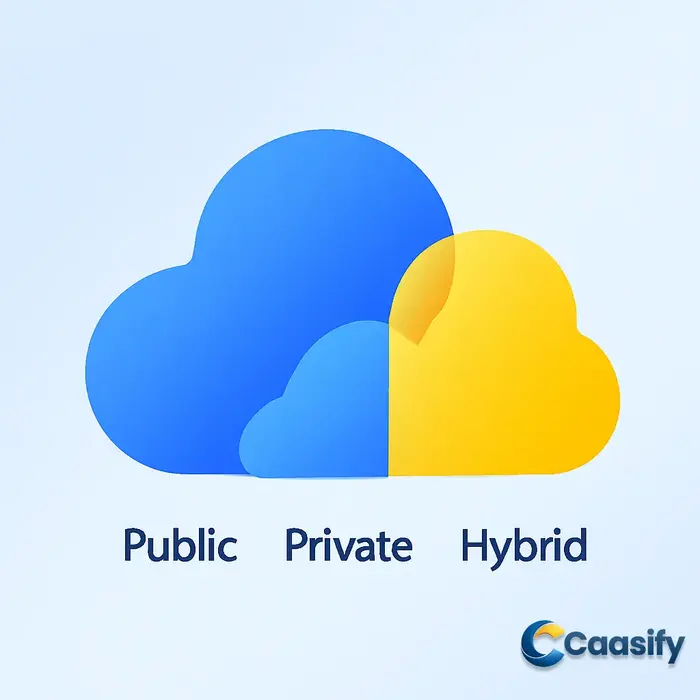
    Leveraging Cloud Infrastructure for Consistent Performance

    Cloud infrastructure plays a critical role in ensuring the performance and stability of online gaming. Many game servers, including Hypixel, leverage cloud solutions like AWS or Google Cloud to provide reliable and fast connections for players around the world.

    1. How Cloud Services Improve Performance

    Cloud infrastructure ensures that Hypixel connection settings are optimized for global reach and low-latency communication. By distributing server load across multiple data centers worldwide, cloud solutions can maintain performance consistency and prevent downtime.

    • Cloud servers allow Hypixel to maintain a fast and stable connection regardless of the number of players online.
    • Cloud solutions offer auto-scaling, meaning they can handle sudden increases in player demand without performance degradation.

    2. The Benefits of Cloud Infrastructure for Gamers

    By hosting servers on powerful cloud platforms, Hypixel ensures lower ping, better server stability, and minimal lag. This infrastructure helps players maintain consistent performance even during peak gaming hours. Additionally, cloud services provide redundancy, which prevents server crashes and ensures uptime.

    Incorporating cloud infrastructure into gaming networks helps reduce latency, ensuring that players can enjoy a smoother experience when connecting to Hypixel, regardless of their location.


    Optimizing your Hypixel connection isn’t just about choosing the right server IP address; it involves configuring your router, adjusting DNS settings, selecting the best server region, and understanding how cloud infrastructure supports consistent gaming performance. By following these steps, you’ll enjoy lower latency and a smoother connection to the Hypixel Minecraft server.

    Optimizing Your Network for a Smooth Hypixel Experience

    When connecting to the Hypixel server, having a stable and optimized network is crucial to ensuring a smooth gameplay experience. One key factor in making sure you can join Hypixel without issues is knowing the Hypixel IP address. Whether you’re on PC or console, understanding how to configure your network and adjust settings will help you reduce lag, avoid disconnections, and improve overall performance while playing Minecraft on one of the most popular multiplayer servers. This guide will walk you through methods for optimizing your connection and ensuring a smoother Hypixel experience.

    Adjusting Quality of Service (QoS) Settings

    What is QoS?

    Quality of Service (QoS) is a feature available on most modern routers that allows you to prioritize certain types of traffic over others. This is especially useful for gaming, as it ensures that your network allocates more bandwidth to the Hypixel server, minimizing lag and preventing packet loss. By prioritizing game traffic over other activities like streaming or downloads, QoS can make a big difference in improving the stability of your connection to Hypixel.

    How to Adjust QoS for a Smoother Hypixel Connection

    To adjust QoS on your router, follow these general steps:

    1. Log into your router: Enter your router’s IP address into a web browser. This is often something like 192.168.1.1 or 192.168.0.1. You’ll need to enter your username and password, which you can find on your router’s manual or sticker.
    2. Find the QoS settings: This will usually be under the “Advanced” or “Network” settings in your router’s interface.
    3. Enable QoS: Check the box to enable QoS (if not already enabled).
    4. Set Hypixel as a priority: Find the section where you can prioritize devices or services. Set your device (or gaming console, if applicable) to a high priority. You can usually do this by either selecting your device from a list or entering the IP address of your device manually.
    5. Save and reboot: Once you’ve set your priority settings, save them and reboot your router to apply the changes.

    Benefits of QoS for Gaming

    • Reduced Lag: By prioritizing gaming traffic, QoS ensures that your connection remains stable even if other devices on your network are using bandwidth.
    • Less Packet Loss: This is particularly useful for real-time games like Minecraft, where even a small amount of packet loss can lead to lag spikes or disconnections.
    • Improved Stability: With QoS, your connection to Hypixel is more reliable, as your router ensures that gaming packets take precedence over less important traffic.

    Example of QoS Settings

    Here’s a simple example of how to configure QoS for a gaming device:

    • Device Name: “Minecraft PC”
    • Priority: High
    • IP Address: 192.168.1.100 (replace with your device’s IP address)

    By setting your gaming device to high priority, you ensure that your Minecraft sessions on Hypixel will receive the necessary bandwidth, even during heavy network usage.


    Using a VPN for Stable Connection (Pros and Cons)

    What is a VPN?

    A Virtual Private Network (VPN) allows you to create a secure connection to another network over the internet, often used to protect your privacy or secure your connection. In the context of Hypixel, a VPN can help stabilize your connection by routing your internet traffic through a different server, potentially reducing lag and improving your overall gaming experience.

    Pros of Using a VPN for Hypixel

    • Reduced Lag and Latency: VPNs can route your traffic through faster or less congested servers, improving your connection to Hypixel.
    • Bypass Throttling: Some ISPs may intentionally slow down your connection during peak gaming times. A VPN can help bypass these restrictions by masking your traffic.
    • Better Routing: If your current ISP’s routing is inefficient, a VPN may connect you to a more optimal server, improving performance.

    Cons of Using a VPN

    • Increased Latency: While VPNs can reduce lag in some cases, they can also introduce latency due to the extra step in routing your connection. This is especially true if you’re connected to a distant VPN server.
    • Compatibility Issues: Some VPNs may interfere with your connection to certain servers, and Hypixel could potentially flag VPN use as suspicious activity.
    • Server Selection: You may need to experiment with different VPN servers to find the one that offers the best performance for Hypixel.

    How to Set Up a VPN for Hypixel

    Here’s how to set up a VPN for a smoother Hypixel connection:

    1. Choose a VPN provider: There are several VPN providers that are optimized for gaming, such as NordVPN or ExpressVPN. Make sure the provider offers low-latency servers and high-speed connections.
    2. Install the VPN software: Download and install the VPN client on your device. Most VPN services offer user-friendly apps for Windows, macOS, and even consoles.
    3. Connect to a server: Open the VPN app and connect to a server that’s geographically close to you or to a server that has low ping to Hypixel’s servers.
    4. Test your connection: Once connected to the VPN, test your connection by joining Hypixel and monitoring for any improvements or lag reduction.

    Example VPN Setup for Hypixel

    • VPN Service: NordVPN
    • Server Location: United States (New York)
    • Tested Result: Lower ping by 15ms, more stable connection with reduced disconnections.

    While a VPN can help with stability, it’s important to test different server locations to find the one that works best for you.


    Optimizing with Flexible Cloud Solutions for Better Stability

    How Cloud Solutions Improve Connection Stability

    Cloud-based solutions, such as Cloudflare Spectrum, provide server-side optimizations that can greatly improve your connection to Minecraft servers like Hypixel. These solutions are designed to reduce network congestion, increase server reliability, and lower latency by utilizing global edge networks to accelerate your connection.

    Benefits of Using Cloud Solutions for Hypixel

    • Reduced Latency: Cloud services like Cloudflare’s global network can help route your traffic more efficiently, reducing the time it takes to send data between your device and the server.
    • Server Optimization: Cloudflare Spectrum, for example, optimizes your game server’s connection, ensuring that it remains fast and stable even during peak usage times.
    • Global Availability: These services operate on a global scale, ensuring that you always have access to the best possible connection regardless of your location.

    How to Implement Cloud Solutions for Hypixel

    1. Choose a cloud service: For gaming, services like Cloudflare Spectrum are specifically optimized for gaming traffic.
    2. Set up Cloudflare Spectrum for your Minecraft server: If you manage a server or are playing on a server that uses Cloudflare, you’ll automatically benefit from this solution. However, for private setups, you might want to investigate if your server is partnered with Cloudflare.
    3. Configure your DNS settings: You can improve DNS resolution speeds by using a fast DNS service such as Cloudflare’s 1.1.1.1, which will also reduce DNS lookup times, ensuring quicker server access.

    Example of Cloudflare 1.1.1.1 DNS Setup

    1. Change your DNS server to Cloudflare’s 1.1.1.1:
      • Primary DNS: 1.1.1.1
      • Secondary DNS: 1.0.0.1
    2. How to set it up:
      • On Windows, go to Network & Internet settings > Change adapter settings > Right-click your connection > Properties > Internet Protocol Version 4 (TCP/IPv4) > Use the following DNS server addresses.
      • Enter 1.1.1.1 as the primary and 1.0.0.1 as the secondary.

    By implementing cloud solutions, you ensure that your connection to Hypixel is more stable, reducing lag and improving gameplay quality.


    Conclusion

    Optimizing your connection to Hypixel involves several key steps, such as adjusting your network settings, using a VPN, and leveraging cloud solutions. By ensuring your Hypixel IP address is properly configured and following these optimization tips, you can enhance your gameplay experience, minimize lag, and reduce disconnections. Whether you’re adjusting QoS on your router, setting up a VPN for a more stable connection, or using cloud-based services for improved routing, these strategies will help you enjoy a smoother experience on Hypixel.

  • What Is a Firewall? The Complete Guide to Choosing the Best One

    What Is a Firewall? The Complete Guide to Choosing the Best One

    Types of Firewalls: Software vs. Hardware vs. Managed vs. Unmanaged

    Firewalls play a critical role in cybersecurity by protecting networks from unauthorized access and cyberattacks. Whether you’re securing a home network or a business infrastructure, choosing the right type of firewall is essential. But with so many options available, what is a firewall and how do the different types compare? In this section, we’ll explore four primary types of firewalls—software, hardware, managed, and unmanaged—to help you understand their unique characteristics, advantages, and drawbacks. By the end, you’ll be able to make an informed decision on which firewall suits your needs for optimal network protection.

    Key Differences Between Software and Hardware Firewalls

    When considering a firewall for your network, it’s important to understand the distinction between software firewalls and hardware firewalls, as each serves a different purpose and is best suited for specific use cases.

    Software Firewalls

    A software firewall is a program that runs on your computer or server to monitor and control incoming and outgoing network traffic. It is commonly used for personal or small business applications and is often bundled with operating systems like Windows Defender or third-party security tools.

    Key Advantages:

    • Cost-effective: Typically included with the operating system or available at low cost.
    • Flexible: Can be installed and configured on individual devices or servers.
    • Easy to install: No additional hardware required, making it convenient for small networks or home use.

    Disadvantages:

    • Device-specific: Protects only the device it is installed on, not the entire network.
    • Performance impact: May slow down system performance, especially on older devices with limited resources.

    Example: A typical home network might use a software firewall like Windows Defender to protect individual computers from internet threats. This solution is cost-effective and easy to set up but offers limited protection compared to hardware firewalls.

    Hardware Firewalls

    In contrast, a hardware firewall is a physical device that acts as a gatekeeper between a network and external traffic. It is often placed at the network perimeter, protecting all devices within the network.

    Key Advantages:

    • Network-wide protection: Safeguards all devices connected to the network, including computers, smartphones, and IoT devices.
    • Dedicated resource: Since it’s a standalone device, it doesn’t consume system resources, unlike software firewalls.
    • Advanced features: Often includes features like VPN support, intrusion detection systems (IDS), and content filtering.

    Disadvantages:

    • Higher cost: Hardware firewalls require an upfront investment for the device and maintenance.
    • Complex installation: May require technical expertise to configure, especially in large or business networks.

    Example: A small business might deploy a Cisco ASA hardware firewall between its internal network and the internet. This would provide strong, network-wide protection and support more advanced security features, making it ideal for environments where multiple devices need protection.

    Key Differences: While software firewalls are cost-effective and flexible, hardware firewalls provide stronger protection at the network level, making them better suited for businesses or more advanced users with multiple devices.

    Pros and Cons of Managed vs Unmanaged Firewalls

    When it comes to managing your firewall, you’ll encounter two broad categories: managed and unmanaged firewalls. Both have their own advantages, but the choice depends on the level of control and support you need.

    Managed Firewalls

    A managed firewall is a solution where the firewall’s configuration, monitoring, and maintenance are handled by a third-party service provider. This is often the ideal choice for businesses that lack the technical resources to manage a firewall on their own.

    Key Advantages:

    • Expert management: A team of security professionals manages and configures the firewall, ensuring optimal protection.
    • Proactive updates: Managed services often include automatic updates and security patches to keep the firewall up-to-date.
    • 24/7 monitoring: Many managed firewalls include round-the-clock monitoring, providing ongoing security alerts and responses to potential threats.

    Disadvantages:

    • Cost: Managed firewalls typically come with higher subscription fees due to the service provided.
    • Less control: You rely on a third-party service for maintenance and updates, which might not align with your specific needs or preferences.

    Example: A small business without dedicated IT staff might choose a managed firewall solution like Cloudflare’s Managed WAF. This service includes all the benefits of expert management, such as real-time threat monitoring, automated patching, and customized configurations, while the business focuses on its core activities.

    Unmanaged Firewalls

    On the other hand, unmanaged firewalls are self-managed, meaning you or your IT team are responsible for configuration, monitoring, and maintenance. This type is typically used by tech-savvy users or organizations with in-house IT expertise.

    Key Advantages:

    • Cost-effective: Unmanaged firewalls usually come at a lower cost since they don’t include ongoing management or support.
    • Full control: You have complete control over the firewall configuration and can tailor it to your exact needs.
    • Customization: Since you’re handling the setup, it’s easier to configure the firewall to suit specific requirements.

    Disadvantages:

    • Requires technical knowledge: Setting up and managing the firewall may require advanced skills, especially for complex configurations.
    • No ongoing support: You are responsible for troubleshooting and resolving any issues that arise.

    Example: A home user or a small office might choose an unmanaged firewall like pfSense. This firewall is highly customizable, but the user must be comfortable with configuration and troubleshooting without external support.

    Key Differences: Managed firewalls are ideal for those who prefer to outsource the complexity of network security, while unmanaged firewalls offer more control and flexibility but require more hands-on management.

    Cloud-Based Firewall Solutions: Example Use Cases

    Cloud-based firewalls have become increasingly popular for both home and business users due to their scalability, flexibility, and ease of management. These firewalls are hosted and maintained by third-party service providers and are typically used to secure cloud-based environments or remote networks.

    Cloud Firewalls

    A cloud firewall operates at the cloud infrastructure level, filtering traffic before it reaches your internal network. These firewalls are typically used in cloud environments where they provide an extra layer of security against external threats.

    Key Advantages:

    • Scalable: Cloud firewalls can easily scale up or down based on your needs, making them ideal for growing businesses.
    • No hardware required: Since it’s a cloud solution, no physical devices are necessary, reducing the cost and complexity of managing hardware.
    • Centralized management: Cloud firewalls can be managed from a single interface, which is especially useful for businesses with remote workers or multiple offices.

    Disadvantages:

    • Reliance on the provider: Your firewall security depends on the cloud provider’s infrastructure and availability.
    • Latency: Depending on the provider, there may be a slight delay in traffic filtering due to the distance between your network and the cloud infrastructure.

    Example Use Cases:

    • Business with remote workers: A company with employees working from different locations might use a cloud firewall solution like AWS Web Application Firewall (WAF). This setup ensures that all traffic to their cloud-hosted applications is filtered and secured, regardless of where the users are located.
    • Cloud infrastructure protection: A tech startup might use a cloud firewall to protect its virtual servers hosted on platforms like Google Cloud or Microsoft Azure. This protects against attacks like DDoS and malicious bot traffic.

    Key Takeaways: Cloud firewalls are ideal for businesses that rely on cloud-based infrastructure or have distributed teams. They offer scalability and centralized management but may come with minor latency concerns or reliance on the cloud provider.

    In conclusion, choosing the right type of firewall depends on your specific needs and environment. Whether you opt for a software, hardware, managed, or unmanaged firewall, it’s important to consider factors like cost, control, and the level of technical expertise required to maintain the firewall. Cloud-based firewalls add a modern solution for businesses and remote workers, offering flexibility and scalability in an increasingly digital world.

    Choosing the Right Firewall for Your Home or Business Network

    When considering network security, one of the most essential tools you can implement is a firewall. A firewall acts as a barrier between your internal network and external threats, such as hackers or malware. But what is a firewall? Simply put, it’s a security system that monitors and controls the incoming and outgoing network traffic based on predetermined security rules. This guide will help you understand the different types of firewalls available and provide actionable advice on selecting, configuring, and optimizing the best one for your home or business needs.

    Selecting a Firewall for Home Use

    For most home users, the primary concern is ensuring basic security while keeping the setup process simple. Home networks often consist of devices like computers, smartphones, smart TVs, and security systems, and protecting these devices requires an effective yet manageable firewall.

    Types of Firewalls for Home Use

    When choosing a firewall for home use, there are two primary options: software firewalls and hardware firewalls.

    • Software Firewalls: These firewalls are installed directly onto your devices, such as a computer or smartphone. They offer a customizable level of protection based on the device they are installed on.
      • Example: On a Windows PC, you can enable the built-in Windows Defender Firewall. It’s user-friendly, automatically enabled, and offers essential protection for most home users.
      • To enable it, go to Control Panel > System and Security > Windows Defender Firewall and turn it on for your network.
    • Hardware Firewalls: These are physical devices that sit between your network and the internet. They provide a more robust security solution by protecting all devices on your network at once.
      • Example: A common home router may come with a built-in firewall, but standalone hardware firewalls can provide more advanced features, such as higher-level monitoring and intrusion detection.
      • If you’re considering a standalone firewall, devices like the Ubiquiti Unifi Security Gateway offer ease of setup and strong network protection.

    Installation and Basic Configuration

    • Software Firewalls: For most home users, software firewalls are easy to install and require minimal setup. For example, activating the built-in firewall in Windows or macOS is often a one-click process. After installation, you may be prompted to adjust specific settings, like allowing trusted apps or services.
    • Hardware Firewalls: These require more setup, often involving plugging the device into your router and following an on-screen configuration process. For example, with a home router that includes firewall capabilities, you would typically log into the router’s web interface (usually found at 192.168.1.1) and enable the firewall feature.

    Both types of firewalls are important for home use, with hardware firewalls offering a higher level of protection for households with multiple devices or those looking to improve their overall network security.

    Choosing a Firewall for Small and Medium-Sized Business Networks

    Small and medium-sized businesses (SMBs) have unique networking needs that require a more complex approach to security. As businesses expand, managing multiple devices, securing sensitive data, and ensuring the security of online transactions or remote workers become essential tasks.

    Managed vs. Unmanaged Firewalls

    Businesses need to decide whether they want a managed or unmanaged firewall. Both options have their pros and cons, but for most SMBs, a managed firewall can provide additional peace of mind.

    • Managed Firewalls: These are firewalls that are actively monitored and maintained by a third-party provider. This means you don’t have to worry about daily management, configuration, or regular updates.
      • Example: A managed firewall service might include daily threat assessments, updates, and proactive interventions.
      • Managed firewalls are great for businesses that lack dedicated IT staff and need round-the-clock protection. Many cloud service providers offer these types of solutions, including options for centralized control over your business network’s security.
    • Unmanaged Firewalls: These require in-house management, meaning your IT team is responsible for configuring, monitoring, and updating the firewall.
      • Example: A small business might opt for an unmanaged firewall if they have internal resources capable of handling security duties. The pfSense firewall, for example, is an open-source option that allows businesses to create a custom security setup.

    Practical Tips for SMBs

    • If your business handles sensitive customer data or financial transactions, prioritize a managed firewall. These solutions tend to offer more advanced features, such as intrusion detection, which can be vital for maintaining business network security.
    • For a simple setup, an unmanaged firewall can suffice, but it’s important to allocate resources for consistent management and updates.

    A well-configured firewall can prevent data breaches, downtime, and costly security incidents. For businesses with remote workers, cloud-based firewalls are also an option that can be easily scaled as the business grows.

    How to Choose a Firewall Based on Your Specific Needs

    Selecting the right firewall depends largely on your specific needs and future plans. Are you securing a single home device, multiple devices, or an entire network with employees and sensitive business data? Here are some key considerations to help guide your decision.

    Scalability

    As your business or network grows, so will your security needs. For smaller networks, a simple software firewall might be enough, but for larger businesses, you may want a solution that can scale with your operations.

    • Example: If you anticipate expanding your network in the near future, consider cloud-based firewalls that offer flexibility and scalability, such as Amazon Web Services (AWS) firewall solutions. These services can easily be scaled up or down depending on the needs of the network.

    Ease of Use vs. Customization

    If you’re not tech-savvy, you may want a firewall that’s easy to set up and doesn’t require constant attention. On the other hand, if you need more control over your security, you may opt for a customizable, unmanaged firewall.

    • Example: Ubiquiti’s Unifi Security Gateway offers both an easy-to-use interface and customizable security options, making it ideal for both beginners and those who want a bit more control over their firewall settings.

    Future-Proofing

    Consider what the future holds for your network. Will you be adding new devices, expanding your business, or integrating more cloud-based applications? Firewalls that integrate well with cloud services or that are designed for larger networks can help future-proof your setup.

    • Example: If your business is moving towards a hybrid cloud infrastructure, it may be worth investing in cloud-based firewalls, which can provide greater control over remote access and cloud resources.

    Conclusion

    Choosing the right firewall for your home or business network is essential to maintaining strong network security. For home users, a basic software or hardware firewall may be sufficient, but businesses with more complex needs should consider managed firewalls or scalable cloud-based solutions. Whichever you choose, ensure your firewall is easy to install, fits your current and future needs, and is maintained regularly to protect against evolving threats.

    Post-Deployment: How to Monitor and Optimize Your Firewall’s Effectiveness

    After deploying a firewall, it’s critical to monitor its effectiveness and continuously optimize its performance to ensure it is providing maximum protection without compromising your network’s efficiency. What is a firewall? It is a crucial security system that monitors and controls incoming and outgoing network traffic based on predetermined security rules. This section will guide you on how to track key firewall metrics and use optimization techniques to ensure your firewall is performing optimally in terms of security, speed, and availability.

    Monitoring Firewall Effectiveness: Key Metrics and Tools

    Effective firewall monitoring is essential for ensuring that your network is secure and functioning optimally. By tracking key performance indicators (KPIs), you can identify potential issues, adjust configurations, and optimize your firewall for better performance.

    Key Metrics to Monitor

    1. Packet Filtering Rate: This is the rate at which your firewall processes network packets. A high filtering rate ensures that your firewall can efficiently inspect and block malicious traffic while allowing legitimate communication through. Regular monitoring can help identify bottlenecks in the firewall processing flow.
    2. Latency: Latency refers to the delay in processing network traffic. While firewalls are essential for network security, they can sometimes introduce delays. Monitoring latency helps ensure that your firewall doesn’t negatively impact your network’s overall speed. You can reduce latency by optimizing rule sets and adjusting timeout settings.
    3. Dropped Packets: If a firewall is dropping legitimate packets due to misconfiguration or over-zealous filtering rules, this can affect network performance. Monitoring dropped packets helps you identify misconfigurations and adjust rules accordingly to ensure proper traffic flow.
    4. Throughput: This refers to the total amount of data the firewall can process within a given time frame. Monitoring throughput helps you identify if the firewall is being overburdened and ensure it can handle the traffic load of your network.

    Tools for Monitoring Firewall Performance

    1. Firewall Logs: One of the most basic and powerful tools for monitoring your firewall’s performance is its log file. Firewall logs provide detailed information about traffic, including any blocked or allowed packets, threats detected, and overall firewall activity.

      For example, on a Linux system using ufw, you can enable firewall logging with the command:

      sudo ufw logging on

      This command activates logging, allowing you to track detailed information about network traffic.

      You can view the logs by accessing the ufw log file:

      cat /var/log/ufw.log

      This will display a list of blocked or allowed connections, including IP addresses, ports, and protocols.

    2. Intrusion Detection Systems (IDS): IDS can work in tandem with your firewall to provide insights into suspicious activity that could bypass basic filtering rules. Tools like Snort or Suricata can be integrated with firewalls to detect and alert you about unusual network activity, providing an added layer of monitoring.
    3. Third-party Platforms: Tools like Nagios and SolarWinds are widely used to monitor firewall health and generate alerts for issues like performance degradation, high latency, or excessive dropped packets. These platforms offer easy-to-read dashboards and real-time alerting systems, making them excellent for both small and large-scale networks.

      For example, in Nagios, you can set up a simple service to monitor your firewall’s status by checking for specific logs or response times.

    Practical Instructions for Enabling Logs

    1. Enable Logging on Linux with UFW: As mentioned, to enable logging on a Linux server using ufw, run:
      sudo ufw logging on

      After that, you can check the logs with:

      cat /var/log/ufw.log
    2. Cisco ASA Logs: If you’re using Cisco ASA, you can check dropped packets using the following commands:
      show conn
      show log

      These commands help you identify connections and logs associated with blocked or dropped packets.

    By regularly reviewing these logs and monitoring metrics, you can ensure that your firewall is performing optimally and is correctly configured to protect your network. For a detailed guide on firewall performance monitoring, check out this How to Monitor Firewall Performance: Tackling Firewall Overload.

    Optimizing Firewall Performance for Low Latency and High Availability

    Once you have set up monitoring for your firewall, the next step is optimization. A well-optimized firewall not only protects your network but also ensures minimal impact on your network’s speed and availability. Here’s how to achieve that balance.

    Reducing Latency

    Latency can often be a problem when firewalls are overly restrictive or inefficient in processing rules. To reduce latency, consider the following:

    1. Optimize Rule Sets: Complex rule sets can increase processing time. Review and simplify your firewall rules to reduce unnecessary checks. Prioritize rules that are more likely to be hit and consider grouping similar rules.

      For example, on a Linux server using ufw, you might simplify your rules by blocking unnecessary traffic directly:

      sudo ufw deny from 192.168.0.1 to any port 80

      This rule directly denies traffic from a specific IP to port 80, simplifying the process.

    2. Connection Timeouts: Firewalls maintain stateful connections, and the longer they wait to time out an inactive connection, the more resources they consume. Adjusting timeout settings can reduce unnecessary traffic processing and improve response times.
    3. Use of Cloud-based Firewalls: For global performance improvements, integrating cloud-based firewalls like Caasify can help reduce latency. These services typically have multiple data centers around the world, which ensures faster responses and better routing for global traffic.

      For instance, using Caasify can offer reduced latency by routing traffic through its global network, optimizing performance and increasing uptime. By utilizing DDoS protection and load balancing, cloud firewalls can seamlessly handle high-traffic situations without compromising security.

    High Availability Configurations

    High availability ensures that your firewall remains functional even in the event of a hardware failure or traffic surge. There are two primary configurations for high availability:

    1. Active/Passive: In an active/passive setup, one firewall acts as the primary (active) device, while the other remains in standby mode (passive). If the active device fails, the passive device takes over without disruption.

      To configure failover on a Cisco ASA firewall, use the command:

      set failover

      This command sets up the secondary unit to take over in case of primary unit failure.

    2. Active/Active: In an active/active setup, both firewalls share the load, ensuring that if one firewall fails, the other can still handle traffic without any downtime. This is more complex but provides better performance in high-demand environments.

    Tools for Performance Testing

    To test firewall performance, you can use basic tools such as ping or traceroute to measure latency and packet loss:

    • Ping: The ping command helps measure round-trip time for packets. You can use it to check latency before and after optimization:
      ping <target_ip>
    • Traceroute: Traceroute shows the path that packets take to reach a destination, which can help identify latency bottlenecks in the network:
      traceroute <target_ip>

    By using these tools, you can continuously monitor and adjust your firewall to maintain low latency and high availability, ensuring a secure and efficient network. To learn more about optimizing firewall performance and latency, refer to this guide on Azure Firewall best practices for performance.


    With these monitoring and optimization strategies, you can ensure that your firewall remains an effective barrier against threats while maintaining high performance, low latency, and availability. By regularly reviewing metrics and adjusting configurations, your network’s security will be both robust and efficient.

  • What Is a Proxy Server? The Ultimate Guide to Online Privacy

    What Is a Proxy Server? The Ultimate Guide to Online Privacy

    What is a Proxy Server and Why Do You Need One?

    A proxy server acts as an intermediary between your device and the internet, helping to mask your IP address and control internet traffic. By rerouting your connection through a proxy, you can enhance your online privacy, boost security, and improve performance. In this section, we will break down what a proxy server is, explore its benefits, and highlight different types of proxies to help you understand how to choose the right solution for your needs.

    Understanding Proxy Servers

    A proxy server functions as a gateway between your device and the internet. When you access a website, your device sends a request for data. If you’re using a proxy, this request goes through the proxy server first. The proxy then forwards the request to the website, retrieves the data, and sends it back to your device. Essentially, the proxy server acts as a middleman, ensuring that your actual IP address remains hidden and allowing you to browse the web more securely and privately.

    Key Benefits of Using a Proxy Server:

    • Enhanced Privacy: By hiding your real IP address, proxies protect your identity and help prevent tracking by websites, advertisers, or even hackers.
    • Increased Security: Proxies can block access to harmful sites, filter malicious content, and prevent unauthorized users from accessing your network.
    • Improved Performance: With certain types of proxies, you can cache web content, which means faster access to frequently visited sites.

    Types of Proxy Servers

    There are various types of proxy servers, each suited for different use cases. Let’s break down a few common types:

    1. Forward Proxy: This is the most common type of proxy. It forwards requests from your device to the internet. It’s typically used for security purposes or to bypass geo-restrictions on certain websites.
    2. Reverse Proxy: Unlike a forward proxy, a reverse proxy sits in front of web servers and handles requests from clients on behalf of those servers. It’s often used for load balancing and securing internal networks.
    3. Residential Proxy: These proxies use IP addresses provided by Internet Service Providers (ISPs), making them appear as if they belong to real users. They’re useful for activities like bypassing geo-restrictions or accessing region-specific content.

    Each of these proxies serves a unique purpose, so choosing the right one depends on your specific needs. For example, if you’re looking to bypass geo-restrictions, a residential proxy is ideal, as it uses real IP addresses, making it harder for websites to detect that you’re using a proxy.

    How Proxy Servers Enhance Security and Privacy

    Proxy servers can be key tools in improving both security and privacy online. By masking your IP address, they make it more difficult for hackers, websites, or other entities to track your online activities or gain access to your personal information. For businesses, proxies are also effective in filtering out malicious websites and securing their networks from external threats.

    In terms of online privacy, using a proxy can help keep your browsing habits private. For instance, many users rely on proxies to avoid targeted ads or to prevent third-party websites from tracking them. Proxies are also beneficial for geo-restriction bypassing, which is especially useful for accessing streaming services that are available only in certain countries.

    Choosing the Right Proxy for Your Needs

    When selecting a proxy server, consider your specific goals. For example:

    • For privacy and anonymity: A residential proxy might be the best choice as it uses IP addresses assigned by ISPs, making it appear more like a regular user browsing the web.
    • For bypassing geo-restrictions: A forward proxy can be helpful as it allows you to connect to a server in another country, thus giving you access to content that may be blocked in your region.
    • For business security: A reverse proxy is commonly used by companies to protect internal servers from external threats and distribute traffic efficiently.

    Choosing the right proxy configuration is crucial for maximizing the benefits it can provide, whether for privacy, security, or performance.

    For a deeper understanding of proxy servers, you can check out articles like What is a Proxy Server? Definition, Uses & More or What Is a Proxy Server and Should You Use One? for more beginner-friendly insights.

    By understanding the fundamental role of proxy servers and selecting the best type for your needs, you can enjoy a more secure, private, and optimized online experience.

    How Does a Proxy Server Work? An Overview of its Core Functions

    A proxy server acts as an intermediary between your device and the internet. In simple terms, it handles requests from your device to websites or online services, offering a layer of security and privacy. But what is a proxy server, and how does it actually work? Proxy servers are used to improve privacy, enhance security, and boost online performance by controlling and rerouting your internet traffic.

    Privacy and Anonymity

    One of the primary reasons people use proxy servers is to enhance their online privacy. When you connect to the internet through a proxy, it can mask your real IP address, replacing it with one from the proxy server. This helps protect your identity and makes it more difficult for websites or hackers to track your location or activities.

    For example, when browsing with a proxy server, websites will see the proxy’s IP address instead of your device’s, making it harder to identify you. This can also help prevent targeted ads, as your browsing behavior is anonymized.

    Security Enhancement

    Proxy servers play a crucial role in improving online security. By acting as a middle layer between your device and the internet, they can filter out malicious content and prevent access to harmful sites. Some proxy servers, like those used by businesses, offer additional security features such as encrypting traffic to protect sensitive information.

    For instance, if you’re accessing a website that could potentially contain malware, a proxy can block that site from reaching your device, preventing harmful content from being downloaded.

    Performance Boost

    In addition to privacy and security, proxy servers can also improve performance, especially when it comes to load times and network traffic management. Caching is one of the key techniques used by proxies to enhance speed. When you visit a website through a proxy, the server may store (or “cache”) a copy of the site. The next time you visit, the proxy can deliver the cached version, which is faster than retrieving the website data from the internet.

    Furthermore, proxies are often used to bypass geographic restrictions. If you’re trying to access content that is only available in a certain country, a proxy server can make it appear as if you’re browsing from that region, allowing you to access otherwise restricted content.

    Types of Proxy Servers

    There are several types of proxy servers, each offering different benefits depending on your needs. Forward proxies, for example, are used by clients to access the internet, while reverse proxies are used by servers to manage traffic coming from the internet. Each of these proxies has unique applications in business security, content delivery, and improving internet speed.

    For a detailed breakdown of forward and reverse proxies, you can refer to GeeksforGeeks’ comparison of forward and reverse proxies.

    In summary, proxy servers are valuable tools for enhancing internet privacy, security, and performance. Whether you’re looking to protect sensitive data, improve browsing speed, or access geo-restricted content, understanding how proxy servers work can help you make more informed decisions about online security and privacy.

    For a more thorough explanation of proxy servers and their uses, check out this Fortinet CyberGlossary page or read Cybernews’ resource guide for additional insights.

    Types of Proxy Servers and Their Uses: Choosing the Right One for Your Needs

    A proxy server acts as an intermediary between a user’s device and the internet, offering various benefits such as improved security, privacy, and performance. If you’re wondering what is a proxy server and how it can help your needs, you’re in the right place. This section will explore different types of proxy servers, including forward proxies, reverse proxies, and residential proxies, helping you determine which one is best for your specific use case.


    Comparing Forward, Reverse, and Residential Proxies: Pros and Cons

    Forward Proxy

    A forward proxy is the most common type of proxy, often used by businesses and individuals to hide their real IP addresses. It sits between the client (such as a computer) and the server (such as a website), forwarding requests from the client to the server.

    Pros:

    • Anonymity: A forward proxy helps mask the user’s IP address, which enhances privacy.
    • Access Control: Businesses often use forward proxies to control and monitor employee internet usage.
    • Security: Forward proxies can help protect users from malicious sites by filtering out harmful content.

    Cons:

    • Limited Use: It primarily hides the client’s identity but doesn’t provide additional functionalities like caching.
    • Performance: In some cases, using a forward proxy may slow down the internet connection.

    Use Case: Forward proxies are ideal for businesses that need to ensure secure and controlled internet access for their employees. For example, a company might use a forward proxy to block access to social media sites while allowing access to necessary tools for work.

    Reverse Proxy

    A reverse proxy differs from a forward proxy in that it sits in front of the server, handling requests from clients on behalf of the server. It is commonly used for load balancing and caching.

    Pros:

    • Improved Load Balancing: Reverse proxies distribute incoming traffic across multiple servers, preventing any one server from becoming overwhelmed.
    • Enhanced Security: It hides the internal server infrastructure, making it harder for attackers to directly target a server.
    • Caching: Reverse proxies can cache content, improving the speed of responses for frequently requested resources.

    Cons:

    • Complex Setup: Configuring reverse proxies can be more challenging compared to forward proxies.
    • Performance Hit: While caching can improve performance, misconfigured reverse proxies can introduce latency.

    Use Case: Reverse proxies are often used by large websites or online services to ensure their servers can handle high traffic volumes. For instance, a high-traffic e-commerce site might use a reverse proxy to distribute incoming traffic across multiple servers to ensure a smooth shopping experience for users.

    Residential Proxy

    A residential proxy is a proxy server that provides real IP addresses assigned by an Internet Service Provider (ISP). These proxies are typically used to bypass geo-restrictions and avoid detection by websites that block data center IP addresses.

    Pros:

    • Bypass Geo-restrictions: Residential proxies are excellent for accessing content from regions where it is restricted.
    • High Anonymity: Because residential proxies use real IP addresses, they are harder to detect and block compared to data center proxies.
    • Variety of Use Cases: These proxies are useful for activities such as market research, ad verification, and social media automation.

    Cons:

    • Cost: Residential proxies tend to be more expensive than other types due to their high quality and the difficulty of obtaining them.
    • Speed: While they are more anonymous, residential proxies can sometimes be slower than datacenter proxies due to the way they are routed.

    Use Case: Residential proxies are perfect for activities like bypassing geo-restrictions to access region-locked content. For instance, someone wanting to stream shows available only in the UK would use a residential proxy to appear as though they are browsing from within the UK.


    Understanding Anonymous Proxies and Their Role in Maintaining User Privacy

    Anonymous proxies are designed to provide a high level of privacy by masking the user’s IP address when browsing the internet. These proxies don’t transmit the user’s real IP address to websites, ensuring that their online activities remain private.

    Benefits of Using Anonymous Proxies:

    • Enhanced Online Privacy: By hiding your real IP, anonymous proxies allow you to browse the web without revealing your location or identity.
    • Protection Against Tracking: They prevent websites and advertisers from tracking your online activities and collecting personal information.
    • Safeguard Personal Data: For individuals concerned about their personal data being exposed, using an anonymous proxy can provide peace of mind.

    Use Case: A common scenario where an anonymous proxy would be useful is when browsing the web on public Wi-Fi. Since public networks can be insecure, using an anonymous proxy helps protect sensitive information, such as login credentials and personal data, from potential hackers.


    Choosing Between Residential and Datacenter Proxies for Specific Use Cases

    When deciding between residential proxies and datacenter proxies, it’s essential to understand the unique characteristics of each type and how they match your specific needs.

    Residential Proxies

    Residential proxies are IP addresses assigned by ISPs to real devices, making them harder for websites to detect and block. These proxies are often used when you need to appear as though you are accessing a website from a specific region.

    Use Case: Ideal for bypassing geo-restrictions or running automated tasks on social media platforms without being detected. For example, businesses running global ad verification campaigns often use residential proxies to appear as if they are browsing from various locations around the world.

    Datacenter Proxies

    On the other hand, datacenter proxies come from data centers and are typically not linked to real devices. They are faster and cheaper than residential proxies but can be easily flagged by websites as they often share similar IP addresses.

    Use Case: Datacenter proxies are perfect for large-scale web scraping, where speed is more important than anonymity. A company gathering data for SEO purposes might use datacenter proxies to quickly crawl multiple websites without worrying about detection.

    Choosing the Right Proxy: If you need to access region-locked content or avoid detection while browsing, residential proxies are the better choice. However, if you’re performing tasks like web scraping or data collection at a large scale, datacenter proxies are often more cost-effective and faster.


    Scalable Proxy Server Solutions for Growing Businesses

    As your business grows, your need for reliable and scalable proxy server solutions will also increase. Having the ability to scale up your proxy infrastructure allows you to meet growing demands without sacrificing performance.

    Why Scalability Matters:

    • Handling Increased Traffic: As a business grows, it will likely face an increase in traffic, and scalable proxy solutions help ensure smooth performance by distributing the load across multiple servers.
    • Adapting to Changing Needs: Scalable solutions allow businesses to adjust their proxy setup as their needs change. For example, a business might start with a few proxies for basic security and scale up as they expand globally.

    Use Case: A startup might begin using a few proxy servers for localized security needs. As the business grows and operates in multiple regions, it will require a more robust and scalable proxy infrastructure to handle increased traffic and access to global markets.


    In conclusion, selecting the right proxy server depends on your specific needs. Whether it’s for improved privacy, bypassing geo-restrictions, or handling large-scale traffic, understanding the different types of proxies, their pros and cons, and their use cases will help you make an informed decision. If you want to learn more about how proxies work, check out this guide on proxy servers.

    The Benefits of Using a Proxy Server for Privacy and Security

    A proxy server acts as an intermediary between your device and the internet, providing a layer of privacy and security while browsing. By rerouting your internet traffic through a separate server, proxies help mask your IP address, effectively hiding your identity from websites and services you interact with online. This fundamental function of a proxy server plays a crucial role in improving online privacy and enhancing internet security. For a more detailed explanation, check out this overview of what a proxy server is and why you might use one.

    Using a proxy server provides several key benefits for both privacy and security. Let’s explore how these benefits work in practice:

    Enhanced Privacy and Anonymity

    One of the most significant benefits of using a proxy server is the enhancement of internet anonymity. By acting as an intermediary between you and the sites you visit, a proxy server replaces your real IP address with one that belongs to the proxy itself. This makes it far harder for websites, advertisers, and even hackers to track your online activities.

    For instance, when you access a website, the proxy server will fetch the content on your behalf and send it back to you, masking your original IP address. This helps to protect your personal data from being exposed during your browsing sessions. Whether you’re simply concerned about privacy or want to keep your browsing habits hidden from prying eyes, proxies offer a valuable layer of protection.

    Improved Security

    Proxy servers can significantly boost your internet security by acting as a filter for malicious traffic. Since proxy servers act as a gateway between your device and the internet, they can inspect incoming data for potential threats such as malware or phishing attempts. If any suspicious content is detected, the proxy can block it before it reaches your device, effectively safeguarding your system from these risks.

    In addition, proxies can help encrypt your internet connection, especially when used in conjunction with VPNs (Virtual Private Networks). This ensures that any data sent over the internet is unreadable to outsiders, protecting sensitive information such as login credentials, financial data, and personal communications.

    Bypassing Geo-Restrictions

    Another common use case for proxy servers is bypassing geo-restrictions. Some websites and streaming services restrict access based on your geographical location. By using a proxy server located in a different country, you can easily access content that would otherwise be blocked in your region.

    For example, if you’re trying to access a service that only offers content in the United States, you can route your traffic through a proxy server based in the U.S. This allows you to enjoy content that may not be available in your home country, all while maintaining privacy and security.

    Conclusion

    In summary, a proxy server offers a range of privacy and security benefits, including enhanced anonymity, improved protection against malicious content, and the ability to bypass geo-restrictions. These advantages make proxies an essential tool for anyone looking to secure their online activities and protect personal data. Whether you’re concerned about privacy or simply want to access global content, understanding what a proxy server is and how it works can help you make informed decisions about how to protect your internet security. For more information on how proxy servers improve security, refer to this detailed guide.

    By using a proxy server, you can take significant steps toward safeguarding your online identity and browsing experience.

    How to Select the Best Proxy Server for Your Business or Personal Use

    When considering a proxy server for your business or personal use, it’s important to understand the key factors that influence your decision. Whether you’re looking to enhance privacy, bypass geo-restrictions, or improve business scalability, selecting the right proxy configuration can significantly impact performance. In this section, we will guide you through the essential factors to consider when choosing a proxy server, how proxies help in accessing region-locked content, and how flexible proxy configurations can support business growth.

    Key Factors to Consider When Choosing a Proxy Server Configuration

    When choosing a proxy server, it’s crucial to consider several key factors to ensure the best fit for your needs. These include speed, security, and anonymity.

    • Speed: Different types of proxies offer varying speeds. For instance, residential proxies tend to be slower compared to data center proxies, but they offer greater anonymity. If speed is your priority, consider using forward proxies, which are generally faster for tasks like web scraping or browsing.
    • Security and Anonymity: If privacy is your primary concern, look for proxies that provide high levels of anonymity. Residential proxies are a good choice here, as they are less likely to be flagged or banned. A reverse proxy can also enhance security by hiding your internal network from the internet, making it harder for attackers to target your systems.
    • Proxy Types: The type of proxy you choose will affect how it performs for different tasks. For instance:
      • Forward Proxy: Best for general browsing or bypassing geo-restrictions.
      • Reverse Proxy: Useful for protecting servers and load balancing in a business environment.
      • Residential Proxy: Ideal for privacy and avoiding detection when accessing websites.

    An example of choosing a proxy based on need could be using a residential proxy for accessing a personal account on a restricted website, while a forward proxy might be the better option for quick access to websites for business tasks that don’t require high anonymity.

    For more details, you can read the difference between forward and reverse proxies here.

    How Proxy Servers Help in Bypassing Geo-restrictions and Accessing Content

    One of the most common uses of proxy servers is to bypass geo-restrictions and access region-locked content. For example, if you want to watch a TV show that is only available in another country, you can use a proxy server to change your virtual location.

    • Geo-restrictions: Websites and streaming services often block access based on the user’s geographic location. By routing your internet traffic through a proxy server located in a different region, you can appear as though you’re browsing from that location.
    • Practical Example: Suppose you’re trying to access content on Netflix that is only available in the US. By connecting to a proxy server located in the US, you can bypass these restrictions and stream the content, even if you’re located elsewhere.

    This use of proxy servers is particularly helpful for users who want access to international streaming services, gaming sites, or websites that restrict content based on location. Simply put, proxies allow you to take control of your virtual presence and access the content you need without being hindered by location-based limitations.

    Learn more about proxy servers and how they work in detail here.

    Flexible Proxy Server Configurations for Business Scalability

    When it comes to business use, flexibility in proxy configurations is essential for scaling your operations. As your business grows, your proxy needs may evolve, and it’s important to choose a solution that can adapt.

    • Initial Setup: For small to medium businesses, forward proxies are a great choice. They are easy to set up and can be configured to allow access to necessary web resources while maintaining basic security.
    • Advanced Configurations: As your business grows, you might need to switch to a reverse proxy to better manage internal resources, balance traffic, or protect sensitive data. Reverse proxies help with load balancing and act as a gateway, ensuring that internal servers remain secure from external threats.
    • Scalability: The ability to scale is important, especially if your business expands into different regions or offers new services. Using a mix of proxy configurations, such as forward proxies for everyday tasks and reverse proxies for more advanced setups, allows you to adjust based on your growing needs.

    For example, a startup might begin with a forward proxy to secure web browsing and internal operations, but as the company expands, they may switch to using reverse proxies to ensure that their internal systems remain protected while efficiently handling increased traffic.

    By choosing the right proxy configuration for your business, you ensure that your operations can grow smoothly without worrying about network security or performance bottlenecks.

    In conclusion, selecting the right proxy server configuration is crucial for meeting both business and personal needs. Whether you’re focused on privacy, bypassing restrictions, or scaling a business, the right proxy can make all the difference. For more detailed advice on how to configure a proxy server, refer to resources on setting up and comparing proxy solutions that fit your specific needs.

    Configuring Your Proxy Server: Key Considerations for Optimal Performance

    When setting up a proxy server, one of the first questions that arises is, what is a proxy server and how can it enhance your online security and performance? A proxy server acts as an intermediary between your device and the internet, forwarding requests from users to the internet and vice versa. This configuration helps improve security, anonymity, and load distribution. Properly configuring your proxy server is essential to optimize its performance, especially for cloud environments, multi-region scalability, and low-latency applications. This section will explore the key considerations for setting up and optimizing proxy servers to ensure you achieve the best possible results for your needs.

    Setting Up Proxy Servers for Cloud Environments and Scalable Applications

    When deploying a proxy server in a cloud environment, scalability is one of the most crucial factors. Cloud environments often require resources to be flexible and adaptable to demand, making proxy configuration essential for smooth scaling.

    To set up a proxy in a cloud environment, start by selecting a cloud provider like AWS, Google Cloud, or Azure, which offer infrastructure to run your proxy servers. You’ll need to configure load balancing to distribute traffic efficiently across your servers, ensuring that performance remains stable as demand grows. Proxy servers in these environments can be used to offload SSL/TLS processing, cache content, and manage incoming traffic to prevent server overloads. For example, a cloud proxy can handle incoming traffic for a web application, reducing latency and enhancing user experience.

    Consider using forward proxies to direct client requests or reverse proxies to balance load and secure your backend servers. Reverse proxies, in particular, are often used for enhancing security and scalability by hiding the identity of backend systems and enabling caching. For more information on reverse proxies, check out Cloudflare’s guide to forward and reverse proxies.

    A good proxy setup can help ensure your cloud application scales efficiently, improves performance, and remains secure as it grows.

    Configuring Proxies for Multi-region Support and Global Scaling

    When dealing with global applications, proxy servers play an essential role in providing multi-region support. A proxy server can help optimize content delivery by routing traffic through servers that are closer to the user, reducing latency and improving the user experience.

    For example, when delivering content across different geographical locations, it’s crucial to set up proxy servers in multiple regions. By doing so, you can ensure that users in Europe access your website from a server located in Europe, while users in Asia connect to a server closer to them. This can drastically reduce latency and enhance browsing speed.

    Another key benefit of multi-region proxies is overcoming geo-restrictions. If you’re offering services that are blocked in certain countries, proxies can help bypass these geo-blocks by rerouting traffic through servers located in unblocked regions. This feature is particularly useful for businesses that operate globally or need to access region-specific content.

    For a detailed comparison of forward vs. reverse proxies, GeeksforGeeks provides a helpful breakdown of how different proxy types function in various scenarios.

    Setting up multi-region proxies requires careful planning of server locations and configurations, but the benefits in terms of performance and access far outweigh the complexity.

    Optimizing Proxy Server Configurations for Low Latency and High Performance

    One of the most important factors in proxy server configuration is reducing latency and maximizing performance. Latency issues can arise when the proxy server is too far from the end user or when the proxy server itself is overloaded with requests.

    To optimize proxy server performance, consider the following strategies:

    • Choose proxies with low latency: Select a proxy server located close to your user base to minimize the time it takes for data to travel back and forth. For example, using a local data center for your proxy servers can significantly reduce the round-trip time.
    • Enable caching: Proxies can cache frequently requested data, which reduces the need to fetch the same information multiple times. This speeds up the response time and reduces the load on your backend servers.
    • Load balancing: Distribute traffic across multiple proxy servers to avoid overloading a single server. This ensures that no single server becomes a bottleneck, helping maintain fast and responsive performance.

    In high-performance scenarios such as gaming or business-critical applications, latency can be a deal-breaker. A proxy server with low latency ensures fast connections and stable performance. For instance, a gaming application that uses a proxy server with low latency can provide a smooth and uninterrupted experience for players, making it essential to choose the right proxy server for such use cases.

    Optimizing a proxy server for high performance often involves monitoring its performance and making adjustments based on real-time data. Tools like AIMultiple’s overview of proxy server types can help you compare options based on your specific needs, whether that’s speed, cost, or anonymity.

    Conclusion

    Configuring a proxy server is an essential step for optimizing your network’s security, performance, and scalability. Whether you’re deploying proxies in the cloud, scaling across multiple regions, or focusing on low-latency applications, understanding how proxies work and how to configure them effectively will help you achieve optimal results. By considering key factors such as location, caching, and load balancing, you can ensure that your proxy setup aligns with your goals, whether for cloud environments, global scaling, or performance optimization. For additional insights, review articles on the different types of proxies and their benefits to determine the best fit for your needs.

    Post-Implementation: Optimizing Proxy Server Settings for Long-Term Efficiency

    Once your proxy server is up and running, optimizing its settings for performance, privacy, and security becomes essential to ensure it continues to meet your needs over time. This process involves fine-tuning various aspects of your proxy server setup to balance speed, security, and scalability effectively. In this section, we’ll explore practical methods for optimizing your proxy server settings, maintain optimal performance, and ensure it scales with your business growth.

    How to Optimize Proxy Server Settings for Best Performance

    Optimizing your proxy server for performance involves several key steps that can drastically improve its speed and efficiency. One of the first things to consider is configuring the server to handle traffic as quickly as possible while maintaining its overall stability.

    1. Enable Proxy Caching: Proxy servers can cache frequently requested content, reducing the need to retrieve the same data repeatedly from the origin server. Caching can significantly improve response times, particularly for websites with high traffic.

      Example for Nginx:

      proxy_cache_path /var/cache/nginx levels=1:2 keys_zone=cache_zone:10m max_size=1g inactive=60m;
      proxy_cache_key "$scheme$host$request_uri";
      proxy_cache_valid 200 1h;

      This configuration enables caching for HTTP 200 responses, improving load times for repeated requests.

    2. Use Compression: Enabling content compression can reduce the size of the data being transferred between the proxy and the client, which can speed up responses, especially for users with slower internet connections. For Nginx, adding the following configuration can enable gzip compression:
      gzip on;
      gzip_types text/plain application/xml text/css application/javascript;

      This setting will compress supported file types, reducing bandwidth usage and improving response time.

    3. Optimize Connection Handling: Tweaking your proxy server’s connection settings can help ensure that it handles requests more efficiently. For example, you can increase the number of worker processes and connections in Nginx to better manage high traffic:
      worker_processes auto;
      worker_connections 1024;

      This will allow Nginx to handle more connections concurrently, improving performance during high-traffic times.

    By implementing these settings, you can improve your proxy server’s performance significantly, offering faster response times for your users.

    Proxy Server Performance Considerations: Speed vs Privacy

    When optimizing a proxy server, one of the most significant trade-offs to consider is the balance between speed and privacy. While optimizing for speed can improve response times, it might inadvertently compromise user privacy. On the other hand, focusing too much on privacy might slow down performance due to the added layers of encryption and authentication.

    • Speed-Focused Setup: If performance is a priority, you may want to reduce the level of encryption and rely on faster proxy types, such as forward proxies. For instance, using HTTP proxies instead of SOCKS proxies can provide quicker connections, though this might leave sensitive data more exposed.
    • Privacy-Focused Setup: Prioritizing privacy may involve implementing stricter encryption protocols, using SOCKS5 proxies (which are more secure than HTTP proxies), or setting up an encrypted tunnel through technologies like SSL/TLS. This will ensure data security but may result in slightly slower connections due to the overhead of encryption.

    The key to an effective proxy server setup is finding the right balance for your use case. For example, if your users are accessing sensitive data, privacy should be prioritized, while general web browsing or media streaming might focus more on speed.

    Best Practices for Maintaining and Updating Proxy Server Configurations

    Maintaining your proxy server’s performance and security requires regular updates and checks to ensure it continues to function optimally. Regular maintenance can prevent downtime and security vulnerabilities while keeping the server running at peak efficiency.

    • Software Updates: Regularly updating your proxy server’s software, such as Nginx or HAProxy, is essential for keeping your server secure and performant. These updates often include performance improvements, bug fixes, and security patches.

      Example: To update Nginx on Ubuntu, run the following command:

      sudo apt update && sudo apt upgrade nginx

      This ensures that your server runs the latest, most secure version.

    • Monitor Server Logs: Monitoring your proxy server’s logs can help identify performance bottlenecks or unusual traffic patterns that might indicate a security issue. Tools like logwatch or using built-in logging features in Nginx can help you track server health and troubleshoot problems.
    • Security Audits: Regularly auditing your proxy’s security settings—such as access controls, user authentication, and SSL/TLS configurations—can prevent data breaches and other security incidents.

    Performing these maintenance tasks regularly ensures that your proxy server remains secure, efficient, and aligned with the latest best practices.

    Leveraging Scalable Proxy Solutions for Ongoing Business Growth

    As your business grows, so will your need for more robust proxy solutions. Scalable proxy solutions allow you to increase your server capacity without compromising on performance or security. This can be achieved through techniques such as load balancing, adding additional proxy servers, or using cloud-based proxy services that automatically scale with demand.

    • Load Balancing: Using a load balancer to distribute traffic among multiple proxy servers can help ensure that no single server becomes overloaded. For example, in an Nginx setup, you can configure load balancing by adding multiple upstream servers:
      upstream backend {
          server backend1.example.com;
          server backend2.example.com;
      }

      This configuration ensures that requests are distributed evenly across the two backend servers, improving overall performance and reducing the risk of server failure.

    • Cloud Proxy Solutions: Cloud providers often offer scalable proxy services that automatically adjust to traffic spikes. For example, services like AWS or Azure allow you to increase resources as needed, providing a flexible solution that grows with your business.

    By implementing scalable proxy solutions, your system can handle higher traffic volumes without performance degradation, ensuring long-term growth.


    Optimizing your proxy server settings is an ongoing process that requires regular maintenance and adjustments. By balancing performance and privacy, maintaining configurations, and leveraging scalable solutions, you can ensure your proxy server remains efficient, secure, and adaptable to your business needs for years to come. If you’re still unsure about the basics, you might want to start by revisiting the question, what is a proxy server? Understanding its fundamentals will help you make informed decisions as you optimize your setup.

  • What Is Cloud Computing: The Ultimate Guide to Benefits & Types

    What Is Cloud Computing: The Ultimate Guide to Benefits & Types

    What is Cloud Computing? A Simple Introduction

    Cloud computing is a technology that allows businesses and individuals to access computing resources like storage, processing power, and software over the internet instead of relying on local servers or personal devices. In simple terms, it means using remote servers to store, manage, and process data, instead of doing all of it on a physical computer. This flexibility makes cloud computing a popular choice for businesses of all sizes, from startups to large enterprises. It allows companies to scale their operations without the need for significant upfront investments in infrastructure.

    Key Benefits of Cloud Computing: Flexibility, Scalability, and Cost-Efficiency

    Cloud computing offers several advantages that make it a compelling choice for businesses and individuals. Here are the core benefits:

    • Flexibility: Cloud computing allows businesses to scale their resources up or down according to their needs. For example, a growing e-commerce website can easily increase its server capacity during high-traffic periods, such as sales events, without the need to invest in permanent infrastructure. This flexibility makes cloud solutions ideal for businesses that experience fluctuating demand.
    • Scalability: One of the most powerful features of cloud computing is its scalability. Cloud services can dynamically adjust to changing demands. This means businesses only pay for what they use, avoiding the need for over-provisioning. A startup, for example, can begin with a small cloud package and expand as their business grows, ensuring they don’t overpay for unnecessary resources.
    • Cost-Efficiency: Traditional IT infrastructure requires businesses to invest in expensive hardware, software, and ongoing maintenance. Cloud computing, on the other hand, allows businesses to pay for services on a subscription basis, often based on usage. This eliminates the need for significant capital expenditures and reduces operational costs. Small businesses, in particular, can benefit from cost-efficient cloud solutions by avoiding the costs of managing physical servers and data centers.

    These benefits make cloud computing an attractive option for businesses looking to improve operational efficiency while keeping costs manageable. For example, a small business can save on expensive hardware by using cloud storage solutions instead of buying physical servers. As a result, they can focus on growing their business without worrying about IT maintenance.

    To learn more about cloud computing’s key benefits, you can refer to authoritative sources such as the NIST definition of Cloud Computing and the Benefits of cloud computing at IBM. For a deeper dive into the scalability and cost-efficiency aspects, you may find the Azure learning module describing cloud scalability and cost benefits helpful.

    Cloud Computing Models: Public, Private, and Hybrid Clouds Explained

    Cloud computing has revolutionized the way businesses store, manage, and process data. If you’re new to the concept, you might be wondering, “What is cloud computing?” In simple terms, cloud computing allows users to access computing resources like servers, storage, and software over the internet, instead of relying on local servers or personal computers. As more companies move to the cloud, understanding the different cloud computing models—public, private, and hybrid—is essential to make informed decisions about which option best suits your business needs.

    In this section, we will break down the three primary cloud computing models: Public, Private, and Hybrid clouds. We’ll also explain the different service models—Infrastructure as a Service (IaaS), Platform as a Service (PaaS), and Software as a Service (SaaS)—and how they fit into the broader landscape of cloud computing.

    Overview of Cloud Computing Models (IaaS, PaaS, SaaS)

    Cloud computing offers three main service models: IaaS, PaaS, and SaaS. Each model provides a different level of control and responsibility for the user, catering to various business needs.

    • IaaS (Infrastructure as a Service): In this model, the cloud provider offers fundamental computing resources like virtual machines, storage, and networking. You manage the operating systems, applications, and data. For example, AWS EC2 (Elastic Compute Cloud) is a popular IaaS offering that allows users to rent virtual servers. IaaS is ideal for businesses that need maximum control over their infrastructure but don’t want the hassle of maintaining physical hardware.
    • PaaS (Platform as a Service): PaaS provides a higher-level platform for developers to build, test, and deploy applications without worrying about the underlying hardware or software layers. Google App Engine is an example of PaaS, where developers can focus on writing code while the platform takes care of infrastructure and scaling. PaaS is perfect for companies that need to quickly build applications without managing servers or databases.
    • SaaS (Software as a Service): SaaS delivers software applications over the internet on a subscription basis. Users don’t need to worry about installation, maintenance, or infrastructure. Microsoft Office 365 is a well-known example of SaaS. SaaS is ideal for businesses that need ready-to-use software, like email or CRM tools, without investing in the underlying infrastructure.

    Each of these models offers varying degrees of flexibility, cost, and management responsibility. IaaS offers the most control, while SaaS provides the least. By understanding the distinctions between them, businesses can choose the right model based on their specific needs.

    Cloud Deployment Options: Public vs. Private vs. Hybrid Cloud

    Cloud deployment models refer to how the cloud infrastructure is managed and who has access to it. The three primary deployment models are Public, Private, and Hybrid clouds. Here’s a breakdown of each:

    • Public Cloud: A public cloud is owned and operated by a third-party cloud service provider, such as AWS, Google Cloud, or Microsoft Azure. In this model, the cloud resources—such as servers and storage—are shared across multiple organizations. Public clouds are highly scalable, cost-effective, and ideal for businesses that don’t require high levels of control over their infrastructure. They are commonly used by startups, small businesses, and enterprises looking to minimize costs and complexity. Learn more about public, private, and hybrid clouds from Microsoft.
    • Private Cloud: A private cloud is a dedicated infrastructure that is either hosted on-premises or by a third-party provider, but it is not shared with other organizations. Private clouds offer greater control, customization, and security, making them ideal for industries with strict regulatory requirements, such as finance or healthcare. A company that uses a private cloud has more control over security and compliance but must manage the infrastructure or work with a managed service provider. Private cloud solutions are often more expensive than public clouds due to the higher level of control and security. For example, financial institutions often use private clouds to ensure data privacy and regulatory compliance.
    • Hybrid Cloud: A hybrid cloud combines elements of both public and private clouds, allowing businesses to take advantage of the scalability of the public cloud while maintaining the security and control of the private cloud for sensitive workloads. A hybrid cloud is ideal for businesses that need flexibility, such as running non-sensitive applications on a public cloud while keeping critical data on a private cloud. Many organizations use hybrid clouds to balance cost, performance, and security. However, it is essential to manage and integrate both cloud environments effectively, as this can increase complexity.

    When choosing between public, private, and hybrid clouds, businesses should consider factors like scalability, cost, security, and control. Public clouds are typically more cost-effective and easy to scale, while private clouds offer better control and security. Hybrid clouds provide a balance of both, but they can require more effort to integrate and manage. Explore more on types of cloud computing from AWS.

    By understanding the strengths and weaknesses of each cloud deployment option, businesses can select the right model based on their needs, resources, and objectives. For businesses looking for flexibility, scalability, and cost-efficiency, a public cloud might be the best choice. If security and compliance are a priority, a private cloud might be more suitable. For those who need the best of both worlds, a hybrid cloud provides a customizable solution.

    In conclusion, knowing “what is cloud computing” and understanding the differences between cloud models is essential for making the right choice for your business.

    How Cloud Computing Enhances Security and Performance

    Cloud computing is revolutionizing how businesses approach IT infrastructure, offering a scalable, flexible, and cost-effective way to manage resources. But beyond its ability to reduce costs, cloud computing enhances both security and performance. By utilizing key features like firewalls, encryption, and optimization strategies, cloud services ensure data protection while improving overall system efficiency. In this section, we will explore how cloud computing can elevate your infrastructure by focusing on its security capabilities and performance enhancement strategies.

    Evaluating Cloud Security Features: Firewalls, Encryption, and Access Control

    Security is a major concern when adopting cloud services, but cloud providers have implemented powerful tools to protect data and infrastructure. Among these tools, firewalls, encryption, and access control are fundamental in safeguarding cloud environments.

    • Firewalls: Firewalls play a critical role in preventing unauthorized access to cloud services. They monitor and filter incoming and outgoing traffic based on security rules. For instance, cloud providers like AWS offer security groups, which act as virtual firewalls to control inbound and outbound traffic to cloud instances. By defining security group rules, you can control which IP addresses can access your resources, ensuring that only authorized users can interact with your cloud environment.
    • Encryption: Encryption ensures that data remains unreadable to unauthorized users. In cloud environments, data is encrypted both at rest and in transit. For example, Google Cloud provides options for encrypting your data before it is stored in the cloud, ensuring that even if someone gains unauthorized access to your storage, the data remains protected. SSL/TLS protocols are also used to encrypt data in transit, safeguarding your data while it’s being transferred between users and cloud servers.
    • Access Control: Access control is about defining who can access your cloud resources and what actions they can perform. Services like AWS Identity and Access Management (IAM) allow you to create policies that control who can access certain cloud resources and what they can do with them. For example, an IAM policy might grant a user the ability to read data from a storage bucket but not modify it. This level of granularity ensures that only authorized individuals can make critical changes to your cloud infrastructure.

    By leveraging these cloud security features, you can significantly enhance the protection of your data and cloud services.

    Performance Optimization Strategies in Cloud Computing

    Cloud computing not only enhances security but also allows for performance optimization, which ensures your cloud environment runs efficiently and cost-effectively. Several strategies can help improve the performance of cloud-hosted applications and services.

    • Load Balancing: One of the primary performance optimization strategies is load balancing. Cloud providers offer load balancing services that distribute incoming traffic across multiple servers, ensuring that no single server becomes overwhelmed. For example, Google Cloud Load Balancing automatically routes traffic to the healthiest instances, improving response times and minimizing downtime. By balancing traffic, you can scale your cloud resources dynamically to handle fluctuations in demand.
    • Auto-Scaling: Another key performance feature in cloud environments is auto-scaling, which allows you to adjust the number of active virtual machines (VMs) based on the demand for your application. For instance, in Google Cloud, you can set auto-scaling policies that increase or decrease the number of VMs based on CPU utilization or network traffic. This helps maintain optimal performance during traffic spikes while saving costs during periods of low demand.
    • Content Delivery Networks (CDNs): To further enhance performance, Content Delivery Networks (CDNs) are often used. CDNs distribute cached content across multiple servers located globally, reducing the latency for users accessing your services from different geographic regions. Google Cloud CDN is a great example, offering seamless integration with Google Cloud services to accelerate content delivery and reduce load times, especially for global applications.

    By adopting these optimization strategies, businesses can ensure that their cloud services provide fast, reliable, and scalable performance, no matter the demand.

    Selecting a Cloud Provider for High-Performance Virtual Machines

    When choosing a cloud provider for high-performance virtual machines (VMs), there are several factors to consider to ensure that you select the best solution for your needs.

    • Scalability: High-performance VMs need to be scalable to handle large workloads. Look for cloud providers that offer elastic compute resources, allowing you to scale up or down based on demand. For example, AWS EC2 instances allow you to choose from a variety of instance types tailored for performance, including options for memory-optimized, compute-optimized, and GPU-based workloads.
    • Geographic Availability: The location of cloud data centers can affect the performance of your virtual machines. Selecting a provider with data centers in key geographic regions allows you to deploy VMs closer to your target users, reducing latency and improving response times. For example, if your customers are primarily in Europe, selecting a provider with data centers in Europe will help ensure faster access to your applications.
    • VM Specifications: Cloud providers offer different virtual machine configurations, with varying amounts of CPU, memory, and storage. When selecting a VM, consider the specifications that align with your workload requirements. For example, AWS EC2 instances come in different families with varying performance characteristics, such as compute-optimized for high CPU performance or memory-optimized for large datasets.

    By carefully evaluating these factors, you can select a cloud provider that meets your high-performance needs, ensuring that your virtual machines are both scalable and optimized for the best possible performance.

    Cloud computing offers powerful features that enhance both security and performance. From firewalls and encryption to load balancing and auto-scaling, these tools and strategies help businesses safeguard their data and improve system efficiency. By understanding these key concepts and selecting the right cloud provider, you can optimize your cloud infrastructure for maximum security and performance.

    Factors to Consider When Choosing the Right Cloud Provider and Configuration

    When evaluating cloud computing services, one of the first questions you may ask is, “What is cloud computing?” In simple terms, it refers to the delivery of computing services over the internet, including storage, processing power, and networking. For businesses and individuals, choosing the right cloud provider and configuration is critical to ensuring that their infrastructure is reliable, scalable, and cost-effective. There are several factors to consider, such as the type of cloud services, pricing models, scalability, and customer support. By the end of this section, you’ll have the insights needed to choose the best cloud provider and configuration for your needs.

    Factors to Consider When Choosing a Cloud Computing Provider

    When selecting a cloud provider, it’s important to weigh several factors. Here are the key considerations:

    • Scalability: Cloud services should grow with your business. Look for a provider that offers easy scalability options. For example, providers like AWS, Microsoft Azure, and Google Cloud all offer the ability to scale resources up or down as needed, allowing businesses to only pay for what they use.
    • Reliability and Uptime: Ensure the provider offers high uptime guarantees. AWS, for example, promises 99.99% availability for many of its services. Reliability is essential to keep your services running smoothly without downtime.
    • Security and Data Privacy: Different cloud providers have different security protocols. Make sure the provider you choose complies with industry regulations like GDPR or HIPAA if your business requires it. Azure, for instance, is known for its robust security features.
    • Customer Support: 24/7 customer support can make a big difference, especially when you run into issues outside of business hours. Look for providers with responsive support channels, such as live chat, email, and phone support.
    • Pricing and Flexibility: Pricing structures vary widely. While some cloud services offer pay-as-you-go pricing, others may offer discounts for long-term commitments. It’s crucial to assess how the provider charges for resources and if flexible options are available to optimize your costs.

    By considering these factors, you can narrow down your choices to a cloud provider that fits your needs. For example, AWS might be the best option for businesses needing extensive scalability, while Azure might be ideal for those looking for robust security and enterprise-level support.

    Virtual Machines in the Cloud: Benefits and Limitations

    Virtual machines (VMs) in the cloud are a core offering from most cloud providers, allowing businesses to run applications on virtualized servers. VMs provide significant flexibility by allowing businesses to allocate resources dynamically based on demand.

    Benefits:

    • Resource Allocation: Cloud VMs let you quickly allocate resources like CPU and memory, which helps you meet fluctuating demands.
    • Isolation: VMs run in isolated environments, meaning they don’t affect other workloads on the same physical server.

    Limitations:

    • Cost: Depending on the cloud provider and the resources you allocate, VMs can be expensive, especially if left running continuously.
    • Performance: Since VMs share physical resources, performance can be impacted by “noisy neighbors,” where other VMs on the same hardware consume excessive resources.

    Providers like AWS offer EC2 instances, which are a type of virtual machine that can scale with demand. Understanding both the benefits and limitations will help you decide whether virtual machines are suitable for your needs.

    Cost Comparison: Pay-as-you-go vs. Subscription-Based Pricing in Cloud Services

    Cloud services often offer two main pricing models: pay-as-you-go and subscription-based pricing. Here’s a breakdown:

    • Pay-as-you-go: In this model, you only pay for the resources you use, which is ideal for businesses with unpredictable demand. For example, AWS charges for its EC2 instances on an hourly basis, allowing you to scale resources up or down based on your actual needs.
    • Subscription-based: This pricing model provides a fixed rate for a certain amount of resources over a set period, usually with a discount for committing to a longer term. Azure, for instance, offers Reserved Instances, where you commit to a one- or three-year contract in exchange for a lower price.

    Pros and Cons:

    • Pay-as-you-go is flexible and cost-efficient for startups and businesses with unpredictable workloads.
    • Subscription-based can be more affordable if you can predict your needs and commit to using the service long-term.

    For instance, AWS provides both models, letting you choose between on-demand EC2 instances or Reserved Instances, based on your usage patterns.

    Optimizing Your Cloud Configuration: Case Example with Flexible Pricing Options

    Optimizing your cloud configuration is key to ensuring cost efficiency, especially as your usage grows. Consider a startup that is scaling its cloud usage and looking to optimize costs.

    One option is to use Flexible Pricing Options such as AWS Reserved Instances or Azure Spot VMs. These services allow businesses to reserve capacity in advance at a lower cost or take advantage of unused capacity at a discounted rate.

    For example, if the startup knows it will need consistent computing resources for several months, it could choose Reserved Instances on AWS, locking in a lower price for a year-long commitment. This would reduce their monthly cloud spend compared to the pay-as-you-go model.

    These flexible pricing options are particularly useful for businesses that have predictable cloud needs but still want to take advantage of discounts. By balancing demand with flexible configurations, businesses can keep costs low while maintaining performance.


    By carefully considering these factors—cloud provider selection, virtual machine usage, pricing models, and optimization strategies—you can confidently make the right choice for your cloud computing needs. For more details on what is cloud computing, you can explore resources like Microsoft Azure’s explanation and AWS’s guide.

    Post-Implementation Steps: Optimizing Your Cloud Environment for Long-Term Success

    After migrating to the cloud, the next critical step is to ensure your environment remains optimized for performance and cost efficiency. But what is cloud computing, and how do you keep it running smoothly in the long term? This section will guide you through essential post-migration steps, focusing on monitoring, cost management, and continuous optimization. These practices will help you maintain an efficient, secure, and cost-effective cloud environment that meets your needs over time.

    Post-Migration Cloud Monitoring and Performance Analysis

    Once your cloud environment is live, monitoring its performance is crucial for identifying issues before they escalate. Cloud monitoring tools like AWS CloudWatch and Azure Monitor provide real-time insights into the health of your system. These tools track essential metrics such as CPU usage, memory consumption, storage, and network performance.

    To get started, you’ll want to set up performance alerts to ensure you’re notified when specific thresholds are reached. For example, in AWS CloudWatch, you can create an alarm for CPU usage that exceeds 80% for 5 minutes. This would alert you to potential resource constraints that could lead to downtime if not addressed promptly.

    Steps to set up a CPU usage alarm in AWS CloudWatch:

    1. Log in to your AWS Management Console.
    2. Go to the CloudWatch dashboard and select “Alarms.”
    3. Click “Create Alarm” and choose the “CPU Utilization” metric from your EC2 instance.
    4. Set the threshold to 80% for 5 minutes.
    5. Choose your notification method (e.g., email) and create the alarm.

    This simple setup helps ensure that your cloud environment is always running optimally. Additionally, regularly reviewing performance metrics can help identify patterns that inform future resource planning. Tools like AWS CloudWatch and Azure Monitor also allow you to visualize these metrics, providing a clear picture of your cloud’s performance over time. For more information on logging and monitoring in AWS, refer to this AWS guide.

    Best Practices for Cloud Cost Management and Optimization

    Managing costs in the cloud is vital to prevent overspending and ensure that you’re getting the most out of your resources. Cloud providers like AWS, Azure, and Google Cloud offer tools to track and manage usage and spending, such as AWS Cost Explorer. These tools help you understand where your money is going and identify areas where you can optimize.

    One straightforward way to reduce costs is by using reserved instances. Reserved instances allow you to commit to a certain amount of usage over a longer period in exchange for a discount, which can significantly lower your cloud spending. For example, AWS offers discounts of up to 75% compared to on-demand pricing when you commit to a one- or three-year reserved instance plan.

    Example: Optimizing cloud costs with AWS Cost Explorer:

    1. Log in to AWS and navigate to the “Cost Explorer” dashboard.
    2. Set up custom reports to track spending by service or account.
    3. Identify any unexpected spikes in usage or spending and investigate further.
    4. Use this data to adjust your usage or move to more cost-effective pricing plans.

    By regularly monitoring your cloud costs, you can also adjust your resource allocation to optimize for efficiency. For example, scaling down underused services or choosing cheaper storage options can help minimize costs. For more information on cloud cost optimization best practices, check out this CloudZero blog.

    Ensuring Continuous Optimization with 24/7 Support

    Even after migration, continuous optimization is essential to ensure your cloud environment remains efficient and responsive to changing business needs. Many cloud providers offer managed services and 24/7 support to handle ongoing maintenance and optimization.

    For example, AWS Managed Services provides ongoing monitoring, security, and optimization of your cloud environment. With 24/7 support, any issues that arise can be addressed immediately, minimizing downtime and ensuring that your cloud services run smoothly at all times.

    Benefits of continuous support and optimization:

    • Proactive issue resolution, preventing service interruptions.
    • Regular performance reviews and adjustments to ensure efficiency.
    • Immediate access to expert support when problems arise.

    By leveraging 24/7 support and managed services, you can focus on your core business while ensuring that your cloud environment is continuously optimized. This not only improves performance but also enhances security and reduces the risk of costly disruptions.

    By following these post-migration steps—setting up effective monitoring, managing costs, and ensuring continuous optimization with support—you can maximize the long-term benefits of your cloud environment.

    How to Ensure Compliance and Data Security in Cloud Environments

    Cloud computing has revolutionized how businesses operate, providing flexible, scalable, and cost-effective solutions. However, with these benefits come significant concerns around data security and compliance. Understanding how to safeguard sensitive information and meet regulatory requirements is essential for any organization using cloud services. In this section, we’ll explore key considerations for data security in cloud environments and discuss how businesses can ensure compliance with global regulations.

    Key Considerations for Data Security in Cloud Environments

    When it comes to data security in cloud environments, there are several important factors to keep in mind to protect your information and maintain the integrity of your systems.

    1. Encryption: Securing data both at rest (stored data) and in transit (data being transmitted) is a fundamental practice. Many cloud service providers, such as AWS, offer built-in encryption tools to ensure that your data is encrypted before it even leaves your local environment. For example, you can encrypt sensitive files before uploading them to the cloud, ensuring that unauthorized parties can’t access the data during transit.
    2. Access Control and Identity Management: Proper access control is essential for minimizing the risk of data breaches. Implementing role-based access control (RBAC) ensures that users only have access to the data they need. For instance, if you’re using AWS, you can assign specific permissions to users based on their roles in the organization, limiting access to critical resources.
    3. Regular Audits and Security Monitoring: Regular audits help identify vulnerabilities before they are exploited. Cloud service providers like Azure provide built-in monitoring tools to track and analyze suspicious activities. For example, setting up an audit trail in Azure ensures that you have a record of who accessed what data and when, which is vital for both security and compliance.

    For more details on encryption practices, you can refer to AWS encryption best practices for data at rest and in transit.

    How to Ensure Compliance with Global Regulations in Cloud Computing

    Compliance with global regulations is crucial for any business operating in cloud environments. Here are the primary steps to help ensure your cloud services meet the necessary standards:

    1. Understand Key Regulations: Regulations like the General Data Protection Regulation (GDPR) in Europe and Health Insurance Portability and Accountability Act (HIPAA) in the U.S. impose strict requirements on data storage, processing, and security. It’s important to understand these regulations and how they apply to your cloud environment. For example, businesses handling health data must adhere to HIPAA standards when using cloud services to ensure patient data is protected.
    2. Work with Compliant Cloud Providers: Leading cloud providers such as AWS and Azure maintain a range of certifications to meet international compliance standards. For instance, Azure provides a comprehensive list of certifications, including GDPR, HIPAA, and ISO certifications, which businesses can use to verify their compliance.
    3. Maintain Ongoing Compliance: Compliance isn’t a one-time task—it’s an ongoing process. Regularly review your cloud provider’s compliance certifications and audit your own systems. For example, to verify GDPR compliance, you can review your cloud provider’s GDPR certification status and make sure they adhere to the necessary data processing requirements. You can read more about how GDPR impacts cloud services in this guide on GDPR and cloud computing.

    By following these guidelines and working with trusted cloud service providers, you can ensure both data security and regulatory compliance, paving the way for successful and secure cloud adoption.

    Best Practices for Managing and Monitoring Your Cloud Setup

    Understanding what is cloud computing and how to manage and optimize your cloud setup can significantly improve the efficiency and scalability of your web applications. Cloud computing offers flexible, scalable solutions for businesses of all sizes. By leveraging the right cloud services and tools, you can ensure that your cloud infrastructure grows alongside your business needs. In this section, we’ll explore key best practices for managing and monitoring cloud setups, focusing on scalability, global coverage, and user-friendly management tools.

    Scalable Cloud Hosting Solutions for Modern Web Applications

    Scalability is one of the fundamental advantages of cloud computing. It allows you to adjust your resources as your web application grows or experiences fluctuating demand. For example, if your website experiences a sudden traffic spike, you can quickly scale up your cloud server to handle the increased load, ensuring that your users experience no downtime.

    To scale your resources, cloud providers like AWS and Google Cloud offer easy-to-use interfaces that let you increase your server’s CPU, RAM, or storage with just a few clicks. This flexibility means you can pay only for the resources you use, making it a cost-effective solution for growing applications.

    For a simple example, consider an e-commerce website that sees a surge in traffic during a holiday sale. By scaling up your cloud server, you can ensure the website remains responsive and capable of handling high traffic without slowing down or crashing. This ability to scale up or down seamlessly is a major benefit of cloud hosting solutions like scalable cloud hosting.

    How Cloud Computing Supports Global Coverage and Distributed Teams

    Cloud computing offers global coverage, enabling businesses to reach customers and teams around the world. With data centers located in various regions, cloud providers like AWS, Google Cloud, and Microsoft Azure allow you to serve content quickly and efficiently, regardless of where your users are located.

    For instance, a company based in the U.S. can use cloud infrastructure to serve its customers in Europe, Asia, or Australia with minimal latency. Cloud computing also supports distributed teams by providing remote access to shared resources. This makes collaboration easy, as team members can access files, applications, and databases from anywhere, at any time.

    An example of this is a software development company with offices in multiple countries. Using cloud services, their team can work on the same codebase, access shared databases, and manage tasks in real time, all while being located in different parts of the world. This is a key benefit of cloud computing, as it allows businesses to grow their operations globally without the complexities of traditional infrastructure.

    The Role of User Control Panels in Cloud Service Management

    User control panels are essential tools for managing cloud services. These intuitive interfaces allow users to monitor, configure, and manage their cloud resources without needing in-depth technical knowledge. Cloud providers like AWS, Google Cloud, and DigitalOcean offer control panels that allow users to perform tasks such as adding more storage, scaling resources, or managing security settings.

    For example, through a control panel, you might add more virtual machines to your cloud setup to handle increased traffic. Control panels make it easy to adjust resources with just a few clicks, eliminating the need for complex configurations or command-line inputs. This simplicity is one of the main reasons why control panels are so popular for cloud service management.

    To get started, many cloud services provide a step-by-step guide within the control panel to help users navigate their cloud environments. This makes it easy for beginners to take full advantage of their cloud infrastructure, ensuring that their web applications are always optimized and running smoothly.

    In summary, understanding what is cloud computing and its core features—such as scalability, global reach, and user-friendly management tools—will help you make informed decisions as you manage and optimize your cloud setup. For a deeper dive into the cloud computing benefits and how they can support your growing business, check out additional resources on cloud technology.

  • ls Command in Linux: The Ultimate Guide to Mastering File Navigation

    ls Command in Linux: The Ultimate Guide to Mastering File Navigation

    Introduction to the ‘ls’ Command: A Fundamental Tool for Navigating Linux Filesystems

    The ls command in Linux is one of the most essential tools for navigating and managing files within the terminal. It allows you to list files and directories, making it a foundational command for anyone working in Linux. Understanding how to use ls effectively can greatly enhance your productivity when interacting with the Linux file system. In this section, we will dive into the basic functionality and syntax of the ls command, as well as its practical applications.

    How the ‘ls’ Command Helps Navigate Directories in Linux

    The ls command is primarily used to list the contents of a directory, helping you quickly navigate through files and folders. When executed without any options, it simply displays the names of files and directories in the current directory.

    Example:

    ls

    This command lists the files in the current directory. By default, it shows only the visible files, excluding hidden ones. To enhance its functionality, you can add options like -l to display detailed information about the files, or -a to include hidden files.

    For instance:

    ls -a

    This command will list all files, including hidden ones (those starting with a dot .).

    Exploring the Syntax of the ‘ls’ Command for Beginners

    The syntax of the ls command is straightforward but highly flexible, allowing you to tailor your file listings to suit your needs. At its core, the command follows this format:

    ls [options] [directory]
    • -l: This option displays a detailed list of files, showing permissions, ownership, size, and timestamps.
    ls -l

    This command will list files with detailed information like file permissions, owner, size, and modification date.

    • -a: This option includes hidden files (those starting with a dot .).
    ls -a

    This command lists all files in the directory, including hidden ones.

    • -h: When used with the -l option, this flag makes file sizes human-readable (e.g., in KB, MB).
    ls -lh

    This command will show the file sizes in a more understandable format.

    These basic options form the foundation of the ls command’s syntax and are essential for navigating and organizing files in Linux effectively. For more information, you can refer to the GNU Coreutils manual on ls invocation.

    For additional details and practical examples of using the ls command, check out this GeeksforGeeks guide and this helpful article on The Linux Code.

    Understanding the Basic Syntax of the ‘ls’ Command

    The ls command in Linux is an essential tool for anyone working in a Linux environment. It allows users to list files and directories, making it a crucial part of daily file management tasks. Whether you’re managing files locally or remotely, understanding how to use ls effectively can significantly improve your workflow. In this section, we will explore the basic syntax of the ls command, covering essential options and practical use cases that will help you navigate and manage your Linux file system with ease.

    A Guide to Common ‘ls’ Command Options and Their Usage

    The ls command comes with a variety of options to customize the output, making it adaptable to different needs. Below are some of the most commonly used flags:

    • -a: This option lists all files, including hidden ones (those starting with a dot). It’s helpful when you want to view every file in a directory.
      • Example: ls -a
      • This command will show all files, including hidden ones like .bashrc.
    • -l: The long listing format provides detailed information about each file, including permissions, ownership, size, and modification date.
      • Example: ls -l
      • This shows a detailed listing like:
        -rw-r--r-- 1 user user  1234 Nov 10 12:34 example.txt
    • -h: When used with -l, this option humanizes file sizes, showing them in a more readable format (e.g., KB, MB).
      • Example: ls -lh
      • This will display file sizes like 1.2K instead of 1234.
    • -R: The recursive option lists directories and their contents, including subdirectories.
      • Example: ls -R
      • This will show all files in the current directory and its subdirectories.
    • -S: Sorts files by size, with the largest files first.
      • Example: ls -S
      • This is particularly useful when you want to identify large files in a directory.

    These are just a few of the many options available for the ls command. Using these options can drastically improve how you navigate and manage files in Linux.

    How to List Hidden Files Using the ‘ls’ Command

    Hidden files in Linux are files or directories that begin with a dot (.). By default, the ls command does not show these hidden files, but with the -a option, you can reveal them.

    • -a: As mentioned earlier, this option shows all files, including hidden ones.
      • Example: ls -a
      • This command will display files like .bashrc and .gitconfig, which are typically hidden from the standard ls output.

    In many Linux systems, hidden files are used for configuration files that control how programs behave. For instance, the .bashrc file in your home directory contains shell configurations for your user account. Being able to see and modify these files can be crucial when you’re customizing your system.

    Sorting Files with the ‘ls’ Command: Best Practices

    Sorting files can make it easier to find what you’re looking for, especially in directories with many files. The ls command provides several options for sorting:

    • -S: This option sorts files by size, with the largest files appearing first.
      • Example: ls -S
      • This can help you quickly identify large files that may be taking up unnecessary space.
    • -t: Use this flag to sort files by modification time, showing the most recently modified files first.
      • Example: ls -t
      • This is useful when you need to see what files have been changed recently.
    • -r: The reverse flag inverts the order of sorting.
      • Example: ls -Sr
      • This command will show the smallest files first, or the oldest files if you’re using -t.

    Combining these options allows you to tailor the ls command’s output to your specific needs. For example, if you want to see the largest files in reverse order of modification time, you can use ls -S -tr.

    Understanding the ‘ls -l’ Command for Detailed File Information

    The -l flag is one of the most useful options for understanding the details of files in a directory. It provides a long listing format, which includes the following columns:

    1. Permissions: The first column shows the file’s permissions (e.g., -rw-r--r--).
    2. Number of links: The second column shows how many links point to the file or directory.
    3. Owner: The third column shows the file’s owner (e.g., user).
    4. Group: The fourth column shows the group that the file belongs to.
    5. Size: The fifth column shows the file size in bytes (unless you use the -h option).
    6. Modification date: The sixth column shows the last modified date.
    7. File or directory name: The final column shows the file or directory name.
    • Example: ls -l
    -rw-r--r-- 1 user user  1234 Nov 10 12:34 example.txt

    Each part of this output provides essential information that can help you manage and understand your files more effectively. For instance, the permissions column (-rw-r--r--) tells you who can read, write, or execute the file.

    Choosing the Right Environment for Optimal ‘ls’ Command Performance

    The environment in which you use the ls command can affect its performance and the best options to use. For instance, if you’re working on a remote server, listing large directories or files can be slow if you’re not using the right options.

    • Local systems: On your local machine, ls works quickly because it operates on the local file system. You might not need as many performance optimizations.
    • Remote systems: On remote servers or over SSH, file listings might take longer, especially if you’re working with directories that have many files. Using the -h option to humanize sizes can improve readability, while the -l flag gives detailed information without overwhelming you with raw byte sizes.
      • Example: ls -lh
      • This is especially helpful for viewing large files in a readable format when working on remote servers.

    By choosing the right options based on your environment, you can optimize both the speed and the usefulness of your ls command output.

    By understanding these basic ls command options and how to tailor them to your needs, you can improve your workflow and file management in Linux. Whether you’re navigating a local system or working remotely, these commands provide the flexibility and power you need to manage your files efficiently. For more details on advanced usage, check out the GNU Coreutils manual or explore practical examples in the Linuxize guide and Baeldung tutorial.

    Exploring Common ‘ls’ Command Options and Their Usage

    The ls command in Linux is a fundamental tool for listing files and directories in the terminal. By default, it displays the contents of a directory in a simple list format. However, the true power of the ls command comes from its versatile options, which allow you to customize the output for better efficiency in managing files. This section will explore some of the most common and useful options, helping you to navigate your Linux file system with ease and boost your productivity.

    A Guide to Common ‘ls’ Command Options and Their Usage

    The ls command is a staple in any Linux user’s toolkit, and understanding its options is key to efficient file management. Here are a few commonly used options:

    • -a: Lists all files, including hidden ones (those starting with a dot).
    • -l: Provides a long listing format, showing file permissions, owner, size, and modification date.
    • -h: With -l, this option displays file sizes in a human-readable format (e.g., KB, MB).
    • -S: Sorts files by size, making it easy to find large files.

    For instance, running ls -l /home/user/ will show detailed information about the files in the specified directory. If you want to see hidden files as well, try ls -a /home/user/—this command will list all files, including those starting with a dot (e.g., .bashrc).

    These options can be combined for even more control over the output. For example, ls -lhS lists files in a human-readable format, sorted by size.

    How to List Hidden Files Using the ‘ls’ Command

    Hidden files in Linux are any files or directories whose names begin with a dot (.). These files are usually configuration files for system tools or user applications. To display these hidden files, you can use the -a option with ls.

    ls -a /home/user/

    This command will show all files, including hidden ones like .bashrc or .gitconfig. It’s particularly useful when you need to modify configuration files or see all the files in a directory that are not typically shown by default.

    Sorting Files with the ‘ls’ Command: Best Practices

    Sorting files can greatly enhance the efficiency of your workflow, especially when you’re dealing with large directories. The ls command offers several sorting options:

    • -S: Sorts files by size, showing the largest files first.
    • -t: Sorts files by modification time, showing the most recently modified files first.
    • -r: Reverses the order of the sorting (useful when combined with other sorting options).

    For example, if you want to list files in a directory sorted by modification time, use:

    ls -t /home/user/

    This will display the most recently modified files first. To sort files by size, you can use:

    ls -S /home/user/

    By using these sorting options, you can quickly find large files or identify the most recently modified files in a directory.

    Understanding the ‘ls -l’ Command for Detailed File Information

    The ls -l command is an essential tool for viewing detailed information about files and directories. It shows the following details for each file:

    • File permissions: Indicates who can read, write, or execute the file.
    • Owner and group: Shows the file’s owner and the associated group.
    • Size: Displays the file size in bytes.
    • Modification time: Shows the last modification date and time.

    Example:

    ls -l /home/user/

    Output:

    -rw-r--r-- 1 user user 1048576 Dec 5 12:34 example.txt

    In this example:

    • -rw-r--r--: File permissions (read/write for the owner, read-only for others).
    • 1: The number of hard links to the file.
    • user user: The owner and the group.
    • 1048576: The file size in bytes.
    • Dec 5 12:34: The last modification time.
    • example.txt: The file name.

    This detailed view helps you quickly assess the file’s attributes, such as its size, ownership, and permissions, which is especially useful when managing system files.

    Choosing the Right Environment for Optimal ‘ls’ Command Performance

    The performance of the ls command can be affected by the size of the directory you’re working with. In directories containing a large number of files, the command may take longer to execute, especially if you’re using options like -l or -S. To optimize performance, try the following:

    • Limit directory depth: Use the -d option to limit the depth of directories being listed. This is particularly helpful when you’re working in directories with many subdirectories.

    Example:

    ls -d /home/user/*/

    This command will list only the directories in /home/user/ and not the files inside them.

    • Avoid excessive flags: While options like -l or -S are helpful, they can slow down the command when applied to directories with many files. Stick to the essential options for better performance in large directories.

    By understanding and leveraging these options, you can optimize your workflow and make the ls command in Linux work more efficiently for you.

    For more detailed information, refer to the GNU ls manual page or explore additional examples in the Baeldung ls tutorial.

    How to Use the ‘ls’ Command for Sorting and Detailed Views

    The ls command in Linux is a powerful tool for listing files and directories. It can be customized with various options to help users manage files more effectively. In this section, we’ll focus on two advanced features of the ls command: sorting files by time and size, and displaying file sizes in a human-readable format. Mastering these features will allow you to improve your workflow and optimize Linux file management.

    Efficient File Sorting Using ‘ls’ with Time and Size Parameters

    When managing files in Linux, sorting them by specific attributes can improve efficiency and help you find what you need quickly. The ls command offers options to sort files by time and size, which are some of the most commonly used sorting methods.

    To sort files by modification time, use the -t option:

    ls -t

    This command lists files sorted by the last modification time, with the most recently modified files displayed first. This is particularly useful when you want to identify which files were changed last, such as when reviewing log files or tracking file changes over time.

    For sorting files by size, use the -S option:

    ls -S

    This command will display files in descending order by size, helping you quickly locate the largest files in a directory. Sorting by size is useful when managing disk space or when you’re looking to clean up large files.

    You can also combine both options to sort files by time and then by size. For instance, to list files by modification time first and by size second, use:

    ls -tS

    This approach is useful when you want to prioritize recent files but still consider their size for further management.

    Understanding how to use the -t and -S options together or separately is key for efficient Linux file sorting. These options help you quickly organize files based on their relevance to your workflow, whether it’s by when they were last modified or by how large they are.

    Displaying File Sizes in a Human-Readable Format with ‘ls -lh’

    The ls command in Linux also allows you to display file sizes in a more readable format. By default, the ls command shows file sizes in bytes, which can be hard to interpret, especially when dealing with large files. To overcome this, you can use the -lh option to display sizes in a human-readable format, such as kilobytes (K), megabytes (M), or gigabytes (G).

    To use this option, run:

    ls -lh

    This command lists files with detailed information, including file sizes in a human-readable format. For example, a file size of 12345 bytes would be displayed as 12K, and 1234567890 bytes would be shown as 1.1G. This format makes it easier to quickly assess the size of files and directories.

    Here’s a sample output of the ls -lh command:

    -rw-r--r-- 1 user user 12K Dec  5 12:30 example_file.txt
    -rw-r--r-- 1 user user 1.1G Dec  5 12:30 large_video.mp4

    In this example, example_file.txt is 12 kilobytes, and large_video.mp4 is 1.1 gigabytes. The human-readable format ensures that you don’t have to manually convert byte counts into more manageable units.

    Using ls -lh is especially useful when managing large files, as it provides a clear overview of file sizes at a glance. Whether you’re cleaning up a disk or organizing your files, this option ensures you can easily spot large files and assess their impact on disk space.

    For further details on the ls command and its options, check out the GNU Coreutils manual page for ls. Additionally, you can explore a comprehensive guide on sorting files with the ls command.

    Mastering Recursive Listings with the ‘ls -R’ Command

    The ls command in Linux is a powerful tool for listing files and directories. By adding the -R option, you can expand its functionality to list directories and their contents recursively, which is particularly helpful for navigating complex file structures. This section will walk you through the basics of using ls -R, explore its impact on navigation and file management, and provide practical examples to optimize its usage.

    How to Use the ‘ls’ Command Recursively with the -R Option

    The syntax for using the ls command recursively is straightforward:

    ls -R [directory]

    Where [directory] is the target directory. If no directory is specified, it will list the contents of the current directory and all of its subdirectories recursively.

    Example 1: Listing Contents of a Directory Recursively

    If you have a directory named projects with several subdirectories and files inside them, you can list them all recursively with:

    ls -R projects

    Example Output:

    projects:
    project1
    project2
    projects/project1: file1.txt file2.txt
    projects/project2: file3.txt subdir1
    projects/project2/subdir1: file4.txt

    This output shows how ls -R traverses the directory tree and lists all files and subdirectories, showing the hierarchy of files under each directory. The recursive listing is especially useful for understanding the structure of complex directory trees.

    Understanding the Impact of Recursive Listings with ‘ls -R’

    The primary benefit of the ls -R command is that it helps you visualize the entire file system structure in one go. For example, when working with large projects that have nested directories, you can use ls -R to see the entire contents of those directories without manually navigating through each subdirectory.

    Use Case 1: Navigating Complex File Structures

    Imagine you are working with a large project that includes multiple layers of subdirectories. Running ls -R can give you a bird’s eye view of the entire file structure. This is much more efficient than opening each directory one by one.

    Example 2: Practical Use Case in a Development Environment

    Let’s say you need to find all .conf files in a large project. You can use ls -R in combination with grep to search recursively through the directories for specific file types:

    ls -R /path/to/project | grep ".conf"

    This will return a list of all .conf files, helping you quickly identify configuration files scattered across multiple subdirectories.

    Performance Considerations

    While ls -R is incredibly useful, it can slow down if used on directories with a massive number of files or deeply nested subdirectories. The more directories and files there are to list, the more time the command will take to complete. If performance becomes an issue, you might consider other strategies, such as using find for more optimized searches on large file systems.

    In conclusion, the ls -R command in Linux is a versatile tool for listing directories and files recursively, making it an essential part of your Linux command line toolkit for managing file structures efficiently. For more details, you can refer to the official Linux manual page for ls.

    Customizing ‘ls’ Command Output for Improved Efficiency

    The ls command in Linux is a fundamental tool for displaying the contents of directories. Customizing its output can significantly improve your efficiency when navigating the file system. By using various flags and options, you can tailor the display to show just the information you need, making it easier to manage files in the Linux terminal.

    How to Customize the ‘ls’ Command Output for Maximum Efficiency

    To enhance your productivity with the ls command, there are several flags you can use to modify the output. Some commonly used flags include:

    • -l: Displays detailed information about each file, including permissions, ownership, size, and timestamp.
    • -a: Lists all files, including hidden ones (those starting with a dot).
    • -h: Formats file sizes in a human-readable way (e.g., KB, MB, GB).
    • -R: Recursively lists subdirectories.

    For example, running ls -lah provides a long listing of all files, including hidden ones, and displays file sizes in a human-readable format.

    ls -lah

    Explanation:

    • -l gives detailed information.
    • -a includes hidden files.
    • -h formats file sizes in a readable way (e.g., “1.5K” instead of “1536”).

    This customization allows you to quickly understand the structure and details of your files, which is crucial for efficient navigation in the Linux terminal.

    Fine-Tuning ‘ls’ Output for Improved System Navigation

    When you’re working with a large number of files, fine-tuning the output of the ls command can make navigation easier. Here are some options for more tailored listings:

    • -t: Sorts files by modification time, with the most recently modified files listed first.
    • -S: Sorts files by size, with the largest files at the top.
    • -X: Sorts files by extension.

    For example, to list files by size, you can use the following command:

    ls -lhS

    Explanation:

    • -l gives detailed information.
    • -h provides human-readable sizes.
    • -S sorts files by size, making it easier to identify large files.

    This method of sorting is particularly useful when managing directories with numerous files. By focusing on size, time, or file type, you can quickly prioritize tasks and navigate the system more efficiently.

    For more advanced options and detailed explanations of ls command flags, consider reviewing the GNU Coreutils manual: ls invocation and Understanding the ls command with long‑listing format and permission bits.

    Evaluating the Performance of Different ‘ls’ Configurations in Large Directories

    The ls command in Linux is essential for listing files and directories, but when dealing with large directories, its performance can be a challenge. In this section, we will explore various configurations of the ls command, focusing on how to optimize its performance when dealing with directories containing thousands of files. By understanding the pros and cons of different options, you can make informed choices to improve your workflow and reduce the time spent waiting for results.

    Pros and Cons of Using Different ‘ls’ Command Options

    When working with large directories, the ls command has several options that can significantly impact its performance. Here’s a breakdown of some of the most commonly used options and their effects on large directories:

    • ls -l (Long Listing Format)

      This option displays detailed information about each file, including permissions, owner, size, and modification time. While it provides valuable information, it can be slow when used in directories with many files because it requires extra system resources to retrieve and display the file details.

      Example Command:

      ls -l

      What it does: Lists files with detailed information in long format.

    • ls -a (Show Hidden Files)

      The -a option includes hidden files (those starting with a dot). Although it’s useful for viewing all files, in very large directories, it can add extra processing time due to the number of hidden files being listed.

      Example Command:

      ls -a

      What it does: Lists all files, including hidden ones.

    • ls -R (Recursive Listing)

      This option lists files in the current directory and all of its subdirectories, making it especially slow in directories with deep hierarchies. If performance is a priority, using -R can cause significant delays due to the depth of the directory tree.

      Example Command:

      ls -R

      What it does: Lists files recursively in all subdirectories.

    • ls -lh (Human-Readable Format)

      The -h option makes the file sizes more readable by displaying them in human-readable units (e.g., KB, MB). While this can be helpful, it can also introduce a slight performance penalty, particularly when working with many files, as it requires conversion of byte values to their respective units.

      Example Command:

      ls -lh

      What it does: Lists files with human-readable file sizes.

    • ls -1 (One File per Line)

      This option outputs the file list in a single column, making it easier to read for large directories. It is much faster than -l because it skips retrieving additional file metadata, making it an optimal choice for simple file listing.

      Example Command:

      ls -1

      What it does: Lists one file per line, which is faster than the long listing format.

    Evaluating the Performance of Different ‘ls’ Commands in Large Directories

    When dealing with large directories, performance becomes a critical factor. Certain ls options can slow down the command significantly, especially when you’re working with tens of thousands of files. Here’s a comparison of how different options perform in large directories:

    • Using ls -l vs ls -1

      In a directory containing 10,000 files, the difference in performance between ls -l and ls -1 can be noticeable. The -l option retrieves detailed file information, which adds overhead, while -1 merely lists the filenames, leading to much faster execution.

      Performance Comparison Example:

      • Running ls -l on a directory with 10,000 files might take 10 seconds.
      • Running ls -1 on the same directory might only take 1 second.

      Conclusion: For basic file listing, ls -1 is the clear winner in terms of speed.

    • Using ls -R in Large Directory Trees

      If you’re working with a directory that contains subdirectories, using the -R option can drastically slow down performance, especially if the directory structure is deep. For example, listing files in a directory with 100 subdirectories could take much longer than a simple listing due to the recursive traversal of all subdirectories.

      Performance Comparison Example:

      • Running ls -R on a directory with 100 subdirectories and 50,000 files could take several minutes, whereas ls -1 would finish in seconds.

      Recommendation: Avoid using -R unless absolutely necessary in large directory structures.

    • Impact of Sorting

      The default sorting method of ls is by filename, but sorting can add overhead. For example, using ls -l with sorting can take longer due to the extra computation required for ordering the files. Disabling sorting by using ls -1 or ls -U (which lists files in the order they appear on disk) can provide a significant speed boost.

      Example Command for No Sorting:

      ls -1U

      What it does: Lists files without sorting them, improving performance in large directories.

    Practical Recommendations for the Most Efficient ‘ls’ Usage

    When working with large directories, optimizing your ls usage can make a significant difference. Here are some practical tips for improving the speed and efficiency of ls:

    • Use ls -1 for Fast Listings

      If you don’t need detailed information, ls -1 is the fastest option for simply listing files.

    • Avoid ls -l and ls -a in Large Directories

      If you’re working with a directory containing a large number of files, avoid using the -l and -a options unless absolutely necessary. These options slow down the command by fetching extra metadata or hidden files.

    • Limit Recursive Listings

      Unless you need to list files across an entire directory tree, avoid using ls -R. If you must use recursion, try to limit the depth or use a different tool like find.

    • Use ls -U to Skip Sorting

      When performance is critical, use ls -U to prevent the system from sorting the files, which can save time in very large directories.

    By understanding how different ls options affect performance, you can tailor your usage of this command for optimal speed and efficiency in large directories. For more advanced techniques, check out resources like this guide on optimizing ‘ls’ for large directories.

    Optimizing Your Workflow with Advanced ‘ls’ Options

    The ls command in Linux is an essential tool for navigating the file system. While the basic functionality of ls is widely known, advanced options can help optimize system performance and streamline your workflow. By leveraging these options, you can more effectively sort, filter, and display file information, making it easier to manage and troubleshoot Linux file systems. In this section, we will explore advanced ls options to help you maximize your workflow efficiency, track directory changes, and optimize performance in distributed environments.

    Maximizing System Performance with Advanced ‘ls’ Command Options

    Optimizing system performance with the ls command involves using advanced options to enhance the way files are displayed, sorted, and managed. The following options can help fine-tune your Linux file system navigation and boost efficiency:

    • -l: This option provides a detailed listing of files, including permissions, owner, size, and timestamp. It helps you quickly identify large files or files with specific attributes.
    • -S: Sorts files by size, with the largest files displayed first. This option is particularly useful for identifying space hogs in large directories.
    • -h: When used with -l, this option displays file sizes in a human-readable format (e.g., KB, MB, GB). This makes it easier to understand file sizes at a glance.

    For example, running the command:

    ls -lS

    This command lists files in the current directory, sorted by size. It’s useful when you need to identify and manage large files in a directory quickly.

    Additionally, using ls -lh allows you to view file sizes in a more readable format:

    ls -lh

    This makes it easier to scan through directories, especially when dealing with multiple files of various sizes. These advanced options improve performance by reducing the need to open each file individually and by making it easier to identify which files are taking up valuable system resources.

    Monitoring Directory Changes with ‘ls’ and Logging Techniques

    You can track changes in a directory over time using the ls command in combination with logging techniques. This is especially useful for system administrators or developers who need to monitor specific directories for modifications. A simple way to accomplish this is by combining ls with the watch command or using cron jobs for periodic checks.

    For example, to continuously monitor a directory for changes, you can use the watch command like so:

    watch ls -lh

    This command will update the file listing every 2 seconds, allowing you to keep an eye on any changes. You can customize the interval with the -n option to adjust the refresh rate.

    Alternatively, you can automate the process with a cron job to log directory changes at specific intervals. Below is a simple shell script that logs the output of ls to a file:

    #!/bin/bash
    ls -lh > /path/to/logfile.txt

    To set up a cron job that runs this script every hour, add the following entry to your crontab:

    0 * * * * /path/to/your/script.sh

    This setup ensures that directory changes are captured at regular intervals and logged for review, providing an ongoing snapshot of directory contents.

    Optimizing Performance in a Distributed Environment Using ‘ls’ Command

    When working in a distributed environment or across multiple networked systems, the ls command can be used effectively to list files across multiple directories or remote machines. This can be particularly useful for administrators who need to manage files in a large-scale network setup.

    For example, to list the contents of multiple directories locally, you can run:

    ls /dir1 /dir2

    This command will list files from both directories in a single output. It’s a simple yet effective way to compare files in different locations without needing to switch between directories.

    In a distributed system, you can use ssh to list files on remote machines. For instance:

    ssh user@remote_host "ls -l /remote/dir"

    This command connects to a remote machine via SSH and runs ls to list files in a specified directory. This is helpful when managing files across multiple servers without needing to log in to each one separately.

    By using ls in this way, you can efficiently navigate distributed file systems, ensuring you have quick access to the files you need across various environments.

    For further details on the ls command, you can refer to the GNU Coreutils manual page for ls or explore more practical examples at LinuxConfig guide to using the ls command.

    How to Choose the Right ‘ls’ Command Options for Your Use Case

    The ls command in Linux is an essential tool for navigating and listing files and directories. By choosing the right ls options, you can significantly enhance your productivity when working in the command line. In this section, we’ll help you understand how to select the best ls options for different scenarios and optimize your workflow.

    Choosing the Right ‘ls’ Command Options for Your Use Case

    When you use the ls command, the options you choose can drastically change how the output is displayed, making it more suited to your specific needs. Below are some common scenarios where selecting the right flags will improve your experience:

    • Listing files in a human-readable format: If you want to display file sizes in a format that is easy to read, such as KB, MB, or GB, use the -h flag with ls. This is particularly useful when dealing with large directories or files.

      Example:

      ls -lh

      This command lists files with their detailed information, including human-readable file sizes.

    • Viewing hidden files: By default, ls doesn’t show files or directories that start with a dot (.)—these are typically hidden configuration files. To include hidden files in your listing, use the -a flag.

      Example:

      ls -la

      This will show all files, including hidden ones, along with detailed information.

    • Recursive listing: If you want to list files and directories recursively (i.e., including files inside subdirectories), you can use the -R flag. This is useful when you want to explore the entire directory structure.

      Example:

      ls -R

      This will display files in the current directory and all subdirectories, providing a comprehensive view of your file structure.

    • Sorting files: You might need to sort your files in a specific way, such as by size, modification time, or name. For instance, if you want to sort files by modification time, use the -t flag. To reverse the order of sorting, you can also add -r.

      Example:

      ls -ltr

      This will sort files by modification time, displaying the oldest files first.

    • Listing directories only: If you need to list only directories (and exclude files), you can use the -d flag with the */ pattern.

      Example:

      ls -d */

      This will list only directories within the current directory.

    When choosing the right ls command options, consider the type of task you’re performing and how much detail you need. For example, if you’re working in a directory with many subdirectories and files, combining -R for recursion with -lh for human-readable file sizes gives you a comprehensive yet readable listing.

    For more details on all available options, you can refer to the GNU Coreutils documentation for ls invocation, which provides a complete reference for all the flags and their use cases.

    If you’re looking for more practical examples of using ls in various scenarios, check out this Linux Handbook guide, which provides 17 useful examples of ls commands in different contexts.

    By experimenting with these options and understanding how they work together, you can tailor the ls command to fit your workflow and improve your efficiency in navigating Linux file systems.

    After Migrating: Optimizing ‘ls’ Command Usage for Better System Performance

    The ls command in Linux is one of the most fundamental tools for navigating the file system. However, after a system migration, optimizing its usage can greatly enhance productivity and system performance. Understanding how to tailor the ls command with advanced options and customization can save time and reduce system load, especially when managing large directories or complex file systems.

    Basic Usage and Syntax of the `ls` Command

    The basic syntax of the ls command is simple:

    ls [options] [file|directory]

    By default, ls lists the contents of the current directory. For example, running ls in your terminal will display the names of files and directories in the current location.

    Advanced Flags to Optimize `ls` Command Performance

    To maximize your productivity when using the ls command in Linux, utilizing its advanced flags can provide key performance benefits, particularly when dealing with large directories or when specific sorting or filtering is needed.

    • -l: Displays detailed information about each file, including permissions, number of links, owner, group, size, and the last modified date.
    • -h: When used with -l, it shows file sizes in human-readable format (e.g., 1K, 234M, 2G).
    • -S: Sorts the files by size, allowing you to quickly identify large files.
    • -t: Sorts files by modification time, with the most recently modified files listed first.
    • -r: Reverses the order of file listing, often used with -t or -S for descending order.

    For example, if you want to list files in a directory, sorted by size in human-readable format, you can use:

    ls -lhS

    This command displays files with their sizes, sorted from largest to smallest.

    Customizing `ls` for Efficiency

    Customization can go a long way in enhancing your ls workflow. One common approach is to create an alias for frequently used ls commands, saving you time by reducing the need to retype long options. For instance, you can add the following alias to your .bashrc or .zshrc file:

    alias l='ls -lhS'

    This simple alias allows you to run l instead of the full ls -lhS, streamlining your command input.

    Another powerful way to customize ls output is by integrating color coding. The --color option helps distinguish between file types by using different colors. To enable this feature permanently, you can add the following to your .bashrc or .zshrc file:

    alias ls='ls --color=auto'

    Real-World Optimization Example

    If you often work with directories containing thousands of files, using the ls command with the -U option, which prevents sorting and thus speeds up the output, can be a game-changer:

    ls -U

    This command will list files without sorting, drastically reducing the time needed to display results in large directories. This option is particularly useful when you’re only interested in the file names, not in their properties or sort order.

    For further exploration of the ls command, refer to the GNU Coreutils manual – ls invocation or check the ls(1) — Linux manual page.

    Enhancing System Performance with `ls`

    Efficiency in the terminal often translates to better system performance, especially post-migration when new configurations may need tweaking. Using optimized ls commands not only saves time but also reduces the load on the system by minimizing unnecessary resource consumption.

    For example, if you’re working with a directory full of log files and need to check for recently modified files, the following command will quickly give you an overview:

    ls -lt --color=auto

    This command sorts files by modification time, displaying them with color for quick identification, and it does so efficiently without overwhelming your system’s resources.

    By mastering these advanced ls command options and tailoring them to your specific workflow, you can achieve faster file system navigation and improve your overall Linux experience.

  • Emergency Restart Windows 10: Easy Guide for Quick Fixes

    Emergency Restart Windows 10: Easy Guide for Quick Fixes

    Why You May Need an Emergency Restart for Windows 10

    When your Windows 10 system becomes unresponsive, an emergency restart windows 10 can be a quick and effective solution to regain control. This section explores the methods you can use to perform an emergency restart, including keyboard shortcuts, using the power button, and more advanced methods like Safe Mode. By understanding these options, you’ll be better equipped to resolve system freezes and prevent them from happening in the future.

    Understanding Emergency Restart Features in Windows 10

    An emergency restart in Windows 10 is a way to force your system to restart when it becomes unresponsive or frozen, without following the usual shut-down process. This process is critical when normal controls, like the Start menu or taskbar, are unresponsive. It’s designed to quickly regain control of the system and avoid data loss in situations where the computer is stuck and unable to perform basic actions.

    Here are the most common methods to initiate an emergency restart:

    • Keyboard Shortcuts: The Ctrl + Alt + Del keyboard shortcut is one of the easiest ways to interrupt the system and access options like Task Manager. If your system is unresponsive, pressing Ctrl + Alt + Del allows you to force-close applications or restart the PC.
    Ctrl + Alt + Del

    This command opens a screen where you can select “Restart” to reboot the system.

    • Power Button: If keyboard shortcuts don’t work, using the power button can help. Press and hold the power button for around 5-10 seconds to force the system to shut down and restart. This method can be particularly useful when the system is entirely unresponsive.
    • Safe Mode: Safe Mode is an advanced option that can be accessed when the computer is not responding to normal restart commands. It’s helpful for troubleshooting underlying issues like corrupted files or driver problems. To use Safe Mode, you can press Shift + Restart from the Start menu or enter the Recovery Environment during startup.

    Each of these methods has its own use case depending on the severity of the system freeze. While the keyboard shortcut or power button is usually sufficient for minor freezes, Safe Mode is more effective for more persistent issues.

    When to Use an Emergency Restart for Windows 10

    An emergency restart is needed when your Windows 10 system becomes unresponsive, freezes, or crashes. These situations can be frustrating, but knowing when to use an emergency restart can help you save time and get back to work quickly.

    Here are a few common scenarios where an emergency restart windows 10 is necessary:

    • Frozen System: When your computer’s screen becomes unresponsive, and the mouse or keyboard doesn’t work, an emergency restart is the quickest solution.
    • Application Hang: If a particular program freezes and you can’t close it through the normal methods, using Ctrl + Alt + Del or the power button can help you regain control without waiting for the system to recover on its own.
    • System Not Responding to Normal Restart: Sometimes, clicking “Restart” in the Start menu may not trigger the reboot. In this case, using an emergency restart method like holding the power button down is necessary to force a reboot.
    • Blue Screen of Death (BSOD): If you encounter a BSOD, it indicates a severe system failure. In this case, you’ll need to use one of the emergency restart methods to bring your system back online.

    Comparing these methods:

    • Keyboard Shortcuts are typically the fastest and easiest solution for minor freezes or app hangs.
    • Power Button method works well when other methods fail or when the system is completely unresponsive.
    • Safe Mode is ideal for recurring freezes or crashes, especially when related to driver or software issues.

    Knowing which method to choose based on the severity of the issue can save you time and help you maintain control over your Windows 10 system.

    For more in-depth guides on troubleshooting system freezes or regular maintenance tips for Windows 10, check out How to Emergency Restart Windows 10/11 and Emergency Restart on Windows 10 – Pureinfotech guide.

    In conclusion, performing an emergency restart windows 10 is a valuable skill for dealing with system freezes or crashes. Understanding when and how to apply these methods can keep your system running smoothly and help prevent further issues in the future.

    Step-by-Step Guide to Force Restart Windows 10

    When Windows 10 freezes or becomes unresponsive, it can be frustrating, especially if you’re in the middle of important work. In these situations, performing an emergency restart is often the quickest way to get things back on track. This guide will walk you through various methods to force restart Windows 10, including keyboard shortcuts, using the power button, and utilizing Safe Mode for more advanced options. By the end of this guide, you’ll be equipped with the knowledge to resolve system freezes and avoid them in the future.

    How to Force Restart Windows 10 Using Keyboard Shortcuts

    One of the quickest ways to perform an emergency restart on Windows 10 is through keyboard shortcuts. This method is ideal when the system is unresponsive but still allows you to interact with certain elements like the Task Manager or the desktop.

    Here’s a simple step-by-step guide:

    1. Press `Ctrl + Alt + Del`: This opens the security options menu, which provides you with the option to restart the system.
    2. Select “Task Manager”: In the security menu, click on “Task Manager” to open the task management interface. This allows you to see which programs are causing the system to freeze.
    3. End Unresponsive Programs: If you can identify any unresponsive programs, right-click on them and select “End Task” to close them.
    4. Restart the System: If the Task Manager option is not available, you can press the Power icon on the bottom right and choose “Restart.”

    This method is a quick and effective way to resolve freezes without needing to power off the machine entirely. If the system remains unresponsive, however, you may need to try other options, like using the power button.

    Using the Power Button for an Emergency Restart

    If keyboard shortcuts don’t work, using the power button for an emergency restart is your next best option. This method forces the system to shut down and restart, often solving issues caused by system freezes or unresponsiveness.

    Follow these steps to perform a force shutdown:

    1. Press and Hold the Power Button: Press and hold the power button on your PC for 5-10 seconds. This will force Windows 10 to shut down completely, even if it’s frozen.
    2. Wait for the System to Power Off: Ensure the system powers down before releasing the button. You’ll see the screen go blank, and the lights on your PC will turn off.
    3. Wait a Few Seconds, Then Restart: After the PC has powered off completely, press the power button again to restart it.

    This method should only be used as a last resort, as it forces your system to shut down without closing applications properly, which could lead to data loss in unsaved work. However, it’s an effective way to regain control of your system when other methods fail. For additional troubleshooting, you may want to refer to Microsoft’s guide on emergency restarts.

    Using Safe Mode for Advanced Restart Options

    When simple restarts don’t fix the issue, booting into Safe Mode can help you troubleshoot deeper system problems. Safe Mode starts Windows 10 with only the essential drivers and services, allowing you to diagnose and fix issues without interference from third-party software or other system complexities.

    Here’s how to force restart into Safe Mode:

    1. Hold Shift and Restart: Press the Shift key on your keyboard, then click the Restart option from the power menu (accessible through the Start button).
    2. Navigate to Advanced Startup Options: After your PC restarts, it will present a blue screen with multiple options. Click on Troubleshoot, then Advanced options, and finally Startup Settings.
    3. Enable Safe Mode: Click on Restart, and once your PC restarts again, a list of options will appear. Press F4 to enable Safe Mode or F5 to enable Safe Mode with Networking.
    4. Perform Troubleshooting: Once in Safe Mode, you can run various diagnostics and uninstall recent software that may have caused the freeze.

    Using Safe Mode is an excellent option for diagnosing issues with Windows 10 and performing system recovery tasks like undoing recent changes, rolling back drivers, or uninstalling troublesome programs.

    Configuring Virtual Machines for System Optimization Post-Restart

    If you’re using Windows 10 in a virtual machine (VM) environment, optimizing your system for smoother restarts is particularly important. Virtual machines often suffer from resource allocation issues that can cause system freezes or slowdowns. Proper configuration of your VM can help reduce these issues, leading to more stable system performance and quicker recovery from freezes.

    Here’s how you can optimize your virtual machine environment:

    1. Adjust Resource Allocation: In your VM software (such as VMware or VirtualBox), ensure that the system has adequate resources (RAM and CPU cores) allocated. Too little can cause sluggish performance and increase the likelihood of freezing.
    2. Enable Virtual Machine Optimization Settings: Many VM platforms offer performance-boosting features like 3D acceleration or hardware virtualization support. Enable these settings for better performance.
    3. Update VM Software and Guest OS: Make sure both your virtual machine software and the Windows 10 installation within the VM are fully updated to avoid compatibility issues.
    4. Use Snapshots and Backups: Regularly create snapshots or backups of your VM before making significant changes. This way, if a freeze or crash occurs, you can quickly restore to a stable state without losing progress.

    By adjusting these settings and optimizing your virtual machine, you can reduce the chances of encountering system freezes and improve your overall experience.

    Conclusion

    Knowing how to perform an emergency restart Windows 10 can be a lifesaver when your system becomes unresponsive. Whether you’re using keyboard shortcuts, the power button, Safe Mode, or configuring virtual machines, these methods will help you regain control of your PC. To prevent future freezes, be sure to maintain regular system updates and optimize your virtual machine settings. If issues persist, consider further troubleshooting steps or consult resources like PCWorld’s guide on emergency restarts for additional insights.

    Comparison of Emergency Restart Methods: Pros and Cons

    When your Windows 10 system freezes, crashes, or becomes unresponsive, performing an emergency restart can often be the quickest way to resolve the issue and get back to work. Unlike a regular restart from the Start menu, an emergency restart is used when the system fails to respond to typical commands. This section will explore the various methods available for an emergency restart on Windows 10, compare their advantages and disadvantages, and help you choose the best method for your needs.

    Pros and Cons of Emergency Restart vs Regular Restart in Windows 10

    Both emergency restart and regular restart methods serve to reset your system, but they are used in different situations. A regular restart is the typical process initiated from the Start menu and is often used for routine system updates or software installations. On the other hand, an emergency restart is used when your computer becomes unresponsive, such as during a system freeze or crash.

    • Regular Restart:
      • Pros: Safe and controlled, ensures proper shutdown of applications, and avoids potential data corruption.
      • Cons: Cannot be performed when the system is completely unresponsive or frozen.
      • When to Use: Ideal for routine shutdowns or restarts when the system is functioning normally.
    • Emergency Restart:
      • Pros: Quick and effective in situations where the system becomes completely unresponsive, such as when an application freezes or the screen turns black.
      • Cons: Risk of data loss if the system is unable to save open files, especially during a forced restart using the power button.
      • When to Use: Necessary when the system is frozen and other methods (like using the Start menu) fail to work.

    In most cases, the emergency restart is a last resort, but it can often save time when the system is unresponsive. If possible, it’s always better to try a regular restart before opting for an emergency solution.

    Key Considerations When Choosing Between Emergency Restart Methods

    Choosing the best emergency restart method depends on the state of your system and how responsive it is. Here are a few factors to consider:

    • System State:
      • If only an application has frozen, you may want to try closing the app or using Ctrl + Alt + Del to open Task Manager before restarting the system.
      • If the entire system is unresponsive (such as a black screen or system freeze), a power button restart or Safe Mode restart may be the only viable options.
    • Time Constraints:
      • Keyboard shortcuts like Ctrl + Alt + Del are quick and may allow you to recover without shutting down your entire system.
      • Power button restart might take a few seconds longer but can still be effective in emergency scenarios.
    • Risk of Data Loss:
      • Forced restarts (e.g., using the power button) may cause data loss, especially if files were open and not saved. Always ensure you save your work regularly and consider using backup solutions like cloud storage to minimize this risk.

    Choosing the right method boils down to the urgency of the situation, the type of freeze, and whether you can afford potential data loss.

    Alternative Methods to Reboot a Frozen Windows 10 PC

    If your PC freezes and normal options aren’t working, several methods can help you perform an emergency restart. Here are the most common methods:

    1. Using Keyboard Shortcuts (Ctrl + Alt + Del):
      • Press Ctrl + Alt + Del to open the task manager or lock screen. This is often effective when an application freezes.
      • If Task Manager appears, try ending the unresponsive task before restarting the system.
    2. Using the Power Button:
      • If Ctrl + Alt + Del doesn’t work, press and hold the power button for 5–10 seconds to force the PC to shut down.
      • This method forces a hard restart, which can help in most unresponsive situations but might risk data loss.
    3. Booting into Safe Mode:
      • Safe Mode can be a useful tool if the system is repeatedly freezing and you need to troubleshoot. Restart the system and press F8 (or use the advanced startup options in the recovery environment).
      • Safe Mode starts Windows with minimal drivers, which can help isolate issues.

    Each of these methods can be effective depending on the severity of the issue and how unresponsive the system is. In most cases, starting with Ctrl + Alt + Del is a safer, non-destructive option.

    Leveraging Cloud Infrastructure for Optimal Post-Restart Performance

    An emergency restart can sometimes lead to data loss, especially if programs were open during the restart. To prevent potential data loss, cloud backup solutions are invaluable.

    Using cloud services like OneDrive, Google Drive, or Dropbox can ensure that important documents and files are automatically saved, even during system failures. By syncing your files to the cloud, you can easily restore data after a restart without worrying about losing your work.

    Additionally, cloud services offer the advantage of accessing your files from multiple devices. If your system experiences frequent freezes, keeping a cloud backup ensures that critical data remains accessible and safe.

    In conclusion, while performing an emergency restart in Windows 10 may be necessary to recover from a system freeze or crash, it’s important to evaluate the method that best suits your needs. Whether you choose keyboard shortcuts, a power button restart, or Safe Mode, each approach has its pros and cons. For long-term peace of mind, consider using cloud backup solutions to safeguard your data before performing any emergency restart.

    By carefully weighing the options and understanding when to use each method, you can make the most informed decision when facing a system freeze or crash.

    How to Troubleshoot Unresponsive Windows 10 Systems Before Restarting

    When your Windows 10 system becomes unresponsive, the instinct may be to perform an emergency restart. However, before you resort to rebooting your computer, there are several troubleshooting steps you can try. These solutions will help you regain control of your system and avoid the disruption that a restart can cause.

    Common Causes for System Freeze in Windows 10 and How to Handle Them

    System freezes in Windows 10 can occur for several reasons. Common causes include overloaded RAM, high CPU usage, and faulty drivers. Understanding these issues can help you troubleshoot and resolve the problem without the need for an emergency restart.

    • Overloaded RAM: When your computer’s memory is maxed out, it can lead to unresponsiveness. You can check your system’s memory usage through Task Manager.
      • To open Task Manager, press Ctrl + Shift + Esc. In the “Processes” tab, look for any applications using excessive memory. Right-click and select End Task to free up memory.
    • High CPU Usage: A process that’s consuming too much CPU power can also cause your system to freeze. In Task Manager, check the Performance tab to see if the CPU usage is spiking.
      • You can close resource-hungry applications directly from Task Manager, or, if the problem persists, consider updating the drivers for the program causing the issue.
    • Faulty Drivers: Outdated or corrupted drivers can also cause Windows 10 to freeze. To check for driver updates:
      1. Open the Device Manager by typing it into the Start menu search bar.
      2. Look for any devices with a yellow warning icon, which indicates a problem.
      3. Right-click on the device and select Update Driver to ensure that you have the latest software.

    For a more detailed guide on troubleshooting freezes and blue screen issues, you can refer to this Microsoft support document.

    How to Configure Windows 10 to Handle Unresponsiveness More Efficiently

    If your system is frequently becoming unresponsive, there are several configuration adjustments you can make to improve its performance and responsiveness.

    • Adjust Power Settings: Changing your power settings can help improve performance by allowing your system to prioritize speed over energy conservation.
      1. Open Settings from the Start menu.
      2. Go to System > Power & sleep.
      3. Under Related settings, click Additional power settings and select High performance.
    • Disable Unnecessary Startup Programs: Programs that launch automatically during startup can slow down your system and contribute to freezes.
      1. Open Task Manager (press Ctrl + Shift + Esc).
      2. Go to the Startup tab and disable any unnecessary programs by right-clicking and selecting Disable.
    • Manage Visual Effects: Windows 10 uses a variety of visual effects that can use up system resources. Reducing these effects can help speed up your computer.
      1. Right-click on the Start button and select System.
      2. Choose Advanced system settings on the left.
      3. In the Performance section, click Settings, and select Adjust for best performance to disable unnecessary visual effects.

    For more details on optimizing Windows 10, including automating regular maintenance tasks with Task Scheduler, you can refer to this guide on Windows 10 freezing and BSOD issues.

    By making these adjustments, your system will be better equipped to handle issues before they escalate to the point of requiring an emergency restart in Windows 10.

    For additional help, you can explore Microsoft’s advanced troubleshooting for startup issues.

    Best Practices for Maintaining System Stability and Preventing Freezes

    When facing a frozen or unresponsive Windows 10 system, an emergency restart can be a quick solution to regain control. This section will guide you through various emergency restart methods for Windows 10, helping you choose the best approach and optimize your system for long-term stability. By understanding key preventive strategies like system updates, using monitoring tools, and enhancing performance, you can avoid these frustrating interruptions in the future.

    The Role of System Updates in Preventing Emergency Restart Situations

    Keeping your Windows 10 system up to date is one of the most effective ways to prevent emergencies that might lead to freezes or system unresponsiveness. Regular Windows updates are designed to fix bugs, patch security vulnerabilities, and improve system performance, all of which contribute to system stability.

    For example, when Windows 10 detects certain hardware issues or software incompatibilities, it may release a patch that helps prevent crashes or freezes. These updates often contain important performance fixes that ensure your system runs smoothly, which reduces the need for emergency restarts.

    To enable automatic updates:

    1. Open Settings > Update & Security > Windows Update.
    2. Click Check for Updates to ensure your system is up to date.

    Windows 10 freezes are often caused by outdated drivers or missing security updates. By keeping your system updated, you ensure that your PC is protected from many potential stability issues, making emergency restarts less frequent.

    System Monitoring Tools to Help Prevent Windows 10 Freezes

    Windows 10 offers built-in tools like Task Manager and Performance Monitor, which allow you to track your system’s health and catch issues before they cause a freeze. Monitoring your system regularly with these tools can help you identify processes or programs that are consuming excessive resources, which might lead to instability.

    To open Task Manager:

    1. Press Ctrl + Shift + Esc or right-click the Taskbar and select Task Manager.
    2. Here, you can check the CPU, Memory, and Disk usage to identify any processes that are causing excessive load.

    Similarly, Performance Monitor can give you a more in-depth look at your system’s performance over time. By using these tools, you can take proactive steps, such as closing resource-heavy programs or troubleshooting underlying issues, before they cause a system freeze.

    For more details on managing system performance and monitoring tools, check out our guide on optimizing system performance.

    Improving the Speed and Efficiency of Emergency Restart Procedures

    When your system becomes unresponsive, knowing how to perform a quick emergency restart is crucial to regain control. The fastest way to do this is by using keyboard shortcuts or the power button.

    • Keyboard Shortcut: Press Ctrl + Alt + Del. This will bring up the options screen, allowing you to select Task Manager or log out, which can sometimes restore system functionality without needing a full restart.
    • Power Button: If your system remains unresponsive, holding the power button for about 5-10 seconds will force a hard shutdown, which is often the quickest option.

    While this method can help in the short term, it’s important to understand that performing frequent emergency restarts might indicate deeper issues with system performance or stability. For long-term solutions, regular system maintenance and updates are crucial.

    Optimizing System Performance with Scalable Cloud Infrastructure

    For users who experience frequent freezes or performance issues, leveraging cloud infrastructure can provide significant improvements. By offloading resource-intensive tasks or storing critical data in the cloud, you can reduce the strain on your local hardware and prevent system slowdowns that lead to freezes.

    Cloud solutions, such as backups or performance optimization tools, ensure that your system operates efficiently, even when your local resources are strained. For example, cloud backups can protect your data in case your system needs an emergency restart, reducing the risk of data loss.

    By using cloud-based tools and services, you can also improve the overall performance of your system, reducing the likelihood of needing an emergency restart in the first place. This approach to system stability offers a long-term solution to managing resource demands effectively.

    For further guidance on optimizing your system with scalable cloud infrastructure, you can refer to this Windows 10 optimization guide.


    By adopting these best practices, from keeping your system updated to utilizing monitoring tools and scalable cloud infrastructure, you can significantly reduce the likelihood of needing an emergency restart windows 10 in the future. Regular maintenance and proactive strategies will keep your system running smoothly, ensuring long-term stability and performance.

    Optimizing Windows 10 After an Emergency Restart

    After an emergency restart in Windows 10, you may notice a decrease in system performance or even encounter occasional freezes. Taking the right steps to optimize your system can improve stability and prevent further issues. In this section, we’ll walk you through essential actions to ensure your system runs smoothly after an emergency restart, including disk cleanup, running Windows updates, and troubleshooting tools to prevent future freezes.

    Steps to Optimize Windows 10 After an Emergency Restart

    After performing an emergency restart in Windows 10, it’s crucial to optimize your system to restore performance and prevent future issues. Here are some easy-to-follow steps you can take:

    1. Run Disk Cleanup

      Disk cleanup is a quick and effective way to free up space and remove temporary files that might slow down your system.

      • Open the Start menu and search for Disk Cleanup.
      • Select the drive you want to clean (usually the C: drive) and click OK.
      • Choose the types of files to delete (such as system files, temporary files, and thumbnails), then click OK to start the cleanup.
      • This helps free up valuable space and may improve performance.
    2. Check for Windows Updates

      Keeping your system up-to-date is essential for maintaining security and stability.

      • Go to Settings > Update & Security > Windows Update.
      • Click Check for updates to ensure you have the latest patches and improvements installed.
      • Regular updates help fix bugs that could cause system freezes and enhance overall performance.
    3. Run the System File Checker (SFC)

      The System File Checker (SFC) tool scans your system for corrupted files and repairs them.

      • Open Command Prompt as an administrator (search for cmd, then right-click and select Run as administrator).
      • Type the following command:
        sfc /scannow
      • Press Enter.
      • This process may take some time, but it will automatically repair any corrupted system files.

    By following these steps, you’ll help ensure your system is in top shape after an emergency restart.

    Post-Restart Troubleshooting to Prevent Future System Freezes

    To prevent future freezes and system instability after an emergency restart, it’s important to address potential underlying issues with both software and system settings. Here are key steps to troubleshoot and maintain system health:

    1. Run the Performance Troubleshooter

      Windows 10 includes a built-in tool to help diagnose performance problems.

      • Go to Settings > Update & Security > Troubleshoot.
      • Select Additional troubleshooters, then choose System Maintenance and follow the on-screen instructions.
      • This will check for issues that could be causing your system to freeze and provide suggestions for fixes.
    2. Ensure Your Drivers Are Up-to-Date

      Outdated drivers can lead to system instability and performance problems.

      • Open Device Manager (search for it in the Start menu).
      • Right-click on your device categories (such as Display adapters or Network adapters) and select Update driver.
      • Choose Search automatically for updated driver software to ensure everything is up to date.
    3. Backup Your System Regularly

      Regular backups help protect your data and ensure you can restore your system to a stable state if needed.

      • Set up File History or use OneDrive for automatic backups.
      • Go to Settings > Update & Security > Backup to enable File History.

    By following these troubleshooting steps, you can maintain your system’s performance and prevent future freezes, ensuring that your Windows 10 machine runs smoothly over time.

    For more details on cleaning up your drive, check out this official Microsoft guide on freeing up drive space and how to defragment and optimize your drives.

    Ensuring Data Safety During an Emergency Restart

    When performing an emergency restart in Windows 10, ensuring data safety is critical to avoid potential loss or corruption. Emergency restarts can happen for various reasons, such as system freezes or software crashes, but knowing how to back up your data beforehand and understanding the risks involved can significantly minimize the chances of losing important files. This section will explain simple, effective backup strategies and highlight the differences between emergency restarts and hard shutdowns to help you safeguard your data.

    How to Backup Data Before an Emergency Restart in Windows 10

    To protect your data before performing an emergency restart in Windows 10, using built-in backup tools is crucial. There are several methods for backing up your files, but File History and OneDrive are the easiest and most accessible for most users.

    1. Enable File History

      File History is a simple and automatic backup feature that regularly saves copies of your files, making it easy to restore them if something goes wrong. Here’s how to enable it:

      1. Open the Settings menu.
      2. Click on Update & Security.
      3. Select Backup from the left-hand menu.
      4. Under Back up using File History, click on Add a drive and select an external drive or network location.
      5. Turn on the Automatically back up my files option.

      What it does: File History backs up files from your Libraries, Desktop, Contacts, and Favorites. It’s a great way to automatically ensure data safety before restarting or if your system experiences a failure. Learn more about configuring File History here.

    2. Use OneDrive for Cloud Backup

      OneDrive is another excellent option for backing up your files to the cloud. It automatically syncs files from your OneDrive folder to cloud storage, making them accessible from any device:

      1. Right-click on the OneDrive icon in your taskbar and select Settings.
      2. Under the Backup tab, click Manage backup to choose which folders to sync (e.g., Documents, Pictures).
      3. Ensure Sync all files and folders is selected to back up your data.

      What it does: OneDrive stores your files in the cloud, protecting them from local system failures. It’s especially helpful for ensuring your most important documents are always available, even if your computer has to undergo an emergency restart.

    By enabling these backup methods, you ensure that your data is safe and can be quickly restored if needed. Explore other backup options for Windows 10.

    Emergency Restart vs Hard Shutdown: Key Differences and Risks

    It’s important to understand the difference between an emergency restart and a hard shutdown in Windows 10, as each has its own set of risks.

    • Emergency Restart

      An emergency restart is typically performed when your system becomes unresponsive, but you can trigger it through standard software methods. For example, using Ctrl + Alt + Delete or selecting the Restart option in the Start menu. It aims to restart your system safely and cleanly, closing applications and processes properly.

      Risks: While an emergency restart is usually safer than a hard shutdown, it can still result in potential data loss if open files or applications are not saved before the restart.

    • Hard Shutdown

      A hard shutdown occurs when you forcibly power off your computer, usually by holding down the power button for several seconds. This method should only be used when the system is completely unresponsive.

      Risks: A hard shutdown is riskier than an emergency restart because it cuts power abruptly, which can lead to:

      • Data loss: If files were being written when the power was cut, they may not be saved correctly.
      • File corruption: Improper shutdowns can corrupt files or the operating system, potentially leading to long-term issues.

      Why hard shutdowns can lead to data loss or file corruption.

    To minimize the risk of data loss, always try to perform an emergency restart when possible and avoid hard shutdowns unless absolutely necessary. Regularly backing up your data ensures that you are prepared for unexpected system failures, no matter how they occur.

    Understanding Windows 10 Recovery Options Beyond Emergency Restart

    When your Windows 10 system becomes unresponsive, an emergency restart is often the first solution that comes to mind. However, there are several additional recovery options that can help resolve more persistent issues or prevent future crashes. This guide will walk you through various recovery methods, including Safe Mode, System Restore, and Startup Repair, providing actionable solutions for when your system freezes or fails to start correctly.

    Windows 10 Recovery Options and Their Effectiveness

    Windows 10 offers several recovery methods that go beyond a simple emergency restart. These options are designed to address more complex system issues, such as software conflicts, driver problems, or corrupted system files.

    • Emergency Restart Methods: In the event of a system freeze, you can initiate an emergency restart using a few different methods. A quick way to force a restart is by holding down the power button for about 10 seconds until the system shuts down completely. Alternatively, pressing Ctrl + Alt + Del can bring up the Task Manager, where you can restart the system if the screen is responsive. These methods are effective for minor freezes but may not address deeper system issues.
    • Safe Mode: Safe Mode starts Windows with a minimal set of drivers and services, making it ideal for troubleshooting system errors. To access Safe Mode, restart your computer and press F8 (or Shift + F8) before Windows loads. In Safe Mode, you can uninstall problematic software, update drivers, or run antivirus scans to identify potential causes of your system freeze. Safe Mode is particularly effective for addressing software-related issues, but it may not resolve hardware or critical system file errors.
    • System Restore: If your system was working fine before and suddenly began to crash, using System Restore can help you roll back to a previous stable state. To access System Restore, type “System Restore” in the search bar, select Create a restore point, and click System Restore. This method is especially useful when recent changes (e.g., updates or installations) cause system instability. However, it will not affect your personal files, only system settings and installed programs.
    • Startup Repair: If your system fails to boot, you can use Startup Repair to fix common startup issues. To access this option, restart your computer, and during boot, press F11 or use the Advanced Startup options in Settings. From there, select Troubleshoot, then Advanced Options, and choose Startup Repair. This tool automatically scans and repairs any issues preventing Windows from loading properly. It is particularly helpful for fixing corrupted system files or boot issues.

    How to Set Up Automatic Restarts for Windows 10 to Avoid Crashes

    An effective way to minimize disruptions caused by system freezes is to enable automatic restarts. This feature allows your system to automatically reboot when a critical error occurs, reducing the impact of unexpected crashes.

    To enable automatic restarts in Windows 10, follow these simple steps:

    1. Press Windows + R to open the Run dialog box.
    2. Type sysdm.cpl and press Enter to open the System Properties window.
    3. Click the Advanced tab and under Startup and Recovery, click Settings.
    4. In the Startup and Recovery window, check the box next to Automatically restart under the System failure section.

    Enabling this option ensures that if Windows encounters a system failure (such as a blue screen of death), it will automatically restart rather than leaving the system stuck in an error state. This is a helpful feature that can prevent long periods of system downtime, especially after a crash. However, it’s essential to monitor the system’s performance afterward, as repeated crashes could indicate deeper issues that require more advanced troubleshooting.

    For further guidance on setting up recovery options, you can explore the Windows recovery options in Windows 10 — official Microsoft support and learn more about other tools like Startup Repair and System Restore.