Category: Uncategorized

  • err_cache_miss Fix: Ultimate Guide to Safe Error-Free Solutions

    err_cache_miss Fix: Ultimate Guide to Safe Error-Free Solutions

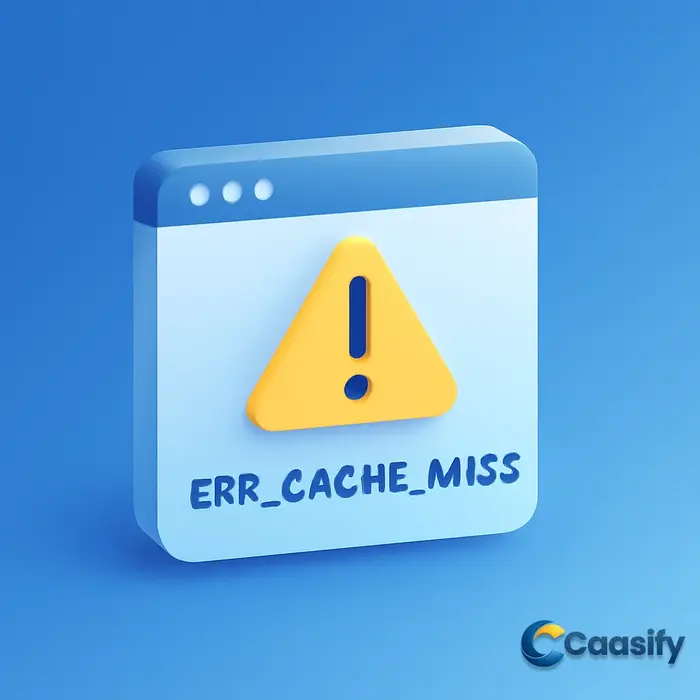
    Introduction: Understanding the ‘ERR_CACHE_MISS’ Error

    The ERR_CACHE_MISS error is a common issue that web users and developers encounter, typically related to problems with cached data. This error occurs when the browser fails to retrieve the required resources from the cache, resulting in a failed page load or unexpected behavior. Understanding why it happens and how to fix it is crucial for maintaining a smooth web experience. This guide covers the causes of the ERR_CACHE_MISS error and provides insight into its impact on systems or websites, with a focus on actionable solutions.

    What is ‘ERR_CACHE_MISS’ and Why Does It Occur?

    The ERR_CACHE_MISS error appears when a browser is unable to fetch data from its cache. The cache, which stores frequently accessed files like images, scripts, and stylesheets, speeds up page loading by avoiding repeated requests to the server. However, when the cache is outdated, corrupted, or misconfigured, the browser fails to retrieve necessary resources, resulting in the ERR_CACHE_MISS error.

    Common causes of this issue include:

    • Outdated or corrupted cache data: If the cached files are stale or corrupted, the browser cannot load them properly.
    • Server-side caching issues: Problems with the server’s cache can also lead to this error, as the browser may not receive the correct cache headers from the server.
    • Changes in the website: If a site undergoes updates and the cache isn’t refreshed, the browser might still try to load old resources.

    These causes often manifest when accessing websites that rely heavily on caching mechanisms to optimize performance. The err_cache_miss fix typically involves clearing or updating the cache, either on the browser or the server.

    How the ‘ERR_CACHE_MISS’ Error Impacts Your System or Website

    The ERR_CACHE_MISS error can significantly affect user experience and website performance. When users encounter this error, they may experience issues such as slow page loads, missing content, or the inability to access specific features of a site.

    Here are some typical impacts:

    • Page loading failures: If the browser can’t retrieve the required resources, the page may not load correctly, leading to an incomplete or broken webpage.
    • Reduced user engagement: Frequent cache misses can frustrate users, causing them to leave the site or abandon their tasks.
    • Performance degradation: Websites may experience slower load times as browsers repeatedly attempt to fetch missing resources from the server rather than utilizing cached data.

    To mitigate these impacts, it’s essential to address the ERR_CACHE_MISS error quickly. While it can be fixed by clearing the cache on the user’s side, understanding its root cause—whether it’s related to server-side issues or local browser problems—can lead to more effective long-term solutions.

    For more detailed information on the ERR_CACHE_MISS error, you can refer to this guide on what the error means, or check out steps for fixing it in Chrome. For a comprehensive tutorial on cache clearing methods, you can visit this SiteGround article.

    How Browser Cache Affects Performance and Contributes to ‘ERR_CACHE_MISS’

    The browser cache plays a pivotal role in improving web performance by reducing the load time of websites. However, improper cache management can contribute to errors like ERR_CACHE_MISS. Understanding how the browser cache works, how it can become corrupted, and the impact of outdated browsers is essential for troubleshooting this error and improving website performance. In this section, we’ll explore these aspects and provide actionable strategies to fix the ERR_CACHE_MISS error.

    The Role of Browser Cache in Web Performance

    The browser cache is a critical mechanism that stores various web assets like images, stylesheets, and JavaScript files locally on your device. This helps reduce load times by ensuring that previously accessed resources don’t need to be downloaded again from the server, which can be time-consuming.

    For example, consider a user visiting a website for the first time. The browser downloads the necessary files such as images and scripts to render the page. When the same user revisits the website, the browser uses the locally stored files (cached content) to load the page much faster, improving the overall user experience and reducing server load. This process is particularly beneficial for websites that contain large files or require multiple resources to render the page.

    Caching improves user experience by:

    • Reducing load times: Faster access to content already stored in the cache.
    • Lowering server requests: By serving cached content, the browser reduces the number of requests made to the server.

    However, there is a trade-off. If the cache becomes outdated or if a resource is updated on the server but the cache is not cleared, it can cause issues like the ERR_CACHE_MISS error. This happens when the browser is unable to retrieve the updated content from its cache, leading to a failed page load. To manage this, Cache-Control headers, such as Cache-Control: no-cache or Cache-Control: max-age=3600, can be set to control how long the cache should be considered valid.

    How Corrupted Cache Files Lead to ‘ERR_CACHE_MISS’

    Corrupted cache files can disrupt the normal functioning of the browser, leading to errors like ERR_CACHE_MISS. Corruption typically occurs when cache files become incomplete, damaged, or improperly stored. As a result, the browser may fail to load certain resources, even though they are cached locally, causing a page to load improperly or not at all.

    For instance, imagine a user attempting to revisit a website, but the page fails to load. This could be due to a corrupted cache where the browser is unable to find the necessary files to load the page correctly. In such cases, clearing the browser cache often resolves the issue, as it forces the browser to reload fresh copies of the resources from the server.

    To fix this, you can manually clear the cache or use developer tools to inspect and remove any problematic cached files. Here’s how to clear the cache in Google Chrome:

    1. Open Chrome and press Ctrl + Shift + Delete (Windows) or Command + Shift + Delete (Mac).
    2. Select “Cached images and files” and click “Clear data.”

    This action deletes any corrupted files, and the browser will download the updated versions of the files on the next visit, preventing the ERR_CACHE_MISS error.

    The Impact of Outdated Browsers on Cache Errors

    Outdated browsers can also contribute to cache-related errors, including the ERR_CACHE_MISS error. Modern browsers are better at managing cache, ensuring that outdated or corrupted files are cleared automatically when necessary. However, older browsers may struggle with cache management, leading to inconsistent behavior and errors when attempting to access cached content.

    For example, a user with an outdated version of Google Chrome might encounter the ERR_CACHE_MISS error while trying to revisit a website. This could happen because the outdated browser doesn’t handle cache invalidation as efficiently as newer versions. By updating the browser to the latest version, many cache-related issues, including ERR_CACHE_MISS, can be resolved.

    To update your browser:

    1. In Chrome, click on the three dots in the top-right corner.
    2. Go to “Help” > “About Google Chrome.”
    3. Chrome will automatically check for updates and install them if available.

    Regularly updating your browser ensures that it can manage the cache properly and handle newer web technologies, preventing cache-related issues that lead to errors like ERR_CACHE_MISS.

    By understanding the role of browser cache in performance and the causes behind the ERR_CACHE_MISS error, you can take proactive steps to optimize cache management and improve user experience.

    For more detailed guidance on how to fix the ERR_CACHE_MISS error, check out How to Fix ERR_CACHE_MISS Error in Chrome — SiteGround. For further information on cache clearing methods, visit How to fix ERR_CACHE_MISS error in Google Chrome — Hostinger.

    Comparison of Solutions for Fixing ‘ERR_CACHE_MISS’

    The ‘ERR_CACHE_MISS’ error is a common issue faced by many users when dealing with web browsers or servers. This error usually occurs when a browser fails to load cached resources, resulting in unnecessary page reloads and delays. In this section, we will compare several solutions for resolving the ‘ERR_CACHE_MISS’ error. By understanding the pros and cons of each method, you’ll be able to choose the most suitable fix for your website or application, preventing the error from disrupting user experience in the future.

    Browser-Side Fixes: Clearing Cache vs. Using Developer Tools

    One of the first steps to address the ‘ERR_CACHE_MISS’ error is to clear your browser cache. Browsers often store data to speed up page loading, but if this cache becomes outdated or corrupted, it can lead to errors like ‘ERR_CACHE_MISS’. Clearing the cache ensures the browser fetches fresh copies of the necessary files.

    Steps for Clearing Cache:

    • Google Chrome:
      1. Open Chrome and click on the three dots in the upper-right corner.
      2. Navigate to More tools > Clear browsing data.
      3. Select Cached images and files and click Clear data.
    • Mozilla Firefox:
      1. Open Firefox and click on the three horizontal bars in the upper-right corner.
      2. Go to History > Clear Recent History.
      3. Select Cache and click Clear Now.

    Clearing the cache can often resolve the issue, but if the error persists, using the browser’s developer tools may provide more insights into the cause.

    Using Developer Tools to Diagnose Cache Issues:

    1. Open Chrome’s DevTools by pressing Ctrl + Shift + I or right-clicking on the page and selecting Inspect.
    2. Go to the Network tab and check the status of the resources being loaded. A “304 Not Modified” response indicates that the cache is being used.
    3. If resources are not being served from cache, look for potential cache-control issues.

    Developer tools allow you to dig deeper into cache management and see real-time data on how the browser interacts with cached files.

    Server-Side Fixes: Configuration Tweaks vs. Advanced Caching Strategies

    In addition to browser-side fixes, server-side adjustments can resolve ‘ERR_CACHE_MISS’. Server-side cache control ensures that cached resources are properly served to clients. There are two primary approaches: simple configuration tweaks and more advanced caching strategies.

    Configuration Tweaks:

    Simple changes in the server configuration can have a significant impact on cache behavior. For instance, setting appropriate cache headers helps ensure that the browser caches resources effectively.

    Example – Setting Cache-Control Header:

    Cache-Control: public, max-age=86400

    This header tells the browser to cache the resource for one day (86400 seconds).

    Advanced Caching Strategies:

    For larger websites or applications, advanced caching strategies may be necessary. This involves deeper server configurations, such as edge caching, dynamic content caching, and using more sophisticated caching mechanisms like Varnish or Nginx.

    Example – Nginx Cache-Control Setup:

    location ~* .(jpg|jpeg|png|gif|css|js)$ {
        add_header Cache-Control "public, max-age=31536000, immutable";
    }

    This Nginx configuration ensures static resources like images, CSS, and JavaScript files are cached for up to one year.

    Both server-side fixes can resolve the ‘ERR_CACHE_MISS’ error, but advanced strategies require careful planning and testing to ensure compatibility with your infrastructure.

    Tools for Debugging ‘ERR_CACHE_MISS’: Pros and Cons

    To effectively troubleshoot ‘ERR_CACHE_MISS’, using specialized tools can save a lot of time. Browser developer tools, as mentioned earlier, provide basic diagnostics, but there are additional third-party tools designed for cache issue debugging.

    Popular Debugging Tools:

    • Chrome DevTools: Offers in-depth insights into network requests and cache responses. It is a quick way to identify problems like caching headers and resource status.
    • F12 Developer Tools in Edge: Similar to Chrome’s DevTools, offering a comprehensive view of the request and response headers.
    • WebPageTest: Provides detailed results on cache headers, load time, and other performance metrics.

    Pros:

    • Inexpensive or free tools (like Chrome DevTools) are readily available.
    • Provides real-time diagnostics that can help identify cache-related problems.

    Cons:

    • These tools may not reveal complex server-side issues or problems that occur in production environments.
    • They require some technical knowledge to interpret the results effectively.

    By using the right tools, you can quickly identify the root cause of ‘ERR_CACHE_MISS’ and apply an appropriate fix.

    Using Scalable Cloud Solutions for Caching Optimization

    For websites with high traffic or complex infrastructure, scalable cloud solutions offer an effective way to optimize caching and avoid errors like ‘ERR_CACHE_MISS’. Content Delivery Networks (CDNs) like Cloudflare or AWS CloudFront can cache content at the edge, reducing the load on your server and improving overall site performance.

    Benefits of Scalable Cloud Solutions:

    • Improved Load Times: Content is served from the nearest server to the user, reducing latency.
    • Enhanced Cache Control: Cloud services allow fine-grained cache control, ensuring the right resources are cached at the right time.

    Example – Cloudflare Cache Control:

    cache-control: public, max-age=3600

    Cloudflare allows setting cache expiration times and managing how static content is cached globally.

    These scalable solutions are ideal for websites with significant traffic or dynamic content, providing both caching benefits and reduced server load.

    Conclusion

    In this section, we’ve explored multiple solutions for fixing the ‘ERR_CACHE_MISS’ error. By using browser-side fixes, server-side configuration tweaks, or advanced caching strategies, you can resolve this error and optimize your caching system. If you’re dealing with complex caching setups, consider leveraging cloud solutions like Cloudflare or AWS CloudFront for scalable optimization. Remember, proper diagnostics using developer tools is key to identifying the root cause and implementing the right fix.

    For more information on fixing related issues, check out our ERR_CONNECTION_RESET Fix: Expert Guide to Solving Browser Issues.

    Choosing the Right Solution for Your Setup

    When dealing with the ‘ERR_CACHE_MISS’ error, selecting the right fix can be challenging. This error typically occurs when there’s a problem with the cache, either due to browser settings, network configurations, or server-side issues. In this section, we will guide you through different approaches to resolve this issue. Whether you’re troubleshooting your Windows 10 browser or fine-tuning your server settings, this guide will help you choose the best solution for your setup and ensure a smoother browsing experience.

    Step-by-Step Guide to Fixing ‘ERR_CACHE_MISS’ on Windows 10

    If you’re encountering the ‘ERR_CACHE_MISS’ error on a Windows 10 system, clearing the browser cache and resetting certain network settings are essential first steps. Here’s how you can resolve the issue:

    1. Clear Browser Cache

      A corrupted or outdated browser cache is often the culprit behind the error. To clear your cache in Chrome:

      • Open Chrome and go to the three-dot menu in the upper-right corner.
      • Navigate to More Tools > Clear Browsing Data.
      • Choose a time range (e.g., “All time”) and check Cached images and files.
      • Click Clear Data.
    2. Flush DNS Cache

      Running a DNS flush can help clear cached data at the system level:

      • Open the Command Prompt as an administrator.
      • Run the following command:
      • ipconfig /flushdns

        This command clears your DNS resolver cache, which could resolve issues linked to cached DNS entries.

    3. Reset TCP/IP Stack

      Resetting your TCP/IP stack can help if network issues are causing the error. Run the following command:

      netsh int ip reset

      This resets the TCP/IP stack to its default state, potentially resolving any issues with network communication.

    These steps should help resolve the ‘ERR_CACHE_MISS’ error in most cases. If the issue persists, you may need to delve into more advanced solutions.

    How to Use Developer Tools for Advanced Debugging

    When basic solutions don’t resolve the ‘ERR_CACHE_MISS’ error, using browser developer tools can provide deeper insights. Here’s how to use them to diagnose the problem:

    1. Access Developer Tools

      In Google Chrome, press F12 or right-click on the page and select Inspect to open the developer tools.

    2. Inspect Network Requests

      Switch to the Network tab, and reload the page to see all network requests. Look for any failed requests, particularly those related to cached content. Pay attention to the status codes (e.g., 404 or 500) to identify issues with resources not being loaded properly.

    3. Examine Cache Headers

      In the Network tab, click on any resource and check the Headers section. Look for cache-control headers like:

      • Cache-Control: no-cache
      • Pragma: no-cache

      These headers dictate caching behavior, and improper configurations might be contributing to the error.

    Using developer tools effectively can help pinpoint the exact cause of the error, allowing you to take more targeted actions to fix it.

    How to Configure Your Server for Better Cache Management

    Server-side cache management plays a crucial role in preventing errors like ‘ERR_CACHE_MISS’. Here’s how you can optimize your server’s cache settings:

    1. Configure Cache-Control Headers

      A misconfigured cache header is often responsible for preventing proper caching. You can define cache settings using the Cache-Control header in your server configuration. For instance, add the following in your .htaccess or server configuration file:

      Cache-Control: max-age=3600, must-revalidate

      This instructs the browser to cache the content for one hour and revalidate the cache once expired.

    2. Set ETag Headers

      The ETag header helps in validating whether the cached content is still valid. Ensure that the server sends an appropriate ETag header for dynamic content:

      ETag: "5d8c72a5a"

      If the content hasn’t changed, the browser will use the cached version, reducing the chances of encountering the ‘ERR_CACHE_MISS’ error.

    3. Leverage Server-Side Cache Control

      Consider using server-side caching solutions such as Varnish or Redis for better control over how data is cached and served to users.

    By implementing these strategies, you can minimize cache-related errors and ensure optimal cache management on the server-side.

    Evaluating Network Settings for Optimal ‘ERR_CACHE_MISS’ Resolution

    Network configurations can sometimes be the root cause of the ‘ERR_CACHE_MISS’ error. Here’s how to evaluate and modify your network settings to fix it:

    1. Reset Winsock Catalog

      If network settings have been altered, resetting the Winsock catalog can help:

      netsh winsock reset

      This resets the network stack and can resolve issues like network congestion or improper DNS resolution, which could be contributing to the error.

    2. Check Proxy Settings

      Incorrect proxy settings might cause issues with loading cached resources. To ensure your proxy is configured correctly:

      • Open Settings > Network & Internet > Proxy.
      • Make sure Use a proxy server is turned off unless you need it for your network.

    These network adjustments can fix issues that might be blocking or improperly interacting with cached data, reducing the likelihood of encountering the ‘ERR_CACHE_MISS’ error.

    Implementing Scalable Solutions for Better Cache Management

    To prevent the ‘ERR_CACHE_MISS’ error from recurring, implementing scalable cache management solutions is essential. Here are a few strategies to optimize caching for long-term success:

    1. Configure Cache Expiration Times

      Set appropriate expiration times for resources to ensure the cache is regularly updated without causing errors:

      Cache-Control: public, max-age=86400

      This sets the cache to expire after 24 hours, ensuring that stale content is refreshed periodically.

    2. Utilize Content Delivery Networks (CDNs)

      CDNs can help distribute cached content efficiently across the globe, reducing the strain on your server and minimizing the chance of cache-related issues. Popular CDNs like Cloudflare or AWS CloudFront automatically manage cache expiration and content delivery, which helps prevent errors like ‘ERR_CACHE_MISS’.

    3. Use Versioning for Static Assets

      Versioning your static assets (e.g., style.css?v=2.0) ensures that users always receive the latest version of the content without relying on outdated cache data.

    These scalable solutions provide long-term benefits by optimizing cache management and ensuring that your website or application operates smoothly, even under heavy load.

    By following these solutions, you can effectively resolve the ‘ERR_CACHE_MISS’ error and implement cache management practices that prevent it from recurring.


    For more advanced troubleshooting, check out our ERR_CONNECTION_RESET Fix: Expert Guide to Solving Browser Issues.

    Preventing ‘ERR_CACHE_MISS’ Through Optimization and Maintenance

    The ‘ERR_CACHE_MISS’ error often arises when the browser fails to retrieve a requested resource from the cache, leading to slower loading times and potential functionality issues. To prevent this error, it’s crucial to optimize both browser and server-side caching settings. In this section, we’ll explore several strategies for managing and automating cache processes, ensuring your website performs smoothly and reduces the chances of encountering ‘ERR_CACHE_MISS’ in the future.

    Best Practices for Managing Browser Cache to Avoid ‘ERR_CACHE_MISS’

    To prevent the ‘ERR_CACHE_MISS’ error, it’s essential to configure your browser cache settings effectively. The key is ensuring that cache control headers are set properly and that expiration policies are in place. Properly configured cache headers tell browsers how long they can store specific resources, preventing unnecessary cache misses.

    A typical example of setting cache control headers in an HTTP response is:

    Cache-Control: max-age=3600

    This header instructs the browser to cache the resource for 3600 seconds (1 hour). This helps reduce the likelihood of cache misses when the browser revisits the resource. Additionally, ensure you use appropriate cache expiration settings to match the resource’s update frequency, which can minimize the risk of outdated cache data causing errors.

    Automating Cache Management to Prevent Future Errors

    Automating cache management is an effective way to prevent the recurrence of ‘ERR_CACHE_MISS’. By using scripts or browser extensions, you can schedule regular cache clearing or set up automated tasks to maintain optimal cache configurations.

    For instance, a simple cron job can be set up on the server to clear the cache at regular intervals:

    0 0 * * * rm -rf /path/to/cache/*

    This cron job clears the cache directory every day at midnight. It ensures that stale cache files are removed, and fresh resources are fetched, preventing ‘ERR_CACHE_MISS’ errors. Additionally, browser extensions such as “Cache Cleaner” can be used to automate cache clearing on the client-side, further reducing manual intervention.

    Monitoring Web Performance After Resolving ‘ERR_CACHE_MISS’

    After resolving the ‘ERR_CACHE_MISS’ error, it’s important to monitor your website’s performance to ensure the solution is effective and no new issues arise. Performance tools like Google PageSpeed Insights or GTmetrix can be used to track improvements and validate cache optimizations.

    For example, using Google PageSpeed Insights, you can assess the impact of your cache settings on load times. After making cache improvements, rerun the tool to compare before-and-after results. A decrease in loading time and fewer cache miss warnings indicates successful optimization.

    How to Ensure Your Caching Configuration Is Scalable and Reliable

    As your website grows, ensuring that your caching configuration can handle increased traffic is crucial. A scalable cache setup prevents ‘ERR_CACHE_MISS’ errors, especially during high traffic periods. Consider adjusting cache timeouts and increasing server-side cache capacity to meet demand.

    A common approach is configuring server-side cache headers that are appropriate for high-traffic websites:

    Cache-Control: public, max-age=86400, s-maxage=86400

    This configuration caches content for 24 hours (86400 seconds) and ensures that both the browser and CDN caches are utilized. This setup can handle high demand while preventing ‘ERR_CACHE_MISS’ by serving cached content to users during peak times.

    Optimizing Cloud Infrastructure for Seamless Cache Management

    For websites hosted on the cloud, optimizing cache management can greatly improve performance and prevent ‘ERR_CACHE_MISS’. Cloud-based caching solutions, such as Content Delivery Networks (CDNs), distribute cache copies across multiple locations, improving access speed for users worldwide.

    A practical step is setting up a CDN like Cloudflare, which can cache static resources and serve them from the nearest server to the user. For instance, configuring a CDN to cache assets like images, JavaScript, and CSS can reduce the load on your origin server and prevent cache misses:

    Cache-Control: public, max-age=31536000

    This header tells the CDN to cache the resource for one year (31536000 seconds), ensuring it’s served efficiently without needing to fetch from the origin server frequently.

    By combining these cloud caching strategies with your server and browser cache optimizations, you create a seamless caching environment that minimizes the chances of encountering the ‘ERR_CACHE_MISS’ error.

    For more detailed insights on browser-related issues, check out our ERR_CONNECTION_RESET Fix: Expert Guide to Solving Browser Issues.

    Troubleshooting and Common Fixes for ‘ERR_CACHE_MISS’

    The ‘ERR_CACHE_MISS’ error can interrupt your browsing experience, often due to cached data conflicts. In this section, we will guide you through troubleshooting common causes and applying practical fixes tailored to your system or website. By the end, you’ll have clear steps for resolving the issue and preventing it from happening in the future.

    How to Troubleshoot Common Extensions and Their Role in ‘ERR_CACHE_MISS’

    Browser extensions can often be the culprits behind the ‘ERR_CACHE_MISS’ error. Some extensions, particularly those related to ad-blocking or privacy, may interfere with cache management and lead to this issue. Here’s how to troubleshoot and resolve it:

    1. Disable Extensions:
      • In Google Chrome, click the three-dot menu in the top right corner and go to More Tools > Extensions. Disable any extensions, especially ad blockers, to see if the error resolves.
      • In Firefox, click the hamburger menu, select Add-ons and disable extensions one by one.
    2. Clear Cache After Disabling Extensions:
      • After disabling the extensions, it’s essential to clear your cache to ensure there’s no residual data causing conflicts. Go to Settings > Privacy and Security > Clear Browsing Data, and make sure to check Cached images and files.

    By disabling problematic extensions and clearing your browser cache, you can often fix the ‘ERR_CACHE_MISS’ error caused by browser extensions. Keep in mind that you should only enable extensions one by one to pinpoint which one is the culprit.

    How to Reset Network Settings for ‘ERR_CACHE_MISS’ Resolution

    If the error persists after addressing browser extensions, resetting your network settings may resolve underlying issues with cached network data. Here’s how to do it:

    1. Reset Network Settings on Windows:
      • Open Settings and go to Network & Internet.
      • Scroll down and click Network reset.
      • Select Reset now and restart your computer.
    2. Reset Network Settings on macOS:
      • Go to System Preferences > Network.
      • Select your active connection (Wi-Fi or Ethernet) and click the minus sign to remove it.
      • Re-add your connection and restart your Mac.

    Resetting your network settings can help clear any corrupted DNS or IP data that might be contributing to the ‘ERR_CACHE_MISS’ error. However, note that doing this will disconnect you from saved Wi-Fi networks, so you’ll need to reconnect afterward.

    How to Handle ‘ERR_CACHE_MISS’ on Mobile Devices vs. Desktop

    Handling the ‘ERR_CACHE_MISS’ error differs between mobile and desktop platforms, so let’s break down the steps for each:

    1. On Desktop:
      • Google Chrome: Open the menu, go to Settings > Privacy and Security > Clear Browsing Data, and choose Cached images and files. Clear the cache and refresh the page.
      • Firefox: Go to Options > Privacy & Security > Cookies and Site Data and click Clear Data to remove cached content.
    2. On Mobile:
      • Android (Chrome): Open Chrome, tap the three dots in the top right, and go to Settings > Privacy > Clear Browsing Data. Ensure Cached images and files is checked and tap Clear Data.
      • iOS (Safari): Go to Settings > Safari, scroll down, and tap Clear History and Website Data.

    The steps vary slightly depending on the device and browser, but the process is largely the same: clearing the cache resolves many instances of ‘ERR_CACHE_MISS’. Whether you’re on desktop or mobile, ensuring that your browser cache is up to date is critical to resolving this error.

    By following these steps, you can troubleshoot and resolve the ‘ERR_CACHE_MISS’ error on both desktop and mobile devices. Make sure to test the fixes after each step to determine if the issue has been resolved.


    In conclusion, resolving the ‘ERR_CACHE_MISS’ error often involves troubleshooting extensions, resetting network settings, and clearing the cache. By following these solutions, you can quickly resolve the issue and prevent it from reoccurring in the future. For additional help, you can explore related troubleshooting resources, such as How to Fix the ‘ERR_CACHE_MISS’ Error Message in Chrome, How to Fix “Err_Cache_Miss” in Chrome – How-To Geek, and How to fix ERR_CACHE_MISS error on Google Chrome – Hostinger.

    Tips for Preventing ‘ERR_CACHE_MISS’ on Multi-User Websites

    The ERR_CACHE_MISS fix is a common concern for website administrators, particularly those managing multi-user environments. This error typically occurs when the cache fails to serve the correct resources, leading to issues like slow page loads or users encountering blank or outdated content. In multi-user websites, where cache conflicts can be frequent, preventing such errors requires a combination of strategies, especially on the server-side. By understanding key considerations and optimizing server-side caching, you can minimize the risk of encountering this error in your web environment.

    Key Considerations for Preventing ‘ERR_CACHE_MISS’ in Multi-User Environments

    When managing a multi-user website, there are several factors that can contribute to the occurrence of ERR_CACHE_MISS errors. One of the primary causes is cache mismanagement, where content is not cached correctly for each user session or where the cache is improperly invalidated. In multi-user environments, it’s common to see issues arise from shared resources or dynamic content that may not be handled properly by the cache.

    To minimize these risks, consider the following key points:

    • User-Specific Caching: In multi-user environments, ensure that dynamic content is cached separately for each user session. For example, a page with personalized content like a user’s name or shopping cart should not be cached globally.
    • Cache Invalidation: Regularly invalidate cache when content updates. If a page’s content changes due to user interaction or external updates, the cache must be refreshed to avoid serving stale content. This is especially important in environments where multiple users are interacting with the same resources.
    • Session Management: If your website uses session-based data, such as logged-in users, configure your caching to respect these sessions. For example, do not cache a page that is user-specific unless the cache includes specific rules to handle different sessions appropriately.

    For a detailed guide on fixing ERR_CACHE_MISS errors in Chrome, you can refer to How to Fix ‘ERR_CACHE_MISS’ Error Message in Chrome — Kinsta.

    Optimizing Server-Side Caching to Prevent Future Errors

    Server-side caching is an essential strategy for reducing the occurrence of ERR_CACHE_MISS errors. Proper cache configuration ensures that resources are efficiently served to users without unnecessary cache misses. A few critical considerations include cache expiration, cache headers, and cache invalidation.

    • Cache-Control Headers: Configure appropriate Cache-Control headers to manage how long resources are cached. For example, if you want to prevent caching of user-specific pages, set headers like Cache-Control: no-store to ensure that the page is not cached. On the other hand, for static content that doesn’t change often, set a longer expiration time to reduce load times.

    Example:

    Header set Cache-Control "public, max-age=3600"

    This configuration tells the server to cache the content for 1 hour (max-age=3600) for all users, making it an efficient way to prevent unnecessary cache misses.

    • Cache Expiration and Invalidation: Properly configuring cache expiration is key. Use strategies like cache invalidation to ensure that when content is updated or changed, the server invalidates the old cache and generates new content. This is particularly important in a multi-user website, where different users may experience different content based on their actions.

    For example, in Nginx, you can configure cache expiration like this:

    location / {
        expires 1h;
    }

    This configuration sets an expiration time of 1 hour for all resources.

    By focusing on these server-side caching optimizations, you can significantly reduce the likelihood of ERR_CACHE_MISS errors. Furthermore, for in-depth guidance on managing cache headers, see the MDN documentation for HTTP Cache‑Control header.

    For more detailed steps on troubleshooting ERR_CACHE_MISS, take a look at How to Fix ‘ERR_CACHE_MISS’ in Chrome (10 Easy Fixes) — Cloudways.

    By implementing the right cache configuration and invalidation rules, you can ensure that ERR_CACHE_MISS errors are minimized and your multi-user website runs smoothly.

  • Download Ubuntu: The Ultimate Guide to Choosing and Optimizing

    Download Ubuntu: The Ultimate Guide to Choosing and Optimizing

    Introduction to Ubuntu: What You Need to Know Before Downloading

    If you’re considering making the switch to Ubuntu, you’re likely wondering how to download Ubuntu and which version is right for you. Ubuntu is a popular, open-source operating system that offers a user-friendly experience while being powerful enough for developers and advanced users. Whether you’re a beginner seeking an easy-to-use system or a developer looking for a customizable environment, Ubuntu has something for everyone. In this section, we’ll guide you through what Ubuntu is, why it’s a great choice, and how to download Ubuntu to get started.

    What is Ubuntu and Why Should You Consider It for Your System?

    Ubuntu is a free, open-source operating system based on Linux, known for its simplicity and ease of use. One of its most appealing features is its user-friendly interface, making it ideal for those new to Linux. Ubuntu comes with a range of pre-installed software, making it easy to get started right away. Additionally, its open-source nature means that it’s constantly updated by a global community of developers, ensuring security and innovation.

    For beginners, Ubuntu offers a smooth and intuitive experience, with a large community offering support and tutorials. If you’re looking for a system that is both easy to use and powerful enough for a range of tasks, Ubuntu could be the perfect fit. Whether you need it for basic browsing or more advanced applications, Ubuntu is an accessible choice for all skill levels.

    Overview of Different Ubuntu Use Cases: From Beginners to Advanced Users

    Ubuntu is versatile and can cater to a variety of use cases, from beginners to more advanced users. For beginners, the Ubuntu Desktop version is an excellent choice. It provides a simple and familiar user interface, making it easy to navigate and complete everyday tasks such as web browsing, document editing, and media consumption.

    For developers, Ubuntu is a robust platform that supports various programming languages, frameworks, and tools. The Ubuntu for Developers edition offers specialized software for development environments, including IDEs, version control, and server management.

    Advanced users who need more control over their system might prefer the Ubuntu Server edition, which is designed for hosting and managing web services, databases, and other server-related tasks. Ubuntu LTS (Long-Term Support) versions are especially beneficial for those who need stability over time, with support for up to five years, making them ideal for both production systems and developers working on long-term projects.

    For more details on different Ubuntu versions, you can explore the official Ubuntu download page. If you’re ready to start with Ubuntu, visit the Ubuntu Desktop installation guide.

    Comparing Ubuntu Versions: Desktop vs. Server and LTS vs. Regular Releases

    When you’re looking to download Ubuntu, one of the first decisions you’ll face is which version to choose. Ubuntu offers various editions, each designed for specific use cases. Understanding the differences between the Desktop, Server, and IoT versions, as well as choosing between Long Term Support (LTS) and regular releases, will help ensure you make the right choice for your needs. This guide breaks down these options to help you navigate the Ubuntu ecosystem with ease.

    Differences Between Ubuntu Desktop, Server, and IoT Versions

    Ubuntu comes in several editions, each tailored for specific types of hardware and use cases. Here’s a quick comparison:

    • Ubuntu Desktop:
      • Designed for personal computers with graphical user interfaces (GUIs).
      • Suitable for everyday tasks such as browsing, document editing, and media consumption.
      • Requires more system resources than the Server version due to its GUI.
    • Ubuntu Server:
      • Optimized for use in data centers or for running services like web servers, databases, and applications.
      • No graphical user interface (GUI) by default, which conserves system resources.
      • Includes server-specific packages like Apache, MySQL, and various network tools for enterprise environments.
    • Ubuntu IoT (Internet of Things):
      • Built for small devices like Raspberry Pi or other embedded systems.
      • Focused on low-resource consumption and remote management.
      • Typically used for IoT devices, smart home technologies, and edge computing.

    Each version has its unique strengths, so the right choice depends on whether you’re setting up a personal workstation, a server for hosting applications, or a small device for IoT purposes.

    Exploring Ubuntu LTS vs. Regular Releases: Which One is Right for You?

    One of the key decisions when downloading Ubuntu is choosing between Long Term Support (LTS) versions and regular releases. Here’s what you need to know:

    • LTS (Long Term Support):
      • Supported for 5 years with security updates, bug fixes, and software patches.
      • Ideal for stability and reliability, especially in enterprise environments or production systems.
      • Examples: Ubuntu 20.04 LTS and Ubuntu 22.04 LTS.
    • Regular Releases:
      • Supported for 9 months with updates.
      • These releases feature the latest software, new features, and improvements.
      • Best suited for users who want to try the latest updates and are willing to upgrade regularly.
      • Examples: Ubuntu 23.04, Ubuntu 23.10.

    LTS versions are the best choice for most production environments, as they provide a stable foundation for long-term projects. However, regular releases might be a good option if you’re looking to stay on the cutting edge and don’t mind upgrading every few months.

    How to Choose the Best Ubuntu Version for Your Use Case

    Choosing the right Ubuntu version depends largely on your use case. Here’s a guide to help you decide:

    • For personal use: If you want a familiar, user-friendly operating system, Ubuntu Desktop is your best bet. It’s perfect for day-to-day computing tasks like browsing the web, writing documents, and watching videos.
    • For servers: If you’re setting up a web server, database, or file server, go with Ubuntu Server. It’s optimized for running services and has a smaller footprint, which helps you maximize your hardware resources.
    • For long-term stability: If you’re working in an enterprise or setting up a system that needs long-term support, the LTS version of Ubuntu is the best choice. It provides security updates and stability for up to five years.
    • For experimentation and new features: If you like to try out new features, or you’re working on a project where you want to stay up-to-date with the latest releases, consider a regular release.

    Keep in mind your hardware requirements, your need for stability, and how often you’re willing to upgrade when choosing the version that’s best for you.

    Choosing the Right Cloud Provider for Your Ubuntu Deployment

    When it comes to deploying Ubuntu in the cloud, selecting the right cloud provider is crucial. Here’s what to consider:

    • Performance: Choose a provider that offers the necessary computational power and scalability for your use case. Popular providers include AWS, Google Cloud, and Microsoft Azure, all of which offer solid Ubuntu support.
    • Cost: Depending on your budget, some cloud providers offer better pricing models. For example, AWS offers flexible pricing with pay-as-you-go options, while Google Cloud often provides free credits to new users.
    • Support: Ensure the cloud provider offers good documentation and support for Ubuntu. Both AWS and Azure have excellent resources for Ubuntu deployments, and you can find community support in forums as well.
    • Security: Choose a provider that offers strong security features, including firewalls, encryption, and regular security patches.

    For beginners setting up Ubuntu in the cloud, platforms like AWS EC2 or Google Cloud’s Compute Engine are excellent starting points. These services make it easy to get an Ubuntu Server installation up and running quickly.

    By considering these factors, you can ensure that your Ubuntu deployment in the cloud is both cost-effective and well-suited to your needs.


    Understanding the differences between Ubuntu Desktop, Ubuntu Server, and Ubuntu IoT, as well as the distinctions between LTS and regular releases, will help you make an informed choice when it comes time to download Ubuntu. Whether you’re a beginner setting up a personal machine, an enterprise deploying servers, or experimenting with IoT, there’s an Ubuntu version for every scenario. Once you decide on the best version, you can begin the installation and enjoy a smooth, optimized experience.

    How to Choose the Right Ubuntu Version for Your Needs

    Choosing the right version of Ubuntu is a critical step to ensure optimal performance for your system, whether you’re setting it up for gaming, development, or a server environment. Different versions of Ubuntu offer varying features, stability, and support durations, making it important to select the right one based on your specific requirements. In this guide, we’ll help you understand how to download Ubuntu and choose the most suitable version for your needs. We will also cover key considerations, such as hardware compatibility, LTS vs. regular releases, and selecting the best version based on your use case.

    Understanding Ubuntu Installation Requirements and Hardware Compatibility

    Before you download Ubuntu, it’s important to ensure that your hardware meets the installation requirements and is compatible with Ubuntu. While the system requirements for Ubuntu are not too demanding, ensuring compatibility can make your installation smoother.

    Minimum system requirements:

    • CPU: 2 GHz dual-core processor or higher.
    • RAM: 4 GB (recommended) or more.
    • Storage: 25 GB of free space (for Ubuntu Desktop).
    • Graphics: Graphics card capable of 1024×768 resolution.

    For Ubuntu Desktop, most modern laptops and desktops with these specifications should work without issues. For example, a typical system like an Intel Core i5 processor, 8GB RAM, and 256GB SSD should run Ubuntu Desktop with ease. If you’re installing Ubuntu Server, hardware requirements are slightly less demanding but still need to meet the minimum specifications for your chosen version.

    To check if your specific hardware is supported, you can visit the official Ubuntu hardware compatibility list. This can help ensure that your system’s drivers are well-supported, especially for specialized devices like GPUs or wireless cards.

    Choosing Between Long-Term Support (LTS) and Regular Releases

    Ubuntu offers two main types of releases: Long-Term Support (LTS) and regular releases. Understanding the differences between these two options will help you choose the right version for your needs.

    • LTS (Long-Term Support) versions:
      • Support Duration: 5 years of security updates and patches.
      • Stability: Focuses on providing stability and reliability for long-term use.
      • Ideal For: Users who need a stable system for production environments, such as servers or businesses.
      • Example: Ubuntu 22.04 LTS is an ideal choice for server setups or users who need a dependable system without frequent updates.
    • Regular releases:
      • Support Duration: 9 months of updates and support.
      • Features: Contains the latest software, drivers, and updates.
      • Ideal For: Users who need the newest features, such as developers or gamers.
      • Example: Ubuntu 23.10 offers cutting-edge updates and features but has a shorter support cycle, making it better suited for users who want the latest and are okay with more frequent updates.

    Choosing an LTS version is typically recommended for users prioritizing stability, while regular releases are ideal for those seeking the latest features and improvements.

    How to Select the Correct Version Based on Your Use Case (e.g., Gaming, Development, Server)

    Your use case plays a significant role in determining which Ubuntu version you should download. Here’s how to decide:

    • For Gaming:
      • Best Version: Ubuntu Desktop (either LTS or regular releases).
      • Why: Ubuntu Desktop includes a user-friendly GUI, making it easy to install and use game clients like Steam, Epic Games, or Lutris.
      • Example: If you’re a gamer, you may prefer Ubuntu 23.10 for the latest graphics drivers and gaming tools, but Ubuntu 22.04 LTS would also work well for long-term stability.
    • For Development:
      • Best Version: Ubuntu Desktop (LTS or regular releases depending on need).
      • Why: Developers often need access to the latest libraries and tools, so a regular release like Ubuntu 23.10 may be more appropriate. However, LTS versions provide greater stability for development environments that require longer support cycles.
      • Example: A developer working with Python, Java, or web development might prefer Ubuntu 22.04 LTS for its stability and long-term support.
    • For Servers:
      • Best Version: Ubuntu Server (LTS).
      • Why: Ubuntu Server provides the best performance and stability for hosting websites, databases, or other server-side applications. It doesn’t include unnecessary desktop software, making it lightweight and efficient.
      • Example: Ubuntu 22.04 LTS is a solid choice for deploying a production-grade web server.

    If you’re unsure, consider using the LTS version, especially if your system needs to stay running for long periods without frequent updates. For newer features and cutting-edge applications, the regular releases will serve you better.

    Evaluating Cloud Infrastructure for Optimal Ubuntu Performance

    For cloud deployments, the version of Ubuntu you choose can have a significant impact on performance and compatibility with cloud platforms like AWS, Azure, or Google Cloud.

    • Ubuntu Server is often the preferred version for cloud-based environments due to its lightweight nature and ability to handle multiple concurrent tasks efficiently. It also integrates well with cloud-specific tools and services.
    • Cloud providers typically support LTS releases, ensuring that your system receives long-term updates and security patches.

    Example: If you’re deploying an Ubuntu-based instance on AWS, Ubuntu 22.04 LTS is often the ideal choice, as it is supported by most cloud platforms and provides a stable foundation for production applications. For more specific tasks like containerized applications, Ubuntu 23.10 might be suitable for leveraging newer software versions.

    Once you’ve selected the right version based on your needs, you can visit the Ubuntu official download page to download Ubuntu and begin the installation process.

    Choosing the right version to download Ubuntu based on your use case is a crucial step to ensure that your system performs optimally and meets your expectations. For more in-depth performance optimizations and cloud infrastructure setups, check out our guide on Buy Ubuntu VPS: Proven Solutions for Pricing and Performance Issues.

    Step-by-Step Guide to Downloading and Installing Ubuntu

    Ubuntu is one of the most popular Linux distributions, known for its ease of use and community support. Whether you’re a first-time user or looking to refresh your system, this guide will walk you through the steps to download Ubuntu, create a bootable USB drive, verify the ISO file, and complete the installation process. By following these clear and simple steps, you’ll have your Ubuntu system up and running in no time.

    Step 1: Downloading the Ubuntu ISO Image Securely

    To start, you need to download Ubuntu. There are different versions of Ubuntu available, such as the Long Term Support (LTS) release and regular versions. If you’re new to Ubuntu, it’s best to choose an LTS version, as it receives updates and security patches for five years.

    To download Ubuntu securely:

    1. Go to the official Ubuntu download page: https://ubuntu.com/download.
    2. Choose between the Desktop and Server versions. For most users, the Desktop version is the ideal choice.
    3. Select the LTS version for long-term support or the latest release if you’re interested in cutting-edge features.
    4. Click the download button and save the ISO file to your computer.

    Tip: Downloading from the official Ubuntu website ensures the integrity of the file and protects against malware or corrupted downloads.

    Step 2: Creating a Bootable USB Drive for Installation

    Once the Ubuntu ISO is downloaded, you need to create a bootable USB drive. This allows you to install Ubuntu on your computer.

    For Windows users:

    1. Download and install Rufus from https://rufus.ie/.
    2. Insert a USB drive (at least 4GB of storage).
    3. Open Rufus, select the USB drive, and choose the downloaded Ubuntu ISO.
    4. Click Start and wait for the process to finish.

    For macOS/Linux users:

    1. Download Etcher from https://www.balena.io/etcher/.
    2. Insert the USB drive and open Etcher.
    3. Select the Ubuntu ISO file, choose the USB drive, and click Flash.

    Important: Double-check that you’ve selected the correct USB drive to avoid overwriting other data.

    Step 3: Verifying the Integrity of the Ubuntu ISO

    It’s important to verify the integrity of the Ubuntu ISO file to ensure it wasn’t corrupted during the download process. This step uses checksums to verify the file’s authenticity.

    To verify the checksum on Windows:

    1. Open a command prompt and run:
      CertUtil -hashfile path_to_iso SHA256
    2. Compare the output with the official checksum provided on the Ubuntu download page.

    On macOS/Linux:

    1. Open the terminal and run:
      shasum -a 256 path_to_iso
    2. Compare the result with the official checksum from the download page.

    Why it matters: Verifying the checksum helps ensure that the Ubuntu ISO file is complete and has not been tampered with, ensuring a smoother installation experience.

    Step 4: Installing Ubuntu – Walkthrough of the Process

    Now that your bootable USB is ready and verified, it’s time to install Ubuntu.

    1. Insert the USB drive into your computer and reboot it.
    2. Enter the BIOS/UEFI settings by pressing the appropriate key (often F2, F12, or DEL) and change the boot order to boot from USB first.
    3. Save changes and reboot.
    4. When Ubuntu loads, you’ll see the installation menu. Choose Install Ubuntu.
    5. Select your language and time zone.
    6. Choose your installation type. For most users, the Erase disk and install Ubuntu option is best. (This will erase all data on your disk, so be sure to back up anything important first!)
    7. Proceed with the installation, selecting your keyboard layout and creating a user account.

    The installation process will take some time. Once it’s finished, you’ll be prompted to restart your computer and remove the installation media (the USB drive). Ubuntu will then boot up, ready to use!

    Pro Tip: If you want to set up a dual-boot system with another operating system, choose the Something else option during installation, which allows you to manually partition your disk.

    Conclusion

    After installing Ubuntu, you may want to spend some time optimizing your system, such as updating software or installing additional drivers. If you encounter any issues during installation, consult the official Ubuntu installation guide or visit the Ubuntu forums for troubleshooting tips. With Ubuntu installed, you’re ready to explore the world of Linux!

    Post-Installation Optimization: Configuring Ubuntu for Performance and Security

    After you download Ubuntu and complete the installation process, the next step is to optimize your system for both performance and security. Fine-tuning these aspects can ensure your Ubuntu installation runs smoothly and securely. This section will guide you through the essential steps to configure your Ubuntu system to meet your needs, whether you are setting up a high-performance workstation or ensuring your system is secure and compliant with industry standards.

    Optimizing Ubuntu for Low-Latency Applications and Performance

    If you plan to use Ubuntu for applications that require low latency, optimizing the system is essential. High-performance applications, such as real-time audio processing or video streaming, benefit from adjustments to system settings that reduce delays and improve responsiveness.

    To optimize Ubuntu for low-latency performance, you can make a few simple adjustments:

    1. Adjust CPU Frequency Scaling

      By setting the CPU governor to “performance,” you can ensure that the processor always operates at its maximum frequency, reducing latency during intensive tasks.

      sudo cpufreq-set -g performance

      This command sets the CPU governor to performance mode, ensuring the processor runs at full speed for better performance in latency-sensitive applications.

    2. Disable Unnecessary Services

      Ubuntu comes with a variety of background services that may not be needed for performance-critical tasks. Disabling unneeded services can free up system resources.

      sudo systemctl disable bluetooth.service
      sudo systemctl disable cups.service

      These commands disable Bluetooth and printing services, freeing up resources for your applications.

    By applying these settings, you can significantly reduce latency and improve overall performance, making your Ubuntu system more responsive to the demands of specialized applications.

    Choosing the Right File System: Ext4 vs. Btrfs

    When setting up Ubuntu, one key decision is selecting the right file system. The two most common options are Ext4 and Btrfs, each offering different advantages based on system needs.

    • Ext4 is the default file system for many Linux distributions and is known for its stability and high performance, especially for everyday usage. It’s a good choice for users who need a reliable file system without complex features.
    • Btrfs offers advanced features such as snapshots, compression, and built-in RAID support. It’s ideal for users who need more flexibility and advanced management tools for large storage systems.

    Switching Between File Systems

    If you decide to change your file system after installation, you can do so by first creating a backup and then formatting the partition:

    sudo mkfs.ext4 /dev/sda1  # Format as Ext4

    or for Btrfs:

    sudo mkfs.btrfs /dev/sda1  # Format as Btrfs

    Both commands format the specified partition as Ext4 or Btrfs, respectively. Make sure to back up your data before reformatting any partition.

    Choosing the right file system depends on your needs: Ext4 is more suitable for general users, while Btrfs is better for users needing advanced features.

    How to Configure Your Ubuntu System for Optimal Security and Compliance

    Securing your Ubuntu installation should be a priority, especially if the system is exposed to the internet or will store sensitive data. Ubuntu provides several built-in tools and configuration options to improve security and ensure compliance with best practices.

    1. Enable the UFW Firewall

      The Uncomplicated Firewall (UFW) is an easy way to secure your system by blocking unwanted traffic.

      sudo ufw enable
      sudo ufw allow ssh

      The first command enables the firewall, and the second command allows SSH connections. This setup is a good starting point for securing your server or desktop system.

    2. Configure Automatic Security Updates

      Ubuntu can automatically install security updates to ensure your system is always up to date.

      sudo dpkg-reconfigure -plow unattended-upgrades

      This command configures Ubuntu to automatically install security patches, reducing the risk of vulnerabilities.

    By setting up basic security measures like a firewall and automatic updates, you can significantly enhance the security of your Ubuntu installation.

    Post-installation Setup: Installing Essential Applications and Tools

    Once Ubuntu is installed and configured for optimal performance and security, it’s time to set up essential applications and tools that will make your system more productive and efficient.

    1. Install Media Players and Utilities

      If you need to watch videos or play music, you can install popular media players like VLC.

      sudo apt install vlc

      VLC is a powerful media player that supports a wide range of formats.

    2. Install Development Tools

      For developers, it’s crucial to have programming languages and compilers available. You can install essential packages such as build-essential.

      sudo apt install build-essential

      This package includes the GCC compiler and other necessary development tools.

    3. Set Up Git for Version Control

      If you’re working on projects that require version control, Git is a must-have tool.

      sudo apt install git

      After installation, you can configure Git with your name and email:

      git config --global user.name "Your Name"
      git config --global user.email "[email protected]"

    These steps cover the installation of essential applications that most users will need to get started with Ubuntu.

    Leveraging Scalable Cloud Infrastructure for Ubuntu Optimization

    If you’re planning to run Ubuntu in a cloud environment, such as AWS or Google Cloud, optimizing the system for cloud infrastructure can enhance performance and scalability.

    1. Optimize for Cloud Resources

      Cloud environments often require optimizations to make the best use of virtualized resources. For instance, you might want to adjust the number of CPU cores or optimize storage.

      For AWS EC2, you can use the Elastic Block Store (EBS) to manage scalable storage:

      sudo apt install awscli
      aws ec2 create-volume --size 100 --availability-zone us-east-1a

      This command installs AWS CLI and creates a 100GB EBS volume in AWS.

    2. Enable Cloud-Specific Monitoring Tools

      Cloud platforms offer tools for monitoring system performance. For instance, AWS CloudWatch can monitor the system’s CPU usage and memory. Setting up monitoring ensures that you can track your system’s health and make optimizations as needed.

    By leveraging cloud infrastructure, you can scale your Ubuntu system efficiently and ensure it performs well under changing workloads.


    By following these steps, you can optimize your Ubuntu installation for both performance and security. Whether you’re setting up a high-performance workstation, securing a server, or optimizing for cloud environments, these guidelines will help you get the most out of your Ubuntu system. If you need more specific advice on configuring applications, consider checking out Install Docker on Ubuntu: A Complete Guide for Beginners for additional setup instructions.

  • 502 Bad Gateway Error Fix: Expert Troubleshooting Tips Explained

    502 Bad Gateway Error Fix: Expert Troubleshooting Tips Explained

    What is a 502 Bad Gateway Error and Why is it Critical to Resolve?

    A 502 Bad Gateway error occurs when a server acting as a gateway or proxy cannot get a valid response from an upstream server. This error is often caused by server misconfigurations, network issues, or high traffic loads, and it can severely impact your website’s availability and user experience. Resolving this issue quickly is critical to avoid downtime and prevent potential revenue loss.

    Understanding and fixing a 502 Bad Gateway error is essential for maintaining a smooth, uninterrupted web experience. In this section, we will cover common causes of the error and provide actionable steps for fixing it, ensuring that you can get your website back online as quickly as possible.

    How server misconfigurations contribute to 502 Bad Gateway errors

    Server misconfigurations are a frequent cause of 502 Bad Gateway errors. These issues can occur when the web server is unable to communicate properly with a backend server, often due to incorrect proxy settings or server routing issues.

    What to check for:

    • Proxy settings: If your server is acting as a reverse proxy (e.g., using Nginx or Apache), incorrect proxy configuration can lead to 502 errors.
    • Upstream server issues: The proxy may be unable to communicate with the upstream server due to misconfigurations in the server’s configuration file.
    • Server logs: Checking the logs can often provide insights into what caused the error, such as timeouts or failed connections.

    Example fix:

    1. Open your Nginx configuration file (usually found at /etc/nginx/nginx.conf).
    2. Look for the proxy settings, such as proxy_pass, and ensure they are correctly pointing to the backend server.
    3. Test your Nginx configuration with the command:
    nginx -t

    This command tests the Nginx configuration for any syntax errors or misconfigurations. Once confirmed, restart the Nginx service:

    sudo systemctl restart nginx

    Why this works: The nginx -t command checks the configuration for errors, and restarting the server applies any changes.

    Impact of network connectivity issues on 502 Bad Gateway errors

    Network connectivity issues can contribute to 502 Bad Gateway errors by preventing communication between the web server and the upstream server. Common causes include DNS misconfigurations, routing issues, or packet loss.

    What to check for:

    • DNS issues: If the DNS server cannot resolve the upstream server’s address, a 502 error can occur.
    • Routing issues: Network routes between your server and the upstream server might be misconfigured or unavailable.
    • Packet loss: Even minor packet loss can cause timeouts or failed connections, leading to the 502 error.

    Example fix:

    1. Use the ping command to check for packet loss:
    ping -f <server-ip>

    If packet loss occurs, it indicates a network issue that needs to be resolved.

    1. Check DNS resolution with dig:
    dig <domain-name>

    This will return the DNS resolution details. If it fails to resolve, there may be an issue with your DNS settings.

    Why this works: The ping and dig commands help diagnose network-related issues, providing insights into connectivity or DNS problems.

    Server load and its role in triggering 502 Bad Gateway errors

    Heavy server load can cause 502 Bad Gateway errors, especially when the server cannot handle incoming requests due to resource exhaustion. This often happens during traffic spikes or when the server is running resource-intensive processes.

    What to check for:

    • CPU and memory usage: High server load can cause slow or failed responses from the backend server, triggering a 502 error.
    • Traffic spikes: If the server experiences a sudden surge in traffic, it might become overwhelmed and unable to process requests.

    Example fix:

    1. Use the htop or top commands to monitor server performance:
    htop

    This displays a real-time overview of CPU and memory usage. If the server is under heavy load, you might need to optimize resource usage or scale your infrastructure.

    Why this works: Monitoring the server’s resource usage helps identify whether high traffic or insufficient resources are causing the error.

    Role of DNS settings in resolving 502 Bad Gateway issues

    Incorrect DNS settings can prevent your server from resolving the upstream server’s address, leading to 502 Bad Gateway errors. Misconfigured DNS servers or incorrect IP addresses in your DNS records are common culprits.

    What to check for:

    • DNS resolution: Ensure that the server can resolve the correct IP address of the upstream server.
    • DNS configuration: Check your DNS configuration for any errors or outdated records.

    Example fix:

    1. Use dig to check DNS resolution for the upstream server:
    dig <domain-name>

    This will provide DNS resolution details. If the resolution fails, you may need to update your DNS records or switch to a different DNS provider.

    1. If DNS resolution is correct, check for other issues such as server misconfigurations or network problems.

    Why this works: Ensuring correct DNS resolution allows the server to communicate with the upstream server, resolving the 502 error.

    By understanding the common causes of 502 Bad Gateway errors and following the troubleshooting steps above, you can quickly diagnose and fix the issue. Regular monitoring and optimizing server configurations, DNS settings, and load balancing can help prevent future occurrences.

    Common Causes of 502 Bad Gateway Errors: Server Load, DNS Issues, and More

    A 502 Bad Gateway error can be frustrating, indicating that your web server is unable to communicate with an upstream server. This error is commonly caused by server misconfigurations, network issues, or server overload, among other factors. Understanding the root causes of this issue is key to resolving it. In this section, we’ll dive into some of the most frequent culprits behind 502 Bad Gateway errors and offer practical troubleshooting methods, including how to address server misconfigurations, DNS settings, network connectivity problems, and server load.

    How server misconfigurations contribute to 502 Bad Gateway errors

    Server misconfigurations are one of the most common causes of 502 Bad Gateway errors. Issues like incorrect proxy settings or improper server configurations can prevent your server from properly communicating with upstream servers.

    To troubleshoot server misconfigurations:

    1. Check server logs: Review your server logs for error messages that can point to misconfigurations. Use the following command to monitor real-time logs:
      tail -f /var/log/nginx/error.log

      This command displays the most recent entries in the NGINX error log, which can help identify issues causing the 502 error.

    2. Verify server configurations: Inspect your server’s configuration files for errors. For instance, with NGINX, check the nginx.conf file:
      nano /etc/nginx/nginx.conf

      Ensure that proxy settings and other configurations are correct. Misconfigured proxy settings can cause communication issues between servers, resulting in a 502 error. Addressing these issues typically resolves the error, especially when it’s related to proxy configuration mistakes.

    Impact of network connectivity issues on 502 Bad Gateway errors

    Network connectivity issues, such as an unreachable server or failed DNS resolution, can also trigger 502 Bad Gateway errors. These issues can arise from firewall restrictions, server misconfigurations, or DNS problems.

    To check for network issues, you can use tools like ping, traceroute, and nslookup:

    1. Ping the server: Ensure the server is reachable by sending a ping request:
      ping yourserver.com

      This command helps confirm if the server is online and responding to network requests.

    2. Run a traceroute: Use traceroute to identify any network hops that might be causing delays:
      traceroute yourserver.com

      This shows the path your request takes, helping to pinpoint network issues that could be leading to the 502 error.

    3. Check DNS resolution: Use nslookup to check if your server’s domain is resolving correctly:
      nslookup yourserver.com

      If the DNS lookup fails, you may need to adjust your DNS settings or troubleshoot your DNS provider.

    Server load and its role in triggering 502 Bad Gateway errors

    A high server load due to CPU or memory overload can result in 502 Bad Gateway errors. When a server is overwhelmed, it may fail to respond to requests in a timely manner, triggering this error.

    To check the server’s resource usage:

    1. Monitor CPU and memory usage: Use the top or htop command to view real-time resource usage:
      top

      This shows an overview of processes, CPU, and memory usage. If the server is overloaded, you might notice high CPU usage or memory consumption.

    2. Restart services: If you find that a particular service is consuming excessive resources, restarting the service can temporarily resolve the issue:
      systemctl restart nginx

      Restarting the NGINX service helps free up system resources and may resolve a 502 error caused by server overload.

    By keeping an eye on resource usage and restarting services when necessary, you can prevent 502 errors caused by server load.

    Role of DNS settings in resolving 502 Bad Gateway issues

    Incorrect or misconfigured DNS settings can lead to 502 Bad Gateway errors, especially if the DNS server is unable to resolve your domain name. This can result in your server being unable to communicate with the necessary upstream server.

    To check and fix DNS settings:

    1. Check DNS resolution with nslookup: This tool verifies that your domain name is correctly resolving to an IP address:
      nslookup yourdomain.com

      If the result shows an error or the wrong IP address, you may need to update your DNS settings.

    2. Use dig for detailed DNS information: For more detailed DNS information, use the dig command:
      dig yourdomain.com

      This provides detailed information on the DNS lookup process and can help identify where DNS resolution is failing.

    By ensuring that your DNS settings are correct and your domain is resolving properly, you can often fix 502 errors related to DNS issues.


    Addressing these common causes—server misconfigurations, network connectivity issues, server overload, and DNS problems—can go a long way in resolving 502 Bad Gateway errors. By following the troubleshooting steps above, you can effectively diagnose and fix the issues causing these errors, improving your site’s performance and uptime. For more in-depth troubleshooting, consult additional resources such as How to Fix a 502 Bad Gateway Error (13 Quick Fixes).

    Troubleshooting Basic Solutions: Refreshing, Clearing Cache, and More

    When encountering a 502 Bad Gateway error, it can feel overwhelming, but there are several basic steps you can take to resolve the issue. The 502 Bad Gateway error fix often starts with simple troubleshooting techniques like refreshing your page, clearing your browser cache, or running a few diagnostic commands. In this section, we’ll walk through some practical, easy-to-follow methods to identify and solve the issue—whether it’s caused by browser-side problems or server-side complications.

    Common troubleshooting steps for fixing 502 Bad Gateway errors

    The first step in fixing the 502 bad gateway error is to perform some basic troubleshooting. These steps can often resolve the issue before diving into more advanced solutions.

    1. Refresh the Page: Sometimes, the error occurs due to a temporary connection problem. Refreshing the page may resolve the issue by reloading the connection. To refresh the page, simply press Ctrl + R (or Cmd + R on macOS).
    2. Clear the Browser Cache: If the cached data in your browser is outdated or corrupted, it may cause the error. To clear the cache:
      • In Chrome: Go to Settings > Privacy > Clear Browsing Data.
      • Select “Cached images and files” and hit “Clear data.”
    3. Check DNS Settings: Ensure your browser is connecting to the correct server by verifying the DNS settings. You can flush the DNS cache by running the following command in your terminal:
      ipconfig /flushdns

      This clears your local DNS cache and ensures that your browser retrieves the correct DNS records.

    4. Check Server Connectivity: Use tools like curl or ping to test connectivity to the server. For example:
      curl -I http://example.com

      This command checks the server’s response headers. If there’s a connection issue, this could help identify it.

    If these basic troubleshooting steps don’t resolve the issue, there may be server-side problems that need further investigation.

    How to identify and resolve PHP timeout errors causing 502 Bad Gateway

    PHP timeouts are a common cause of 502 error troubleshooting and can lead to a Bad Gateway error if the server fails to respond in time. Here’s how to identify and fix these errors:

    1. Check Server Logs for PHP Errors: Look for timeouts in your server’s PHP error logs. You can view PHP errors in real-time using the tail command:
      tail -f /var/log/php_errors.log

      This command will display the latest PHP error messages. Look for lines that reference “timeout” or “max execution time exceeded.”

    2. Increase PHP Execution Time: If the timeout is caused by long-running scripts, you can increase the PHP execution time in your php.ini file. Add or modify the following line:
      max_execution_time = 60

      This sets the maximum execution time for scripts to 60 seconds (adjust as necessary). After making the change, restart the server to apply the new settings.

    By resolving PHP timeout issues, you can prevent the 502 Bad Gateway error from occurring due to script delays.

    Is your proxy server causing the 502 Bad Gateway error?

    Proxy servers can also be the source of a Bad Gateway fix, particularly when they are misconfigured or overwhelmed. Here’s how to troubleshoot:

    1. Check Proxy Server Logs: Start by examining your proxy server logs for errors. If you’re using Nginx, you can check the logs with:
      tail -f /var/log/nginx/error.log

      Look for any entries related to 502 errors or misconfigurations.

    2. Restart the Proxy Service: If the proxy server is misbehaving, a simple restart might resolve the issue. You can restart the Nginx proxy service with:
      sudo systemctl restart nginx

      This will refresh the service and potentially clear any temporary errors that may be causing the Bad Gateway issue.

    3. Check Server Load: If the proxy server is overwhelmed, it could be refusing connections. Check the load on your server using commands like top or htop. If the server is under heavy load, consider optimizing it or upgrading its resources.

    By addressing issues with your proxy server, you can prevent it from causing the 502 Bad Gateway error.

    In conclusion, the 502 bad gateway error fix often involves simple steps like refreshing the page, clearing the cache, or diagnosing server configurations. By following these methods, you can efficiently troubleshoot and resolve the error before it escalates to more complex server-side issues. For more detailed fixes, consider reviewing the server logs or adjusting server configurations, particularly for PHP timeouts or proxy server issues.

    Advanced Fixes: Reviewing Server Logs and Adjusting Configurations

    When a 502 Bad Gateway error occurs, it can cause significant disruption to your website, making it crucial to address quickly. In this section, we will explore advanced troubleshooting methods to resolve this error, focusing on reviewing server logs, configuring your server for maximum performance, optimizing DNS settings, and utilizing cloud-based solutions. By following these steps, you can not only fix the 502 error but also enhance the stability and performance of your site long-term.

    The Importance of Server-Side Diagnostics in Fixing 502 Errors

    Server-side diagnostics are a critical first step when troubleshooting the 502 Bad Gateway error. Errors in server communication or configuration often trigger this issue, and logs can reveal valuable insights into what’s happening behind the scenes. Server logs typically contain detailed messages that can point to the exact cause of the error, such as an issue with server overload or misconfigured server settings.

    To start diagnosing the error, you can check your server logs using commands like:

    tail -f /var/log/nginx/error.log

    This command will display the most recent entries in the error log in real time, allowing you to spot any signs of issues such as “502 Bad Gateway” or “upstream timed out.” These errors typically occur when your server cannot properly communicate with upstream servers or services.

    Once you identify the error messages, you can use them to narrow down the possible causes, whether it’s an overload, server timeout, or a configuration error. For instance, a log entry like this:

    2025/12/05 10:05:47 [error] 12345#12345: *23456 upstream timed out (110: Connection timed out) while connecting to upstream, client: 192.168.1.1, server: www.example.com

    indicates a timeout error between your web server and the upstream server. This is a clear sign that the issue might be related to network problems or server resource limits.

    How to Configure Your Server for Maximum Performance and Error Resilience

    Once you’ve identified the issue in the server logs, the next step is to adjust server configurations to prevent future 502 Bad Gateway errors. One of the most common causes of these errors is server resource exhaustion or misconfigured settings that can’t handle the server load.

    Start by adjusting timeouts and buffer settings to ensure your server can handle heavy traffic. For example, in Nginx, you can increase the timeout settings like so:

    http {
        proxy_read_timeout 300;
        proxy_connect_timeout 300;
        proxy_send_timeout 300;
    }

    This configuration increases the proxy timeout settings to 300 seconds, allowing more time for slow server responses and reducing the chances of a timeout causing a 502 error.

    Another adjustment is increasing buffer sizes, which can prevent issues when your server is handling large requests. For instance:

    client_max_body_size 10M;

    This setting increases the maximum allowed size for client requests to 10MB, which can help prevent errors when large files are being uploaded.

    These adjustments can help make your server more resilient, preventing overloads and ensuring smoother communication between components, reducing the likelihood of 502 Bad Gateway errors.

    Best Practices for Optimizing DNS Settings to Reduce 502 Bad Gateway Errors

    In many cases, 502 Bad Gateway errors are linked to DNS misconfigurations that prevent your server from properly reaching other services. Optimizing DNS settings is an essential step in minimizing the occurrence of these errors.

    Start by ensuring that your DNS records are correctly configured, with the correct TTL (Time to Live) values set for your domain. For instance, if your TTL is set too high, it could delay the propagation of DNS changes, leading to potential errors. A lower TTL can allow changes to take effect faster.

    Additionally, verify that your DNS records are pointing to the correct IP addresses. You can do this with the nslookup command:

    nslookup www.example.com

    This command checks the DNS record for your domain and shows you the IP address it resolves to. If there is a discrepancy between the DNS record and the actual server IP, this can lead to communication errors like the 502 Bad Gateway error.

    Also, ensure that your DNS servers are reliable and responsive. You can configure multiple DNS servers for redundancy, which helps prevent DNS-related failures from causing downtime.

    If you’re experiencing DNS issues, consider switching to a more reliable DNS provider that offers faster response times and better uptime guarantees.

    For further guidance on resolving DNS errors, you can check out this article: How to Fix DNS_PROBE_FINISHED_NXDOMAIN Error: Easy Fixes for Any User.

    Exploring Cloud-Based Solutions to Support Server Configurations

    Cloud-based solutions can play a vital role in preventing 502 Bad Gateway errors by providing additional support for server configurations. Using cloud infrastructure, you can scale resources dynamically, ensuring your server has the capacity to handle traffic spikes that could otherwise result in 502 errors.

    One effective method for improving server resilience in the cloud is load balancing. With load balancing, you can distribute incoming traffic across multiple servers, ensuring that no single server is overwhelmed. Services like AWS Elastic Load Balancing or Google Cloud Load Balancing can automatically adjust to traffic demands, minimizing the risk of overload.

    For example, configuring an Elastic Load Balancer on AWS to distribute traffic might look like this:

    1. Set up a target group for your servers.
    2. Create an Application Load Balancer (ALB).
    3. Assign the ALB to your target group, ensuring that traffic is routed evenly to all servers.

    This setup helps ensure that if one server goes down or becomes overwhelmed, the load balancer will redirect traffic to healthy servers, preventing a 502 Bad Gateway error.

    Cloud services can also offer features like auto-scaling, which automatically adds resources during traffic spikes and scales down when traffic decreases. This elasticity is essential for maintaining consistent performance and preventing errors like the 502.

    By combining proper server configuration and cloud-based solutions, you can ensure your site remains up and running smoothly, even under heavy traffic conditions.

    How to Choose the Right Fix Based on Your Technical Expertise

    When faced with a 502 Bad Gateway error, choosing the appropriate fix can be tricky, especially when you’re deciding between simple solutions and more complex server-side fixes. Your technical expertise plays a big role in selecting the right approach. This section will guide you through evaluating different methods for fixing the 502 error, weighing server configuration changes against third-party services, and understanding how scalable cloud solutions can help during traffic surges.

    Evaluating different methods for fixing the 502 error

    The 502 Bad Gateway error can occur due to several issues, such as server overload, DNS issues, or network problems. As an intermediate user, you might be familiar with basic troubleshooting methods, but it’s important to evaluate when and how to apply them effectively.

    Start with simple fixes like refreshing the page or clearing the cache. These methods are quick and can resolve transient issues caused by your local browser or network connection. For example, refreshing the page may resolve a temporary issue caused by server timeouts. Clearing your browser’s cache ensures you’re not loading outdated files that may trigger the error.

    If these basic steps don’t work, check for server-related issues. For instance, if the error is due to a DNS problem, you can run tools like nslookup or ping to test network connectivity and identify DNS issues. For server-side issues like overload, reviewing your server logs can help pinpoint the cause.

    The key is to act quickly to minimize downtime. As soon as you notice the 502 error, applying basic fixes like refreshing the page can save time before diving into more technical solutions. However, if the issue persists, deeper troubleshooting, such as checking server performance or DNS configurations, may be necessary.

    Choosing between server configurations vs. third-party services

    When deciding how to fix the 502 Bad Gateway error, you’ll face a choice between modifying server configurations or using third-party services like a Content Delivery Network (CDN) or proxy services such as Cloudflare. The right choice depends on your level of technical expertise and the specific nature of the issue.

    If you’re comfortable with server configurations, you may want to tweak settings such as timeout values, server caching, or error-handling parameters. For instance, if your server is timing out due to long request processing, you can adjust the timeout settings in your web server configuration (e.g., nginx.conf or httpd.conf). These adjustments can help reduce the likelihood of the 502 error.

    On the other hand, third-party services like Cloudflare offer a more user-friendly, scalable option for addressing 502 errors caused by network or server overload. Cloudflare acts as a reverse proxy, handling traffic between users and your server, and can automatically route traffic away from overloaded servers. This approach requires minimal setup but trades off some level of control over server-side configurations.

    If you’re looking for a quick solution with less hands-on management, third-party services can save time and effort. However, if you want more fine-tuned control over your server’s behavior and have the expertise to make changes, adjusting server settings may be more appropriate.

    Selecting Scalable Cloud Solutions to Handle Traffic Surges

    In some cases, a 502 Bad Gateway error arises due to server overload caused by traffic spikes. If your site experiences high or unpredictable traffic, scalable cloud solutions like AWS or Google Cloud can provide automatic load balancing and auto-scaling to prevent such issues.

    For example, AWS offers Auto Scaling, which automatically adjusts the number of servers based on traffic demand. By setting up an Auto Scaling group, your infrastructure will expand during high traffic periods and scale back down when the demand subsides. This can help prevent server overload, a common cause of 502 errors.

    Similarly, load balancing across multiple servers can ensure that no single server is overwhelmed. Cloud services can distribute the load evenly, ensuring that the server infrastructure can handle more requests without triggering a 502 error. Google Cloud offers a similar load balancing solution, which can route requests across multiple instances based on current server load.

    For sites with fluctuating or high traffic, implementing scalable cloud solutions is an effective way to avoid 502 errors without the need for manual intervention. This approach provides flexibility and reliability, ensuring that your site remains accessible even under heavy traffic conditions.

    By carefully selecting the appropriate fix based on your technical expertise, whether adjusting server configurations, leveraging third-party services, or implementing scalable cloud solutions, you can efficiently address the 502 Bad Gateway error and minimize site downtime.

    Post-Fix Optimization: Improving Performance to Prevent Future Errors

    After resolving a 502 Bad Gateway error, it’s critical to focus on post-fix optimization to ensure the issue doesn’t recur. While addressing the immediate problem is essential, the long-term health and stability of your site depend on continuously monitoring its performance, adapting to changes in traffic, and scaling infrastructure to meet growing demands. This section explores the practical steps you can take to optimize your server, monitor traffic, and scale your infrastructure effectively, preventing future errors and ensuring a smooth user experience.

    How to monitor server health to prevent recurring 502 Bad Gateway errors

    Proactively monitoring your server health is a key component of preventing 502 Bad Gateway errors in the future. By keeping a close eye on system performance, you can detect and resolve issues before they escalate into significant errors.

    One of the simplest ways to monitor server health is by tracking server uptime and reviewing error logs. Uptime monitoring tools such as Pingdom or UptimeRobot can alert you when your server is down, allowing you to act swiftly. Additionally, reviewing your error logs (e.g., nginx or Apache logs) helps you spot anomalies such as sudden spikes in traffic or issues with server configurations.

    For example, to monitor nginx logs, you can check the log files located at /var/log/nginx/access.log and /var/log/nginx/error.log. Here’s how you can view the most recent errors:

    tail -f /var/log/nginx/error.log

    This command will display new log entries in real-time, helping you track errors as they happen. By reviewing logs frequently, you can spot potential issues like server overloads or configuration errors, which could trigger a 502 Bad Gateway error.

    Using traffic monitoring tools to detect potential 502 errors early

    Traffic spikes, DDoS attacks, or unexpected surges in requests can overwhelm your server and lead to a 502 Bad Gateway error. Monitoring traffic patterns allows you to identify abnormal activity that could indicate an issue before it affects your site.

    Tools like New Relic, Datadog, and even open-source options such as GoAccess can provide valuable insights into your site’s traffic behavior. These tools track metrics like request rates, response times, and error rates, which are vital for detecting issues early.

    For instance, using a simple tool like GoAccess, you can analyze your web server’s access logs to identify traffic trends:

    goaccess /var/log/nginx/access.log -o report.html --log-format=COMBINED

    This command generates a detailed report, helping you identify traffic spikes or other anomalies. By using traffic monitoring tools, you can proactively manage traffic surges, detect DDoS attempts, and prevent the server from becoming overwhelmed, ultimately avoiding future 502 errors.

    For more detailed insights, you can also explore traffic monitoring tools that provide advanced metrics and analytics to optimize your site’s performance further.

    How to scale your infrastructure to handle heavy traffic and avoid 502 errors

    Handling heavy traffic is crucial for avoiding server overloads, which often lead to 502 Bad Gateway errors. Scaling your infrastructure is the best way to ensure that your site can handle increased demand without crashing.

    The first step in scaling your infrastructure is to implement load balancing. Load balancers distribute incoming traffic across multiple servers, ensuring no single server is overwhelmed. Common solutions for load balancing include using software like HAProxy or hardware load balancers.

    Here’s an example of setting up a simple load balancing configuration with nginx:

    http {
        upstream backend {
            server backend1.example.com;
            server backend2.example.com;
        }
        server {
            location / {
                proxy_pass http://backend;
            }
        }
    }

    This configuration ensures that requests are evenly distributed between backend1.example.com and backend2.example.com, preventing either server from becoming a bottleneck. By employing load balancing, you can easily scale your infrastructure to handle more traffic and avoid the 502 Bad Gateway error during high-traffic periods.

    Implementing Scalable Infrastructure to Ensure Long-Term Stability

    Ensuring long-term stability requires infrastructure that can grow with your needs. Scalable infrastructure not only handles increased traffic but also accommodates future expansions without introducing significant risks of downtime or errors.

    Cloud services like AWS, Google Cloud, and Azure offer autoscaling solutions that can automatically add or remove servers based on traffic load. For instance, with AWS, you can configure autoscaling groups that automatically launch new EC2 instances when traffic spikes.

    Here’s an example of how to set up AWS Auto Scaling using an Auto Scaling group:

    1. Create an Auto Scaling group: Choose the EC2 instances you want to scale and define the scaling policies based on CPU utilization, network traffic, or custom metrics.
    2. Set scaling policies: Configure policies for scaling up or down based on specific thresholds.
    3. Monitor and adjust: Continuously monitor your instances to ensure that the scaling policies are working effectively.

    By implementing scalable infrastructure, you can automatically adjust your resources in response to changes in traffic, ensuring that your website remains stable and resistant to the issues that typically lead to 502 errors.


    By taking these steps to monitor server health, use traffic monitoring tools, scale infrastructure, and ensure long-term stability, you can significantly reduce the likelihood of encountering 502 Bad Gateway errors again. These optimizations will help maintain a smooth, uninterrupted experience for your users.

    How to Monitor Your Website to Ensure Long-Term Stability

    Maintaining long-term stability on your website is crucial to ensuring a smooth user experience and avoiding disruptions such as the 502 Bad Gateway error. Once you’ve addressed and fixed a 502 error, it’s important to implement strategies that keep your site running smoothly, especially during high-traffic times or after migrations. In this section, we’ll walk through practical steps for ensuring stability post-fix, as well as how to integrate traffic monitoring tools to detect potential 502 errors before they cause issues.

    Ensuring long-term stability after fixing a 502 Bad Gateway error

    After resolving a 502 Bad Gateway error, the next step is to ensure your website remains stable and doesn’t experience recurring issues. A single fix is not enough to guarantee long-term stability; ongoing attention and optimization are necessary.

    1. Optimize Server Resources

    Server overload is a common cause of 502 errors, so it’s important to regularly monitor and optimize server resources. This includes reviewing CPU, RAM, and disk space usage to ensure your server can handle increased traffic. For example, if you notice that your CPU utilization is consistently high, it may be necessary to upgrade your server or optimize the code running on your site.

    2. Implement Load Balancing

    In many cases, a 502 error can occur when one server gets overwhelmed, causing it to become unresponsive. To prevent this, implementing a load balancing solution helps distribute incoming traffic evenly across multiple servers. This ensures that no single server becomes a bottleneck and improves your website’s overall stability. A good example would be using a reverse proxy server like Nginx or HAProxy to distribute traffic.

    3. Regular Server Monitoring

    To catch potential problems before they escalate into full-blown errors, regular server monitoring is essential. Using monitoring tools like Datadog can help you keep track of your server’s health, allowing you to proactively address issues before they lead to downtime or a 502 Bad Gateway error.

    By following these steps, you’ll not only resolve the immediate 502 error but also establish a foundation for ongoing website stability. It’s about optimizing your server and setting up systems that automatically alert you to potential issues, allowing you to take action before they impact your users.

    How to integrate traffic monitoring tools to detect potential 502 errors early

    Traffic spikes are one of the most common causes of 502 Bad Gateway errors. Monitoring your website traffic regularly can help you detect issues early, such as sudden surges that could overwhelm your server. Implementing traffic monitoring tools is a great way to catch these potential problems and prevent downtime.

    1. Choose the Right Monitoring Tool

    Several monitoring tools can alert you to server overloads or other issues that might lead to 502 errors. Popular tools like UptimeRobot and Datadog are great for real-time monitoring and offer detailed insights into your website’s performance. These tools track uptime, response times, and server health, and can send you instant alerts when something is wrong.

    2. Set Up Alerts for Traffic Spikes

    Once you’ve selected a tool, configure it to alert you when traffic spikes occur. For example, UptimeRobot can notify you when there’s a sudden increase in response times, which often signals a server overload that could lead to a 502 error. Setting up threshold alerts helps you take action early by scaling your resources or investigating performance issues before they disrupt your website.

    3. Monitor Key Performance Indicators (KPIs)

    Monitoring key metrics such as response time, server CPU usage, and database performance is essential to detect early signs of potential 502 errors. By regularly reviewing these KPIs, you can identify trends or patterns that indicate server stress. For example, if you see a sudden increase in response time, you might need to adjust your server configuration or optimize your database queries to avoid future 502 errors.

    By integrating traffic monitoring tools into your website’s infrastructure, you can detect and address potential issues proactively. These tools provide the visibility you need to avoid the next 502 Bad Gateway error and ensure long-term website stability.

    In conclusion, both optimizing server resources and integrating traffic monitoring tools are essential steps to maintain the stability of your website after resolving a 502 Bad Gateway error. With the right tools and strategies, you can ensure that your website remains responsive and reliable in the long term.

    Scaling Your Infrastructure to Handle Heavy Traffic and Avoid 502 Errors

    When your website experiences a surge in traffic, it can quickly overwhelm your infrastructure and lead to performance issues, including the dreaded 502 Bad Gateway error. The “502 Bad Gateway” typically occurs when a server is unable to process a request or when it gets an invalid response from an upstream server. This can be particularly disruptive during periods of high traffic, as it affects the user experience and can harm your site’s SEO rankings. In this section, we’ll explore practical strategies for scaling your infrastructure to manage heavy traffic loads and minimize the risk of encountering 502 errors.

    Understanding the role of cloud-based solutions in reducing 502 Bad Gateway issues

    Cloud-based solutions, such as those offered by Amazon Web Services (AWS) and Google Cloud, play a critical role in preventing 502 errors caused by server overloads and DNS issues. These platforms provide scalability and flexibility, enabling your infrastructure to automatically adjust to traffic spikes without manual intervention.

    One of the most effective cloud features for handling high traffic loads is auto-scaling. With auto-scaling, your cloud environment automatically adjusts the number of active servers based on real-time traffic demands. This ensures that your website has enough resources to handle traffic surges without causing server overloads that can trigger 502 errors.

    Additionally, cloud load balancing distributes incoming traffic across multiple servers, reducing the strain on any single server. This not only improves website performance but also prevents bottlenecks that lead to server failure and subsequent errors. For example, AWS Elastic Load Balancing (ELB) can seamlessly route traffic to healthy instances of your application, preventing a server overload that would otherwise cause a 502 error.

    Example:
    If you’re using AWS, you can configure auto-scaling by setting up an EC2 Auto Scaling group with an associated ELB. The ELB will distribute traffic among the healthy EC2 instances in the Auto Scaling group. Here’s an example of how you can set it up:

    aws autoscaling create-auto-scaling-group --auto-scaling-group-name my-auto-scaling-group --launch-configuration-name my-launch-config --min-size 1 --max-size 10 --desired-capacity 2 --load-balancer-names my-load-balancer

    This command creates an auto-scaling group that adjusts the number of EC2 instances between 1 and 10, based on the demand, and integrates with your load balancer. This helps ensure that your infrastructure can scale up or down based on real-time traffic needs, minimizing the chances of a 502 Bad Gateway error.

    For more information on scaling strategies for Elastic Load Balancing, check out Scaling strategies for Elastic Load Balancing.

    How to implement redundancy in your infrastructure to prevent 502 errors

    Redundancy in your infrastructure is key to ensuring that your website remains operational even if a particular server or data center experiences issues. By implementing redundancy techniques such as failover systems, server clustering, and utilizing multiple data centers, you can minimize the risk of encountering 502 errors during heavy traffic.

    A failover system ensures that if one server becomes unresponsive, another server can take over and continue processing requests. This ensures high availability and prevents service disruptions. For example, in a redundant setup, you may have multiple web servers running in different geographical locations, each serving a copy of your website. If one server fails, the others automatically pick up the traffic, ensuring that users are not affected.

    Server clustering also plays a role in distributing the load. A server cluster typically consists of multiple servers working together to handle traffic. These servers share resources, and when one server becomes overloaded, the others can take over the extra load.

    Example:
    Here’s an example of how to set up redundancy using multiple data centers with a load balancer:

    nginx
    http {
        upstream backend {
            server backend1.example.com;
            server backend2.example.com;
            server backend3.example.com;
        }
        server {
            location / {
                proxy_pass http://backend;
            }
        }
    }
    

    In this example, Nginx is configured to distribute incoming requests to multiple backend servers (backend1, backend2, and backend3), which ensures that if one server fails, the others can handle the traffic. This kind of redundancy helps to prevent 502 errors caused by server overloads.

    By implementing these redundancy strategies, you ensure that your infrastructure can handle traffic spikes without downtime or errors. This type of setup guarantees that if one part of the infrastructure fails, your site remains accessible through backup systems.

    For detailed information on how to distribute incoming traffic in a cloud environment using load balancing, you can refer to the AWS documentation on Use ELB to distribute incoming application traffic in your Amazon EC2 Auto Scaling group.


    By scaling your infrastructure and leveraging cloud-based solutions and redundancy techniques, you can significantly reduce the chances of experiencing 502 Bad Gateway errors. Implementing cloud auto-scaling, load balancing, and server redundancy not only helps manage traffic effectively but also ensures that your site remains accessible and performs optimally, even during periods of high demand.

  • 500 Internal Server Error Fix: The Complete Guide to Solutions

    500 Internal Server Error Fix: The Complete Guide to Solutions

    What is a 500 Internal Server Error and Why It Matters?

    A 500 Internal Server Error is a generic message that appears when a web server encounters an unexpected condition preventing it from fulfilling a request. It’s one of the most common server-side errors, indicating a failure on the server’s end, rather than an issue with the client’s request. Resolving this error swiftly is critical, as it can lead to website downtime, affecting both user experience and business operations. A 500 internal server error fix is essential for restoring proper functionality and maintaining your website’s reputation.

    Understanding HTTP 500 Errors: What Causes Server-Side Failures?

    The 500 Internal Server Error typically occurs when there is a malfunction or issue within the server itself, which prevents the server from processing a request. Common causes include:

    • Server misconfigurations: Incorrect settings in configuration files like .htaccess, or misconfigured server software can trigger 500 errors. For example, an improperly configured Apache server might fail to load the appropriate modules, causing an internal error.
    • Example: A misconfigured .htaccess file with incorrect rewrite rules might cause Apache to return a 500 error.

    • Resource exhaustion: The server may run out of critical resources such as memory or processing power, causing it to fail when trying to handle a request. This typically occurs under heavy load conditions.
    • Example: A high traffic volume might exhaust the available server memory, resulting in a 500 error.

    • Application-level issues: Problems within the website’s code, such as broken scripts or incompatible plugins, can also trigger this error. For instance, a PHP script that consumes too much memory can result in a 500 error.

    Understanding the underlying causes helps in troubleshooting and implementing a 500 internal server error fix.

    Key Differences Between Server Misconfigurations and Resource Exhaustion

    While both server misconfigurations and resource exhaustion can lead to 500 Internal Server Errors, they differ in their root causes:

    • Server misconfigurations typically involve incorrect file permissions, faulty server settings, or missing files. For example, incorrect file permissions on files or directories can prevent the server from reading or executing them properly.
    • Example: A server misconfiguration fix could involve adjusting file permissions using the command:

      chmod 755 /path/to/directory

      This ensures the server has the necessary permissions to access the files.

    • Resource exhaustion, on the other hand, happens when a server’s hardware or software resources (such as memory, CPU, or disk space) are maxed out. When this occurs, the server can no longer process requests, leading to errors like the 500 Internal Server Error.
    • Example: If the server runs out of memory, increasing the PHP memory limit might resolve the issue. This can be done by adjusting the memory_limit in the php.ini file:

      memory_limit = 256M

    Understanding these differences will guide you to the appropriate solution—whether it’s adjusting configurations or optimizing server resources.

    The Role of PHP Limits and Database Connections in Server Errors

    In many cases, PHP limits and database connections contribute to server failures leading to a 500 error. These limitations are often set by default but can be adjusted based on the needs of your site.

    • PHP memory limits: A low memory limit in PHP may cause errors when processing complex scripts. This can be addressed by increasing the memory_limit in php.ini:
    • memory_limit = 512M

      This adjustment allows PHP to use more memory for processing scripts, which can help prevent 500 errors caused by memory exhaustion.

    • MySQL connection limits: If your database exceeds the maximum allowed connections, it can result in a 500 error. You can modify the max_connections setting in MySQL to allow more simultaneous connections:
    • SET GLOBAL max_connections = 200;

      This command increases the allowed number of simultaneous database connections, which can prevent server errors related to connection limits.

    By understanding these key configurations, you can make precise adjustments to fix PHP-related issues and database connection errors that lead to 500 errors.

    Common Server Configuration Mistakes That Lead to 500 Errors

    There are several server configuration mistakes that can trigger 500 Internal Server Errors. Some of the most common ones include:

    • Incorrect .htaccess configurations: A malformed .htaccess file can cause Apache to return a 500 error. For example, improper redirect rules or missing directives can lead to failure when the server attempts to process requests.
    • Solution: Review your .htaccess file for syntax errors or remove recent changes that may have triggered the error.

    • File permissions: As mentioned earlier, improper file permissions can block the server from accessing necessary files, resulting in a 500 error. Ensuring correct permissions is essential for smooth operation.
    • Solution: Use the chmod command to ensure the proper permissions are applied:

      chmod 644 /path/to/file

      This command makes the file readable by the server.

    • Error in server software configuration: For example, an incorrect Apache or Nginx configuration file can lead to server errors. Running a configuration test can help identify syntax issues.
    • Example: Use the following command to test Apache’s configuration:

      apache2ctl configtest

      This checks for syntax errors and other issues in the Apache configuration files.

    Regularly checking server configurations and monitoring logs for errors can help prevent these mistakes from causing costly downtime.


    In conclusion, resolving a 500 internal server error fix requires a careful review of both server configurations and resource allocation. By understanding the causes, such as misconfigurations, resource exhaustion, and PHP/database limits, you can effectively diagnose and fix the issue. Implementing the right changes will help prevent future errors, ensuring your site remains functional and responsive.

    For a more in-depth guide, consider checking out the 500 Internal Server Error – HTTP status code definition on MDN, or explore What Is a 500 Internal Server Error — and How Do I Fix It? for additional insights.

    Common Causes of 500 Internal Server Errors: A Deep Dive

    A 500 internal server error is one of the most common and frustrating issues that website owners and administrators face. These errors often signal a server-side problem, and while they are not specific, they can result from a variety of issues. In this section, we will explore the most common causes of 500 errors, offering actionable solutions to fix them. You’ll also learn how to test your server’s stability after making fixes to ensure long-term reliability and prevent future errors.

    Fixing Permissions Issues: A Critical Step in Resolving HTTP 500 Errors

    One of the most common causes of a 500 internal server error is incorrect file or directory permissions on your web server. When file permissions are not set correctly, the server may not be able to access necessary files, leading to this error.

    To fix this, ensure that your files and directories have the correct permissions. Typically, web directories should have the 755 permission, while files should be set to 644.

    Example: Fixing Permissions with `chmod`

    To fix file permissions, you can use the following command:

    chmod 755 /var/www/html

    This command sets the correct permissions for the web server directory, allowing the server to access and execute necessary files. The 755 permission allows the owner to read, write, and execute, while others can read and execute but cannot modify the files.

    Make sure you also check the permissions on other relevant directories and files, such as configuration files or log directories. Improperly configured permissions on critical files like .htaccess can also cause 500 errors.

    How to Clear Browser Cache and Refresh Pages to Resolve 500 Errors

    Sometimes, the 500 internal server error might not be server-side at all. It could be due to outdated or corrupted files stored in your browser’s cache. When the browser tries to load an outdated version of a page, it can trigger errors, including the dreaded 500 error.

    Clearing your browser cache can often resolve this issue.

    Steps to Clear the Cache

    • For Google Chrome:
      1. Click the three dots in the top-right corner.
      2. Go to “More tools” > “Clear browsing data”.
      3. Select “Cached images and files” and click “Clear data”.
    • For Mozilla Firefox:
      1. Click the menu button (three horizontal lines).
      2. Go to “History” > “Clear Recent History”.
      3. Select “Cache” and click “Clear Now”.

    After clearing the cache, try refreshing the page. If the error is related to outdated files in the cache, this should resolve it.

    Server Log Analysis for Diagnosing 500 Errors: Tools and Tips

    When a 500 internal server error occurs, it’s crucial to check your server logs for more details about the issue. The logs can provide insight into what went wrong, whether it’s a permissions issue, a misconfiguration, or something else.

    Checking Server Logs

    To diagnose the issue, check the error logs for your web server. Here’s how you can do this:

    tail -f /var/log/nginx/error.log

    This command shows the last few lines of the Nginx error log in real-time, allowing you to spot any errors or issues related to the 500 error. For Apache servers, you would use:

    tail -f /var/log/apache2/error.log

    Look for entries that correspond to the time when the error occurred. Common issues in the logs include missing files, database connection errors, or issues with specific server modules.

    Additionally, you can use log analysis tools like Loggly or Datadog to help aggregate and analyze server logs more efficiently, identifying patterns that could lead to recurring errors.

    How to Test Server Stability Post-Fix to Ensure Long-Term Reliability

    Once you’ve applied a fix for the 500 internal server error, it’s important to test your server to ensure the problem is truly resolved and that the server remains stable over time.

    Testing Server Stability

    One way to test the server’s performance is by using load testing tools to simulate traffic and monitor server behavior. Tools like Apache Benchmark or Load Impact allow you to simulate multiple requests to your server, helping you assess its stability and performance under stress.

    For example, you can use the following command with Apache Benchmark to simulate 1000 requests:

    ab -n 1000 -c 10 http://yourwebsite.com/

    This command sends 1000 requests to your server, with 10 requests being processed simultaneously, helping you observe how the server handles multiple connections.

    By testing your server after making fixes, you can be more confident that your solution is effective and that the server can handle future traffic without issues.


    By addressing common causes like incorrect permissions, browser cache issues, and analyzing server logs, you can often resolve 500 internal server errors and restore stability to your website. Additionally, by testing server performance post-fix, you can ensure long-term reliability.

    How to Troubleshoot and Fix 500 Internal Server Errors: Step-by-Step Guide

    A 500 Internal Server Error is one of the most common yet frustrating issues encountered by website administrators. This error typically signals that something has gone wrong on the server-side, but it doesn’t specify the exact cause. In this guide, we’ll walk you through the key steps to diagnose and resolve this issue efficiently, ensuring that your server runs smoothly and is less prone to errors in the future.

    Choosing the Right Hosting Environment to Avoid 500 Internal Server Errors

    Selecting a reliable hosting environment is crucial for preventing 500 internal server errors. A poorly configured server or a shared hosting environment with insufficient resources can lead to frequent server issues. For instance, a hosting service with limited resources (e.g., CPU, RAM, or disk space) might struggle to handle high traffic volumes, triggering 500 errors.

    To avoid such issues, opt for hosting environments with strong uptime guarantees, high resource availability, and scalability. Choosing reputable hosting providers with solid support for server management can also minimize the risk of encountering these errors. Additionally, ensure that your hosting plan supports the specific technologies your website uses, such as PHP, databases, or server-side applications.

    A poor hosting configuration example might be a shared hosting environment where too many websites are running on the same server, leading to performance bottlenecks and resulting in 500 errors. Opting for a VPS or dedicated server may be a better solution in such cases, as it allows for more control and dedicated resources.

    How to Clear Browser Cache and Refresh Pages to Resolve 500 Errors

    In some cases, clearing your browser cache and refreshing the page can resolve 500 errors, especially when they are caused by outdated or corrupt cached data. Here’s a step-by-step guide to clearing your browser cache:

    1. Google Chrome:
      • Click the three-dot menu in the top-right corner.
      • Select More tools > Clear browsing data.
      • Choose a time range (e.g., “Last 24 hours” or “All time”).
      • Check the box for Cached images and files.
      • Click Clear data.
    2. Mozilla Firefox:
      • Click the three-line menu in the top-right corner.
      • Select Settings > Privacy & Security.
      • Scroll to Cookies and Site Data and click Clear Data.
      • Check Cached Web Content and click Clear.
    3. Safari:
      • Open Safari and click Safari in the top menu.
      • Select Preferences > Advanced and check Show Develop menu in menu bar.
      • In the menu bar, click Develop and select Empty Caches.

    After clearing the cache, refresh the page to see if the error is resolved. This process works when the error is caused by outdated or corrupt files stored in the browser’s cache, which can interfere with loading updated content on the server.

    Server Log Analysis for Diagnosing 500 Errors: Tools and Tips

    Server log analysis is one of the most effective ways to diagnose the root cause of a 500 internal server error. The logs typically contain detailed information about server operations, errors, and warnings that can pinpoint the issue. Here’s how to analyze your logs:

    1. Apache Logs:
      • Locate the error log file, typically found in /var/log/apache2/error.log.
      • Use the command tail -f /var/log/apache2/error.log to monitor real-time errors.
      • Look for entries marked with 500 or specific error messages such as “Internal Server Error.”
    2. Nginx Logs:
      • Nginx logs are usually located at /var/log/nginx/error.log.
      • To view errors, use tail -f /var/log/nginx/error.log.

    Common log entries for 500 errors might include permission issues, file not found errors, or misconfigurations in server settings. By reviewing these entries, you can gain insights into whether the issue is related to file permissions, application issues, or other server configurations.

    How to Test Server Stability Post-Fix to Ensure Long-Term Reliability

    After fixing the 500 internal server error, it’s crucial to test the server’s stability to ensure the issue doesn’t recur. Here are a few steps to ensure long-term reliability:

    1. Load Testing:

      Use tools like Apache JMeter or LoadRunner to simulate high traffic and ensure that your server can handle increased load without errors. These tools allow you to test how your server behaves under stress and identify any potential issues before they cause downtime.

    2. Monitor Server Performance:

      Regularly monitor server performance with tools like Nagios, Zabbix, or New Relic. These tools provide real-time insights into server metrics such as CPU usage, memory, and response time, helping you catch any abnormalities early.

    3. Server Resource Allocation:

      Ensure that your server has sufficient resources allocated, particularly for high-traffic periods. You can adjust server settings like max_execution_time and memory_limit in PHP to handle more intensive processes and prevent 500 errors related to resource exhaustion.

    By implementing load testing and continuous performance monitoring, you can detect potential issues and ensure long-term stability, reducing the likelihood of recurring 500 errors.

    Evaluating Different Solutions for Resolving 500 Server Errors: Pros and Cons

    When faced with a 500 Internal Server Error, resolving the issue quickly is essential to maintain your website’s functionality and user experience. However, choosing the right solution is not always straightforward, as various factors such as hosting provider reliability, performance, and error prevention strategies come into play. In this section, we’ll explore different solutions for fixing and preventing 500 server errors, comparing their pros and cons to help you select the best approach for your needs.

    Choosing the Right Cloud Hosting Provider to Prevent 500 Errors

    One of the most important steps in preventing 500 internal server errors is selecting a reliable cloud hosting provider. A good provider can minimize the risk of these errors by offering strong uptime guarantees, excellent performance, and scalable infrastructure. Here’s what to consider when making your choice:

    • Uptime Guarantees: Hosting providers with strong uptime guarantees (e.g., 99.9% uptime or higher) are crucial for minimizing downtime and preventing 500 errors. For example, AWS and Google Cloud offer uptime guarantees backed by Service Level Agreements (SLAs), which ensure that your website is available and running smoothly most of the time.
    • Performance and Scalability: Look for cloud providers that offer scalable solutions to meet the demands of your website. Whether you’re running a small blog or a large e-commerce site, performance and scalability are essential to avoid server overloads that could trigger 500 errors. Providers like DigitalOcean and Linode provide scalable virtual private servers (VPS) that allow you to adjust resources like RAM and CPU on-demand.
    • Server Redundancy: Redundant systems, such as multiple servers or data centers, ensure that your website remains operational even if one server goes down. For instance, Amazon Web Services (AWS) and Microsoft Azure offer multi-region redundancy, which helps mitigate the risk of server outages causing 500 errors.
    • Latency and Bandwidth: Low latency and sufficient bandwidth are also critical factors in preventing errors. A hosting provider with high network throughput ensures your website can handle traffic spikes without overwhelming the server. Cloud providers like AWS and Google Cloud excel in providing low-latency solutions with robust networking capabilities.

    When choosing a provider, remember that 500 errors can often be avoided by investing in a hosting provider that ensures consistent performance and offers strong support for scalability and redundancy.

    Comparing Cloud Infrastructure Providers: What Matters for Error-Free Hosting?

    Another crucial aspect of preventing 500 internal server errors is selecting the right cloud infrastructure. Different cloud providers offer various features that impact the reliability and performance of your hosting setup. When comparing infrastructure providers, it’s important to focus on the following:

    • Uptime Reliability: Similar to hosting providers, cloud infrastructure providers should offer robust uptime guarantees. For example, Google Cloud provides a 99.95% uptime SLA, which is vital for reducing the likelihood of errors. Check for service level agreements (SLAs) that specifically cover uptime and performance metrics.
    • Latency and Bandwidth: Cloud infrastructure providers differ in their ability to handle data throughput and latency. AWS, for example, offers low-latency networking and allows users to deploy instances in multiple availability zones, improving response times and error prevention. Providers that offer high bandwidth and low latency are key to maintaining a smooth, error-free user experience.
    • Cost-Effectiveness: While it’s important to choose a reliable infrastructure provider, cost is also a significant factor. Compare the pricing models of providers like AWS, Microsoft Azure, and Google Cloud to find a solution that meets your performance needs without exceeding your budget. Keep in mind that choosing a cheaper provider might lead to lower uptime or performance issues, which could result in 500 errors down the line.
    • Performance Metrics: Beyond latency, consider the infrastructure’s ability to handle traffic spikes and resource demands. Providers like DigitalOcean and Vultr offer easy-to-scale VPS solutions that can handle sudden traffic surges without causing server errors. Understanding how a provider manages scaling is essential to preventing downtime during periods of high traffic.

    By evaluating these factors, you can make an informed decision about which cloud infrastructure provider is best suited for your needs, minimizing the risk of 500 internal server errors.

    In conclusion, both cloud hosting and infrastructure providers play significant roles in preventing 500 errors. Ensuring that your provider offers high uptime guarantees, scalable solutions, and low latency will significantly reduce the likelihood of encountering such errors. Carefully consider the pros and cons of each provider based on your website’s needs and performance expectations.

    Best Practices for Preventing 500 Errors: Ongoing Monitoring and Optimization

    When it comes to preventing 500 internal server errors, it’s crucial to address the root causes that often stem from server misconfigurations, inadequate resources, outdated software, or poor monitoring practices. These errors not only disrupt user experience but can also impact the performance and reputation of your website. This guide will walk you through the best practices for configuring server resources, maintaining up-to-date software, performing routine server maintenance, and setting up automated monitoring to keep your server reliable and error-free.

    Best Practices for Configuring Server Resources to Prevent 500 Errors

    Allocating sufficient server resources is essential for ensuring your server performs optimally and avoids issues like 500 internal server errors. Insufficient CPU, RAM, or disk space can lead to server overload, which is a common cause of these errors. Here are key practices to help prevent them:

    • Allocate Sufficient Resources: Ensure that your server has enough CPU, RAM, and disk space for its intended workload. When these resources are maxed out, the server might fail to handle requests, leading to 500 errors.
    • Configure Server Limits: Set appropriate limits for worker processes, maximum connections, and memory allocation to avoid overloading your server. For example:
      • Apache: Modify the MaxRequestWorkers directive in httpd.conf to adjust the number of allowed simultaneous connections.
        MaxRequestWorkers 150

        This setting controls how many requests the server can handle at once. If the limit is reached, new requests will receive a 500 error.

      • Nginx: Adjust worker_processes in nginx.conf to handle more concurrent connections:
        worker_processes 4;

        This increases the number of worker processes, allowing Nginx to handle more simultaneous connections.

      • PHP-FPM: Configure the pm.max_children setting to ensure that PHP can handle more concurrent requests:
        pm.max_children = 50

        This allows PHP-FPM to spawn more child processes to handle increased traffic.

    • Load Balancing: In high-traffic environments, consider implementing load balancing to distribute the load evenly across multiple servers, reducing the risk of overloading any single server.
    • Monitoring Tools: Use monitoring tools like htop or top to visualize real-time resource usage and identify when you’re approaching resource limits. For example, running htop in the terminal shows real-time CPU and memory usage, helping you spot potential bottlenecks early.

    These practices help ensure that your server has the resources it needs to operate efficiently and prevent 500 errors caused by resource shortages.

    Why Regular Software Updates Can Prevent Server-Side Errors

    Outdated software can lead to compatibility issues and vulnerabilities that may cause 500 internal server errors. Regularly updating your server software is essential to ensure optimal performance and security. Here’s why software updates are so important:

    • Fix Known Bugs and Vulnerabilities: Updates often address bugs or security flaws that could lead to server instability or errors. For instance, an outdated web server like Apache or Nginx could have known vulnerabilities that may trigger internal errors.
    • Ensure Compatibility: Newer versions of software, such as PHP or Python, often fix compatibility issues with server environments and other software. An outdated version of PHP might not interact properly with newer web applications, leading to errors.
    • Check for Updates: On Debian-based systems, use the following command to check for updates:
      sudo apt-get update && sudo apt-get upgrade

      This ensures your system is up-to-date with the latest patches and security fixes.

    • Monitor for Critical Security Patches: Apply security updates as soon as they are released to prevent potential exploits. A famous example is the Heartbleed vulnerability in OpenSSL, where timely updates prevented widespread attacks.

    Ignoring updates puts your server at risk for performance degradation and security breaches that could trigger 500 errors, so keep your server software updated regularly.

    How to Perform Regular Server Maintenance to Prevent Future 500 Errors

    Server maintenance is a critical aspect of preventing future 500 internal server errors. By performing regular checks and updates, you can identify issues before they escalate. Here are key maintenance practices:

    • Log File Management: Over time, log files can consume disk space and slow down your server. Use tools like logrotate to manage log file size and rotation. For example, configure logrotate for Apache logs by editing the /etc/logrotate.d/apache2 file:
      /var/log/apache2/*.log {
          weekly
          rotate 4
          compress
          delaycompress
          missingok
          notifempty
          create 640 root adm
      }

      This will rotate logs weekly and compress older logs to save space.

    • Disk Space Monitoring: Regularly check disk space to ensure the system doesn’t run out of room. You can use a simple command like df -h to check available disk space:
      df -h

      Set up alerts to notify you when disk space usage exceeds a certain threshold.

    • Configuration Audits: Regularly review your server configurations, such as Apache or Nginx settings, to ensure they are optimized and aligned with current traffic demands. Adjust server settings, such as worker_processes in Nginx, as necessary based on the server’s performance.

    By maintaining your server’s health through regular checks and cleanups, you can prevent 500 errors and keep your server running smoothly.

    Key Metrics to Monitor Post-Fix to Ensure Server Reliability

    After resolving a 500 internal server error, it’s essential to monitor key metrics to ensure ongoing server reliability and prevent future issues. Here are the most important metrics to track:

    • Uptime and Error Rates: Track the uptime of your server and monitor error rates to detect recurring issues. A sudden spike in errors after a fix may indicate that the problem wasn’t fully resolved.
    • CPU and Memory Usage: High CPU or memory usage can indicate that your server is under heavy load, which could lead to 500 errors. Use tools like Prometheus or Nagios to monitor these metrics continuously.
    • Error Logs: Review your error logs regularly to catch any potential problems early. Tools like Grafana can be used to visualize CPU and memory usage trends over time.
    • Prometheus Setup Example: To monitor error rates using Prometheus, you can use the following query:
      rate(http_requests_total[1m])

      This query tracks the rate of HTTP requests to your server, helping to identify spikes that may lead to errors.

    By actively monitoring these key metrics, you can maintain server reliability and prevent future 500 errors.

    How to Set Up Automated Monitoring for Early Detection of Server Errors

    Automated monitoring is essential for detecting 500 internal server errors before they affect users. By setting up automated alerts, you can quickly address server issues before they escalate. Here’s how to set up effective automated monitoring:

    • Choose the Right Tools: Tools like Monit, Zabbix, or New Relic are excellent for automating server monitoring. Monit, for example, can be configured to monitor Apache:
      check process apache with pidfile /var/run/apache2.pid

      This configuration ensures that Monit monitors Apache and alerts you if the process stops unexpectedly.

    • Set Up Alerts: Set up alerts via email, SMS, or Slack to notify administrators of any server errors. For instance, using Zabbix, you can configure an alert for high CPU load:
      {host:system.cpu.load[percpu,avg1].last()}>5

      This will trigger an alert when the CPU load exceeds 5, allowing you to take action before the server becomes overwhelmed.

    • Regularly Test and Update Monitoring Configurations: Periodically test your automated monitoring to ensure that it is still working effectively. Update alert thresholds as needed based on changes to your server’s performance or traffic.

    By setting up automated monitoring and alerts, you can proactively identify and fix server errors, keeping your website stable and error-free.


    By following these best practices for configuring server resources, performing regular software updates, maintaining the server, and monitoring key metrics, you can significantly reduce the risk of encountering 500 internal server errors in the future. These proactive measures will ensure your server runs smoothly and your website remains reliable for users.

  • Virtual Private Cloud: The Ultimate Guide to Secure Setup

    Virtual Private Cloud: The Ultimate Guide to Secure Setup

    How to Choose the Right VPC Configuration for Your Business Needs

    A Virtual Private Cloud (VPC) is a private network within a cloud environment, allowing businesses to securely host their applications and services while having control over their resources. Choosing the right VPC configuration is crucial for optimizing performance, cost, and scalability. Businesses must evaluate factors like network speed, bandwidth, and processing power when selecting a VPC configuration that aligns with their needs. In this section, we will explore how to evaluate different VPC configurations, weigh the trade-offs between high availability and low latency, and choose the best pricing model and provider for your business.

    Evaluating VPC Options Based on Performance and Cost

    When selecting a VPC configuration, performance and cost are two of the most critical factors to consider. These elements are often interconnected, as higher-performance configurations typically come with a higher price tag. For example, if your business operates in the finance sector, where low latency and high-speed transactions are essential, you may need to invest in a more expensive VPC setup with higher bandwidth and processing power.

    In contrast, a healthcare provider focused on compliance may opt for a more budget-friendly VPC, prioritizing security and cost-effectiveness over high performance. This choice could involve using lower-cost instances like AWS’s t3.medium for moderate workloads rather than more expensive options like m5.large for high-performance computing. Here’s an example of how performance and cost can be balanced:

    • Finance: A financial service might opt for a VPC configuration with high-speed networking and low latency, using AWS EC2 instances such as m5.xlarge for better computational power, but at a higher cost.
    • Healthcare: A healthcare company might choose a less expensive option like t3.medium for non-critical workloads to comply with budget constraints, understanding that performance might be lower but still meets the required service level.

    By comparing the cost of instances, such as AWS EC2’s t3.medium versus m5.large, businesses can make data-driven decisions. Performance-heavy configurations often come at a premium but are essential for applications like real-time financial trading platforms or e-commerce sites handling high volumes of transactions.

    Understanding the Trade-offs: High Availability vs. Low Latency

    When configuring a VPC, businesses must consider the trade-off between high availability and low latency. High availability typically involves having resources in multiple regions or availability zones, ensuring that your application remains up and running even if one zone fails. On the other hand, low latency is crucial for applications that require real-time data processing, such as e-commerce platforms or online gaming.

    For example, an e-commerce site that handles time-sensitive transactions may prioritize low latency to ensure quick responses to customer actions. This can be achieved by leveraging AWS Global Accelerator, which optimizes routing for low-latency access to applications. The configuration might look like this:

    • Low Latency: A global e-commerce platform using AWS Global Accelerator for fast, reliable user access worldwide. The application is hosted in multiple regions to ensure low latency for customers in different locations.

    Conversely, a financial institution might place higher importance on high availability over low latency. In this case, a multi-AZ VPC configuration would ensure that services remain available even if one zone faces downtime, even if latency increases slightly. Here’s an example:

    • High Availability: A bank using AWS Multi-AZ VPC to ensure their services are always available, even at the expense of slightly increased latency, ensuring 99.99% uptime for critical financial applications.

    By carefully weighing these trade-offs, businesses can choose the configuration that best meets their needs based on industry requirements and application needs.

    Assessing VPC Pricing Models and Choosing the Right Plan

    Different VPC pricing models offer flexibility depending on your business needs. VPCs are typically billed based on the resources you use, including compute instances, bandwidth, and storage. The three most common pricing models are on-demand, reserved, and spot instances. Understanding when and how to use each pricing model is key to optimizing costs.

    • On-demand instances: These are the most flexible but often the most expensive. They are suitable for businesses with unpredictable traffic or temporary workloads, like a startup running a marketing campaign or a seasonal business.
    • Reserved instances: These offer significant cost savings (up to 75%) by committing to a specific configuration for a term (typically 1-3 years). This is ideal for larger businesses with predictable workloads, such as an enterprise running a large-scale e-commerce platform.
    • Spot instances: These instances provide the lowest cost but are subject to termination by the provider when demand for resources is high. Spot instances are ideal for non-critical workloads like batch processing or data analysis.

    For instance, a small e-commerce business with fluctuating traffic may prefer on-demand VPC instances, while a larger corporation might use reserved instances for their core infrastructure, saving money over time. Here’s a breakdown of AWS EC2 pricing for VPC configurations:

    • AWS EC2 Pricing for On-demand: t3.medium costs around $0.0416 per hour.
    • AWS EC2 Pricing for Reserved Instances: m5.large costs approximately $0.096 per hour with a one-year commitment.

    To help estimate costs, using the AWS Pricing Calculator allows you to compare different EC2 instance types and configurations, considering factors like traffic, availability zones, and usage patterns.

    Choosing a VPC Provider with Flexible Pricing and Global Reach

    Choosing a VPC provider is a critical decision based on your need for flexible pricing and global reach. Major providers like AWS, Google Cloud, and Azure each have unique offerings that may suit different business models.

    • AWS: AWS VPC is known for its global infrastructure and flexible pricing models. With services available in multiple regions, it’s an excellent choice for businesses that require scalability and low latency worldwide.
    • Google Cloud: Google Cloud’s VPC offers a strong global network, especially for businesses that require seamless integration with other Google services. Google’s flexible pricing and sustained-use discounts can be attractive for startups and small businesses.
    • Azure: Azure’s VPC options are well-suited for enterprises heavily invested in Microsoft tools, offering strong integration with services like Office 365 and Dynamics 365.

    For example, a global tech company might choose AWS for its large infrastructure footprint and low-latency features, while a growing business with a need for lower pricing might select Google Cloud’s VPC for its cost-effective global network and tight integration with Google services.

    In summary, when evaluating VPC providers, it’s essential to consider not just the cost but also factors like the global availability of services and the flexibility of pricing models. Make sure to choose a provider that matches your business’s scalability, performance, and budget needs.


    By following these guidelines, businesses can make informed decisions when selecting the right VPC configuration, ensuring that it meets performance, cost, and scalability requirements. Post-implementation, further optimizations, such as adjusting instance types or scaling resources, can help maintain an efficient and cost-effective VPC setup as your business grows.

    Optimizing Your Virtual Private Cloud Setup for Cost Efficiency and Growth

    Optimizing your Virtual Private Cloud (VPC) setup is essential for businesses looking to balance cost efficiency and growth. A well-optimized VPC allows organizations to leverage cloud infrastructure effectively, ensuring performance, scalability, and security while minimizing unnecessary expenditures. This section will guide you through practical steps and strategies to optimize your VPC for long-term success, ensuring that it meets both current business needs and future growth.

    For more foundational knowledge on cloud technology, refer to our What Is Cloud Computing: The Ultimate Guide to Benefits & Types.

    Monitoring and Managing VPC Usage for Cost Optimization

    One of the key advantages of using a Virtual Private Cloud is the ability to monitor and manage usage effectively. By tracking resource consumption and optimizing VPC configurations, you can significantly reduce costs without sacrificing performance. Here are some best practices for managing your VPC usage:

    • Utilize Cost Monitoring Tools: Tools such as AWS Cost Explorer, GCP Cost Management, and Azure Cost Management are invaluable for monitoring VPC usage. These tools provide real-time insights into resource consumption and help identify areas where costs can be minimized.
    • For example, using AWS Cost Explorer, you can visualize your AWS spending, track which services are costing the most, and create cost reports to track usage trends over time. Here’s how to set up a simple cost report:

      aws ce get-cost-and-usage --time-period Start=2025-01-01,End=2025-12-31 --granularity MONTHLY --metrics "BlendedCost"

      This command retrieves monthly cost and usage data, allowing you to identify areas where cost-saving measures can be implemented.

    • Set Up Cost Alerts: Most cloud providers allow you to set budget alerts to notify you when your spending reaches a predefined threshold. Setting up alerts helps you stay informed and make adjustments before exceeding your budget.
    • For example, on Google Cloud, you can configure budget alerts via the Google Cloud Console. This will notify you when your spending approaches the set limit.

    • Select the Right Instances: Choosing the right instance types for your VPC is crucial. While larger instances provide better performance, they often come at a higher cost. Analyze your workload to determine the appropriate instance size, and consider using spot instances for non-critical tasks to reduce costs.
    • Additionally, services like AWS Auto Scaling can automatically adjust the number of instances based on traffic, helping optimize both cost and performance.

    By following these practices, you can monitor and manage VPC usage effectively, ensuring that your setup remains cost-efficient as your business grows.

    Scaling Your VPC for Business Growth

    As your business grows, so will your infrastructure needs. Scaling your Virtual Private Cloud (VPC) efficiently allows you to handle increased traffic and workloads without unnecessary overhead. Here are a few strategies for scaling your VPC while balancing cost and performance:

    • Auto Scaling for Dynamic Resource Allocation: Auto scaling ensures that your VPC can handle fluctuations in demand by automatically adjusting the number of instances based on real-time usage. This helps optimize performance and minimize costs during periods of low demand.
    • In AWS, you can use Auto Scaling Groups to scale EC2 instances based on traffic. Here’s an example of creating an auto scaling group:

      aws autoscaling create-auto-scaling-group --auto-scaling-group-name my-auto-scaling-group --launch-configuration-name my-launch-config --min-size 1 --max-size 10 --desired-capacity 2 --availability-zones us-east-1a

      This command creates an Auto Scaling group that adjusts between 1 and 10 instances depending on traffic demand.

    • Evaluate Network Performance: When scaling, it’s essential to consider network performance. Adding more instances may increase your traffic, but it can also introduce network congestion if not properly managed. For instance, using Elastic Load Balancer (ELB) to distribute traffic evenly across instances helps ensure that your VPC maintains optimal performance while scaling.
    • Plan for Future Growth: As you scale your VPC, think ahead about future needs. Evaluate potential growth scenarios and ensure your setup can accommodate additional resources (e.g., storage, instances) with minimal disruption. Cloud services like AWS EC2 Reserved Instances offer cost savings for long-term scalability, allowing you to lock in lower rates.

    Incorporating these strategies will help ensure your VPC can scale effectively, maintaining both cost efficiency and high performance as your business grows.

    Ensuring Network Security and Compliance in Your VPC

    Securing your Virtual Private Cloud is a top priority for any business. Ensuring that your VPC meets security standards and complies with regulations like GDPR or HIPAA is essential for protecting sensitive data. Here’s how you can secure your VPC while maintaining compliance:

    • Implement Firewalls and Access Controls: Use Security Groups and Network Access Control Lists (NACLs) to control inbound and outbound traffic to your VPC. This allows you to enforce strict access policies and prevent unauthorized access.
    • For example, creating a security group to allow only certain IP ranges to access your VPC:

      aws ec2 create-security-group --group-name my-security-group --description "Allow specific IP range"
      aws ec2 authorize-security-group-ingress --group-id sg-12345678 --protocol tcp --port 80 --cidr 192.168.1.0/24

      This command creates a security group and allows HTTP traffic on port 80 from a specific IP range.

    • Use Encryption: Ensure that sensitive data is encrypted both at rest and in transit. AWS, GCP, and Azure all offer native encryption options for both data storage (e.g., AWS KMS) and network communication (e.g., TLS/SSL for secure connections).
    • Stay Compliant with Regulatory Standards: If your business operates in regulated industries (e.g., finance, healthcare), ensure your VPC meets compliance requirements such as GDPR, HIPAA, or PCI DSS. Tools like AWS Artifact can help you obtain compliance reports to ensure your VPC configurations adhere to necessary standards.

    By following these security practices, you ensure that your VPC is protected against threats while meeting compliance requirements for your industry.

    Optimizing VPC Performance Using Caasify’s Scalable Infrastructure

    Optimizing VPC performance involves more than just increasing resources; it’s about leveraging scalable infrastructure to meet changing demands while maintaining efficiency. Here’s how you can optimize VPC performance:

    • Leverage Scalable Infrastructure: Using scalable infrastructure like Caasify’s cloud platform allows you to optimize your VPC setup by providing flexible resources that can scale based on your performance needs. Services like Elastic Load Balancing (ELB) and Auto Scaling ensure that resources are automatically allocated based on real-time demand, ensuring that your VPC performs optimally even during high-traffic periods.
    • Improve Latency and Throughput: Optimize the network architecture by using high-performance networking services. For instance, AWS Direct Connect or Azure ExpressRoute offer dedicated connections between your on-premise data center and cloud infrastructure, improving performance and reducing latency.
    • Monitor and Adjust Performance: Continuously monitor your VPC’s performance using monitoring tools like AWS CloudWatch or Google Stackdriver. These tools provide insights into the performance of your instances, allowing you to make adjustments based on real-time data.

    By using scalable infrastructure and performance monitoring tools, you can ensure that your VPC remains highly efficient, providing reliable and fast access to resources even as your business grows.


    Optimizing your Virtual Private Cloud setup is an ongoing process that requires careful monitoring and management. By implementing the right strategies for cost optimization, scaling, security, and performance, you can ensure that your VPC will continue to meet the growing demands of your business.

    Comparing Different Virtual Private Cloud Providers and Configurations

    When evaluating Virtual Private Cloud (VPC) providers and configurations, businesses face numerous decisions that impact performance, cost, and scalability. The right VPC setup can empower organizations to handle dynamic workloads, enhance security, and ensure seamless growth. Whether you’re in finance, healthcare, or e-commerce, understanding the nuances of VPC providers can help optimize your cloud infrastructure for both short-term needs and long-term success. In this section, we’ll explore key factors to consider when comparing VPC options, with practical insights on performance, cost, security, and scalability.

    How to Choose Between VPC Providers Based on Features and Cost

    Choosing the right VPC provider is crucial for balancing performance, cost, and scalability. While all major cloud providers offer robust VPC services, their configurations, pricing models, and feature sets differ significantly. When comparing providers, consider the following factors:

    • Core Features: Look at the basic VPC components such as network routing, private subnets, VPN support, and integration with other cloud services. AWS VPC, for instance, offers advanced features like Transit Gateway for inter-VPC connections, while Google Cloud VPC offers flexible multi-region support.
    • Cost Structure: Different providers have varied pricing models. For example, AWS charges for data transfer between regions, while Google Cloud provides more straightforward pricing for VPC usage. Cost is often based on network traffic, the number of IP addresses, and additional features like load balancing and firewalls.
    • Support and Service Level Agreements (SLAs): The level of support and the provider’s SLAs are important considerations. Some providers, like AWS and Azure, offer premium support tiers for an additional fee.

    Example Cost Comparison: AWS typically offers pay-as-you-go pricing, where you are billed based on resource usage, such as data transfer and IP addresses. In contrast, Google Cloud VPC pricing can be more predictable, especially for businesses requiring substantial network traffic. For instance, if your e-commerce business relies on global transactions, Google Cloud’s flat-rate pricing might be more cost-efficient for international data transfers.

    By assessing these factors, you can determine which VPC provider aligns best with your budget and performance requirements.

    Performance Comparison: VPC vs. Traditional Private Cloud Solutions

    VPCs provide flexibility, scalability, and cost-efficiency that traditional private cloud solutions can struggle to match. However, performance can vary across different VPC configurations and the underlying infrastructure. Here’s how VPCs compare to traditional private clouds:

    • Latency and Speed: VPCs can offer lower latency than traditional private clouds, as they are designed to take advantage of high-speed cloud networks. For example, AWS VPC offers services like Direct Connect, which allows you to create dedicated network connections, reducing latency.
    • Reliability: In traditional private cloud setups, businesses often manage their own infrastructure, which can lead to higher costs and potential downtime if not properly maintained. VPCs, by contrast, benefit from the cloud provider’s global infrastructure and availability zones, enhancing reliability.
    • Scalability: VPCs offer superior scalability, adjusting quickly to business needs. Traditional private clouds might require manual intervention to scale resources, resulting in slower response times and additional maintenance.

    Example Case Study: A financial services company moving from a traditional private cloud to AWS VPC saw a reduction in network latency by 30% due to the enhanced global infrastructure and the ability to provision resources on-demand. This improvement allowed the company to handle peak traffic during financial market events with greater ease.

    When considering performance, a VPC is often the better choice for businesses looking to quickly scale without sacrificing reliability or speed.

    Security and Compliance Features to Consider When Choosing a VPC Provider

    Security is one of the most important factors when choosing a VPC provider, especially for industries that require strict compliance, like healthcare and finance. Different providers offer varying security features and certifications:

    • Encryption: Most VPC providers offer encryption both in transit and at rest. For instance, AWS VPC uses encryption with Amazon Elastic Block Store (EBS), while Azure provides encryption for data at rest via Azure Storage Service Encryption.
    • Firewalls and Access Control: VPC providers offer varying levels of network firewalls and access control. AWS VPC offers security groups, which act as virtual firewalls, while Google Cloud uses the VPC firewall to control incoming and outgoing traffic.
    • Compliance: Ensure that the VPC provider complies with the necessary regulations like HIPAA (for healthcare) or GDPR (for businesses in the EU). AWS, for example, is HIPAA-compliant, making it suitable for healthcare providers.

    Example: A healthcare company adopting Google Cloud VPC benefited from its built-in compliance with HIPAA regulations, offering the required security features like encryption, access control, and audit logging. This allowed the company to securely store patient data while avoiding costly compliance issues.

    Choosing a VPC provider with strong security features is essential to ensure that your business adheres to compliance requirements while maintaining data integrity.

    Scalability and Customization in Different VPC Configurations

    Scalability is one of the primary reasons businesses choose VPCs over traditional private clouds. VPCs can easily scale to meet growing business demands, offering customization in network configuration:

    • Elastic Scaling: VPC providers, such as AWS, offer Auto Scaling, which automatically adjusts the number of virtual machines based on real-time demand. This is particularly useful for handling fluctuating workloads during peak hours.
    • Custom Network Configuration: VPCs provide control over your network setup, allowing you to configure subnets, route tables, and IP allocation. This is especially beneficial for businesses with unique network requirements, such as e-commerce sites that need customized routing for high-traffic periods.
    • Cost Optimization: Scalability doesn’t always mean higher costs. Many VPC providers offer pay-as-you-go models that allow businesses to scale up during demand and scale down during off-peak times, reducing unnecessary costs.

    Example: An e-commerce business using AWS VPC during peak holiday seasons found that the ability to scale its infrastructure with Auto Scaling and customized load balancing allowed it to maintain optimal performance while minimizing costs. This flexible infrastructure ensured that the site could handle thousands of transactions without downtime.

    By leveraging scalability and customization options, businesses can build a VPC configuration that aligns with both current and future needs.

    Example: How Caasify’s Flexible Infrastructure Supports Growing Businesses

    Caasify’s infrastructure is designed to support growing businesses through flexible VPC configurations. With customizable network setups and robust scalability options, Caasify allows businesses to adjust their cloud infrastructure in real-time, ensuring that performance remains consistent even as demand increases.

    • Scalable VPC Configurations: Caasify offers VPC configurations that easily scale from small startups to large enterprises. For instance, an online retail business using Caasify’s VPC was able to expand its infrastructure as traffic increased during promotional events.
    • Cost-Effective Solutions: The flexible infrastructure allows businesses to adjust resources without committing to expensive long-term contracts, making it an attractive option for companies with fluctuating needs.
    • Support for Critical Applications: Whether it’s e-commerce, SaaS, or digital media, Caasify’s VPCs ensure that critical applications remain available with minimal latency, even during traffic surges.

    Example: A SaaS company using Caasify’s VPC was able to accommodate a 40% increase in customer sign-ups during a marketing campaign, scaling its resources seamlessly and maintaining consistent application performance. This allowed the business to focus on growth without worrying about infrastructure limitations.

    For businesses looking for flexibility and scalability, Caasify’s VPC infrastructure provides a solution that evolves with their needs.


    In conclusion, choosing the right VPC provider and configuration involves evaluating key aspects like features, cost, performance, security, and scalability. By understanding these factors and applying real-world examples, businesses can make informed decisions about their cloud infrastructure. For more details on cloud VPS options, check out Cloud VPS.

  • Remote Desktop Connection: The Essential Guide for 2025

    Remote Desktop Connection: The Essential Guide for 2025

    What is a Remote Desktop Connection and How Does It Work?

    A remote desktop connection allows users to access and control a computer from a different location over a network. It’s a valuable tool for remote work, IT administration, and providing technical support. By connecting to a remote desktop, you can interact with a machine as if you were sitting right in front of it. This allows for seamless access to files, applications, and other resources, no matter the physical distance.

    RDP vs. VNC: Key Differences and Use Cases

    When it comes to remote desktop connections, two popular options are RDP (Remote Desktop Protocol) and VNC (Virtual Network Computing). Both serve the same purpose—allowing remote access to a desktop—but they have some key differences in how they function.

    • RDP is typically used for managing Windows environments. It provides a full graphical interface and is highly optimized for Windows operating systems. This makes it an ideal choice for IT administrators managing Windows servers or helping users troubleshoot issues on Windows-based machines. For instance, an IT admin can use RDP to manage multiple Windows servers remotely, ensuring that all systems are running smoothly.
    • VNC, on the other hand, is often chosen for cross-platform compatibility. It allows users to share their desktop across different operating systems, such as Windows, macOS, and Linux. This makes it a good choice for teams working in a mixed-OS environment, where team members may need to access various types of machines. For example, a developer working on both a Mac and Windows PC may use VNC to switch seamlessly between devices.

    In summary, RDP is best for Windows-centric environments, while VNC excels in scenarios requiring cross-platform desktop sharing.

    Evaluating Third-Party Remote Desktop Tools: Benefits and Limitations

    Third-party remote desktop tools provide a variety of features beyond the basic capabilities of built-in solutions like RDP or VNC. These tools can be more user-friendly, offer additional security features, and often support a broader range of devices.

    Benefits of third-party tools include:

    • Enhanced features: Many tools offer advanced security options, such as two-factor authentication or session recording.
    • Cross-platform support: Some tools allow access to devices running various operating systems, making them versatile in mixed environments.
    • User-friendly interfaces: Many third-party solutions are designed with ease of use in mind, providing a smooth setup and management process.

    However, there are also limitations to consider:

    • Cost: Some tools require a subscription or a one-time payment, which might be expensive depending on the number of users.
    • Compatibility issues: Not all tools work well with every operating system, so it’s important to check if the solution is compatible with your setup.

    A good example of when to use a third-party tool is when you’re managing a remote workforce with employees using different devices and operating systems. A third-party tool like AnyDesk or TeamViewer can provide consistent access and support across platforms.

    Pricing and Plans: What to Consider When Choosing a Remote Desktop Solution

    When selecting a remote desktop solution, pricing and plans are important factors to consider. Many remote desktop services offer both free and paid options, with each catering to different needs.

    • Free solutions: These often come with basic features and limitations, such as a limited number of connections or support for only specific operating systems. Free tools are great for personal use or small teams with simple needs.
    • Paid solutions: Typically, paid solutions offer advanced features like higher connection speeds, better security, and more robust support options. These are suitable for businesses and IT admins who need to manage large numbers of machines or require specific functionalities.

    In terms of pricing models, some tools offer subscription-based plans, while others charge a one-time fee. Subscription models often provide continuous updates and support, while one-time payments can be more budget-friendly but may require additional costs for future upgrades.

    For enterprises, pricing can vary significantly based on the number of users and the required features. A small business might only need a basic solution, but larger companies often require enterprise-level services with added functionality and more user seats.

    In conclusion, choosing the right solution depends on your specific needs and budget. Consider both the features and the pricing structure to find the best fit for your remote desktop connection requirements.


    For more information on Remote Desktop Services by Microsoft, check out their official overview here.

    Key Security Considerations for Remote Desktop Connections

    When using a remote desktop connection, it’s crucial to ensure its security to protect sensitive data and prevent unauthorized access. A secure remote desktop setup can safeguard your IT administration tasks, remote work operations, and overall business continuity. Without proper security measures, remote desktop connections can become an attractive target for cybercriminals, potentially leading to data breaches, unauthorized access, and operational disruptions.

    Best Practices for Securing Remote Desktop Connections

    To ensure a secure remote desktop connection, it’s important to implement several key security practices. Below are some of the most effective measures:

    • Use Two-Factor Authentication (2FA): Enabling 2FA adds an extra layer of security to your remote desktop access. Even if a malicious actor acquires your password, they would still need the second authentication factor (like a code sent to your phone) to gain access.
    • For more information on how to implement multifactor authentication for Remote Desktop Services, check out this official Microsoft guide.
    • Encryption for Data Transmission: Ensure that your remote desktop software uses strong encryption protocols, such as TLS or SSL, to encrypt all data transmitted between the client and the server. This ensures that sensitive information, like login credentials or files, is not exposed to attackers during transmission.
    • Limit User Access and Permissions: Restrict the number of users who can access the remote desktop. Only provide access to employees who absolutely need it, and ensure that their permissions are set appropriately. By limiting user access, you can minimize potential vulnerabilities in your remote access security.
    • Regular Software Updates: Regularly update your remote desktop software and operating system to ensure that any security vulnerabilities are patched. Software updates often include fixes for newly discovered exploits, so keeping everything up to date is essential to avoid being compromised.
    • Monitor Remote Desktop Sessions: Constantly monitor active remote desktop connections for any suspicious activity. Set up alerts for unusual login times or IP addresses that don’t match your normal operations. Monitoring tools can help identify and prevent unauthorized access before it causes harm.
    • Use Strong Passwords: Enforce a strong password policy for remote desktop connections. Passwords should be long, complex, and unique to each user account. Consider using a password manager to securely store and manage credentials.
    • Firewall Protection and VPN: Use a firewall to restrict access to the remote desktop from unauthorized IP addresses. Additionally, consider setting up a Virtual Private Network (VPN) to add an extra layer of protection for your remote access security. VPNs encrypt all traffic and ensure that only authorized users can connect to the network.

    By implementing these key security practices, you can significantly reduce the risks associated with remote desktop connections. For further security optimization, check out articles on troubleshooting remote desktop security or explore specific remote desktop solutions that offer enhanced security features.

    It’s also worth noting that attackers specifically target poorly secured remote desktop services. According to Cloudflare, RDP vulnerabilities are often exploited by cybercriminals to gain access to sensitive networks. Therefore, securing your remote desktop connection is essential not only for protecting your data but also for preventing costly attacks and breaches.

    By following these guidelines, you can maintain a secure remote desktop environment for your business or personal use, ensuring that your remote access setup is safe and efficient.

    Choosing Between Remote Desktop Solutions: RDP vs. Third-Party Tools

    When it comes to establishing a remote desktop connection, choosing the right solution can significantly impact both productivity and security. Two of the most common options are RDP (Remote Desktop Protocol), a built-in solution by Microsoft, and third-party tools like VNC or cloud-based services. This section will help you understand the key differences between these options, evaluate their benefits and limitations, and guide you through choosing the most suitable solution for your needs.

    RDP vs. VNC: Key Differences and Use Cases

    RDP (Remote Desktop Protocol) and VNC (Virtual Network Computing) are two distinct technologies for accessing a computer remotely, but they serve slightly different purposes. RDP, developed by Microsoft, is primarily designed for Windows-based environments and offers a rich graphical interface that simulates a local desktop experience. It allows users to interact with a remote system as if they were physically present, with a strong focus on performance and security. RDP is highly effective for IT administrators and businesses relying on Microsoft servers or workstations for remote work.

    On the other hand, VNC is an open-source tool that provides basic remote desktop functionality, focusing on simplicity and cross-platform compatibility. Unlike RDP, VNC operates by transmitting the screen contents of the remote computer, which can be slower in comparison, especially when dealing with graphic-intensive tasks. However, VNC’s strength lies in its ability to support various operating systems such as Windows, Linux, and macOS, making it an excellent choice for teams needing cross-platform access.

    Use Cases:

    • RDP: Best suited for corporate environments and IT administration, where high-performance access to Windows desktops or servers is required.
    • VNC: Ideal for remote support, cross-platform access, or small teams that require a lightweight, easy-to-implement solution.

    Evaluating Third-Party Remote Desktop Tools: Benefits and Limitations

    Third-party remote desktop tools such as AnyDesk, TeamViewer, and RealVNC have become increasingly popular due to their ease of use, advanced features, and cross-platform capabilities. These tools are designed to offer more flexibility than RDP and VNC, often supporting additional functionalities such as file transfer, remote printing, and team collaboration.

    Benefits:

    • Cross-platform access: Most third-party tools work on a wide range of operating systems, making them suitable for mixed environments (Windows, macOS, Linux).
    • User-friendly interfaces: They tend to have more intuitive user interfaces, requiring minimal configuration and making them easy for non-technical users.
    • Additional features: Many tools offer integrated chat, file sharing, and remote administration, which can boost team collaboration and productivity.

    Limitations:

    • Subscription-based pricing: Unlike RDP, which is often included in Windows licenses, third-party tools typically require a paid subscription, which can increase costs over time.
    • Security concerns: While many third-party tools offer encryption, the security of these tools can be a concern, especially when compared to the built-in security features of RDP.

    If you’re managing remote work environments or need IT administration capabilities with a strong emphasis on usability and collaboration, third-party tools can be a good choice. However, for organizations that prioritize high security and performance in a Windows-centric environment, RDP may remain the best option.

    Caasify: A Scalable Cloud Solution for Remote Desktop Optimization

    For businesses that require a cloud-based remote desktop connection to ensure business continuity and scalability, Caasify offers a robust solution. With its cloud hosting infrastructure, Caasify allows users to scale remote desktop access across multiple devices while ensuring performance and security. The cloud platform integrates seamlessly with remote desktop tools and provides advanced features like virtual desktop infrastructure (VDI), offering enhanced flexibility for remote teams.

    If you’re looking for a solution that grows with your business, Caasify can help optimize your remote desktop operations by providing both performance and scalability for diverse remote work needs.

    Pricing and Plans: What to Consider When Choosing a Remote Desktop Solution

    When selecting a remote desktop solution, pricing and available plans are crucial factors to consider. RDP is often free with Windows, making it an attractive option for users already operating in a Microsoft environment. However, third-party remote desktop tools typically operate on a subscription model, with varying pricing tiers based on features and number of users.

    Considerations:

    • Free vs. Paid: While RDP is often bundled with Windows, third-party tools may require a subscription. Be sure to assess whether the additional features justify the cost.
    • Licensing: For enterprise use, some third-party tools offer licensing models based on the number of users or devices, while others may charge per connection.

    Make sure to weigh the long-term costs against the benefits of features like cross-platform access, security enhancements, and remote desktop performance to find the best fit for your needs.

    Step-by-Step Guide to Setting Up Remote Desktop on Windows 10/11

    Setting up a remote desktop connection on your Windows 10 or 11 machine allows you to access your computer from a different location as if you were sitting right in front of it. This step-by-step guide will walk you through the process, helping you configure a secure and reliable remote desktop setup for both personal and professional use. By the end of this guide, you’ll be able to set up and use remote desktop connections with ease.

    Preparing Your Windows System for Remote Desktop

    Before you can set up a remote desktop connection on your Windows system, there are a few essential steps to prepare your system. The first thing to check is whether your version of Windows supports remote desktop. Remote desktop is available on Windows 10/11 Pro, Enterprise, and Education editions. If you’re using Windows Home, remote desktop functionality is not available, and you’ll need to upgrade to one of the supported versions.

    To get started, follow these steps:

    1. Check your Windows version: Open the Settings app, go to System > About, and verify your Windows version.
    2. Enable remote desktop:
      • Go to Settings > System > Remote Desktop.
      • Toggle the switch to On under the “Enable Remote Desktop” section.
      • Click Confirm when prompted to allow the changes.
    3. Network configuration: Make sure your computer is connected to a stable network and that it is not behind a restrictive firewall that could block remote desktop connections.

    Once you’ve enabled remote desktop, your system is ready for configuration, and you can proceed to set up RDP (Remote Desktop Protocol) settings.

    Configuring RDP on Windows 10/11

    Configuring RDP settings on your Windows machine involves enabling the RDP service, configuring firewall rules, and ensuring that remote access is properly set up for both the local and remote machines. Here’s how to do it:

    1. Enable Remote Desktop:
      • Go to Settings > System > Remote Desktop again.
      • Click Advanced settings and ensure Network Level Authentication is turned on for added security.
    2. Allow RDP through Windows Firewall:
      • Press Windows + R to open the Run dialog.
      • Type control and press Enter to open the Control Panel.
      • Go to System and Security > Windows Defender Firewall.
      • Click Allow an app or feature through Windows Defender Firewall.
      • Ensure that Remote Desktop is checked for both Private and Public networks.
    3. Check the RDP port (3389): RDP uses port 3389 by default, so make sure that this port is not blocked by your network firewall or router.
    4. Set up user permissions:
      • Go to Settings > Accounts > Family & other users.
      • Under Other users, add the account you wish to grant remote desktop access to if it’s not already present.

    Once you’ve configured these settings, you should have the necessary setup to start using a remote desktop connection.

    Testing and Verifying Remote Desktop Setup on Windows

    Now that your system is configured for remote access, it’s time to test the setup to ensure everything works smoothly.

    1. On another device, open the Remote Desktop Connection application (found by searching for “Remote Desktop Connection” in the Start menu).
    2. Enter the IP address or hostname of the machine you want to connect to.
    3. Click Connect and enter your login credentials for the remote machine.

    If the connection is successful, you will see your Windows desktop appear on the remote device. If the connection fails, check the firewall and user permissions, as well as the network settings.

    Optimizing Your Windows Remote Desktop Experience with Scalable Infrastructure

    For businesses or users who plan to use remote desktop connections on a larger scale, optimizing your RDP setup is essential for maintaining performance and ensuring a seamless experience.

    1. Adjust display settings: In Remote Desktop Connection, go to Show Options > Display and select the resolution that works best for you. Lowering the resolution can improve performance on slower networks.
    2. Use multiple monitors: If you need to work with multiple screens remotely, you can enable this feature by checking the option for multiple monitors under the Display tab.
    3. Enable efficient data usage: Use the Experience tab in the Remote Desktop Connection settings to choose the best balance between performance and quality based on your network speed. For slower connections, turn off visual effects such as desktop background and font smoothing.

    For teams working remotely, integrating scalable infrastructure such as cloud solutions or VPNs can further improve your remote desktop experience by ensuring consistent, fast, and secure connections. What Is Cloud Computing: The Ultimate Guide to Benefits & Types can offer more insight on how cloud services might benefit remote work setups.

    By following these steps, you can ensure that your remote desktop experience is smooth and optimized for your needs.

    Setting Up Remote Desktop on macOS and Linux: A Complete Guide

    A remote desktop connection allows you to access and control your computer from a different location, and setting it up on macOS and Linux is an excellent way to maintain flexibility and productivity. In this guide, we will walk you through the steps to configure remote desktop access on both macOS and Linux. Whether you’re working from home or need to connect to a remote system, these instructions will ensure that you can access your machine efficiently and securely.

    Setting Up Remote Desktop on macOS

    To set up a remote desktop connection on macOS, you can use the built-in Screen Sharing feature. This is a straightforward process that allows you to remotely access your Mac from another device.

    1. Enable Screen Sharing:
      • Open System Preferences from the Apple menu.
      • Click on Sharing.
      • Check the box next to Screen Sharing.
      • Under Allow access for, select whether all users or specific users can access your Mac remotely.
    2. Configure Your Network:
      • If you’re setting this up over the internet, ensure that your router’s firewall allows traffic on port 5900, which is used by VNC (the protocol macOS uses for Screen Sharing).
      • You may also need to configure your Mac’s firewall to allow remote desktop connections.
    3. Connect from Another Device:
      • On another Mac, you can use the Finder app. Go to Finder > Go > Connect to Server, and enter the VNC address of your Mac (e.g., vnc://<your-ip-address>).
      • You will be prompted to enter the username and password for the Mac you wish to access.

    For more detailed instructions on enabling Screen Sharing, refer to the official Apple Support guide.

    Setting Up Remote Desktop on Linux

    For Linux, setting up a remote desktop connection is typically done using the xRDP server, which allows RDP (Remote Desktop Protocol) connections. Here’s how to set it up on an Ubuntu system:

    1. Install xRDP:

      Open a terminal window and install the xRDP package with the following command:

      sudo apt-get install xrdp

      This command installs the xRDP server, which enables RDP access to your Linux desktop.

    2. Start and Enable xRDP:

      Once the installation is complete, start the xRDP service and enable it to start at boot:

      sudo systemctl enable --now xrdp

      This ensures that the xRDP server starts automatically when your system boots up.

    3. Configure xRDP:
      • Ensure that the firewall allows RDP connections (default port 3389).
      • You may need to adjust configuration settings based on your desktop environment. If you’re using Ubuntu with the default GNOME desktop, xRDP should work out of the box.
    4. Connect from Another Device:
      • On a Windows or another Linux machine, you can connect using a remote desktop client such as Microsoft Remote Desktop (on Windows) or Remmina (on Linux). Simply enter the IP address of the Linux system and use your Linux credentials to log in.

    For further guidance on setting up xRDP, you can refer to this DigitalOcean tutorial on enabling RDP using xRDP or check out this TecAdmin guide for step-by-step installation.


    By following these simple steps, you can easily set up a remote desktop connection on both macOS and Linux. Whether you’re looking to access your macOS machine from another Mac or need to connect to a Linux system remotely, the instructions provided here will help you achieve seamless access. If you’re new to remote desktop configurations, these setups are beginner-friendly and provide the flexibility you need to manage your machines from anywhere.

    How to Ensure Low Latency and High Performance with Remote Desktop

    When setting up a remote desktop connection, ensuring low latency and high performance is crucial for a smooth and responsive experience. Whether you’re working remotely, managing a server, or accessing your desktop from a different location, optimizing network settings and choosing the right remote desktop protocol can make a significant difference in performance. In this section, we will walk through the essential steps and tips for achieving a fast, stable, and low-latency remote desktop experience.

    Optimizing Network Settings for Remote Desktop Performance

    The quality of your network connection plays a significant role in the remote desktop performance. Factors like latency, bandwidth, and stability can directly impact your remote desktop experience. Here are some practical tips to optimize your network settings for low-latency and high-performance remote access:

    1. Use Wired Ethernet Instead of Wi-Fi

      A wired Ethernet connection typically provides a more stable and faster connection than Wi-Fi. This reduces network instability and ensures a lower latency.

    2. Enable Quality of Service (QoS)

      Many routers allow you to enable QoS, which prioritizes traffic for certain applications or ports. For example, assign high priority to the RDP port (3389) to ensure that your remote desktop traffic gets the bandwidth it needs.

      How to do it:

      • Access your router’s settings.
      • Find the QoS section and enable it.
      • Add a rule to prioritize the RDP port (3389).
    3. Adjust Remote Desktop Client Settings

      You can tweak your remote desktop setup to reduce the amount of data transferred, improving performance. Here’s how:

      • Display: Lower the screen resolution and color depth (e.g., use 16-bit color instead of 32-bit).
      • Experience: Disable unnecessary visual effects such as desktop backgrounds, font smoothing, and animations.
      • Audio: Disable sound redirection if not required.

    By following these simple adjustments, you can significantly improve the network performance of your remote desktop session, resulting in lower latency and smoother interactions.

    For further network optimizations, check out the Optimization of RDP traffic guide from Microsoft.

    Choosing the Right Remote Desktop Protocol for Low Latency

    The remote desktop protocol you choose can have a big impact on latency and overall performance. Different protocols are optimized for varying types of use cases, such as general administration or graphics-heavy tasks. Here’s how to select the best protocol for low latency remote desktop performance:

    1. Standard RDP

      Remote Desktop Protocol (RDP) is commonly used for basic tasks like remote administration and light workloads. It tends to offer a good balance between latency and functionality. For low-latency needs, configure RDP with low-resolution and 16-bit color settings, as this minimizes the amount of data being transferred.

    2. VNC

      Virtual Network Computing (VNC) is another common protocol. While it is typically more lightweight, it may not be as responsive as RDP in environments where performance is critical. It may be a good choice for simple, text-based tasks but not ideal for graphics-heavy applications.

    3. PCoIP

      PCoIP (PC over IP) is a high-performance protocol designed for graphic-intensive use cases, like media editing or 3D applications. However, it can sometimes introduce higher latency compared to RDP. It’s more suited to environments where visual fidelity is more important than low-latency responsiveness.

    Scenario Recommended Setting/Protocol Why
    Remote admin or light tasks Standard RDP with low resolution Minimizes data transferred for low latency.
    Graphic-intensive tasks (e.g., media) RDP with GPU encoding or PCoIP Better visual fidelity, even with slightly higher latency.

    For more insights into improving RDP performance, visit How to speed up slow remote desktop connections (RDP) by NetTech Consultants.

    Choosing the right protocol based on your task requirements can significantly improve your remote desktop performance, ensuring a low latency remote desktop setup tailored to your needs.

    Optimizing Your Remote Desktop for Seamless Connectivity Across Devices

    To fully benefit from a remote desktop connection, it’s crucial to optimize your setup for various devices and platforms. This ensures seamless connectivity and enhances both performance and accessibility. Whether you’re accessing your desktop from a mobile device, ensuring compatibility across different operating systems, or leveraging global infrastructure for reduced latency, there are practical steps you can take to ensure a smooth experience.

    Configuring Remote Desktop for Mobile and Tablet Devices

    When configuring a remote desktop connection on mobile and tablet devices, it’s important to adjust settings for screen sizes and touch controls. Many remote desktop software solutions have mobile apps that simplify this process.

    • For Android: Download a remote desktop app such as Microsoft Remote Desktop or Chrome Remote Desktop. After installation, configure the app by entering your remote desktop credentials and ensure the screen resolution is set for mobile devices for better clarity.
    • For iOS: The steps are similar. Install the Microsoft Remote Desktop app, add your server, and adjust the settings to accommodate smaller screen sizes.
    • For Windows Tablets: Ensure that touch gestures are enabled in the settings for a smoother navigation experience.

    These settings improve usability and ensure that your remote desktop connection is optimized for touch navigation and smaller screen real estate. Remember, always test your connection for responsiveness and adjust the screen resolution within the app’s settings if needed to avoid any display issues.

    Ensuring Cross-Platform Compatibility for Remote Access

    Cross-platform access is a key aspect of a smooth remote desktop experience. Ensuring that your remote desktop connection works across various operating systems—such as Windows, macOS, and Linux—is vital for flexibility.

    • Windows to macOS: If you’re connecting from a Windows PC to a Mac, Microsoft Remote Desktop is a great solution. Simply install the app on macOS, enter the connection details, and ensure that the firewall settings on both devices allow the connection.
    • Windows to Linux: For Linux users, open-source options like Remmina or VNC Viewer can be configured to connect to a Windows remote desktop. Adjust the settings to ensure compatibility with the Linux operating system.
    • macOS to Windows: The Microsoft Remote Desktop client for macOS makes it easy to connect. Simply install the app, configure it with your Windows machine’s IP address, and ensure the necessary ports are open.

    By ensuring your remote desktop solution is compatible across platforms, you can connect regardless of the device you’re using, ensuring a flexible and seamless experience.

    Leveraging Global Infrastructure for High-Performance Remote Access

    To boost the performance of your remote desktop connection, consider leveraging global infrastructure. This involves using cloud-based services and choosing the right server locations to reduce latency and improve speed.

    • Cloud-based services: Utilizing cloud services like Microsoft Azure or AWS can significantly enhance your remote desktop performance. These platforms have global data centers, so choosing a server location closer to your geographical location can help minimize delays.
    • VPNs for global access: A Virtual Private Network (VPN) can route your traffic through optimized paths, reducing latency. Some VPNs offer dedicated servers specifically designed for remote work tools like remote desktop connections.

    By selecting servers located near your geographic region, you can experience faster speeds and more reliable connections, which are crucial for a productive remote desktop experience.

    For additional help troubleshooting remote desktop issues, check out this remote desktop troubleshooting guide.

    Troubleshooting Common Remote Desktop Issues and How to Resolve Them

    Remote desktop connections are invaluable tools for remote work, but they can sometimes be plagued with errors or performance issues. Whether you’re encountering connection timeouts, slow response times, or general connectivity errors, understanding how to troubleshoot these issues can help you get back to work efficiently. In this section, we’ll walk you through common remote desktop problems and provide actionable steps to resolve them, ensuring a smoother and more reliable experience.

    Fixing Connection Errors and Timeouts

    One of the most frustrating issues with remote desktop connections is experiencing timeouts or connection errors. These issues often occur due to network instability, incorrect configuration settings, or even firewall interference. Here are some troubleshooting steps you can take to resolve these problems:

    1. Check Your Network Connection
      Ensure that your network cables are securely connected and your router is functioning properly. A loose cable or a reset router can often solve connectivity issues.
    2. Adjust Timeout Settings
      Sometimes, remote desktop software might disconnect due to timeout settings that are too strict. To adjust these settings in Windows, you can use the following command in the Command Prompt:
    netsh interface tcp set global autotuninglevel=disabled

    This command disables TCP autotuning, which can help prevent timeout errors by adjusting the connection’s behavior.

    1. Verify Firewall Settings
      Firewalls, whether on your computer or network, can block remote desktop connections. To check if your firewall is blocking the connection, use the telnet command:
    telnet <remote_ip> <port>

    Replace <remote_ip> with the IP address of the remote computer and <port> with the port number (usually 3389 for RDP). If the connection is successful, your firewall isn’t blocking the remote desktop port. If not, adjust your firewall settings to allow the connection.

    1. Check Antivirus or VPN Interference
      Sometimes antivirus software or VPNs can disrupt remote desktop connections. Try disabling them temporarily to see if it resolves the issue.

    By following these steps, you can troubleshoot and resolve most connection errors and timeouts associated with remote desktop connections.

    Addressing Performance Issues and Latency

    Performance issues and high latency can significantly impact your remote desktop experience. If you’re facing sluggish performance or delays when interacting with a remote desktop, it’s often due to network issues or insufficient server resources. Here’s how you can address these problems:

    1. Test Network Latency
      High network latency can cause delays. You can use the ping command to test latency between your computer and the remote server:
    ping <remote_ip>

    A high response time (over 100ms) can indicate latency issues. If the latency is high, you may want to troubleshoot your network connection or contact your internet service provider.

    1. Adjust Remote Desktop Resolution
      Lowering the resolution of your remote desktop session can improve performance, especially if you’re on a low-bandwidth connection. You can adjust the resolution settings by running:
    mstsc /v:<remote_ip> /f /w:1024 /h:768

    This command opens a remote desktop session with a screen resolution of 1024×768. Reducing the resolution helps to optimize bandwidth usage and improve responsiveness.

    1. Check Internet Bandwidth
      Insufficient bandwidth can cause lag. Perform a bandwidth test using an online tool like Speedtest to ensure your internet connection is fast enough for remote desktop use.
    2. Optimize Remote Desktop Settings
      Some remote desktop software allows you to adjust settings that impact performance, such as disabling desktop wallpaper or reducing color depth. These adjustments can reduce the amount of data transferred, improving performance.

    By following these steps, you can reduce latency and improve the performance of your remote desktop connection, ensuring a smoother and more efficient remote work experience.

    For additional details, you can consult Microsoft’s official guides on troubleshooting remote desktop issues here and here.