Category: Uncategorized

  • Server Definition: The Essential Guide to Types and Setup

    Server Definition: The Essential Guide to Types and Setup

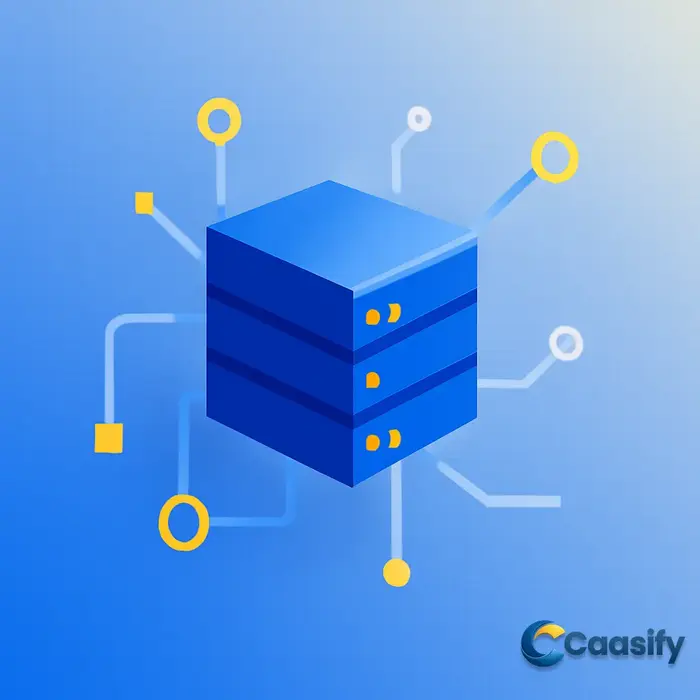
    What is a Server? A Clear Definition and Core Functions

    A server definition refers to a type of computer or software system designed to provide specific services to other devices or programs, often referred to as clients. Servers play a critical role in modern technology, supporting a wide range of functions such as hosting websites, storing data, and enabling network communications.

    At its core, a server is responsible for responding to requests from other devices over a network. These requests can include serving files, running applications, or even facilitating communication between different devices or systems. Servers are essential to ensuring smooth operations for various services, from accessing a website to sending an email.

    Core Functions of Servers

    Servers have several key functions that make them indispensable to modern digital infrastructure:

    • Hosting Websites: Servers are responsible for storing website files and making them accessible to users on the internet. When you type a web address into your browser, your request is sent to a server, which then retrieves and sends back the requested website’s data. This is a simple yet crucial function that allows people around the world to access the content they need.
    • Data Storage: Servers also store and manage large amounts of data. Cloud servers, for example, allow businesses and individuals to store data remotely, making it accessible from anywhere with an internet connection. This function is particularly important for backing up data and ensuring that it remains secure and available.
    • Network Communication: Servers facilitate communication between different devices on a network. For example, email servers handle the sending and receiving of emails, while file servers allow multiple users to access and share documents in a centralized location. These functions ensure that data can flow smoothly across devices and platforms.

    Types of Servers

    There are several types of servers, each suited to different tasks:

    • Dedicated Servers: These servers are dedicated to a single client, offering high performance and control. They are ideal for businesses or websites that need a powerful server without sharing resources with others.
    • Cloud Servers: Cloud servers are hosted on the internet and can be accessed from anywhere. They offer flexibility, scalability, and cost-efficiency, making them a popular choice for businesses that need to store large amounts of data or scale their operations quickly.
    • Virtual Servers: Virtual servers are created by partitioning a physical server into multiple virtual machines, allowing for better resource utilization. Each virtual server operates independently, but they all share the resources of the physical server.

    Understanding the server definition and the roles of different server types is crucial for selecting the right infrastructure for your needs. Servers are foundational to everything from hosting websites to ensuring smooth communication on networks, and their importance in today’s technology cannot be overstated.

    For more detailed insights on servers, their types, and functions, you can check out the resources on What is a server? Definition and function explained and What is a Server? – GeeksforGeeks.

    Understanding Different Types of Servers: Dedicated, Cloud, and Virtual

    When considering how to host your website or application, understanding the server definition is essential. A server acts as a powerful system that stores and serves data to users over the internet. There are different types of servers, each catering to distinct needs and offering unique benefits. In this section, we’ll explore the three most common types of servers: dedicated, cloud, and virtual. By the end, you’ll have a clearer idea of which server best suits your requirements, whether you’re running a large enterprise or a small startup.

    Dedicated Servers: Key Benefits and Use Cases

    A dedicated server is a physical server that is exclusively used by one client. This means you have complete control over the hardware, software, and configurations, providing unmatched performance, security, and flexibility.

    Benefits of Dedicated Servers:

    • Performance: With no other users sharing resources, you can expect optimal performance, especially for high-traffic websites.
    • Security: Dedicated servers are more secure because you have complete control over the security settings and can isolate your data.
    • Customization: You can configure the server to meet your specific needs, from the software to the operating system.
    • Reliability: As you’re the only user, you don’t have to worry about other customers affecting your server’s performance.

    Use Cases:

    • High-Traffic Websites: Large websites with high traffic, such as news outlets or e-commerce platforms, benefit from the dedicated resources of a dedicated server.
    • Enterprises: Businesses that need heavy computing power and advanced security features often choose dedicated servers.
    • Gaming Servers: For online gaming, where performance and low latency are critical, dedicated servers are ideal.

    Example: A popular e-commerce store uses a dedicated server to manage thousands of transactions per minute, ensuring fast load times and high uptime during peak shopping seasons.

    Cloud Servers: Flexibility and Scalability Explained

    A cloud server is a virtual server hosted in a cloud environment, meaning it runs on virtualized hardware provided by a cloud hosting provider like AWS or Google Cloud. Unlike dedicated servers, cloud servers offer flexibility and scalability.

    Benefits of Cloud Servers:

    • Scalability: Cloud servers allow you to scale your resources up or down depending on demand. This flexibility makes them ideal for businesses with fluctuating traffic.
    • Pay-As-You-Go Pricing: Instead of paying for unused capacity, cloud hosting charges based on usage, making it cost-effective for growing businesses.
    • Redundancy: Cloud servers are hosted across multiple physical locations, ensuring higher uptime and disaster recovery.

    Use Cases:

    • Dynamic Websites: Websites with fluctuating traffic, such as online stores or news sites, benefit from the scalability of cloud hosting.
    • Startups and Growing Businesses: Cloud servers are perfect for startups or small businesses that need flexibility without the upfront costs of dedicated hosting.
    • Businesses Needing High Availability: Cloud hosting ensures your website or app remains online even if one server fails, as your data is replicated across multiple locations.

    Example: An e-commerce company uses cloud servers to handle seasonal traffic spikes during holidays, ensuring that their website remains fast and accessible even during high-volume shopping periods.

    Virtual Servers: Cost-effective Solutions for Small to Medium-Sized Businesses

    A virtual server (often referred to as a Virtual Private Server or VPS) is a partitioned portion of a physical server that acts like a dedicated server but is more affordable. VPS hosting allows businesses to run their own server environments while sharing physical hardware with others.

    Benefits of Virtual Servers:

    • Affordability: VPS hosting is significantly more affordable than dedicated servers while still offering a high degree of control.
    • Resource Sharing: While you’re sharing the server with others, you still have dedicated resources allocated to your virtual server.
    • Flexibility: Virtual servers can be customized with the software and configurations you need.

    Use Cases:

    • Small to Medium-Sized Businesses: Ideal for businesses that need a balance between performance and cost-effectiveness.
    • Developers and Entrepreneurs: VPS is perfect for developers who need control over the server environment without the cost of a dedicated server.
    • Web Hosting: Small to medium websites and blogs can run smoothly on a VPS without the need for a dedicated server.

    Example: A small business uses a VPS to host their website and internal tools, allowing them to manage their operations effectively without the high costs associated with dedicated hosting.

    How to Choose the Right Server Based on Your Needs

    Choosing the right server depends on your specific needs. Here’s a simple guide to help you make the decision:

    1. Consider Your Traffic:
      • High Traffic: If your website has high traffic, a dedicated server offers the best performance and reliability.
      • Fluctuating Traffic: For websites with seasonal or fluctuating traffic, cloud hosting provides scalability and flexibility.
      • Moderate Traffic: If you’re running a smaller website or business, a virtual server can offer a good balance of performance and cost.
    2. Evaluate Your Budget:
      • Tight Budget: If cost is a concern, virtual servers are the most cost-effective option.
      • Flexible Budget: If you need more control and better performance, but at a higher cost, dedicated servers are a good option.
      • Growth Potential: If you’re planning to scale quickly, cloud servers are ideal due to their flexibility.
    3. Assess Your Technical Requirements:
      • Custom Configurations: If you need specific configurations or performance capabilities, dedicated servers offer the most customization.
      • Shared Resources: For businesses that don’t require full server control, virtual servers can be a cost-effective choice.
      • Scalability: If you need a server that can grow with your business, cloud hosting offers the best scalability.

    Cloud Hosting Providers: Comparing Flexibility and Pricing

    When considering cloud hosting, there are several top providers that offer competitive features and pricing. Here’s a comparison of three major players:

    Provider Flexibility Pricing Structure Ideal Use Case
    AWS Highly flexible, supports global infrastructure Pay-as-you-go, usage-based pricing Large businesses with high scalability needs
    Google Cloud Flexible, with advanced machine learning options Pay-as-you-go, volume discounts Startups and businesses focusing on data analytics and AI
    Microsoft Azure Highly integrated with Microsoft services Subscription-based, pay-as-you-go Enterprises using Microsoft products and services

    Each of these providers offers excellent cloud hosting solutions with unique strengths. For businesses looking for scalability and flexibility, AWS, Google Cloud, and Microsoft Azure are excellent options, depending on your specific requirements and existing tech stack.


    By now, you should have a clear understanding of dedicated servers, cloud servers, and virtual servers, as well as how to choose the right one based on your business needs. Whether you’re looking for high performance, scalability, or affordability, there’s a server type that fits your requirements perfectly.

    How to Choose the Right Server for Your Performance Needs

    When selecting a server for your business or personal use, understanding the server definition is essential. A server is a system that provides resources, data, services, or programs to other systems, often over a network. Choosing the right server is crucial for ensuring optimal performance and cost efficiency. Depending on your needs, this might involve selecting between different server types like dedicated, virtual, or cloud servers, and optimizing resources such as CPU, RAM, storage, and bandwidth. This section will guide you through the steps to assess, evaluate, and optimize your server based on performance needs.

    Assessing Your Resource Requirements: CPU, RAM, Storage, and Bandwidth

    When selecting a server, understanding how CPU, RAM, storage, and bandwidth affect performance is fundamental. These resources play a crucial role in handling the load of the tasks your server will perform.

    • CPU: The central processing unit dictates the speed at which your server can process requests. If you’re hosting a website with complex functionalities or running multiple applications, a higher-performance CPU will be necessary. For a basic website, however, a standard CPU should suffice.
    • RAM: Random Access Memory is essential for handling multiple tasks at once. If you’re hosting resource-heavy applications or websites with large databases, more RAM is required to prevent slowdowns.
    • Storage: Servers need storage to hold data. Traditional Hard Disk Drives (HDDs) are more affordable but slower, while Solid-State Drives (SSDs) are faster but more expensive. Choose SSDs for better performance, especially if speed is critical for your applications.
    • Bandwidth: This refers to the amount of data your server can transfer over the internet. For high-traffic websites or applications, sufficient bandwidth ensures smooth access and minimal downtime.

    For example, if you’re hosting a medium-sized blog, you may need 4-8 GB of RAM, a mid-range CPU, and SSD storage. For an e-commerce website, you may need more—perhaps 16 GB of RAM and a higher-performing CPU.

    Evaluating Server Performance Benchmarks for Different Workloads

    Understanding server performance benchmarks is key to evaluating whether a server can handle your specific workload. Benchmarks typically measure:

    • CPU speed: How quickly the CPU can process instructions.
    • Memory usage: How efficiently the server uses RAM.
    • Disk I/O: The speed at which data is read from and written to the server’s storage.

    For example, using a benchmarking tool like sysbench, you can test the CPU, memory, and disk performance to understand how well your server will perform for specific tasks. A simple command to test CPU performance might look like this:

    sysbench cpu --cpu-max-prime=20000 run

    This command runs a CPU-intensive test, and the output will show the number of operations per second the server can handle. Such benchmarks can help you understand the server’s capability for your workload, whether it’s web hosting, application processing, or database handling.

    How to Estimate the Right Server Size for Your Website Traffic

    Choosing the correct server size for your website traffic is essential for maintaining smooth performance. Server requirements increase with traffic, so it’s important to have an estimate of the traffic your website will handle. Start by using traffic calculators available on hosting platforms or estimate based on your website’s size and expected visitors.

    For example, a basic blog may need a server with 2 GB of RAM and a CPU with moderate speed, while an e-commerce site could need 8-16 GB of RAM, faster CPUs, and larger storage to manage customer data, product catalogs, and transactions efficiently.

    A quick method to estimate server size:

    1. Check your expected monthly traffic (e.g., 10,000 visitors/month).
    2. Estimate the resources needed per visitor based on your website type.
    3. Choose a server plan that can comfortably handle these needs without overburdening the server.

    This will ensure that your website remains accessible without excessive lag or downtime.

    Considering Scalability Options: When and How to Upgrade

    As your website or application grows, you may need to scale up your server resources. This is especially important if you experience a spike in traffic or if your server begins to show signs of strain, such as slower load times or unresponsiveness.

    Scalability options include:

    • Upgrading server resources: If you’re on a shared server, you may need to move to a dedicated or cloud server for more control and flexibility.
    • Cloud elasticity: Cloud servers like AWS or Google Cloud offer elasticity, meaning you can adjust resources as your traffic grows.

    For example, if you’re running a small website and later experience an increase in traffic, you might upgrade from shared hosting to a cloud server like AWS. Cloud providers offer resources like CPU, RAM, and storage that can be adjusted based on demand.

    Customizable Cloud Virtual Machines: Optimizing Performance with Flexible Resources

    Cloud virtual machines (VMs) are highly customizable and allow you to allocate resources based on your specific needs. Unlike traditional dedicated servers, VMs offer flexibility in configuring CPU, RAM, and storage. This makes them an ideal choice for businesses or projects with changing performance demands.

    For example, an e-commerce website might require significant CPU and storage during peak seasons (e.g., holiday sales), but it can scale down during off-peak times. Using cloud services like AWS or Google Cloud, you can adjust these resources dynamically without manual intervention.

    Here’s an example of selecting a cloud VM for a blog:

    1. Start with a small VM with 2 GB RAM, 1 CPU core, and 20 GB storage.
    2. If traffic increases, you can scale to a 4 GB RAM, 2 CPU core, and 50 GB storage configuration, ensuring optimal performance at all times.

    By using cloud VMs, you can ensure that your server’s resources are always in line with your current needs, avoiding overprovisioning or underperformance.


    In conclusion, choosing the right server requires understanding your server definition, evaluating resource requirements, and considering factors like server performance, traffic, and scalability. Start by assessing your specific needs based on your website or application, and make informed choices about the server type, resources, and scalability options. For more information on cloud servers and how they can benefit your performance needs, check out our guide on What Is Cloud Computing: The Ultimate Guide to Benefits & Types.

    Key Factors to Consider When Configuring Your Server

    When configuring your server, it’s essential to understand the server definition and the various factors that can impact its performance. A server is essentially a computer system that provides services, resources, or data to other computers, called clients, over a network. The way you set up and configure your server determines how effectively it handles requests, processes data, and ensures security. In this section, we’ll explore key factors to consider when configuring a server, focusing on optimizing speed and security, selecting the best server configurations for running databases, and choosing the right server location to minimize latency.

    Configuring for Optimal Speed and Security

    When setting up your server, two key considerations are speed and security. A well-configured server can ensure fast performance while also safeguarding against potential security threats.

    • Speed Configuration: One way to enhance your server’s speed is by adjusting its settings for optimal performance. For example, setting server timeouts can help prevent unnecessary delays by limiting how long the server waits for a response from other systems. Additionally, make sure your server’s hardware is appropriate for the workload it’s handling—faster hard drives (SSD vs. HDD) and more RAM can significantly boost server speed.
    • Security Configuration: To protect your server, start by setting up a firewall to block unauthorized access. You can use ufw (Uncomplicated Firewall) on Linux to manage firewall rules. For example, to allow HTTP traffic, you can run:
      sudo ufw allow 80

      This command enables HTTP traffic on port 80. To activate the firewall, use:

      sudo ufw enable

      This secures your server by only allowing specific traffic to reach it. Additionally, ensure your SSH access is secure by disabling root login and using SSH keys instead of passwords for authentication. These steps will help ensure both speed and security while managing your server configuration.

    Best Server Configurations for Running Databases

    When configuring a server to run databases like MySQL or PostgreSQL, certain settings will help you manage data effectively. A server setup for a database needs to prioritize data storage, processing capacity, and secure access.

    For a MySQL database, the basic setup involves installing the MySQL server package with the following command:

    sudo apt install mysql-server

    This command installs the MySQL server, allowing you to start managing databases. After installation, securing the server with mysql_secure_installation ensures that your database has strong user authentication and is ready for production use.

    While configuring the server for databases, consider these factors:

    • Storage: Use fast SSDs for quick read/write access to your data.
    • Memory: Ensure enough RAM is available to prevent frequent paging to disk, which can degrade performance.
    • Backup and Recovery: Set up automated backups for data protection. Using tools like mysqldump can help in backing up MySQL databases regularly.

    By focusing on these server configuration elements, you can create a solid environment for running and managing databases without delving into complex database optimization techniques.

    Choosing the Right Server Location to Minimize Latency

    The location of your server plays a crucial role in performance, particularly when it comes to latency. Latency refers to the delay before a transfer of data begins following an instruction for its transfer. If you’re hosting a website or an application, selecting a server location close to your end users will help minimize latency and improve loading times.

    For example, if your primary user base is located in Europe, hosting your server in a European data center will result in faster access times than if the server were located in Asia or North America. When configuring your server, always consider the geographic proximity to your user base.

    Using a cloud server can provide flexibility in choosing the ideal location. Cloud providers like AWS and DigitalOcean allow you to pick from various server locations globally. Hosting providers often offer data centers strategically placed in multiple regions to help improve latency and speed. For example, if your users are in the U.S., hosting your server in a U.S. East region will reduce latency significantly compared to a European server location.

    In summary, choosing the right server location is an essential step in server configuration to ensure a smooth and fast experience for users, reducing lag and enhancing performance.

    By considering these factors—speed and security, database management, and server location—you can optimize your server configuration to meet both performance and security needs.

    Optimizing Server Performance After Setup

    Once your server is set up, the real work begins: ensuring it runs efficiently and reliably over time. Optimizing server performance is crucial to maintaining a fast, stable, and responsive environment. This process involves monitoring resources, configuring load balancing, troubleshooting issues, and leveraging cloud infrastructure for global reach and reliability. By focusing on these key areas, you can ensure that your server performs at its best long after the initial setup, providing a smoother experience for users and better uptime.

    Monitoring Server Performance and Resource Utilization

    Effective monitoring is the first step in optimizing server performance. By keeping an eye on key resources like CPU usage, memory, disk I/O, and network throughput, you can identify potential bottlenecks before they impact performance.

    Use tools like top or htop on Linux to check real-time CPU and memory usage. These commands give you a live view of resource consumption and highlight processes that might be consuming excessive resources. For example, to monitor CPU usage, you can run:

    top

    This command will display a list of processes and their respective CPU usage. If a particular process is consuming too much CPU, it could be a sign that you need to optimize or troubleshoot that application.

    Additionally, monitoring disk I/O is important for understanding how quickly data is being read or written to disk. You can use the iostat command to check disk usage:

    iostat -x 1

    This will provide detailed statistics about disk I/O, helping you identify whether a slow disk is affecting your server’s overall performance.

    Incorporating monitoring tools like Prometheus or New Relic can also offer in-depth analytics and long-term trend tracking, which is essential for anticipating performance issues before they escalate.

    Configuring Server Load Balancing for Better Uptime and Reliability

    Server load balancing is a critical technique for ensuring your server can handle traffic efficiently, especially when demand spikes. By distributing requests across multiple servers, load balancing improves uptime and prevents any single server from becoming overwhelmed.

    To set up load balancing, you can use software like HAProxy, which is a popular and reliable tool for managing server traffic. Here’s a basic HAProxy configuration for load balancing:

    frontend http-in
        bind *:80
        default_backend servers
    
    backend servers
        server server1 192.168.1.1:80 check
        server server2 192.168.1.2:80 check

    This configuration tells HAProxy to distribute incoming traffic on port 80 between two backend servers (with IP addresses 192.168.1.1 and 192.168.1.2). By adding more servers as traffic increases, you can scale your system and ensure continuous availability.

    Load balancing also helps with maintenance—if one server goes down or needs updates, traffic can be rerouted to other servers, minimizing downtime. To learn more about cloud-based load balancing solutions, check out What Is Cloud Computing: The Ultimate Guide to Benefits & Types.

    Troubleshooting Common Server Performance Issues

    Even after setup and optimization, issues can still arise that affect server performance. Common problems include high CPU usage, network latency, or slow disk speeds. Here’s how to troubleshoot some of these issues:

    1. High CPU Usage: If your server’s CPU is consistently at 100%, it might be due to a resource-hungry process. Use the top command to identify the culprit, and then investigate further. It might be an application that needs optimization or a misbehaving script.
    2. Network Latency: Slow network performance can be caused by misconfigured network settings or hardware issues. Check your server’s network throughput with netstat or iftop to see if there’s excessive traffic or packet loss. Running ping tests to the server’s IP or DNS can also help identify issues like high latency or connectivity problems.
    3. Slow Disk I/O: As mentioned earlier, iostat can provide insights into disk performance. If your server’s disk is slow, it could be an issue with hardware, or it might be overloaded with read/write operations. In some cases, upgrading your storage solution (e.g., switching from HDD to SSD) can make a significant difference.

    By monitoring logs, using troubleshooting tools, and addressing resource hogs, you can resolve many common server performance issues quickly.

    Maximizing Server Performance with a Global Cloud Infrastructure

    Using a global cloud infrastructure can significantly enhance server performance, especially if you have users across various regions. Cloud providers like AWS, Google Cloud, and Microsoft Azure offer services that can scale to meet growing demand, with multiple data centers across the world.

    Leveraging a global infrastructure allows you to distribute your server load and ensure that users experience fast, reliable performance regardless of their location. For example, by using a Content Delivery Network (CDN), you can cache static content on servers located closer to your users, reducing latency and improving load times.

    Cloud-based tools also provide the flexibility to automatically scale resources based on traffic, meaning you don’t have to manually adjust your server’s capacity. Services like auto-scaling in AWS automatically add resources (e.g., additional instances) when traffic increases, ensuring that your server can handle spikes in demand without downtime.

    Utilizing cloud services not only improves performance but also enhances reliability by offering redundancy and failover capabilities. This setup ensures that if one server or data center experiences issues, another one can take over, preventing service interruptions.

    Incorporating a global cloud infrastructure as part of your server optimization strategy ensures you’re well-equipped to handle traffic surges, keep your server running smoothly, and provide an excellent user experience worldwide.

    Security Features to Look for Before Buying a Server

    When selecting a server, understanding the key security features is crucial for protecting your data and ensuring compliance with industry standards. A server definition refers to the physical or virtual machine that hosts and serves data or applications over a network. Whether you’re considering a cloud server or a dedicated one, there are specific security features that should be non-negotiable in your decision-making process. In this guide, we’ll explore the essential security features, such as compliance standards, firewalls, encryption, and DDoS protection, to help you make an informed choice.

    Understanding Server Security Compliance for Different Industries

    Server security compliance is the process of ensuring that the server meets industry-specific standards and regulations designed to protect sensitive data. For businesses in industries like healthcare, finance, and e-commerce, compliance with regulations like HIPAA, PCI DSS, and GDPR is crucial for maintaining trust and avoiding penalties.

    • HIPAA (Health Insurance Portability and Accountability Act): For healthcare providers, servers must meet strict requirements to protect patient data, such as encryption of stored data and secure data transmission. Servers that comply with HIPAA standards are required to have stringent access controls and logging mechanisms.
    • PCI DSS (Payment Card Industry Data Security Standard): Businesses handling payment card information must ensure their servers meet PCI DSS standards. This includes protecting cardholder data with encryption, implementing firewalls, and conducting regular security testing.
    • GDPR (General Data Protection Regulation): Servers handling personal data of EU citizens need to comply with GDPR, ensuring that data is stored securely and only accessible to authorized personnel. Encryption and access control are key elements in GDPR compliance.

    When evaluating servers, ensure that the provider clearly states their compliance with these regulations. Many cloud and dedicated server providers offer compliance certifications that demonstrate their commitment to security and regulatory standards.

    Important Security Features: Firewalls, Encryption, and DDoS Protection

    When it comes to server security, three fundamental features that protect against common cyber threats are firewalls, encryption, and DDoS protection.

    • Firewalls: Firewalls act as barriers between your server and the internet, filtering incoming and outgoing traffic to block unauthorized access. Most servers come with built-in firewall protection, but you should verify the type (e.g., software vs. hardware firewalls) and whether it offers customizable rules. For example, a dedicated server might offer advanced firewall options to fine-tune security settings based on your needs.
    • Encryption: Encryption ensures that data is unreadable to anyone without the decryption key. This is especially important for protecting sensitive information like login credentials and financial data. A server should support secure protocols like SSL/TLS to encrypt data both at rest (stored data) and in transit (data being transferred). For example, if you’re handling credit card information, encryption helps prevent data theft during transactions.
    • DDoS Protection: Distributed Denial of Service (DDoS) attacks can overwhelm your server with excessive traffic, causing it to crash. Servers with built-in DDoS protection, such as Cloudflare’s DDoS mitigation services, can help ensure that your server remains operational even during an attack. Cloudflare offers robust protection by filtering malicious traffic before it reaches your server. To learn more about how DDoS protection works, you can visit Cloudflare’s DDoS protection FAQ.

    These security features are essential for protecting your server from external threats. Firewalls prevent unauthorized access, encryption keeps your data safe, and DDoS protection ensures uptime even during malicious attacks. When evaluating a server, ensure that these features are part of the package to guarantee a secure environment for your data.

    Cost Considerations: Cloud vs Dedicated Servers

    When deciding between cloud and dedicated servers, it’s essential to first understand what each option entails. The server definition refers to a physical or virtual machine that hosts services or data for users, and both cloud and dedicated servers serve this purpose. Cloud servers are hosted in a shared environment, offering flexibility and scalability, while dedicated servers are physical machines reserved for a single client. In this section, we’ll explore the cost differences between cloud and dedicated hosting, focusing on factors such as scalability, long-term pricing, and resource allocation to help you make an informed decision.

    Cost Comparison: Cloud Servers vs Dedicated Hosting

    Cloud servers and dedicated hosting are priced differently based on their structure and resource allocation.

    • Cloud servers operate on a pay-as-you-go model, meaning you pay for the resources you use, such as storage, bandwidth, and computing power. This flexibility allows businesses to scale their resources up or down as needed, making it ideal for those with fluctuating demands. For example, a basic cloud server plan might cost $10 per month for 1GB of RAM and 20GB of storage, but these costs can increase significantly with higher storage or CPU usage.
    • Dedicated servers, on the other hand, come with a fixed cost, typically billed monthly or annually. These servers are exclusively assigned to one user, providing more control over resources but less flexibility compared to cloud servers. A typical dedicated server might cost $100 to $200 per month, depending on the hardware specifications. Dedicated hosting is often preferred for businesses with steady, predictable needs that require significant resources, such as large databases or high-traffic websites.

    When comparing costs, it’s important to consider not only the upfront pricing but also the long-term pricing predictability. While cloud hosting may seem cheaper initially, it can become more expensive over time as your resource usage grows. Dedicated hosting provides more predictable pricing, but the upfront costs and lack of scalability can make it a less flexible option in the long run.

    For a more detailed comparison, you can refer to resources like the Cloud Server vs Dedicated Server Comparison by Rackspace.

    How to Choose an Affordable Server Provider with Transparent Pricing

    When choosing a server provider, it’s crucial to prioritize pricing transparency to avoid hidden fees and unexpected costs. Here are a few tips for selecting an affordable provider:

    1. Check for Clear Billing Practices: Look for providers who provide a detailed breakdown of their pricing. This should include not only the cost for basic services but also any additional fees for things like data transfers or extra storage.
    2. Read Reviews: Look for feedback from other users about their experience with the provider’s billing practices. Reviews can often highlight hidden costs or issues with the transparency of pricing.
    3. Look for Scalable Options: Consider providers who offer flexible plans that can grow with your business. This is especially important if you’re choosing between cloud and dedicated hosting. Cloud hosting typically offers scalability, while some dedicated hosting providers offer scalable options as well.
    4. Research Well-Known Providers: Stick to well-established providers like AWS, Bluehost, or Liquid Web, which offer straightforward pricing and have a reputation for transparency. For example, Liquid Web offers insights into long-term optimization and cost predictability in its Cloud vs Dedicated Servers Cost Analysis.

    By focusing on pricing clarity and scalability, you can choose an affordable server provider that meets your needs without hidden costs. Remember, the most expensive option is not always the best choice – carefully assess both the initial costs and long-term affordability.

    Best Practices for Server Configuration and Management

    Effective server configuration and management are essential for maintaining a secure and high-performing server environment. Whether you’re working with a dedicated server, cloud server, or virtual server, having a clear understanding of server definition and applying best practices for maintenance, resource management, and security are key to ensuring optimal performance after migration. This section covers practical advice for managing and configuring servers post-migration, with a focus on efficiency and security.

    Best Practices for Server Maintenance and Updates

    One of the foundational tasks in server management is regular maintenance and updating. Server maintenance ensures that your system stays secure, bug-free, and up to date. Here’s how you can keep your server running smoothly:

    1. Keep software up to date: Regularly updating your server’s software ensures that any security vulnerabilities are patched, and that your server remains stable. You can do this using simple package management commands like:
      • For Ubuntu or Debian-based systems:
        sudo apt-get update && sudo apt-get upgrade

        This command updates the package list and installs the latest updates available for your system, ensuring you’re running the most recent versions of your software.

      • For CentOS or RHEL-based systems:
        sudo yum update

        This command serves the same purpose, updating your system’s software packages.

    2. Backup regularly: Always back up your data and system configurations before performing updates. This minimizes the risk of data loss in case anything goes wrong during the update process.
    3. Monitor for software and security updates: Set up notifications or use automated tools to monitor when new updates are released. This can be done using tools like unattended-upgrades (on Ubuntu) to automate updates for critical security patches.

    How to Manage and Monitor Server Resources Post-Migration

    Once your server is up and running after migration, managing its resources—such as CPU, memory, and disk space—is crucial to avoid performance bottlenecks. Here’s how you can keep an eye on your server’s resource usage:

    1. Monitor CPU, memory, and disk usage: Tools like top or htop (for real-time monitoring) and df (for disk usage) provide a clear overview of your system’s resource consumption. For example, running the following command:
    2. top

      will display a live overview of processes and their CPU and memory usage, allowing you to identify any resource-hogging processes quickly.

    3. Set up alerts or logs: For resource spikes, it’s a good idea to set up alerts or logs. Using monitoring tools like Nagios or Zabbix can help automate these checks and notify you when a threshold is reached.
    4. Check disk space: Ensure that your server has enough disk space by running:
    5. df -h

      This will show the available disk space on each mounted filesystem in a human-readable format, helping you track when space is getting low.

    By regularly monitoring your server’s resources, you can prevent overloading and ensure consistent performance.

    Balancing Security and Performance in Server Setups

    Security and performance should always be balanced to ensure your server runs efficiently without compromising on safety. Here are some simple ways to strike that balance:

    1. Configure firewalls properly: Open only the necessary ports to keep your server secure while ensuring that required services are accessible. For example, if you want to allow HTTP traffic while keeping other ports closed, you can use:
    2. sudo ufw allow 80/tcp

      This command opens port 80 (HTTP) on your firewall, while blocking all other ports by default, maintaining a secure setup.

    3. Optimize server configurations: Consider performance-boosting configurations like enabling server-side caching for frequently accessed data or using CDNs to offload traffic. These measures can help improve server response times without impacting security.
    4. Regularly audit security settings: Tools like fail2ban can block malicious login attempts, helping you maintain security while keeping the server responsive. It’s essential to review and adjust security settings periodically to ensure they’re not too restrictive or too lenient.

    By balancing security and performance, you can ensure that your server remains both protected and efficient in its operations.

    For further reading on cloud server management practices, Server Maintenance Checklist: 15-Point List Used by IT Pros, and Windows Server Management documentation, refer to these resources for additional insights on optimizing your server setup.

  • How to Check Windows Version: The Ultimate Guide for 2025

    How to Check Windows Version: The Ultimate Guide for 2025

    Why Knowing Your Windows Version is Crucial for Troubleshooting and Compatibility

    Knowing your Windows version is essential for troubleshooting and ensuring software compatibility. When you know how to check your Windows version, you can better understand system requirements for software and updates, identify potential issues, and apply the correct solutions. This knowledge also helps when troubleshooting errors, as certain problems may be tied to specific Windows versions or builds. In this guide, we’ll show you how to check your Windows version and explain why it matters.

    Navigating to System Settings

    To check your Windows version, the easiest method is through the System Settings. Follow these simple steps:

    1. Click on the Start Menu (Windows icon) at the bottom left of your screen.
    2. Select Settings (the gear icon).
    3. In the Settings menu, scroll down and click on About under the System section.

    In the About section, you’ll see the details of your system, including the Windows version and build number. This is a straightforward method to access essential information about your operating system.

    Interpreting Your Windows Version Information

    Once you’ve accessed the About section in the Settings, you’ll see your Windows version information. Here’s how to interpret it:

    • Windows Version Number: This is the primary version of your OS (e.g., Windows 10, Windows 11). It tells you which major version of Windows you’re running.
    • Build Number: This number identifies the specific build of Windows. It helps identify updates or specific patches installed on your system (e.g., build 19041 for Windows 10 version 2004).
    • System Architecture: This shows whether you are running a 32-bit or 64-bit version of Windows, which is crucial for software compatibility.

    Understanding these details is key for troubleshooting. For example, certain software may only be compatible with specific versions or builds, and some troubleshooting steps may only apply to certain versions of Windows.

    For more detailed steps on how to check your Windows version, you can refer to this official Microsoft guide.

    By regularly checking your Windows version, you can ensure you’re always working with the right system configuration and avoid compatibility issues. For additional methods and details on how to find your Windows version, check out this PCWorld article and How-To Geek’s guide.

    Step-by-Step Guide: How to Check Your Windows Version Using System Settings

    If you’re wondering how to check your Windows version, you can quickly do so using several methods, including through system settings and Command Prompt. Knowing your Windows version is essential for troubleshooting, software compatibility, and ensuring your system is up-to-date. In this guide, we’ll walk you through the easiest ways to check your version, ensuring you can find the information you need without hassle.

    Opening Command Prompt

    The Command Prompt is a quick and simple way to check your Windows version. It’s especially useful if you’re comfortable with basic commands and want to bypass navigating through menus. Here’s how to open it:

    1. Click on the Start menu (the Windows icon in the bottom-left corner).
    2. Type “cmd” into the search bar.
    3. Select “Command Prompt” from the search results.

    Once Command Prompt is open, checking your Windows version is easy:

    1. In the Command Prompt window, type the following command:
    ver
    1. Press Enter.

    This command will display your Windows version number directly in the Command Prompt window. It’s a simple and fast way to get the information you need. This method works for all modern versions of Windows, including Windows 7, 8, 10, and 11.

    Using Commands to Find Windows Version

    In addition to the ver command, there are other useful ways to check your Windows version. Here’s a second approach using the System Information tool:

    1. Open Command Prompt again if it’s not already open.
    2. Type the following command:
    msinfo32
    1. Press Enter.

    The System Information window will appear, and under “System Summary”, you’ll find detailed information about your system, including your exact Windows version.

    This method offers more detailed system information than the ver command alone and can be helpful if you need to check other system specs, like your processor or RAM. For more details on checking your Windows version, you can explore the official Microsoft documentation.

    For a broader overview of methods to check your version, you can also refer to PCWorld’s guide. If you’re using Windows 11, Pureinfotech offers a quick guide to check your version using several tools, including settings, Command Prompt, and PowerShell.

    These steps should help you easily check your Windows version and ensure your system is up-to-date and compatible with the software you need.

    How to Check Your Windows Version via Command Prompt: A Quick Guide

    If you’re trying to determine your Windows version, Command Prompt offers a quick and easy way to find out. Whether you’re troubleshooting, ensuring compatibility with specific software, or just curious about your system, following these steps will guide you through checking your Windows version without much hassle. Let’s dive into how to check your Windows version via Command Prompt.

    Opening Command Prompt

    To begin, you’ll need to open Command Prompt, which is a built-in tool in Windows. Here’s how to do it:

    1. Search for Command Prompt:
      • Click on the Start menu (the Windows icon) or press the Windows key on your keyboard.
      • In the search bar, type “Command Prompt”.
      • From the search results, click on the Command Prompt app.
    2. Run as Administrator (Optional):
      • If you need administrative privileges (for certain commands), right-click the Command Prompt icon in the search results and select Run as administrator. This gives you elevated permissions to execute more complex tasks.

    By following these simple steps, you’ll have Command Prompt ready to go, and you can proceed with checking your Windows version.

    Using Commands to Find Windows Version

    Once you have Command Prompt open, you can use a couple of simple commands to find your Windows version.

    Using the ver Command

    1. Enter the ver Command:
      • In Command Prompt, type the following command and press Enter:
      • ver
      • This command will display the basic version of your Windows operating system.
    2. What You’ll See: The output will look something like this:
      Microsoft Windows [Version 10.0.19042.1165]
      • This tells you that you’re running Windows 10, version 19042.

    Using the systeminfo Command

    For more detailed system information, including your Windows version, the systeminfo command is useful.

    1. Enter the systeminfo Command:
      • In Command Prompt, type:
      • systeminfo
      • Press Enter to execute the command.
    2. What You’ll See: This will provide a detailed summary of your system, including the OS version. Look for the line that reads:
      OS Version:                10.0.19042 N/A Build 19042
      • This provides additional details, like the build number and whether it’s part of a larger release.

    Both commands are useful depending on how much detail you need. For basic version info, ver is quick and easy, while systeminfo provides more detailed insights.

    For more information on the ver command, you can refer to the Microsoft Learn documentation.

    Now you know exactly how to check your Windows version using Command Prompt!

    Comparing Methods: System Settings vs. Command Prompt for Checking Windows Version

    When you need to know which version of Windows you are using, there are two common methods: the System Settings and the Command Prompt. Each method has its strengths and weaknesses, depending on what you’re looking for and your level of comfort with Windows tools. In this section, we will compare these two methods and help you determine which one is best for your needs, with practical tips on using each effectively.

    Pros and Cons of Using System Settings

    The System Settings method for checking your Windows version is one of the easiest ways to find out. You can access it by going to Settings > System > About. This method is ideal for beginners because it offers a user-friendly graphical interface that doesn’t require any technical knowledge.

    Pros:

    • User-friendly: You don’t need to know any commands, making it great for beginners.
    • Quick access: It’s just a few clicks away, so it’s fast and convenient.
    • Visually clear: It shows your Windows version along with other useful details like the system type and build.

    Cons:

    • Limited detail: While it provides basic version information, it doesn’t give the same level of detail as the Command Prompt.
    • Less control: You can’t perform advanced troubleshooting or retrieve other system info directly from this interface.

    Advantages and Disadvantages of Command Prompt

    Using the Command Prompt to check your Windows version involves running specific commands like systeminfo or ver. These commands provide more detailed information, which can be useful for troubleshooting or gathering system-specific data.

    To check your Windows version via Command Prompt:

    1. Press Win + R to open the Run dialog.
    2. Type cmd and press Enter to open the Command Prompt.
    3. Type systeminfo and press Enter (or ver for a simpler version check).

    Pros:

    • More detailed information: The systeminfo command provides comprehensive details, including the exact build number and other system configurations.
    • Faster access for tech-savvy users: For those familiar with commands, it’s a quick way to get all the information in one place.

    Cons:

    • Requires familiarity with commands: If you’re new to the Command Prompt, it might seem intimidating.
    • Not as visually accessible: Unlike System Settings, this method displays information in text form, which might not be as user-friendly for some users.

    When to Choose Each Method

    The choice between using System Settings and Command Prompt depends largely on your needs and technical comfort level. If you’re looking for a quick, simple way to check your Windows version, System Settings is the ideal choice. It’s perfect for most users who just want to confirm their version without needing to dive into the details.

    On the other hand, if you’re troubleshooting or need more detailed system information, Command Prompt is your best bet. It provides more data and can be used to check the version alongside other system specs, which is particularly useful for advanced users.

    Example Scenarios:

    • System Settings: Ideal for casual users or when you just want to confirm your version quickly for things like software compatibility.
    • Command Prompt: Useful when troubleshooting or if you need detailed system info for technical purposes, such as when performing a Windows version check for compatibility with specific software updates.

    Example of Customizable Cloud Infrastructure for Performance Optimization

    Knowing your Windows version is critical when optimizing system performance or ensuring software compatibility. For instance, some performance optimization tools or cloud infrastructure services may require a minimum Windows version for effective operation. By checking your version early, you can avoid compatibility issues and ensure that the infrastructure you’re setting up will work seamlessly with your system.

    As an example, if you are considering a customizable cloud infrastructure that relies on specific Windows features, confirming that your system is running the required version can save you time and effort during setup. This can directly impact your ability to integrate systems and optimize performance for your tasks.

    Tips for Keeping Your Windows System Up-to-Date and Optimized After Version Check

    After you’ve checked your Windows version, the next important step is ensuring your system remains up-to-date and performs at its best. Regular updates and optimization techniques can significantly improve your user experience. In this section, we’ll go over how to keep your Windows system optimized and ready for smooth performance after confirming your version.

    Setting Up Automatic Updates

    Ensuring your system stays up-to-date is essential for security and performance. Here’s how you can enable automatic updates in Windows to ensure you always have the latest patches:

    1. Open Settings: Press Windows + I to open the Settings window.
    2. Navigate to Updates: Click on “Update & Security.”
    3. Enable Automatic Updates: Under the “Windows Update” tab, select “Advanced options.” Make sure the “Automatic (recommended)” option is selected to receive updates as soon as they’re available.

    You can also customize update settings here to choose how updates are delivered, such as deferring certain types of updates or scheduling them for specific times. Keeping automatic updates enabled ensures that you don’t have to manually check and install updates, streamlining your system maintenance.

    Performance Optimization After Checking Your Version

    After confirming your Windows version, it’s time to ensure that your system performs optimally. Follow these simple steps to optimize performance:

    1. Check for Driver Updates: Outdated drivers can affect performance. To update drivers:
      • Right-click the Start button and select “Device Manager.”
      • Expand categories like “Display adapters” or “Network adapters,” right-click on the device, and choose “Update driver.”
    2. Enable System Updates: Make sure Windows Update is running to download the latest system improvements and bug fixes.

    Updating drivers and keeping your system up-to-date can prevent slowdowns and ensure that your hardware is functioning correctly.

    Troubleshooting Common Post-Upgrade Issues

    Sometimes, after an upgrade, you might face some issues that affect system performance. Here are simple troubleshooting steps to resolve them:

    • Windows Update Issues: If updates are stuck or failing, run the Windows Update Troubleshooter:
      1. Open Settings and navigate to “Update & Security.”
      2. Select “Troubleshoot” and then “Windows Update.”
      3. Follow the prompts to resolve any issues.
    • System Corruption: Use the sfc /scannow command to check and fix any system file corruption. Open Command Prompt as Administrator and run:
      sfc /scannow

      This command scans your system files for corruption and attempts to fix any detected issues.

    These simple solutions can quickly resolve common issues after an upgrade and help keep your system running smoothly.

    Optimizing System Performance Post-Upgrade with Scalable Solutions

    After upgrading your Windows system, it’s crucial to take steps that help manage system resources effectively. Here are scalable solutions that can help optimize your performance:

    • Disk Cleanup: Open the Start menu, search for “Disk Cleanup,” and select your system drive to clean up unnecessary files like temporary files, system files, and more.
    • Manage Startup Programs: Open Task Manager (press Ctrl + Shift + Esc), go to the “Startup” tab, and disable programs you don’t need at startup.

    These steps are simple, yet effective in improving your system’s performance without requiring complex configurations. Regularly cleaning up your system and managing background tasks can help maintain optimal performance.

    By following these tips, you can ensure your system remains up-to-date and optimized for everyday use.

    Understanding Different Windows Versions and Their Features

    Knowing your Windows version is crucial for software compatibility, troubleshooting system errors, and ensuring your PC runs smoothly. To check which version of Windows you’re using, simply follow a few straightforward methods, including the Settings app, Command Prompt, or using the “winver” command. Once you know your version, you can resolve issues, enhance performance, and keep your system updated. For more details, refer to the official Microsoft guide.

    Identifying Software Compatibility Issues

    Understanding which version of Windows you are running can help prevent compatibility issues when installing new software. Some programs require specific Windows versions to function properly. For example, certain apps might only work on Windows 10 or newer, while others may need the latest service packs to run smoothly.

    To check your Windows version:

    1. Press Windows + R, type winver, and hit Enter. A small window will appear showing the version and build number.
    2. Alternatively, go to Settings > System > About, where you can see your Windows edition and version.

    For example, if you’re installing a software update for a graphic design program, you might need Windows 10 or later. If your version is Windows 8, you could encounter installation errors or reduced functionality. Knowing this in advance can save you time and frustration.

    Using Version Info to Fix System Errors

    The version information on your system can be a helpful tool in troubleshooting common errors. Many Windows problems, such as failed updates or driver conflicts, are tied to specific versions of the operating system. If you know which version you’re using, you can easily identify known issues or find updates that address those specific problems.

    For instance, if you’re experiencing Windows update failures, knowing your version helps you find the right troubleshooting steps. You might find that the issue is related to a specific update for your version, and you can follow targeted fixes.

    Here’s an example: If your system is running Windows 10 and you’re unable to install a new update, knowing your version can help you identify if the update is incompatible with older builds. You can then update to the latest version by going to Settings > Update & Security > Windows Update and clicking Check for updates.

    By keeping your system’s version information handy, you’ll be able to address errors effectively and ensure smooth system performance. For more tips on troubleshooting Windows errors, check out this helpful PCWorld article.

    Why Knowing Your Windows Version Matters for Software Compatibility

    Knowing your Windows version is crucial for ensuring software compatibility and avoiding system issues. By checking your Windows version, you can determine whether your system meets the requirements for a specific program or software update. This guide will walk you through simple methods to check your Windows version and explain why it’s important for system performance and troubleshooting.

    Identifying Software Compatibility Issues

    One of the primary reasons to check your Windows version is to confirm whether certain software will work properly on your system. Many programs, especially newer ones, are designed for specific Windows versions, such as Windows 10 or Windows 11. For instance, a program that requires Windows 11 might not function correctly on an older Windows 10 system.

    To check your Windows version, you can use the winver command. Simply press Win + R, type winver, and press Enter. A window will pop up displaying your Windows version and build number. This quick check helps you determine if a piece of software you want to install is compatible with your current version.

    Using Version Info to Fix System Errors

    Knowing your Windows version is also essential for troubleshooting system errors or ensuring your system is up to date. Outdated versions of Windows may lead to issues with system performance, security vulnerabilities, or problems running newer software.

    To check your system’s details, including the version and build number, you can use the systeminfo command. Open Command Prompt and type systeminfo, then press Enter. This will provide a detailed list of system information, including your Windows version and last update time. If you find that your version is outdated, it’s a good idea to visit the official Microsoft website to download the latest updates for improved security and performance.

    For more detailed instructions, you can refer to Microsoft’s official What version of Windows am I running? guide.

    How to Use Windows Version Information to Troubleshoot System Issues

    Knowing how to check your Windows version is essential for troubleshooting system issues and optimizing performance. Whether you’re facing compatibility issues with software or dealing with system errors, understanding your operating system version helps you identify potential problems and apply the right fixes. In this guide, we’ll show you simple methods for checking your Windows version and explain how this information can improve your system’s functionality and performance.

    Identifying Software Compatibility Issues

    When you know your Windows version, you can quickly identify whether your system is compatible with certain software or updates. Many programs and apps require specific Windows versions to function properly, and running outdated versions can lead to installation errors or malfunctions.

    For example, if you’re trying to install a program that requires Windows 10 but your system is running Windows 7, the software won’t install or run correctly. Similarly, older versions of Windows may not support newer applications or updates, leading to crashes or slow performance.

    To check your Windows version:

    • Press Windows + R to open the Run dialog box.
    • Type winver and press Enter.
    • A window will appear showing your Windows version and build number.

    Knowing your version will help you make informed decisions about what software is compatible with your system and whether you need to update your operating system to support certain applications.

    Using Version Info to Fix System Errors

    Your Windows version information is also a useful tool for fixing system errors like application crashes or system instability. If your system is outdated, it may not have the latest updates and security patches, which can cause errors or slowdowns. By checking your version, you can determine if your system is up to date and if any critical updates are available.

    To check for system updates:

    • Go to Settings > Update & Security > Windows Update.
    • Click Check for updates.
    • If updates are available, install them to ensure your system is running the latest version.

    Updating your Windows version can often resolve issues like slow performance, missing features, or security vulnerabilities. If you’re experiencing consistent crashes or errors, it’s a good idea to check for updates based on your version. Sometimes, a simple update can fix underlying system problems.

    For more information on viewing your Windows version, you can refer to the Microsoft Learn page. Additionally, if you’re looking for more detailed steps, visit Microsoft Support for guidance on viewing device and OS version details.

    How to Check Windows Version for System Upgrades and Performance

    Knowing your Windows version is essential for making informed decisions about system upgrades and ensuring your computer runs smoothly. If you’re wondering how to check your Windows version, this guide will walk you through the easiest and most reliable methods, helping you assess whether your current version supports the latest updates or upgrades, and offering tips to optimize your system’s performance.

    Evaluating Windows Version for Upgrade Compatibility

    Understanding your Windows version is the first step in ensuring your system is ready for upgrades, like moving from Windows 10 to Windows 11. To check your Windows version, follow these simple steps:

    1. Open Settings: Go to Start > Settings.
    2. Navigate to About: Click System > About.
    3. Find Version Information: Under Windows specifications, you’ll see your version listed, such as Windows 10 Version 20H2 or Windows 11 Version 22H2.

    Alternatively, you can type winver into the Start menu and press Enter. This will quickly display a window with your exact Windows version and build number.

    Why is this important? Different versions of Windows may have varying system requirements for new updates. For instance, Windows 11 requires a compatible processor, TPM 2.0, and specific system configurations. By knowing your current version, you can determine if your system is eligible for the upgrade, or if you need to take further steps to prepare.

    For more detailed methods, check the official Microsoft documentation.

    Impact of Version on System Performance

    Your Windows version can significantly influence your system’s performance. For example, Windows 11 introduces enhanced security features and optimizations that could make your computer feel faster, especially on newer hardware. In contrast, Windows 10 may still provide excellent performance, but without some of the latest improvements, such as optimized multitasking and better support for modern hardware.

    Here’s how upgrading your Windows version might impact system performance:

    • Faster Boot Times: Windows 11 offers faster boot times thanks to improved system optimizations.
    • Enhanced Security: Newer versions, like Windows 11, include more advanced security features that can help prevent malware and improve overall stability.
    • Resource Efficiency: Windows 11 is designed to be more efficient, reducing the strain on system resources when running apps or multitasking.

    Once you know your Windows version, maintaining performance can be as simple as keeping your drivers updated and optimizing startup programs. Regular updates also ensure you’re getting the latest features and bug fixes, which can contribute to smoother operation.

    For tips on maintaining optimal performance, visit PCWorld’s guide.

    The Impact of Your Windows Version on System Security and Performance

    To ensure your system remains secure and runs smoothly, it’s crucial to know how to check your Windows version. Knowing this detail helps you stay updated with the latest security patches and optimize performance based on your specific version. This section will guide you through checking your Windows version and explain why it matters for system security and performance.

    Security Risks of Using Outdated Versions

    Using an outdated Windows version exposes your system to security vulnerabilities that hackers can exploit. Unpatched software creates easy entry points for malware and other malicious attacks. For example, older Windows versions might lack updates that protect against the latest viruses or ransomware, making your data more vulnerable.

    To avoid such risks, regularly updating your Windows version is essential. You can find out if your version is up to date by following the steps outlined in this Microsoft Learn guide. Keeping your system updated ensures that critical security patches are applied, reducing the likelihood of a security breach.

    Optimizing Performance Based on Windows Version

    The version of Windows you are running can significantly impact your computer’s performance. Newer versions typically include performance improvements, bug fixes, and better resource management. If you are using an older version, your system might run slower and have compatibility issues with newer software.

    To optimize your system’s performance based on your Windows version, consider these steps:

    • Update your drivers: Ensure that your drivers are compatible with the latest version of Windows. This can improve overall system stability and speed.
    • Adjust system settings: In some cases, older versions of Windows may require you to adjust settings, like visual effects, to boost performance. This is especially important if you’re using a resource-heavy version like Windows 10 or 11.

    By regularly updating your version or making small optimizations, you can keep your system running efficiently. For more tips, check out this PCWorld guide.

    What to Do After Identifying Your Windows Version: Upgrade or Optimize?

    After checking your Windows version, you’ll need to decide whether upgrading or optimizing your system is the best choice. This depends on factors like your current version, security needs, and overall system performance. Below, we’ll cover both options to help you make an informed decision on how to proceed.

    Choosing to Upgrade Your Windows Version

    If your Windows version is outdated or no longer supported, upgrading to the latest version is crucial for ensuring your system remains secure and performs well. Upgrading can help fix security vulnerabilities, improve overall performance, and give you access to new features.

    To check for an upgrade, follow these steps:

    1. Open Settings and click on Update & Security.
    2. In the Windows Update section, select Check for updates.

    This will prompt Windows to search for any available updates or upgrades. If your system is eligible for an upgrade, follow the on-screen instructions to install it. Regular updates help ensure your system remains protected and efficient.

    Optimizing Your Current Version for Better Performance

    If your version of Windows is up-to-date but you’re experiencing performance issues, optimizing your system can be a great way to enhance its speed and functionality without the need for an upgrade.

    Here are some simple optimization steps to improve your system’s performance:

    • Run Disk Cleanup: Open Disk Cleanup by typing it into the search bar, select the drive you want to clean, and then follow the prompts to remove unnecessary files.
    • Defragment Your Hard Drive: For HDD users, defragmenting can help optimize your system. Type “Defragment and Optimize Drives” in the search bar, select your drive, and click Optimize.

    For additional performance tips, check out the official Microsoft support article on improving PC performance in Windows. These built-in tools can significantly boost your computer’s efficiency.

    Exploring the Benefits of Keeping Your Windows Version Up-to-Date

    Keeping your Windows version up-to-date is essential for ensuring optimal performance, security, and compatibility with new software. If you’re unsure about your current version, it’s easy to check your Windows version by following simple steps. In this section, we’ll guide you through the benefits of checking and updating your system to keep everything running smoothly.

    Choosing to Upgrade Your Windows Version

    Upgrading your Windows version offers several benefits, including the installation of important security patches and access to new features that enhance performance. To determine if an upgrade is necessary, start by checking Windows Update through your system settings. If you see an option to upgrade, it’s likely time to make the switch, especially if your current version is outdated or no longer supported.

    To check for updates, go to Settings > Update & Security > Windows Update, and select Check for updates. If an upgrade is available, follow the prompts to begin the process. This is an easy way to ensure that you’re protected with the latest security fixes and improvements.

    Optimizing Your Current Version for Better Performance

    If you’re not ready to upgrade yet, there are still plenty of ways to keep your current version optimized. Regular updates are key to ensuring system performance and software compatibility. In addition to checking Windows Update, consider removing unnecessary applications and running built-in performance diagnostics to keep your system running smoothly.

    To do this, go to Settings > Apps > Apps & features and uninstall any apps you no longer need. Additionally, use the Windows Security app to perform regular scans and keep your system free from viruses and other potential threats. Regularly checking for updates and performing basic maintenance can go a long way in optimizing your Windows version.

    For more detailed guidance on finding your Windows version, you can refer to What version of Windows am I running? (Microsoft Learn).

    By keeping your system updated and optimized, you’ll enjoy improved software compatibility and better overall performance.

  • How To Fix Your Connection Is Not Private Error Safely

    How To Fix Your Connection Is Not Private Error Safely

    How SSL Certificates Affect Your Connection: Troubleshooting Common Issues

    The “Connection is Not Private” error often appears when SSL certificates are not functioning properly, disrupting your ability to access secure websites. Understanding how SSL certificates work and how to troubleshoot the issue can help you resolve this frustrating error. This guide will show you how to fix your connection is not private error, covering common fixes from clearing browser data to checking SSL certificates, as well as tips for maintaining a secure browsing experience.

    How to Clear Browser Cache and Cookies to Resolve Connection Issues

    One common cause of SSL certificate errors is outdated or corrupted browser cache and cookies. When browsing, your browser saves certain files to speed up the loading of websites, but these files can sometimes cause conflicts with the website’s security certificate. Clearing your cache and cookies can often resolve the “Connection is Not Private” error.

    Here’s how you can clear the cache and cookies in different browsers:

    Google Chrome:

    1. Open Chrome and click on the three dots in the top-right corner.
    2. Select “More tools” and then “Clear browsing data.”
    3. In the popup, choose “All time” for the time range, then check “Cookies and other site data” and “Cached images and files.”
    4. Click “Clear data.”

    Mozilla Firefox:

    1. Open Firefox and click on the three horizontal lines in the top-right corner.
    2. Select “Preferences,” then go to the “Privacy & Security” section.
    3. Under “Cookies and Site Data,” click “Clear Data.”
    4. Check both “Cookies and Site Data” and “Cached Web Content,” then click “Clear.”

    Microsoft Edge:

    1. Open Edge and click on the three dots in the top-right corner.
    2. Select “Settings,” then go to “Privacy, search, and services.”
    3. Under “Clear browsing data,” click “Choose what to clear.”
    4. Check “Cookies and other site data” and “Cached images and files,” then click “Clear now.”

    Clearing these files removes any stored data that may conflict with SSL certificates, often resolving the connection issue.

    Why Switching to a Secure Network Can Resolve the ‘Connection is Not Private’ Error

    Your network connection plays a significant role in the validity of an SSL certificate. If you’re browsing on an insecure or public Wi-Fi network, your connection might be compromised, which can trigger SSL errors like the “Connection is Not Private” message. Public networks, especially those without encryption, can interfere with SSL certificate validation, causing browsers to flag the site as insecure.

    To fix this, try switching to a more secure network:

    • If you’re on public Wi-Fi, disconnect and connect to a private, secured network (such as your home Wi-Fi or a mobile hotspot).
    • If possible, use a VPN (Virtual Private Network) to encrypt your connection, adding an extra layer of security.

    Switching to a secure network ensures that your connection is protected, reducing the chances of SSL certificate errors.

    Steps to Troubleshoot SSL Certificate Issues in Web Browsers

    SSL certificate issues often arise when the certificate has expired or doesn’t match the domain you’re trying to visit. Here’s how you can check for SSL certificate problems:

    1. Check the certificate status:
      • Google Chrome: Click on the padlock icon in the address bar, then click “Certificate” to view details about the certificate.
      • Mozilla Firefox: Click the padlock icon, select “More Information,” and then “View Certificate.”
      • Microsoft Edge: Click the padlock icon and select “Certificate” to view its details.
    2. What to look for:
      • Expiration Date: SSL certificates have expiration dates, and if the certificate is out of date, you’ll need to update it.
      • Certificate Mismatch: If the certificate doesn’t match the website’s domain, the browser will warn you that the connection is insecure.

    If you identify an issue, you may need to contact the website administrator to request a new certificate or fix any domain mismatches. Alternatively, if you’re managing your website’s SSL certificate, you can renew or replace the certificate through your hosting provider or a certificate authority like Let’s Encrypt or DigiCert.

    Using Scalable Cloud Infrastructure for SSL Certificate Management

    Using scalable cloud infrastructure to manage SSL certificates is a highly efficient approach, especially if you are responsible for maintaining multiple websites or web services. Many cloud providers, like AWS and Cloudflare, offer automated SSL certificate management, including automatic renewals and easy integration with your services.

    The benefit of using cloud infrastructure for SSL management is that it takes much of the manual work out of the process. For example:

    • AWS provides AWS Certificate Manager (ACM), which automates SSL certificate renewal and deployment across your infrastructure.
    • Cloudflare offers free SSL certificates that automatically renew, ensuring your site’s connection remains secure without needing manual intervention.

    By leveraging cloud infrastructure, you reduce the risk of SSL certificate errors due to expired or missing certificates, ensuring continuous secure browsing experiences.

    If you’re interested in learning more about SSL certificate issues and fixes, check out our guide on fixing the ERR SSL Protocol Error.

    Choosing the Right SSL Certificate Provider and Security Configuration

    When you encounter the ‘Connection is Not Private’ error, it often points to issues with SSL certificate configuration or its provider. This security feature is essential for encrypting data between your website and visitors, ensuring safe browsing. In this section, we’ll cover how to fix your connection is not private error by helping you select the right SSL certificate provider and configure your security settings properly.

    Comparing SSL Certificate Providers: What to Look for in a Reliable Service

    Choosing the right SSL certificate provider is crucial for securing your website and avoiding connection errors. Here are a few factors to consider:

    • Reliability: Opt for trusted certificate authorities (CAs) like DigiCert, Comodo, or Let’s Encrypt. These CAs offer high levels of security and are recognized by most browsers, ensuring your site is trusted.
    • Support: Good customer support can help resolve any issues quickly. Choose a provider that offers 24/7 assistance, especially if your website handles sensitive transactions.
    • Cost: While paid SSL certificates often come with additional features like higher encryption levels or extended warranties, free options like Let’s Encrypt can also offer strong security for many websites.

    For example, DigiCert offers premium SSL certificates with extensive support, while Let’s Encrypt provides a free option that’s perfect for smaller websites looking to secure their connections. Comodo is another affordable option with reliable support and a variety of certificate types.

    When choosing a provider, ensure their certificates are compatible with your hosting platform and meet your website’s security needs.

    How to Configure Your Website for Scalability While Avoiding Common SSL Pitfalls

    As your website grows, ensuring your SSL configuration can scale is essential to prevent future errors. Here are some steps to avoid common pitfalls:

    • Wildcard Certificates: If you manage multiple subdomains, a wildcard SSL certificate can save you time and effort by securing all subdomains with a single certificate.
    • SAN Certificates: A Subject Alternative Name (SAN) certificate allows you to secure multiple domains with one SSL certificate, perfect for businesses with several websites.

    Common mistakes include mixed content errors, where your website serves both secure (HTTPS) and non-secure (HTTP) content, or certificate mismatches, where the certificate does not match your domain name. To avoid these, ensure all elements on your site are loaded via HTTPS and double-check your SSL installation.

    Leveraging Cloud Infrastructure for Efficient SSL Certificate Management

    Cloud infrastructure can significantly simplify SSL management, especially for websites experiencing rapid growth. Here’s how to leverage it:

    • Automated Renewal: Cloud services like AWS and Cloudflare offer automated SSL certificate renewal, reducing the risk of expired certificates causing errors.
    • Centralized SSL Management: By using cloud-based SSL services, you can manage certificates for multiple websites from a single platform, improving efficiency and reducing administrative overhead.

    For example, Cloudflare provides a simple interface to manage SSL certificates for your website, along with benefits like enhanced performance and DDoS protection. This helps to ensure that your certificates are always up-to-date and your website remains secure without the hassle of manual management.

    By using these services, you can streamline SSL management and avoid the complexities that come with manual configurations.


    By understanding these key aspects—choosing the right SSL provider, configuring your site for scalability, and leveraging cloud infrastructure for certificate management—you can fix your connection is not private error and maintain a secure browsing experience for your visitors.

    How to Ensure Ongoing Security After Fixing the ‘Your Connection is Not Private’ Error

    After resolving the ‘Your Connection is Not Private’ error, it’s crucial to maintain ongoing security for your website to prevent future issues. SSL certificates are vital for protecting your site’s traffic, and ensuring proper management is key to keeping your connection secure. This section will guide you through best practices for monitoring and renewing SSL certificates, securing your website, and implementing enterprise-grade security for long-term protection.

    Best Practices for SSL Certificate Management and Renewal

    SSL certificates need to be renewed periodically to maintain secure communication between browsers and your website. Timely renewal ensures that your site’s encryption remains active and prevents errors like “Your Connection is Not Private.”

    To manage SSL certificates effectively:

    • Use automated tools like Certbot or Cloudflare to renew your certificates automatically. These tools simplify the process, reducing the risk of certificate expiration.
    • Set reminders to manually check and renew certificates if you aren’t using automation.
    • Monitor renewal dates through your certificate provider’s dashboard or using SSL management services.

    For automatic renewal with Certbot, run this command:

    sudo certbot renew

    This command automatically renews your SSL certificate using Certbot. If successful, Certbot will renew the certificate and update it on your server.

    By renewing SSL certificates on time, you can avoid security lapses and keep your website encrypted at all times.

    How to Monitor SSL Certificate Health and Expiry Dates

    Monitoring your SSL certificate’s health and expiry dates is an essential step in ensuring continued security. Regular checks prevent issues where certificates may expire unexpectedly, causing trust errors for your visitors.

    You can monitor SSL certificate health using tools like SSL Labs or through the command line. Here’s how to check your SSL certificate’s expiry date using OpenSSL:

    openssl x509 -enddate -noout -in <cert_file>

    This command checks the expiry date of your certificate by looking at the specified certificate file. It helps you ensure that your SSL certificate is valid and hasn’t expired.

    SSL Labs also provides an online tool where you can test your certificate’s status and security. By regularly using these tools, you can stay informed and take action before any certificate expiration disrupts your site.

    Implementing Effective Web Security Practices After Resolving SSL Issues

    Once you’ve fixed the ‘Your Connection is Not Private’ error, it’s essential to implement additional security measures to protect your website in the long run. These steps ensure that your site remains secure and your visitors are protected.

    One simple but effective way to enhance security is to enforce HTTPS across your site. This can be done by adding the following code to your .htaccess file:

    RewriteEngine On
    RewriteCond %{HTTPS} off
    RewriteRule ^ https://%{HTTP_HOST}%{REQUEST_URI} [L,R=301]

    This code forces all traffic to be redirected to the secure HTTPS version of your site, ensuring encryption for all visitors.

    Additionally, it’s important to:

    • Regularly audit your website for vulnerabilities.
    • Keep your website’s software up to date, including CMS plugins and themes.
    • Enable HTTP Strict Transport Security (HSTS), which tells browsers to only connect via HTTPS.

    These measures, combined with proper SSL certificate management, create a robust security setup for your website.

    Utilizing Enterprise-Grade Security for Ongoing Website Protection

    For larger websites or businesses, enterprise-grade security measures are necessary to ensure the long-term protection of your site. While more advanced techniques may be needed, a few simple steps can help maintain security on a broader scale.

    • Implement Multi-Factor Authentication (MFA) for site administrators and users with access to sensitive data. This adds an extra layer of protection against unauthorized access.
    • Utilize services like Cloudflare for additional security features such as enhanced DDoS protection and SSL management.

    Cloudflare also helps with automatic SSL certificate renewal and ensures your site’s traffic is securely routed through their network, further enhancing security.

    By integrating these advanced yet simple security practices, you can safeguard your website from a range of threats, ensuring continued protection long after the ‘Your Connection is Not Private’ error is resolved.

    What is the ‘Your Connection is Not Private’ Error and Why Does It Happen?

    The “Your Connection is Not Private” error typically appears when there is an issue with a website’s SSL certificate or a problem on your device, such as incorrect system time. Understanding how to fix your connection is not private error starts with recognizing the root causes of this message, which can include SSL certificate errors, system time discrepancies, or third-party software interference. This section explains these causes and offers easy steps to fix the problem, so you can continue browsing securely.

    Why SSL Certificate Validity Matters for Website Trustworthiness

    SSL certificates are critical for securing online communication between your browser and websites. These certificates verify the legitimacy of a website, ensuring that the data exchanged remains private and encrypted. When a website’s SSL certificate is expired, invalid, or misconfigured, your browser may display a “Your Connection is Not Private” warning.

    An example of this might be when a website’s certificate has expired, leading to a “Not Secure” warning in the address bar. This is a sign that the connection may not be safe, and personal information could be at risk if entered on that site.

    Maintaining a valid SSL certificate is essential for building trust and ensuring secure browsing. Without it, both the website and your personal information are vulnerable to cyber threats, such as man-in-the-middle attacks.

    How System Time Discrepancies Can Affect SSL Certificate Validation

    A mismatch between your system’s time and the time recorded on the SSL certificate can trigger errors, including the “Your Connection is Not Private” message. SSL certificates have a defined validity period, and if your computer’s time is incorrect, the certificate may appear as expired or not yet valid.

    To check and fix this, follow these simple steps:

    1. Windows: Go to Settings > Time & Language > Date & Time, then turn on Set time automatically.
    2. Mac: Go to System Preferences > Date & Time, then check Set date and time automatically.

    By ensuring that your system time is accurate, you help your browser correctly validate SSL certificates and avoid connection errors.

    How to Validate SSL Certificates Using Browser Tools and Online Checkers

    Validating an SSL certificate can help you confirm whether the issue is with the website or your device. Most browsers have built-in tools to inspect SSL certificates. Here’s how you can check:

    1. In Chrome:
      • Click the padlock icon next to the URL.
      • Select Certificate to view details about the SSL certificate, including its validity period and issuer.
    2. Online Checkers:

    This will give you a clear picture of whether the SSL certificate is valid or if it’s causing the “Connection is Not Private” issue.

    Assessing the Impact of Third-Party Antivirus Software on SSL Certificate Validation

    Some third-party antivirus software can interfere with SSL certificate validation, mistakenly blocking secure connections. This often happens when antivirus software scans encrypted traffic, which can lead to SSL errors.

    To resolve this, you can adjust your antivirus settings to allow SSL certificates to pass through without interference. For example, check the settings in your antivirus software to disable HTTPS scanning or temporarily disable the antivirus and see if the error persists.

    If this solves the issue, consider consulting the antivirus documentation for specific instructions on adjusting settings related to SSL scanning.

    By addressing these potential causes and implementing these fixes, you should be able to resolve the “Your Connection is Not Private” error and ensure safer, private browsing. For further help, you can explore guides like How to Fix “Your Connection Is Not Private” Errors or consult trusted sources such as SSL Labs for more detailed troubleshooting steps.

    Understanding SSL Certificates and Their Role in Browser Security

    When browsing the web, one common issue users face is the “Connection is Not Private” error. This often stems from problems with SSL certificates, which play a crucial role in maintaining browser security. SSL (Secure Sockets Layer) certificates ensure that the data transmitted between your browser and a website is encrypted, preventing malicious third parties from accessing or tampering with it. Understanding how SSL certificates work is key to resolving connection errors and maintaining a secure browsing experience.

    SSL certificates are issued by trusted Certificate Authorities (CAs) and serve as proof that a website is legitimate and its connection is secure. When you visit a website with SSL, your browser checks the certificate to ensure the connection is safe. If something goes wrong with the SSL certificate—such as it being expired, misconfigured, or not trusted by the browser—the “Connection is Not Private” error can appear. This is a clear sign that the SSL certificate cannot be verified, and the security of the connection is compromised.

    To resolve the “Connection is Not Private” error, it’s essential to ensure that the website you’re visiting has a valid and properly configured SSL certificate. This often involves checking the certificate’s expiration date, ensuring the website is correctly configured to use HTTPS, or verifying that your browser’s security settings are up-to-date. Proper SSL certificate verification guarantees secure browsing, protecting sensitive data like passwords and credit card information from hackers.

    For more detailed information on how SSL certificates work, you can explore this guide on how SSL/TLS certificates secure web connections. Additionally, you can learn how browsers validate SSL certificates in Mozilla’s support documentation. These resources will give you deeper insights into SSL’s role in safeguarding online communication.

    To fix the “Connection is Not Private” error, you can follow a few straightforward steps, such as clearing your browser’s cache, checking your date and time settings, or adjusting security settings. For detailed troubleshooting tips, refer to this step-by-step SSL verification troubleshooting guide. These actions will help you restore a secure and private connection when encountering this error.

    Step-by-Step Guide to Resolve ‘Your Connection is Not Private’ Error

    If you’ve encountered the ‘Your Connection is Not Private’ error while browsing, you’re not alone. This common issue occurs when your browser cannot verify the security of a website’s connection. Luckily, there are simple steps you can take to fix this error and get back to browsing securely. In this guide, we will show you how to fix your connection is not private error, including clearing your browser’s cache and cookies, checking your network connection, and troubleshooting SSL certificate issues.

    How to Clear Browser Cache and Cookies to Resolve Connection Issues

    One of the easiest ways to resolve the ‘Connection is Not Private’ error is by clearing your browser’s cache and cookies. When you visit a website, your browser stores data like images and scripts to load the site faster in the future. However, if this data becomes outdated or corrupted, it can lead to connection issues, including the ‘Connection is Not Private’ error.

    How to clear cache and cookies:

    • In Google Chrome:
      1. Open Chrome and click the three dots in the top right corner.
      2. Select More tools > Clear browsing data.
      3. Choose a time range (select “All time” for the complete cleanup).
      4. Check Cookies and other site data and Cached images and files.
      5. Click Clear data.
    • In Mozilla Firefox:
      1. Click the three horizontal lines in the top right corner.
      2. Select Privacy & Security.
      3. Scroll to Cookies and Site Data and click Clear Data.
      4. Check both Cookies and Site Data and Cached Web Content.
      5. Click Clear.

    Clearing the cache and cookies forces your browser to load fresh data when visiting websites. This can help resolve issues caused by outdated or corrupted files.

    Why Switching to a Secure Network Can Resolve the ‘Connection is Not Private’ Error

    Another common cause of the ‘Connection is Not Private’ error is using an insecure network. If you’re connected to a public Wi-Fi network, such as at a coffee shop or airport, the connection may not be secure enough for your browser to verify the website’s SSL certificate. This can trigger the error.

    To fix this, try switching to a more secure network, such as your home Wi-Fi or a mobile hotspot. Public networks are often unprotected and vulnerable to attacks, which makes it difficult for browsers to ensure a private and secure connection.

    Steps to Troubleshoot SSL Certificate Issues in Web Browsers

    SSL certificate errors occur when your browser cannot verify the security of a website’s connection. This can be due to an expired certificate, incorrect system time, or an issue with the website’s configuration.

    How to troubleshoot SSL certificate issues:

    • In Google Chrome:
      1. Click the padlock icon next to the website’s URL.
      2. Click Certificate to view the details of the SSL certificate.
      3. Check the certificate’s expiration date. If it’s expired, the website may need to update it.
      4. Ensure your computer’s date and time are correct. Incorrect settings can cause SSL verification errors.
    • In Mozilla Firefox:
      1. Click the padlock icon next to the URL.
      2. Select More Information > View Certificate.
      3. Check the certificate status and validity.

    If the SSL certificate is valid but you’re still seeing the error, try restarting your browser or checking for any available updates. If the issue persists, contacting the website’s administrator may be necessary to resolve certificate-related issues.

    By following these steps, you can quickly address the ‘Connection is Not Private’ error and resume secure browsing.

    Comparing Solutions: Clearing Browser Data vs. Checking SSL Certificates

    When you encounter the “Connection is Not Private” error while browsing, you may wonder how to fix your connection is not private error. There are multiple ways to resolve this issue, but two of the most common solutions are clearing your browser data and checking your SSL certificates. Each method addresses different aspects of the error, and understanding how they work can help you decide which solution is best for your situation. Let’s dive into each approach and evaluate their effectiveness.

    How to Configure SSL Certificates for Optimal Security and Performance

    One key factor in resolving the “Connection is Not Private” error is ensuring that your website’s SSL certificates are correctly configured. SSL certificates protect the data exchanged between your browser and the website, helping ensure secure browsing.

    To check your SSL certificate’s validity, follow these steps:

    1. Check via Browser: In most modern browsers, you can view the SSL certificate by clicking on the padlock icon next to the website URL. This will show whether the certificate is valid or expired.
    2. Use OpenSSL: For a more detailed check, you can use OpenSSL with the following command to check the SSL certificate’s validity:
      openssl s_client -connect example.com:443

      This command connects to the server and returns the SSL certificate details. If there are issues with the certificate, such as being expired or not matching the domain, the connection might fail with the “Connection is Not Private” error.

    To ensure optimal security and performance, it’s important to use trusted Certificate Authorities (CAs). SSL certificates from well-known CAs, such as Let’s Encrypt or DigiCert, help establish trust with browsers and prevent errors. You can also use tools like SSL Labs to validate the SSL certificate and ensure it meets industry standards.

    The Role of Browser Updates in Preventing ‘Connection is Not Private’ Errors

    Browser updates play a crucial role in preventing security issues, including the “Connection is Not Private” error. Browsers frequently release updates to address vulnerabilities, improve security, and ensure compatibility with modern web protocols like HTTPS.

    If you haven’t updated your browser in a while, outdated security protocols may cause issues when connecting to websites. To update your browser:

    • Google Chrome: Click the three-dot menu > Help > About Google Chrome. The browser will automatically check for updates and install them.
    • Mozilla Firefox: Click the three-line menu > Help > About Firefox. It will check for updates and install them.

    By keeping your browser up-to-date, you ensure that you’re using the latest security features, which can help prevent SSL/TLS handshake issues that trigger the “Connection is Not Private” error.

    What is Mixed Content, and How Does It Affect Website Security?

    Mixed content occurs when a website loaded over HTTPS contains resources (like images, scripts, or stylesheets) served over HTTP. This can create security vulnerabilities, as the non-secure elements can potentially be intercepted by attackers.

    When mixed content is detected, modern browsers will typically display warnings, which could contribute to the “Connection is Not Private” error. For example, if an image is loaded via HTTP on a secure HTTPS page, browsers may block it, leading to incomplete or broken pages.

    To avoid mixed content issues:

    • Ensure that all resources (images, scripts, etc.) are loaded over HTTPS.
    • If you are a website owner, check your code to ensure all URLs are HTTPS, or use tools like SSL Labs to identify any insecure content.

    By addressing mixed content, you ensure that the entire page is securely loaded, preventing errors like the “Connection is Not Private” message from appearing.

    These methods, whether it’s checking SSL certificates, updating your browser, or addressing mixed content, are crucial steps in resolving the “Connection is Not Private” error and improving website security.

    Troubleshooting and Optimization After Resolving the ‘Connection is Not Private’ Error

    The “Connection is Not Private” error can often cause confusion and frustration, especially if you’re unsure how to resolve it. Fortunately, once you address the root cause, such as SSL certificate issues or mixed content errors, it’s crucial to follow a few additional steps to ensure your website remains secure. This section will guide you through fixing common problems and optimizing your website for secure browsing.

    Steps to Fix Mixed Content Issues in Web Applications

    Mixed content issues arise when a website that should load over HTTPS includes resources (like images, scripts, or stylesheets) loaded over HTTP. This undermines the security of the entire page, leading to the “Connection is Not Private” error.

    To fix mixed content issues, follow these steps:

    1. Identify Mixed Content: Open your browser’s developer tools (usually accessible by pressing F12) and go to the “Console” tab. Look for messages like “Mixed Content: The page at ‘https://example.com’ was loaded over HTTPS, but requested an insecure resource ‘http://example.com/image.jpg’”.
    2. Fix the URLs: Update any HTTP URLs to HTTPS in your code or WordPress settings. For WordPress, you can do this by going to Settings > General and ensuring both the “WordPress Address (URL)” and “Site Address (URL)” use https.
    3. Use Plugins to Force HTTPS: If you’re using WordPress, install a plugin like “Really Simple SSL” to automatically handle mixed content and ensure all resources are loaded securely.
    4. Tools for Diagnosis: Use tools like the SSL Labs’ SSL Test to verify that your entire site is being served securely.

    These steps will help you resolve mixed content errors, ensuring that your site is fully secure when accessed over HTTPS.

    How to Set Up Secure SSL/TLS Connections for WordPress Websites

    Configuring SSL/TLS certificates for WordPress is essential for both securing your site and avoiding the “Connection is Not Private” error. Here’s how you can set up SSL on your WordPress site:

    1. Obtain an SSL Certificate: You can get a free SSL certificate from Let’s Encrypt or purchase one from a trusted provider. For most sites, Let’s Encrypt is sufficient.
    2. Install the SSL Certificate: Depending on your hosting provider, you can often install the certificate via cPanel or your hosting dashboard. If you’re unsure how to do this, consult your hosting provider’s documentation or support team.
    3. Update WordPress Settings: Once your SSL certificate is installed, go to your WordPress dashboard and navigate to Settings > General. Ensure both the “WordPress Address (URL)” and “Site Address (URL)” are set to use https.
    4. Force HTTPS: Install a plugin like “Really Simple SSL” to automatically redirect HTTP traffic to HTTPS and fix any mixed content issues on your site.

    By following these steps, you’ll set up secure SSL/TLS connections, ensuring that all data transmitted to and from your website remains private and secure.

    For more detailed guidance, check out these resources:

  • Block Websites on Chrome: The Ultimate Guide to Boost Focus

    Block Websites on Chrome: The Ultimate Guide to Boost Focus

    Why Block Websites on Chrome? Common Reasons and Benefits

    Blocking websites on Chrome can significantly improve your browsing experience by increasing productivity, safety, and focus. Whether you’re looking to minimize distractions or protect yourself and others from harmful content, using Chrome’s website-blocking features offers numerous advantages. In this section, we’ll explore some common reasons and benefits of blocking websites on Chrome.

    1. Enhanced Focus and Productivity

    One of the most common reasons to block websites on Chrome is to minimize distractions. Websites like social media or entertainment platforms can easily steal your attention and waste time during work or study sessions. By blocking these sites, you can create a more focused and efficient browsing environment. This is especially beneficial for those working from home, students, or anyone trying to stick to a task without frequent interruptions.

    You can use Chrome website blocking tools to prevent access to distracting sites during specific hours of the day or set up complete blockages. This approach helps you stay on task and accomplish more without the temptation of endless scrolling through social media feeds or watching videos online.

    2. Improved Online Safety

    Another significant benefit of blocking websites on Chrome is enhanced safety. Certain websites may contain malicious content, phishing attempts, or harmful downloads that can jeopardize your personal information or security. By blocking harmful websites, you can protect yourself from these online threats and maintain a safer browsing experience.

    Chrome also offers parental controls, allowing you to block websites that are inappropriate for children. Using tools like Google Family Link, parents can restrict access to specific websites, ensuring that their kids are browsing safely. This feature is part of Chrome’s built-in capabilities, offering a practical solution to online safety concerns. You can read more about it here.

    3. Better Time Management

    By blocking distracting or time-wasting websites, you can gain better control over how you spend your time online. Whether it’s during work hours or when you’re studying, blocking irrelevant websites ensures that you’re using your time efficiently. Many users report feeling more organized and accomplished once they’ve removed distractions from their online environment.

    Using a website blocker on Chrome helps in sticking to time-sensitive goals. For example, you can set a timer to block specific websites after a set amount of time, encouraging more disciplined browsing. Research also shows that digital mindfulness, such as blocking distracting apps and websites, improves focus and productivity. You can explore more on this topic here.

    4. Customized Experience

    Blocking websites on Chrome also allows you to customize your browsing experience. Whether you’re focusing on work, learning, or simply browsing for leisure, having control over which websites are accessible gives you more power over your digital space. This flexibility is especially useful for those who want a streamlined and organized browsing experience.

    For instance, if you’re working on a project that requires concentration, you can block certain websites that would otherwise break your focus. This allows you to keep your browser environment aligned with your personal or professional needs.

    In summary, blocking websites on Chrome offers a variety of benefits, from enhancing focus and productivity to protecting your safety online. Whether you’re trying to block distractions, improve time management, or safeguard your personal information, using Chrome’s website blocking tools can help you achieve a more controlled and secure browsing experience. For a step-by-step guide on how to block websites, you can refer to How to Block a Website on Google Chrome.

    Exploring Built-in Chrome Settings for Blocking Websites

    Blocking websites on Chrome can be an effective way to boost productivity and enhance online security. Chrome offers a set of built-in settings that allow users to block websites directly from the browser, making it a practical solution for managing distractions or protecting sensitive information. In this section, we’ll explore how these built-in features work, how they can improve focus and security, and when to rely on Chrome’s default settings rather than third-party extensions.

    How Built-in Chrome Settings Enhance Productivity and Security

    Chrome’s built-in settings for blocking websites are straightforward to use and offer a convenient way to manage browsing without the need for additional tools. These settings can significantly enhance productivity by preventing access to distracting websites, such as social media or entertainment sites, especially during work or study hours. For example, if you’re working on a project and want to block access to Facebook or YouTube, you can set Chrome to prevent those sites from loading, allowing you to focus solely on the task at hand.

    In terms of security, these settings help protect users from potentially harmful websites. By blocking access to malicious or suspicious sites, Chrome can help prevent exposure to phishing attacks or other online threats. For example, a website that looks legitimate but is designed to steal personal information can be blocked using Chrome’s built-in settings, adding a layer of protection to your browsing experience.

    The primary advantage of using Chrome’s native website-blocking tools over third-party extensions or software is simplicity. You don’t need to install additional programs or manage complex configurations. The process is quick, and since the settings are built directly into the browser, there’s less risk of performance slowdowns or compatibility issues.

    When to Use Built-in Settings vs Extensions or Third-Party Software

    While Chrome’s built-in website-blocking settings are convenient for individual users, there are certain scenarios where third-party extensions or software might be more appropriate. For instance, if you’re managing a team or a larger organization, built-in settings might be too basic. Extensions, such as those offering time-management features, can provide additional functionality like customizable block schedules or detailed usage reports.

    However, for most personal use cases or small businesses, Chrome’s built-in settings are sufficient. For example, if you’re simply looking to block a few distracting websites while working from home or studying, Chrome’s native options are quick to implement and easy to maintain. On the other hand, extensions might be better suited for more complex requirements, like blocking specific content types or enforcing stricter site-blocking rules across multiple devices.

    In general, Chrome’s built-in website-blocking settings are ideal for anyone who needs a quick and straightforward solution for limiting distractions or enhancing online security. If you find the built-in options inadequate or need more features, you can always explore extensions or third-party software for additional control.

    For more information on how to configure these settings, you can refer to Chrome’s official guide on blocking websites or read more about parental controls with Google Family Link.

    If you are exploring other ways to block websites on Chrome, you can also check out this comprehensive guide on blocking websites.

    Using Chrome Extensions to Block Websites: Popular Options and Features

    Blocking distracting websites on Chrome can significantly improve productivity by helping users stay focused. Chrome extensions are a convenient and efficient way to block websites, offering flexibility and various features to suit different needs. In this section, we’ll explore some popular Chrome extensions for blocking websites, compare their features, and provide guidance on how to choose the best one for your needs.

    Overview of Popular Chrome Extensions for Website Blocking

    There are several Chrome extensions available to help block websites, each offering unique features suited to different user needs. Some of the most popular options include StayFocusd, BlockSite, and the Freedom extension.

    • StayFocusd: This extension is highly popular for users who want to block time-wasting websites. It allows you to set time limits for specific websites, and once the time limit is reached, those sites become inaccessible. StayFocusd is great for users who need structured work sessions and want to manage their online distractions efficiently.
    • BlockSite: BlockSite provides an easy way to block specific websites or set a schedule for website access. It also includes a “focus mode” for more comprehensive control. BlockSite is ideal for users who want to block sites at certain times of the day or use the app to help manage distractions when working from home.
    • Freedom extension: The Freedom extension goes beyond Chrome and can block websites across all devices. It is perfect for users who want a more versatile solution and need to block websites on multiple platforms, not just within Chrome. This extension can be especially useful for people managing productivity across various devices.

    Each of these extensions provides essential tools to block websites on Chrome, but the best one for you will depend on your unique needs and preferences.

    Pros and Cons of Using Chrome Extensions for Website Blocking

    Chrome extensions for blocking websites come with various advantages, but they also have some limitations. Below, we’ll outline the pros and cons of using these tools to block websites on Chrome.

    Pros:

    • Ease of Use: Chrome extensions are easy to install and use. With a few clicks, you can block specific websites and improve your productivity.
    • Customizable: Extensions like StayFocusd and BlockSite allow for customization, such as setting time limits or scheduling website access. For example, StayFocusd allows you to specify how much time you can spend on each site, and BlockSite lets you create custom blocks based on time of day.
    • Free Options: Many Chrome extensions, including StayFocusd and BlockSite, offer free versions, making them accessible to users who need a budget-friendly solution.
    • Improved Focus: Studies have shown that blocking distracting websites leads to better focus and productivity. According to XDA Developers, users have reported a significant increase in their ability to concentrate when using website blockers.

    Cons:

    • Bypassing the Extension: It’s easy to disable or bypass extensions if you’re determined to access a blocked site. Some users may deactivate the extension or find workarounds to disable blocking features.
    • Compatibility Issues: Occasionally, certain websites may not work correctly with extensions, or the extensions might conflict with other browser tools. For example, some content management systems may be blocked unintentionally by extensions like BlockSite.
    • Limited Features in Free Versions: While most Chrome extensions offer free versions, these often have limitations. To unlock advanced features, you may need to upgrade to a paid version of the extension.

    Despite these cons, the advantages of using Chrome extensions to block websites typically outweigh the drawbacks, especially for users who need simple, effective solutions.

    How to Choose the Right Extension for Your Needs

    When deciding which extension to use for blocking websites on Chrome, it’s essential to consider your specific needs and preferences. Here are some factors to guide your decision:

    • Ease of Use: If you need a quick and straightforward solution, StayFocusd might be the right choice for you. It’s easy to set up, and you can quickly start blocking websites.
    • Scheduling Needs: For users who need to block websites at certain times of the day, BlockSite is an excellent option. Its scheduling feature allows you to block access during specific hours.
    • Cross-Device Blocking: If you’re looking for a solution that works across multiple devices, the Freedom extension could be ideal. It allows you to block websites not only on Chrome but also on your mobile devices, ensuring consistent productivity no matter where you are.

    By evaluating your unique needs—whether it’s time management, productivity, or cross-device blocking—you can choose the right extension for blocking websites on Chrome.

    For more information on these popular extensions, you can explore their official pages: StayFocusd – Website Blocker on Chrome Web Store and BlockSite – Block Websites & Stay Focused on Chrome Web Store.

    If you’re curious about how extensions might affect your browser’s performance, check out this Impact of Extensions on Browser Performance: An Empirical Study on Google Chrome.

    How to Block Websites on Chrome Without Extensions: Step-by-Step Guide

    Blocking websites on Chrome without using extensions is a simple and effective way to boost productivity, enhance online safety, or enforce parental controls. Whether you’re trying to avoid distractions or protect your device from harmful content, Chrome offers built-in methods to block websites. In this guide, we’ll walk you through two practical approaches: modifying your hosts file and adjusting your DNS settings. These methods don’t require any third-party tools, making them ideal for users seeking a straightforward solution.

    Using Hosts File for Website Blocking: A Simple Method

    The hosts file is a system file that allows you to map domain names (like “example.com”) to specific IP addresses. By redirecting a website’s address to your local machine (127.0.0.1), you can block access to that website on Chrome.

    Here’s how to block websites on Chrome using the hosts file:

    1. Locate the Hosts File
      • On Windows: Open C:WindowsSystem32driversetchosts in a text editor (like Notepad).
      • On Mac: Open /etc/hosts in a text editor (you may need to use sudo in Terminal for editing).
    2. Edit the Hosts File

      To block a website, add a new line at the end of the file:

      127.0.0.1    example.com

      Replace example.com with the website you want to block. Save the file.

    3. Flush the DNS Cache
      • Windows: Open Command Prompt and type:
        ipconfig /flushdns

        This command clears the DNS cache, ensuring that the changes to the hosts file take effect immediately.

      • Mac: Open Terminal and type:
        sudo killall -HUP mDNSResponder

    Once the DNS cache is cleared, the website you blocked should no longer be accessible on Chrome.

    Adjusting DNS Settings for Website Blocking

    Another way to block websites on Chrome is by configuring your DNS settings to use a service that blocks certain sites. Services like OpenDNS allow you to filter content by blocking specific websites or categories of websites.

    Here’s how to block websites using DNS settings:

    1. Sign Up for OpenDNS

      Go to OpenDNS and create a free account. Once logged in, configure your network to use OpenDNS by setting your DNS server addresses to:

      • Primary DNS: 208.67.222.222
      • Secondary DNS: 208.67.220.220
    2. Change DNS Settings on Chrome

      Open Chrome and go to Settings > Network > Wi-Fi (or Ethernet) > Advanced.

      In the DNS section, input the OpenDNS server addresses (208.67.222.222 and 208.67.220.220).

    3. Configure Website Blocking on OpenDNS

      Once your DNS settings are updated, go back to the OpenDNS dashboard. Here, you can block specific websites by adding them to your filtering settings.

    Using DNS settings for website blocking gives you a broader level of control over all devices using the same network, including smartphones and tablets.

    Both methods are simple and don’t require additional extensions, allowing you to block websites on Chrome efficiently. For more detailed guidance, you can refer to these articles: How to Block Websites in Google Chrome, Block Websites Using the Hosts File on Windows 10/11, and How to Block a Website on Chrome.

    Evaluating Third-Party Software for Website Blocking on Chrome

    When you’re looking to block websites on Chrome, third-party software can offer more robust features than browser settings or extensions alone. These tools provide advanced customization, cross-device compatibility, and better control over your browsing habits. In this section, we’ll explore what to look for in third-party website blocking software, compare it to Chrome extensions, suggest the best free and paid options, and discuss how scalable virtual machines can be a flexible approach for website blocking.

    What to Look for in Third-Party Website Blocking Software

    When evaluating third-party website blocking software, the key factors to consider include ease of use, customization, and compatibility with Chrome. The software should allow you to block distracting websites and harmful content without complicating your browser experience. Look for features like:

    • Customizable Blocklists: This lets you create a personalized list of websites to block, offering more flexibility than basic Chrome settings.
    • Scheduling: Some tools let you set specific times when certain websites are blocked, helping you stay productive during work hours.
    • Reporting Capabilities: For those monitoring usage or aiming to improve productivity, detailed reports can provide insights into website visits and blocked content.

    Software like Cold Turkey and Freedom are popular for their reliability and feature sets. Cold Turkey, for example, includes a customizable blocklist and allows users to schedule blocking for specific times, making it an excellent tool for both personal and professional use.

    Additionally, consider security aspects—ensure the software effectively blocks harmful websites that could impact your privacy or security.

    Comparing Third-Party Software vs Chrome Extensions

    While Chrome extensions can be a quick and easy solution for blocking websites, third-party software often offers more powerful features. Here’s a simple comparison between the two:

    • Advanced Features: Third-party software, like Cold Turkey, provides features such as detailed scheduling and the ability to block entire categories of websites (e.g., social media, gaming, etc.). Chrome extensions, on the other hand, may offer more limited control.
    • Cross-Device Compatibility: Third-party software often works across multiple devices, allowing you to block websites not only on Chrome but also on other browsers or devices. Extensions typically work only within Chrome.
    • Ease of Setup: Chrome extensions are easy to install, but third-party software might require a bit more setup. However, the trade-off is usually a more comprehensive solution.

    While extensions like StayFocusd are convenient for quick setups, third-party software is generally better for users looking for more control and customization over their website-blocking experience.

    Best Free and Paid Third-Party Solutions

    There are a variety of both free and paid third-party website blocking tools to choose from. Here’s a quick look at some of the best options:

    • Free Option: StayFocusd
      StayFocusd is a popular Chrome extension that offers simple website blocking. It’s perfect for users on a budget, as it’s completely free. The software allows you to set time limits for specific sites, making it a great choice for those looking to improve productivity.
    • Paid Option: Freedom
      Freedom is a paid software that offers more advanced features, such as blocking websites across multiple devices, customizable blocklists, and a scheduling system. It’s great for individuals or teams that need a more comprehensive website-blocking tool.

    For budget-conscious users, StayFocusd is a solid choice. However, if you need more powerful features, Freedom provides excellent value for its price.

    Using Scalable Virtual Machines for Website Blocking: A Flexible Approach

    Using scalable virtual machines (VMs) to block websites on Chrome can be a flexible, albeit more complex, solution. Essentially, a VM allows you to run a virtualized environment separate from your main system, which can include customized website-blocking settings.

    For example, you can set up a VM with its own internet security settings and install website-blocking software that is specifically configured for that environment. This method can be particularly useful for teams or organizations that need a scalable solution. However, for individual users, it may be overkill and require more technical knowledge to implement effectively.

    If you’re comfortable with managing virtual machines and need to block websites on a larger scale, using VMs could be a powerful, scalable approach. However, for most users, third-party software like Freedom or Cold Turkey will be sufficient.

    For additional guidance on securing your online environment, consider checking out our Choosing the Best Firewall for Online Security article.

    How to Block Websites on Chrome Across Multiple Devices (PC, Mac, Android, iPhone)

    Blocking websites on Chrome is a useful way to limit distractions, improve productivity, or manage online safety. Whether you’re using a PC, Mac, Android, or iPhone, Chrome offers various methods to help you restrict access to certain websites. In this section, we’ll explore the best ways to block websites on Chrome across different devices, ensuring you can choose the method that works best for you.

    Blocking Websites on Chrome for PC and Mac

    For PC and Mac users, Chrome provides several straightforward ways to block websites. You can either use Chrome’s built-in settings or install extensions to manage your website blocking.

    1. Using Chrome Settings (for Managed Devices)

      Chrome itself doesn’t have a native option for blocking specific websites for personal users, but you can manage restrictions through “Supervised Users” or managed settings if you’re using Chrome for a business or educational account. To block sites using Chrome settings:

      • Open Chrome and go to the settings menu.
      • Under “Privacy and Security,” look for “Security” settings or access managed settings.
      • You can configure access restrictions here if you’re part of a managed organization.

      Note: This method is more suited for enterprise or managed accounts, and not for casual users.

    2. Using Chrome Extensions

      Extensions are the most practical solution for blocking websites on Chrome. Popular extensions like BlockSite and StayFocusd allow you to block distracting websites across PC and Mac easily. Here’s how to set it up with BlockSite:

      • Open Chrome and go to the Chrome Web Store.
      • Search for “BlockSite” and add the extension to Chrome.
      • After installation, click on the extension icon in your toolbar.
      • In the settings, add the websites you want to block by entering their URLs.

      This will prevent access to those sites while you’re using Chrome.

      Extensions like these provide flexibility, allowing you to block websites temporarily or permanently and set schedules for when restrictions should apply.

    3. Managing Extensions

      If you ever want to disable or adjust your website blocking extensions, you can easily manage them from Chrome:

      • Go to Chrome Settings > Extensions.
      • Here, you can disable, remove, or configure your blocking extension as needed.

      This gives you full control over your website-blocking setup, making it easy to modify if necessary.

      While extensions like BlockSite are straightforward and versatile, they do require you to remember to install and activate them. The main downside is that these solutions only work within Chrome, so if you switch browsers, your website blocks will no longer be in effect.

    Blocking Websites on Chrome for Android and iPhone

    On mobile devices, the process for blocking websites on Chrome differs slightly. While Chrome on Android and iPhone doesn’t offer built-in settings for blocking websites, you can still manage access through third-party apps and parental controls.

    1. Using Family Link on Android

      Google’s Family Link app allows parents to block websites on Chrome for Android devices. Here’s how to use it:

      • Install the Family Link app from the Google Play Store.
      • Open the app and follow the steps to set up your child’s account.
      • Under the “Manage Settings” option, select “Filters on Google Chrome.”
      • You can choose to block certain websites or limit access to only certain types of content.

      Family Link ensures that your child can’t access blocked websites, even when using Chrome.

    2. Blocking Websites with Screen Time on iPhone

      iPhone users can block websites in Chrome using Apple’s Screen Time feature. To do so:

      • Open the Settings app on your iPhone.
      • Tap Screen Time and then Content & Privacy Restrictions.
      • In the Content Restrictions section, select Web Content.
      • Choose Limit Adult Websites or add specific websites to the Never Allow list.

      This method works across all browsers, including Chrome, and ensures a safer browsing experience on iPhones.

    3. Using Focus Tools

      On both Android and iPhone, you can use focus tools like Focus Mode (Android) or Do Not Disturb (iPhone) to limit distractions. While these tools do not block websites outright, they can help by restricting access to apps, including Chrome, during certain hours, limiting temptation.

    On mobile devices, blocking websites generally requires a bit more setup, but tools like Family Link and Screen Time offer excellent ways to control online access and ensure a safer browsing experience.

    For further information about privacy and online restrictions, check out What Is a Proxy Server? The Ultimate Guide to Online Privacy, which offers insights into how proxies can enhance your browsing experience.

    Setting Up Website Blocking: Best Practices for Long-Term Use

    Setting up effective website blocking on Chrome is a great way to stay focused, protect your children, or prevent unwanted distractions. However, simply setting it up once is not enough to ensure long-term success. To keep your website blocking strategy effective, it’s essential to optimize the configuration, monitor its performance, and troubleshoot common issues that may arise over time. In this section, we’ll guide you through the best practices to ensure your website blocking remains effective on Chrome, while helping you address common challenges along the way.

    Optimizing Your Website Blocking Setup for Long-Term Effectiveness

    To block websites on Chrome effectively for the long term, it’s essential to choose the right tools and configure them correctly. Here’s how to get started:

    • Select a Reliable Website Blocking Tool: A Chrome extension for blocking websites is often the easiest and most reliable method. Extensions like “StayFocusd” or “BlockSite” offer customizable features to block distracting websites on Chrome for productivity purposes. For example, StayFocusd lets you set time limits on websites you find distracting, ensuring you don’t waste time on them.
    • Configure Extensions for Maximum Effectiveness: After installing an extension, configure its settings to block the sites you want. For instance, in BlockSite, you can manually add URLs to block by entering the website address directly. Adjust the settings to prevent users from bypassing the blocks, such as setting password protection or enabling a “time-limited” mode for productive browsing.
    • Adjust Chrome Settings: You can also use Chrome’s native settings to block websites, though extensions are typically more flexible. Go to Chrome’s “Settings” > “Privacy and Security” > “Site Settings,” and you can block pop-ups or manage permissions for specific websites.

    By following these optimization steps, you’ll ensure that your website blocking setup remains robust over time, minimizing the chances of bypassing.

    Monitoring and Adjusting Website Blocking Settings

    Once you’ve set up your website blocking, it’s essential to monitor and adjust the settings to ensure they stay effective. Here’s how to keep track of your blocked sites:

    • Review Blocked Websites: Periodically check which websites are blocked by reviewing the list in your Chrome extension or Chrome settings. For example, in BlockSite, you can view and modify the blocked list anytime by going into the extension’s settings. This makes it easy to add or remove websites as your needs evolve.
    • Adjust Blocking Based on Usage: If you notice that certain websites are not effectively blocked or new distractions have appeared, revisit your settings. You might need to update your blocked list or extend the blocking duration. Extensions like StayFocusd allow you to adjust the amount of time spent on sites, so you can make real-time changes based on your productivity needs.
    • Regularly Check for Updates: Both Chrome and website blocking extensions frequently release updates. These updates may include new features, bug fixes, or security improvements. Keep your extensions up to date to ensure optimal performance.

    By regularly monitoring and adjusting your website blocking settings, you can maintain control over your browsing habits and keep distractions at bay.

    Troubleshooting Common Website Blocking Issues

    While website blocking tools for Chrome are generally reliable, you may encounter some issues that require troubleshooting. Here are some common problems and how to fix them:

    • Blocked Websites Are Accessible: If a website you’ve blocked is still accessible, the issue might be related to cookies or caching. To fix this, clear your browser cache and cookies by going to Chrome’s settings: “Settings” > “Privacy and Security” > “Clear browsing data.” This will reset your browser’s stored information, ensuring your blocking tools work effectively.
    • Website Blocks Are Being Bypassed: Sometimes, users might bypass website blocks by using incognito mode or different browsers. To prevent this, enable features like password protection within your blocking extension. In StayFocusd, you can set up a “whitelist” for specific sites and prevent users from bypassing blocks easily.
    • Incompatibility with Other Extensions: If your website blocking isn’t working as expected, it could be because of conflicts with other extensions. Disable any unnecessary extensions one by one to identify the issue. If needed, reinstall the website blocking extension to reset its settings.

    By troubleshooting these common issues, you can ensure that your website blocking method continues to be effective, keeping distractions under control for the long term.

    For more advanced tips on network-level security, you may also find it helpful to explore What Is a Firewall? The Complete Guide to Choosing the Best One, especially if you need to secure your browsing environment further.

    By following these steps and regularly maintaining your setup, you can continue to block websites on Chrome and stay focused for the long haul.

    Troubleshooting Common Issues with Website Blocking on Chrome

    Blocking websites on Chrome is a useful method for improving productivity or avoiding distractions, but sometimes, it doesn’t work as expected. If websites are still accessible despite your best efforts, or if other issues arise, troubleshooting becomes essential. This section provides practical, beginner-friendly solutions to common problems associated with blocking websites on Chrome, including compatibility issues, bypassing methods, and configuration mistakes.

    What to Do If Websites Are Not Being Blocked

    If websites are not being blocked on Chrome, the issue often stems from incorrect settings or conflicting extensions. Here are some steps to help resolve the problem:

    1. Check Chrome Settings: Make sure that the settings you configured to block websites are correctly saved. If you’re using Chrome settings to block specific URLs, double-check that the blocklist is properly set. You can access these settings through the “Site Settings” under Chrome’s “Privacy and Security” section.
    2. Review Extension Settings: If you’re using a browser extension to block websites, ensure the extension is active and correctly configured. Sometimes, extensions can become disabled or misconfigured, preventing them from functioning properly.
    3. Disable Conflicting Extensions: Some extensions, such as those designed for privacy or VPNs, might interfere with website blocking. To check if this is the case, disable all other extensions temporarily:
      • Go to chrome://extensions/ in the address bar.
      • Turn off all extensions except for your website blocker.
      • Test if the website blocking works now. If it does, re-enable extensions one by one to identify the conflicting extension.

    By following these steps, you can ensure that the blocking method is functioning as intended. For additional guidance on website blocking techniques, refer to How to Block a Website on Google Chrome.

    How to Fix Compatibility Issues Between Extensions and Settings

    Sometimes, conflicts between Chrome’s default settings and installed extensions can cause website blocking to fail. Here’s how to resolve such compatibility issues:

    1. Update Extensions: Ensure that the extension you’re using to block websites is up to date. Extensions often release updates to fix bugs and improve functionality. To update an extension:
      • Go to chrome://extensions/.
      • Enable “Developer mode” at the top-right corner.
      • Click “Update” to force Chrome to check for updates for all installed extensions.
    2. Adjust Chrome’s Site Settings: Certain Chrome settings might interfere with website blockers. For example, check whether “Pop-ups and redirects” are allowed for the site you’re trying to block. Go to chrome://settings/content and make sure the proper settings are configured.
    3. Test for Extension Conflicts: If you suspect there’s a conflict between your extension and Chrome settings, disable extensions temporarily to see if the issue resolves. This helps you determine whether Chrome’s settings or the extension is causing the problem.

    By updating extensions and adjusting Chrome settings, you can ensure that both elements work harmoniously to block websites effectively.

    How to Prevent Users from Bypassing Website Blocking

    Users often find ways to bypass website blocking, using methods like VPNs or Incognito Mode. To prevent these workarounds, follow these steps:

    1. Block Incognito Mode: You can prevent users from using Incognito Mode to bypass website blocking. Although Chrome doesn’t provide a built-in option for this, third-party extensions can disable Incognito Mode. A popular extension for this is “Block Site.”
    2. Use Website Blockers with Extra Features: Consider using website blocking tools with enhanced security features that can prevent the use of proxies or VPNs. Some extensions like “StayFocusd” offer advanced blocking features that restrict access to blocked sites regardless of how users try to bypass them.
    3. Enforce Stronger Settings: In Chrome’s “Site Settings,” you can restrict access to websites based on specific criteria. For example, by enabling stricter settings for certain sites or using a more secure blocker, you can limit users from bypassing your restrictions.

    For more detailed assistance with blocking websites in Chrome, visit Allow or block access to websites – Google Help.

    By following these strategies, you can ensure a more effective and secure website blocking experience in Chrome.

  • Clear DNS Cache Windows: The Ultimate Guide to Faster Internet

    Clear DNS Cache Windows: The Ultimate Guide to Faster Internet

    What is DNS Cache and How It Affects Your Internet Speed?

    When you use the internet, your computer stores DNS (Domain Name System) information in a local cache to speed up website loading times. While this can improve performance, an outdated or cluttered DNS cache can cause slow internet speeds and connectivity issues. This section explains what DNS cache is, how it affects your internet performance, and provides clear, actionable steps for clearing the DNS cache on Windows to enhance browsing speed.

    How DNS Cache Affects Internet Performance

    DNS cache is a temporary storage of DNS records, which your computer uses to quickly resolve website names into IP addresses. This speeds up the process of accessing frequently visited websites by bypassing the need to query DNS servers for each new request.

    However, if the DNS cache becomes outdated or corrupted, it can cause delays when accessing websites. Your computer might try to connect to an old or incorrect IP address, resulting in slower page loads or an inability to access certain sites. Common signs that your DNS cache is causing performance issues include:

    • Slow website loading times
    • Inability to access certain websites
    • Error messages such as “DNS server not found” or “Page cannot be displayed”

    These issues often stem from a DNS cache that is clogged with old records. Clearing the cache can resolve these problems by forcing your computer to fetch the latest DNS records.

    Why Clearing DNS Cache Helps Fix Slow Internet Issues

    Clearing the DNS cache can significantly improve your internet speed, especially if you’ve been experiencing slow loading times or connectivity issues. When you clear the cache, you remove outdated or corrupted DNS entries, allowing your computer to refresh its stored information. This process helps ensure that your computer accesses the correct IP addresses and resolves websites faster.

    There are a couple of straightforward methods for clearing the DNS cache on Windows:

    Method 1: Using Command Prompt

    1. Open Command Prompt as an administrator:
      • Press the Windows key, type “cmd,” right-click on Command Prompt, and select Run as Administrator.
    2. Type the following command and press Enter:
      ipconfig /flushdns

      This command clears the DNS cache stored on your computer, allowing it to fetch the latest DNS records.

    3. After the command completes, you should see a message saying, “Successfully flushed the DNS Resolver Cache.”

    This method is quick and effective, especially if you’re comfortable using the Command Prompt. It’s ideal for users who want to clear the DNS cache without navigating through menus.

    Method 2: Using Control Panel

    1. Press the Windows key and type Control Panel to open it.
    2. Go to Network and Internet > Network and Sharing Center > Change adapter settings.
    3. Right-click your active network connection and select Properties.
    4. Under the Networking tab, select Internet Protocol Version 4 (TCP/IPv4) and click Properties.
    5. Click Use the following DNS server addresses and then click OK.

    This method is useful for users who prefer a graphical interface over the Command Prompt. It offers more control over your network settings but can take slightly longer than using the Command Prompt.

    By clearing the DNS cache, you can resolve slow browsing, prevent access errors, and improve overall internet performance.

    The Importance of Clearing DNS Cache for Improved Browsing

    When you’re browsing the web, your computer uses DNS (Domain Name System) to translate domain names like www.example.com into IP addresses. To speed up this process, DNS servers and your computer store DNS records in a cache. However, outdated or corrupted DNS cache can lead to slower internet speeds, access issues, and errors when loading websites. Understanding how DNS cache works and knowing how to clear DNS cache on Windows can significantly improve your browsing experience.

    How DNS Cache Affects Internet Performance

    DNS cache stores the IP addresses of websites you visit, so the system doesn’t need to look up the address every time you access a site. This caching can speed up your browsing by reducing the time it takes to load websites. However, over time, the cached data can become outdated or corrupted. When this happens, your browser may try to access an incorrect or old version of a website, causing slow load times, broken links, or even error messages like “DNS server not found.”

    For example, if you visit a website and the DNS cache has an old IP address for that site, your browser might try to connect to the wrong server, leading to delays or failures in loading the page. This issue can be particularly noticeable when websites have recently changed their server or IP address. Clearing the DNS cache ensures that your browser can always retrieve the most up-to-date information, improving your browsing performance.

    Why Clearing DNS Cache Helps Fix Slow Internet Issues

    Clearing DNS cache on Windows is a simple and effective solution when you’re facing slow internet speeds or website access errors. When the DNS cache is cleared, your system forces a fresh lookup of the DNS records for websites, removing any outdated or incorrect entries. This can resolve issues like slow loading times or error messages that may arise from stale cache data.

    To clear DNS cache on Windows, follow these steps:

    1. Open Command Prompt as Administrator. You can do this by typing “Command Prompt” in the Windows search bar, right-clicking it, and selecting “Run as Administrator.”
    2. In the Command Prompt window, type the following command:
      ipconfig /flushdns

      Press Enter. This command clears your DNS cache.

    3. Once completed, you should see a confirmation message: “Successfully flushed the DNS Resolver Cache.”

    By performing this simple step, you’re ensuring that your system fetches the most current DNS information, leading to a more reliable and faster browsing experience. If you’re interested in learning more, you can check out Microsoft’s guide for more details or visit The Windows Club for an in-depth tutorial.

    For more specific guidance on flushing DNS cache in Windows 11, consider following this step-by-step tutorial.

    Step-by-Step Guide to Flushing DNS Cache on Windows

    Flushing the DNS cache on Windows can help resolve slow browsing issues and improve your overall internet connection speed. The DNS (Domain Name System) cache stores information about websites you’ve visited to speed up the loading process in the future. However, when these cached entries become outdated or corrupted, they can cause issues like page loading errors or slow connections. By clearing the DNS cache, you can refresh these entries and often restore your browsing performance. Below, we’ll guide you through three simple methods to clear the DNS cache on Windows: using Command Prompt, Control Panel, and PowerShell.

    Flushing DNS Cache Using Command Prompt

    The Command Prompt is one of the easiest and quickest ways to clear the DNS cache on Windows. This method works well for users who are comfortable with using basic commands and want a fast solution to their DNS issues.

    Steps to flush DNS cache using Command Prompt:

    1. Press Win + R to open the Run dialog.
    2. Type cmd and press Enter to open the Command Prompt.
    3. In the Command Prompt window, type the following command and press Enter:
      ipconfig /flushdns

    This command clears the DNS resolver cache, potentially improving your browsing performance by forcing Windows to request fresh DNS information.

    Pros of using Command Prompt:

    • Quick and straightforward.
    • Built directly into Windows.
    • Doesn’t require additional software.

    Limitations:

    • Requires administrative rights. You may need to run Command Prompt as an administrator if prompted.

    For a more detailed explanation of the ipconfig command, check out the official Microsoft documentation.

    Flushing DNS Cache Using Control Panel

    For those who prefer not to use command-line tools, the Control Panel provides a graphical interface that can be used to clear the DNS cache. This method may be easier for users who are less familiar with technical tools.

    Steps to flush DNS cache using Control Panel:

    1. Open the Control Panel by pressing Win + R, typing control, and pressing Enter.
    2. Click on Network and Sharing Center.
    3. In the left pane, click Change adapter settings.
    4. Right-click on your active network connection (e.g., Wi-Fi or Ethernet) and select Disable.
    5. Wait a few seconds, then right-click again and choose Enable.

    This process doesn’t directly clear the DNS cache from the Control Panel, but disabling and enabling your network adapter resets the connection and refreshes the DNS settings.

    Pros of using Control Panel:

    • Easy to follow for users who prefer a GUI-based approach.
    • No need for administrative rights to reset the network adapter.

    Limitations:

    • Doesn’t directly target DNS cache but works by resetting the network adapter.
    • Slightly less efficient than using Command Prompt for clearing DNS cache.

    Flushing DNS Cache Using PowerShell

    If you’re looking for a more powerful method, PowerShell allows for advanced options and scripting capabilities. While this method may feel a bit more technical, it is still beginner-friendly with the right steps.

    Steps to flush DNS cache using PowerShell:

    1. Press Win + X and select Windows PowerShell (Admin).
    2. In the PowerShell window, type the following command and press Enter:
      Clear-DnsClientCache

    This command clears the DNS cache, helping to resolve DNS-related browsing issues by forcing Windows to request new DNS data.

    Pros of using PowerShell:

    • More advanced functionality if you want to integrate DNS clearing into scripts or automation.
    • Effective for both local and remote system management.

    Limitations:

    • Slightly more advanced than Command Prompt for beginners.
    • Requires administrative rights.

    For more details on using PowerShell, you can refer to this guide on flushing DNS cache.

    Conclusion

    Flushing the DNS cache on Windows is a simple yet effective way to resolve browsing issues and improve your internet connection speed. Whether you choose to clear your cache using Command Prompt, Control Panel, or PowerShell, each method offers a straightforward solution depending on your preference for using a command-line interface or a graphical user interface. To keep your connection running smoothly, clearing the DNS cache regularly can be an excellent troubleshooting step for any browsing issues.

    If problems persist after clearing the DNS cache, consider resetting your network adapter or consulting a professional.

    Comparing Methods to Clear DNS Cache: Command Prompt vs Control Panel

    Clearing the DNS cache on Windows is a useful step for resolving network issues or improving internet performance. Whether you’re troubleshooting a DNS error or just want to ensure your computer is using the most up-to-date DNS information, clearing the DNS cache can help. In this section, we’ll compare two popular methods for clearing the DNS cache on Windows: Command Prompt and Control Panel. We’ll guide you through each approach and highlight the advantages and disadvantages, so you can choose the best method for your needs.

    Pros and Cons of Using Command Prompt for Flushing DNS Cache

    Using the Command Prompt to clear the DNS cache is a straightforward and quick method, especially if you are comfortable with command-line tools.

    Pros:

    • Speed: The process is faster than using the Control Panel, as it’s a direct command with no need for navigating through multiple menus.
    • Control: You have full control over the process, and it can be executed in just a couple of commands.

    Cons:

    • Requires Administrative Privileges: To run the command, you need to open Command Prompt as an administrator, which can be confusing for beginners.
    • Potential for Mistakes: If you’re not familiar with the command line, you might accidentally enter the wrong command or make other errors.

    Example:

    To flush the DNS cache using Command Prompt, open it with administrative privileges and type the following command:

    ipconfig /flushdns

    This command clears the DNS cache, which can help resolve issues with outdated or incorrect DNS records.

    Pros and Cons of Using Control Panel for Flushing DNS Cache

    For beginners or those who prefer a more visual approach, using the Control Panel offers a user-friendly way to clear the DNS cache.

    Pros:

    • User-Friendly Interface: The Control Panel provides a graphical interface, making it easier to navigate and perform the task without needing to remember commands.
    • No Need for Administrative Privileges: You don’t need to run the Control Panel as an administrator, which makes it more accessible for novice users.

    Cons:

    • Slower Process: The process involves more steps compared to Command Prompt, making it less efficient for users who need a quick solution.
    • Additional Steps: You may need to navigate through several settings to reach the DNS cache options.

    Example:

    To flush the DNS cache using the Control Panel:

    1. Open the Control Panel and navigate to “Network and Sharing Center.”
    2. Click on “Change adapter settings.”
    3. Right-click on your active network connection and select “Properties.”
    4. Click on “Internet Protocol Version 4 (TCP/IPv4)” and then “Use the following DNS server addresses.”
    5. Save the settings and restart your connection to clear the DNS cache.

    This method involves more steps than Command Prompt, but it’s more visual and easier for those less familiar with the command line.

    Which Method Is Better for Different Users?

    Both methods for clearing the DNS cache have their benefits, but the best choice depends on your comfort level with technology.

    • For Beginners: If you’re new to troubleshooting network issues or unfamiliar with command-line tools, the Control Panel method is a great choice. Its graphical interface is intuitive, and you won’t need to worry about typing in specific commands or having administrative privileges. However, the process is slightly slower.
    • For Advanced Users: If you’re comfortable using the Command Prompt and need a quicker solution, flushing the DNS cache with the command is the way to go. It’s faster, more direct, and ideal for those who want more control over the process.

    In general, if you need a simple, step-by-step approach, the Control Panel is a better option. For those who prefer speed and simplicity, the Command Prompt is the ideal method.

    Example: Optimizing DNS Cache Management with Cloud-Based Solutions

    In addition to clearing the DNS cache locally, cloud-based DNS solutions such as Google DNS or Cloudflare DNS can optimize DNS cache management. These services often provide faster and more reliable DNS resolution, helping to improve internet speed and reduce network-related issues.

    For example, configuring your system to use Google DNS or Cloudflare DNS can reduce the likelihood of encountering DNS-related problems, as these providers regularly update their DNS records. Here’s how you can set up Google DNS:

    1. Open the Control Panel and go to “Network and Sharing Center.”
    2. Click on “Change adapter settings.”
    3. Right-click on your network connection, choose “Properties,” and then select “Internet Protocol Version 4.”
    4. Use the following DNS server addresses:
      • Preferred DNS server: 8.8.8.8
      • Alternate DNS server: 8.8.4.4

    This configuration can improve your DNS performance and ensure your system is always using the most up-to-date information.

    By combining local DNS cache clearing with cloud-based DNS solutions, you can significantly enhance your network’s reliability and speed. For further troubleshooting, you can also refer to our guide on How to Fix DNS_PROBE_FINISHED_NXDOMAIN Error.

    Advanced Tips for Optimizing DNS Resolution on Windows

    Improving DNS resolution can significantly enhance browsing performance and ensure faster, more secure internet experiences. One of the most effective ways to achieve this is by managing the DNS cache on your Windows device. Clearing the DNS cache can resolve common issues and help improve the speed of your web browsing. In this section, we’ll guide you through optimizing DNS settings, clearing the DNS cache, and using advanced methods to improve both privacy and speed.

    How to Optimize DNS Settings for Faster Browsing

    Optimizing DNS settings can lead to faster browsing speeds and a more responsive internet connection. One way to achieve this is by switching to public DNS providers such as Google DNS or Cloudflare DNS, both of which are known for their speed and reliability. Here’s how you can change your DNS settings on Windows for better performance:

    1. Open the Control Panel
      • Press the Windows key, type Control Panel, and press Enter.
    2. Go to Network and Internet
      • Select Network and Sharing Center.
    3. Change Adapter Settings
      • In the left-hand menu, click on Change adapter settings.
    4. Select Your Network Connection
      • Right-click on your active network connection (either Ethernet or Wi-Fi) and choose Properties.
    5. Modify DNS Settings
      • In the Properties window, select Internet Protocol Version 4 (TCP/IPv4) and click Properties.
      • Select the option Use the following DNS server addresses.
    6. Enter a Preferred and Alternate DNS Server
      • For Preferred DNS server, enter 1.1.1.1 for Cloudflare or 8.8.8.8 for Google DNS.
      • For Alternate DNS server, enter 1.0.0.1 for Cloudflare or 8.8.4.4 for Google DNS.
    7. Click OK
      • After entering the DNS server addresses, click OK to save your settings.

    By using these public DNS servers, you may notice a significant improvement in browsing speed due to the optimized routing of DNS queries. Both Cloudflare and Google DNS are known for their reliability and performance, providing faster and more secure DNS resolution compared to the default DNS servers provided by your ISP.

    How to Use DNS over HTTPS (DoH) for Improved Privacy and Speed

    DNS over HTTPS (DoH) is a protocol that encrypts DNS requests, making them more secure and private. It prevents third parties from snooping on your browsing activities. Additionally, DoH can sometimes improve browsing speed by preventing certain types of network congestion. Here’s how to enable DNS over HTTPS on Windows using Cloudflare as an example:

    1. Open Windows Settings
      • Press the Windows key, then type Settings, and hit Enter.
    2. Go to Network & Internet
      • In the Settings window, click Network & Internet.
    3. Select Change Adapter Options
      • Under the Status section, click Change adapter options.
    4. Right-click on Your Network Connection
      • Select Properties for your active connection (Wi-Fi or Ethernet).
    5. Configure DNS Settings
      • Select Internet Protocol Version 4 (TCP/IPv4) and click Properties.
      • Click Use the following DNS server addresses and enter:
        • Preferred DNS server: 1.1.1.1
        • Alternate DNS server: 1.0.0.1
    6. Enable DNS over HTTPS
      • Scroll down and click Advanced.
      • In the Advanced TCP/IP Settings dialog, click DNS.
      • Set DNS over HTTPS (DoH) to Cloudflare or another supported provider.
    7. Save and Close
      • After enabling DoH, click OK and Close.

    Enabling DNS over HTTPS with a trusted provider like Cloudflare can increase your privacy and security, while also ensuring faster DNS resolution times.

    Monitoring DNS Performance After Clearing the Cache

    After clearing the DNS cache, it’s essential to monitor DNS performance to verify whether the changes have resulted in improvements. You can use simple tools like nslookup and ping to test DNS resolution times. Here’s how you can do this:

    1. Open Command Prompt
      • Press the Windows key, type cmd, and press Enter.
    2. Test DNS Resolution with nslookup
      • Type nslookup www.example.com and press Enter. This will show you the DNS resolution time for that domain.
      • Example: nslookup www.google.com will display the time taken to resolve Google’s domain.
    3. Test DNS Resolution with ping
      • Type ping www.example.com and press Enter to measure the round-trip time for a packet to reach the server.
      • This will give you an indication of how fast your DNS resolution is.

    If you notice significant improvements in resolution time, it means your DNS settings are optimized. If not, consider revisiting your DNS settings or troubleshooting further.

    Example: Leveraging Global Cloud Providers for Enhanced DNS Performance

    Using global DNS providers like Cloudflare and Google can enhance your DNS performance by leveraging their fast and reliable infrastructure. Here’s an example scenario:

    Suppose you’re using your ISP’s default DNS server, and you’re experiencing slow browsing speeds. By switching to a global DNS provider such as Cloudflare (1.1.1.1), your DNS queries are resolved faster, and you might notice quicker load times for websites.

    Here’s how you can switch your DNS settings to Cloudflare DNS:

    1. Access DNS Settings (as described above).
    2. Set Cloudflare DNS
      • Preferred DNS server: 1.1.1.1
      • Alternate DNS server: 1.0.0.1
    3. Save Changes and close.

    After switching to Cloudflare DNS, you might notice faster browsing, as Cloudflare’s global network is optimized for speed and security. This can be particularly useful for accessing international websites or when your ISP’s DNS servers are slow or unreliable.

    By following these tips, you can ensure that your DNS settings are optimized for both speed and privacy, providing you with a better browsing experience on Windows.

    For additional troubleshooting tips, check out How to Fix DNS_PROBE_FINISHED_NXDOMAIN Error: Easy Fixes for Any User.

    Troubleshooting DNS Issues After Clearing the Cache

    When you clear the DNS cache on Windows, it can help resolve network issues like slow page loading or websites not opening. However, after performing a DNS cache flush, you might encounter some DNS-related problems, such as incorrect IP addresses or error messages. Understanding how to troubleshoot these issues is important for maintaining smooth internet connectivity. This guide will walk you through common DNS problems and how to fix them after clearing your DNS cache on Windows.

    Common DNS Issues and How to Resolve Them

    After clearing the DNS cache, some common issues may arise. These include slow page loading, websites not resolving correctly, or error messages related to DNS. Here’s a simple example:

    • Issue: You try to access a website, but it doesn’t load, or you see a “DNS server not found” error.
    • Solution: A basic troubleshooting step to resolve this is restarting your router. This refreshes the network connection and may resolve any minor DNS issues. Additionally, ensure that your DNS settings are correct. For example, if your router’s DNS settings have changed, the issue might be resolved by resetting them to their default values.

    By restarting the router and checking your DNS settings, you can often solve the issue without needing more complex steps. These simple fixes are the first things you should try after clearing your DNS cache to resolve network connection problems.

    How to Check and Fix DNS Errors After Flushing Cache

    If the DNS issues persist after clearing the DNS cache, you can use a few basic tools to check for errors and troubleshoot further.

    1. Check DNS Status: After clearing the DNS cache, you can verify your DNS settings using the command prompt. Open the command prompt and type the following:
      ipconfig /flushdns

      This command clears your DNS cache. It’s a simple yet effective step for resolving many DNS-related issues. After running this, check if your DNS configuration has been reset correctly.

    2. Test DNS Resolution: You can use the nslookup command to check if DNS resolution is working properly. For example, type the following in the command prompt:
      nslookup www.example.com

      This command checks whether your DNS is able to resolve the domain name www.example.com to its corresponding IP address. If the output shows an error, such as “Server failed,” it indicates that your DNS server is unable to resolve the domain name, and you may need to troubleshoot your DNS settings.

    By using these simple commands, you can easily diagnose DNS errors after flushing the cache and take action to resolve them, ensuring a smoother browsing experience.

    For more detailed information on clearing your DNS cache, you can refer to Microsoft’s guidance on clearing DNS cache.

    ERROR: Response timeout after 290000ms

    Additional Steps to Improve Network Speed and Security After Flushing DNS Cache

    Once you’ve taken the step to clear DNS cache in Windows, you’re already on the right path to resolving certain network issues. Flushing the DNS cache can help fix problems related to website loading, DNS resolution errors, and network-related issues. However, there are additional actions you can take to further optimize your network speed and enhance security on your Windows system.

    Refreshing Network Settings for Better DNS Resolution

    After clearing your DNS cache, it’s a good idea to refresh your network settings. This step can further improve your DNS resolution process and ensure that your system is getting the best possible performance from your network connection.

    One simple way to do this is by releasing and renewing your IP address using the Command Prompt. Here’s how you can do it:

    1. Open Command Prompt as an administrator. You can do this by typing cmd in the search bar, right-clicking on the Command Prompt app, and selecting Run as administrator.
    2. Type the following command to release your current IP address:
      ipconfig /release

      This command releases the current IP configuration, which can help resolve issues related to network connectivity.

    3. Now, renew your IP address by typing:
      ipconfig /renew

      This command refreshes your network settings and requests a new IP address from your router or network server.

    These steps essentially reset your network connection, which can resolve any lingering issues that might be affecting DNS resolution or overall network speed. By refreshing your IP address, your computer will re-establish its connection to the network, potentially resolving any DNS or connectivity errors that could have persisted after clearing the DNS cache. For more detailed information on the ipconfig command, refer to Microsoft’s official ipconfig command reference.

    Other Techniques for Optimizing Network Speed and Security

    In addition to refreshing your network settings, there are several other techniques you can use to improve your network speed and security. These methods can help ensure your internet connection is fast, secure, and reliable after flushing the DNS cache.

    1. Use Public DNS Services: Switching to a reliable public DNS service, such as Google DNS or Cloudflare DNS, can improve both your network speed and security. These services are optimized for faster DNS resolution and can often provide better security features like phishing protection. To change your DNS settings:
      • Open Control Panel and go to Network and Sharing Center.
      • Click on your active network connection, then select Properties.
      • In the properties window, select Internet Protocol Version 4 (TCP/IPv4) and click Properties.
      • Select Use the following DNS server addresses and enter the preferred and alternate DNS server addresses:
        • Google DNS: 8.8.8.8 (Preferred), 8.8.4.4 (Alternate)
        • Cloudflare DNS: 1.1.1.1 (Preferred), 1.0.0.1 (Alternate)
    2. Check for Network Adapter Issues: Sometimes, your network adapter could be causing connectivity problems. You can troubleshoot and resolve any issues by going into Device Manager, locating your network adapter, and ensuring that it is working properly. If needed, you can update the driver or even uninstall and reinstall the adapter to fix any issues.
    3. Update Windows DNS Settings: If you’re still experiencing DNS-related issues, you might want to check your Windows DNS settings. Ensure that your DNS client service is running and properly configured. You can restart the DNS Client service by opening the Services application, finding the DNS Client, and clicking Restart.

    By taking these additional steps, you can optimize both your network speed and security, ensuring that your connection remains stable and efficient after flushing the DNS cache on your Windows system.

    For more detailed guides on optimizing your network, check out How to Flush DNS Cache on Windows (The Windows Club) and Understanding DNS Cache and When to Clear It (PixelFreaks).

  • IP Address Definition: Essential Guide to Network Setup

    IP Address Definition: Essential Guide to Network Setup

    What is an IP Address and Why is It Important for Your Network?

    An IP address definition refers to a unique identifier assigned to each device connected to a network, allowing it to communicate with other devices. Understanding what an IP address is and why it is crucial for your network setup is essential for optimizing network performance, ensuring security, and future-proofing your infrastructure. In this section, we will explore the basics of IP addresses, delve into the differences between IPv4 and IPv6, and discuss why the shift to IPv6 is important for the future of networking.

    Overview of IPv4 and IPv6

    An IP address serves as the identification for devices on a network, enabling communication between them. The two primary types of IP addresses are IPv4 and IPv6:

    • IPv4 (Internet Protocol version 4): The most commonly used IP address, made up of four sets of numbers (e.g., 192.168.0.1). While it’s sufficient for most networks, the growing number of devices online has led to IPv4 address exhaustion.
    • IPv6 (Internet Protocol version 6): A newer format, represented by eight groups of hexadecimal numbers (e.g., 2001:0db8:85a3:0000:0000:8a2e:0370:7334). IPv6 offers a vastly larger address space, making it ideal for the future as more devices connect to the internet.

    Key Differences Between IPv4 and IPv6

    The transition from IPv4 to IPv6 is necessary for addressing the limitations of IPv4 and preparing for future network growth. Here’s a breakdown of their key differences:

    • Address Space:
      • IPv4: Uses 32-bit addressing, allowing for about 4.3 billion unique addresses.
      • IPv6: Uses 128-bit addressing, providing approximately 340 undecillion addresses (a number so large it’s hard to fathom), making it future-proof for the growing internet of things (IoT).
    • Configuration:
      • IPv4: Often requires manual configuration or DHCP (Dynamic Host Configuration Protocol) for address assignment.
      • IPv6: Can auto-configure itself using Stateless Address Autoconfiguration (SLAAC), simplifying network management.
    • Security:
      • IPv4: Security features were added later in its development.
      • IPv6: Built with security in mind, supporting IPsec (Internet Protocol Security) by default.

    Why IPv6 is Important for the Future

    The transition to IPv6 is essential due to the limitations of IPv4, particularly with the rapid growth of connected devices. As the demand for IP addresses continues to rise, IPv6 ensures the availability of a virtually unlimited number of addresses. Key reasons why IPv6 is important include:

    • Address Space Exhaustion: With more devices requiring unique IPs, IPv4 addresses are running out. IPv6 solves this problem by offering an abundance of new addresses.
    • Improved Network Efficiency: IPv6 simplifies network configurations and increases overall performance due to its advanced features like auto-configuration and enhanced security.
    • Support for Emerging Technologies: IPv6 is critical for supporting future technologies, such as smart cities, autonomous vehicles, and the expansion of the IoT.

    The adoption of IPv6 ensures that networks remain scalable, secure, and capable of supporting future innovations without the constraints of IPv4’s limited address space.

    In summary, IP address definition is fundamental to understanding how devices connect to and communicate over a network. The shift from IPv4 to IPv6 plays a crucial role in ensuring that networks continue to grow and evolve with the demands of modern technology.

    Understanding the Differences Between IPv4 and IPv6

    When setting up a network, one key decision you’ll need to make involves understanding the two main IP address types: IPv4 and IPv6. The IP address definition refers to a unique string of numbers or characters that identifies a device on a network. While IPv4 has served us well for decades, the growing demand for internet-connected devices is pushing networks to transition toward IPv6. This section will break down the key differences between these two address types, helping you make an informed choice for your network setup.

    Overview of IPv4 and IPv6

    IPv4 (Internet Protocol version 4) and IPv6 (Internet Protocol version 6) are both standards for assigning IP addresses. IPv4 has been the backbone of internet communication since its inception, using a 32-bit address format. This gives IPv4 a total of 4.3 billion unique addresses, which, while sufficient in the past, is no longer enough to accommodate the exponential growth of connected devices.

    IPv6, introduced to solve IPv4’s limitations, uses a 128-bit address format, offering an almost unlimited number of unique IP addresses. This makes IPv6 essential for future-proofing networks as more devices come online. Here’s a simple comparison of an IPv4 and an IPv6 address:

    • IPv4 example: 192.168.1.1
    • IPv6 example: 2001:0db8:85a3:0000:0000:8a2e:0370:7334

    Key Differences Between IPv4 and IPv6

    The key differences between IPv4 and IPv6 lie in their address format, size, and capacity. Here’s a breakdown:

    • Address Length:
      • IPv4 uses 32-bit addresses, which are typically represented in four decimal numbers separated by dots (e.g., 192.168.1.1).
      • IPv6 uses 128-bit addresses, which are written in eight groups of four hexadecimal digits, separated by colons (e.g., 2001:0db8:85a3:0000:0000:8a2e:0370:7334).
    • Address Space:
      • IPv4 offers around 4.3 billion unique addresses, which, as the internet grows, is not enough to accommodate all devices.
      • IPv6, with its 128-bit structure, can provide 340 undecillion (a 3 followed by 38 zeros) unique addresses—effectively solving the issue of address exhaustion.
    • Header Complexity:
      • IPv4 has a more complex header with optional fields, making it more difficult to process.
      • IPv6 simplifies this by removing optional fields and using a fixed header size, improving efficiency in routing.
    • Adoption:
      • IPv4 is still the dominant protocol, but IPv6 adoption is increasing due to the limitations of IPv4, especially as the number of devices continues to grow.
      • According to DigitalOcean, while IPv6 adoption is essential for long-term growth, IPv4 remains prevalent in many networks today.

    IPv6 resolves many of the limitations of IPv4, especially in addressing the growing demand for IP addresses. The transition to IPv6 is essential for enabling continued internet expansion.

    Why IPv6 is Important for the Future

    IPv6’s role in the future of networking cannot be overstated. As more devices—such as smartphones, smart home gadgets, and industrial sensors—connect to the internet, the need for more IP addresses grows. IPv4’s address pool is nearly exhausted, with only a few remaining unassigned blocks.

    IPv6 addresses this challenge by offering an almost limitless supply of IP addresses, ensuring that new devices can connect without exhausting the available pool. It also brings enhanced security features, such as better support for IPsec, which improves data integrity and confidentiality.

    The widespread adoption of IPv6 is already in motion, with large-scale networks like Google, Facebook, and major ISPs transitioning to IPv6 to meet future demands. According to GeeksforGeeks, the growth of IPv6 adoption is crucial for scaling the internet in the coming years.

    As more organizations and service providers embrace IPv6, the technology will continue to drive the evolution of the internet and ensure it can handle the increasing load of devices, users, and services in a connected world.

    Pros and Cons of IPv4 vs. IPv6 for Your Network Setup

    When discussing network configurations, understanding the IP address definition is essential. An IP address is a unique identifier assigned to each device on a network, allowing it to communicate with other devices. The two most widely used IP versions today are IPv4 and IPv6. Each has its benefits and challenges, making it important to choose the one that best fits your network’s needs. In this section, we’ll explore the advantages and drawbacks of both IPv4 and IPv6, helping you make an informed decision for your network setup.

    Advantages of IPv4

    IPv4, with its IP address definition as a 32-bit address format, has been the standard for decades and remains widely adopted in network configurations. One of the main advantages of IPv4 is its broad compatibility with existing hardware and software, making it an excellent choice for small to medium-sized networks. Here are some key benefits:

    • Widespread Adoption: IPv4 is supported by almost all devices and networks, making it easy to implement.
    • Simplicity: The IPv4 configuration is relatively straightforward, with familiar network troubleshooting tools like ping and traceroute that help resolve connectivity issues.
    • Security: Though not inherently secure, IPv4 networks are often protected by NAT (Network Address Translation) and firewalls, which can add layers of security to the setup.

    For instance, in a home network setup, IPv4 addresses are commonly used, such as 192.168.0.1, because of their ease of use and compatibility with most routers and devices.

    Advantages of IPv6

    As the internet grows, IPv6 was designed to address the limitations of IPv4. The IP address definition for IPv6 uses a 128-bit address format, offering a vastly larger pool of addresses. Here are some of its key advantages:

    • More Addresses: IPv6 supports an almost infinite number of unique addresses, which is crucial as more devices connect to the internet.
    • Built-in Security: IPv6 has IPSec built-in, offering enhanced security features like data integrity and encryption, which makes it more secure than IPv4 by default.
    • Simpler Configuration: IPv6 simplifies network configuration by using stateless address autoconfiguration (SLAAC), which eliminates the need for DHCP (Dynamic Host Configuration Protocol) in many cases.

    An example of an IPv6 address is 2001:0db8:85a3:0000:0000:8a2e:0370:7334. For large enterprise networks, IPv6 is becoming the preferred choice, as it can support vast numbers of devices without running out of addresses.

    Challenges and Limitations of IPv4

    Despite its widespread adoption, IPv4 faces several challenges that can limit its effectiveness, especially as the internet continues to expand. The main drawbacks of IPv4 include:

    • Limited Address Space: With only around 4.3 billion possible addresses, IPv4 faces address exhaustion. This limitation makes it challenging to allocate unique IP addresses for all devices.
    • Network Address Translation (NAT): To overcome address shortages, NAT is often used. While useful, NAT adds complexity to network configurations and can interfere with some internet applications, such as peer-to-peer services.

    For example, home networks often rely on NAT to share a single public IPv4 address among multiple devices. While this works in most cases, it can cause issues with certain online games or applications that require direct peer-to-peer communication.

    Challenges and Limitations of IPv6

    IPv6 was developed to solve many of IPv4’s limitations, but it is not without its challenges. Some of the main issues with IPv6 adoption include:

    • Compatibility with Legacy Systems: Many older devices and software do not support IPv6, which can make the transition difficult in environments with a mix of new and old equipment.
    • Complex Transition: Transitioning from IPv4 to IPv6 is a significant challenge for organizations. The IPv6 adoption process can be slow and may require extensive testing and upgrading of existing systems.

    A real-world example could be a corporate network where certain legacy systems cannot be upgraded to support IPv6. In this scenario, businesses often face difficulties during the transition period from IPv4 to IPv6.

    Considering Global Availability and Performance in IPv4 vs. IPv6

    When considering global availability and performance, the differences between IPv4 and IPv6 can be significant. While IPv4 is still dominant, IPv6 offers several advantages in terms of global reach and network performance:

    • Routing Efficiency: IPv6 is designed to handle routing more efficiently than IPv4, which can lead to lower latency and better performance across long-distance connections.
    • IPv6’s Wider Reach: In regions where IPv6 adoption is more widespread, networks may experience faster speeds and less congestion. This is especially true in countries like Germany and China, where IPv6 has been adopted more rapidly.

    For example, IPv6-enabled regions may offer faster and more reliable connections, especially in areas with a high demand for IP addresses. IPv4-only regions, on the other hand, may face network congestion and slower speeds due to the limited number of available IP addresses.

    As you evaluate your network setup, consider the global performance implications of each IP address type, as well as the future-proofing benefits of IPv6 adoption.

    For further details on network configuration, you can check out our guide on IP Address Explained: Static vs Dynamic for 2025.

    How Your Choice of IP Address Impacts Network Performance and Security

    Understanding the IP address definition is crucial for anyone managing a network. An IP address serves as the identifier that allows devices to communicate over the internet or a local network. The choice of IP address—whether static or dynamic, IPv4 or IPv6—can significantly impact both network performance and security. In this section, we’ll break down how these choices affect your network, focusing on how they influence speed, efficiency, and security.

    How IP Address Allocation Affects Network Performance

    The allocation of IP addresses plays a key role in optimizing network performance. A well-chosen IP address strategy can help ensure better bandwidth management, reduce network congestion, and lower latency.

    • Static vs. Dynamic IP Addresses: Static IP addresses remain the same over time, providing consistency in network routing. This can be particularly beneficial for devices that need a stable connection, such as web servers or networked printers. In contrast, dynamic IP addresses are assigned temporarily and change over time, which can help optimize bandwidth usage by not reserving an IP address for devices that are only occasionally connected.
    • Network Efficiency: Allocating a static IP address to critical devices ensures they are always easily reachable, reducing disruptions caused by IP changes. On the other hand, dynamic IP allocation can lead to occasional disruptions, but it is more flexible and can optimize bandwidth usage in larger networks by avoiding unused addresses.

    Example: In a small office network, assigning static IP addresses to key devices like the router and file server ensures stable access. Meanwhile, other devices like laptops can be given dynamic IPs to prevent unnecessary consumption of available addresses.

    The Role of IP Addresses in Network Security

    IP addresses play a fundamental role in network security, influencing how easily devices can be accessed and attacked. The type of IP address you use—whether public or private—affects your network’s vulnerability to external threats.

    • Static vs. Dynamic IPs: A static public IP address can be a security risk because it provides a fixed point of entry for potential attackers. Since it doesn’t change, attackers can target it directly. On the other hand, dynamic IP addresses change periodically, making it harder for malicious actors to target a specific device or network over time.
    • Private vs. Public IP Addresses: Private IP addresses, which are used within internal networks, are not directly accessible from the internet. This adds a layer of security by keeping sensitive devices out of public view. Public IP addresses, however, are exposed to the internet and can be vulnerable to attacks unless properly protected.

    Example: If you’re hosting a website on a server with a static public IP, an attacker could target that IP directly. Using a dynamic IP address or a private IP address behind a firewall would significantly reduce this risk.

    Evaluating Security Risks of Different IP Address Configurations

    Choosing the right IP address configuration is not just about convenience—it’s also about managing risk. Different IP setups come with varying levels of exposure to security threats, and understanding these risks can help you make a more informed decision.

    • Static vs. Dynamic IP Risks: Static IP addresses are convenient, but they can also be a liability in terms of security. If an attacker knows the static IP, they can attempt attacks like port scanning or DDoS targeting. Dynamic IP addresses mitigate this risk by frequently changing the network’s point of entry, though they may still pose risks if not combined with other security measures like firewalls.
    • Private vs. Public IP Risks: Devices using private IP addresses are inherently more secure from direct external attacks, as they are hidden behind a router or firewall. However, they still need to be protected by internal security protocols, as breaches within the internal network could still occur. Public IP addresses, being exposed to the internet, must be secured with additional tools like firewalls and intrusion detection systems.

    Example: A home network using a private IP address for all devices is more secure because it’s shielded from the internet. If you needed to access the network remotely, you might use a VPN or port forwarding, but even then, a public IP should be protected with a strong password and encryption.

    By carefully considering your IP address configuration—whether static, dynamic, private, or public—you can better balance the needs for network performance and security. For a more in-depth understanding of IPv4 vs IPv6, check out this comparison. If you’re still unsure about private vs public IPs, this guide will clarify the differences and their security implications.

    Choosing Between Private vs. Public IP Addresses for Optimal Network Configuration

    Understanding the difference between public and private IP addresses is essential for optimizing your network configuration. In this section, we’ll break down what these IP addresses are, how they function, and help you decide which one best suits your needs based on factors like security, performance, and scalability.

    Understanding Public IP Addresses

    A public IP address is a unique identifier assigned to a device or server connected to the internet. It allows your network to be reachable from anywhere globally, making it crucial for devices that need to communicate over the internet.

    Public IPs are typically assigned by your Internet Service Provider (ISP) and are visible to everyone online. For instance, when you access a website or send an email, your public IP address is used to identify your device in the communication.

    Example of a public IP address: 192.0.2.45

    In a typical scenario, a web server hosting a website would be assigned a public IP address. This allows users across the world to access the website via the public internet.

    Understanding Private IP Addresses

    A private IP address, on the other hand, is used within a local network, like in your home or office. These addresses are not directly accessible from the internet, and they allow devices to communicate securely within the local network.

    Private IPs fall within specific address ranges, commonly:

    • 10.0.0.0 to 10.255.255.255
    • 172.16.0.0 to 172.31.255.255
    • 192.168.0.0 to 192.168.255.255

    For example, if you have multiple devices in your home, each of them will be assigned a private IP like 192.168.1.2, 192.168.1.3, etc. These devices communicate with each other through the router, which uses a public IP address to access the internet via Network Address Translation (NAT).

    When to Use Public vs. Private IP Addresses

    The decision between using a public or private IP address depends on the specific needs of your network. Here’s a simplified breakdown:

    • Use a public IP address when you need your device to be directly accessible from the internet. For example, if you’re hosting a website or a game server, you’ll need a public IP.
    • Use a private IP address for devices that don’t need internet exposure, like computers and printers within a local network. A router with a private IP can connect these devices to the internet via NAT.

    Real-world examples:

    • A small business may use a public IP for its office server, while the individual employees’ devices would use private IPs within the office network.
    • On the other hand, a large corporation might opt for both: public IPs for the servers and private IPs for internal office workstations.

    By understanding the differences and use cases for each, you can make a more informed decision on how to set up your network for the best balance of security, performance, and scalability.

    For further information on how static and dynamic IP addresses differ, check out IP Address Explained: Static vs Dynamic for 2025.

    Static vs. Dynamic IP Addresses: Which One Is Right for Your Network?

    An IP address is a unique identifier for devices connected to a network. The IP address definition determines how these addresses are assigned, and there are two primary types: static and dynamic. Understanding the differences between these types is crucial for optimizing network performance, security, and future-proofing. In this section, we’ll explore what static and dynamic IP addresses are, their benefits and drawbacks, and how to choose the right one for your network setup.

    What are Static IP Addresses?

    A static IP address is an address that doesn’t change. It is manually assigned to a device and remains fixed unless manually altered. Static IP addresses are commonly used for devices that require a constant connection, such as servers, networked printers, or surveillance cameras.

    For example, in a home network, you might set a static IP for a printer so that it’s always accessible from any device without needing to find its IP address each time.

    How to set a static IP address on a router:

    1. Log into your router’s admin page.
    2. Navigate to the DHCP or LAN settings section.
    3. Assign an IP address that falls outside of the DHCP range.
    4. Enter the device’s MAC address and the chosen IP address.

    This ensures the router will always assign the same IP to your device, maintaining a reliable connection.

    What are Dynamic IP Addresses?

    A dynamic IP address is assigned by a DHCP (Dynamic Host Configuration Protocol) server and can change periodically. Most devices on a home network, such as computers, smartphones, and smart TVs, are assigned dynamic IP addresses. These addresses are not fixed and are released when the device disconnects, to be reassigned to another device when it reconnects.

    For instance, when you connect to the internet, your router assigns a dynamic IP address to your device. The address can change each time you reconnect, but it is typically within a certain range set by the router.

    How dynamic IP assignment works:

    1. Your device sends a request to the router.
    2. The router, running DHCP, assigns an available IP address from its pool.
    3. The IP is assigned for a certain lease time, and it might change after that.

    Dynamic IP addresses are ideal for most personal devices, as they are easier to manage and don’t require manual configuration.

    Choosing Between Static and Dynamic IP Addresses

    When deciding between static and dynamic IP addresses, consider the specific needs of your network.

    When to use a static IP:

    • For devices that need to be always accessible, like servers or printers.
    • If you need to configure port forwarding for online gaming or remote access.
    • For network security setups where a fixed IP is necessary to ensure access control.

    When to use a dynamic IP:

    • For personal devices, such as smartphones, laptops, and tablets, that don’t need a permanent address.
    • For home networks where ease of setup and minimal management are priorities.
    • If your ISP provides dynamic IPs, reducing the need for manual configuration.

    In most cases, dynamic IP addresses are the default and easiest option, especially for home users. However, static IP addresses are crucial for certain devices and services that rely on consistent connectivity, such as hosting websites or running a file server.

    For more information on this topic, you can refer to Static IP vs Dynamic IP: What Is the Difference? and Difference between Static and Dynamic IP address (GeeksforGeeks). Additionally, learn more about the IP address on Wikipedia.

    Best Practices for IP Address Management and Optimization

    Understanding IP address management is critical for maintaining network efficiency and security. An IP address definition refers to the unique identifier assigned to each device in a network, which allows them to communicate with each other. Properly managing and optimizing IP addresses ensures your network remains secure, performs well, and scales with your needs. In this section, we’ll explore various strategies for managing IP addresses, optimizing allocations, and monitoring usage to prevent conflicts, helping you build a more efficient and secure network.

    IP Address Management Strategies

    When it comes to IP address management (IPAM), there are two main strategies: manual and automated. For smaller networks, manual IP address assignment might work best, where you assign specific IP addresses to each device. This can be done using the device’s network settings or through your router’s management interface.

    For example, in a home network with only a few devices (laptops, smartphones, printers), assigning each device a static IP address ensures easy tracking and prevents any accidental address conflicts. In this case, manually assigning IPs works efficiently as there are only a few devices to manage.

    On the other hand, for larger networks or businesses with more devices, automated management using Dynamic Host Configuration Protocol (DHCP) is generally recommended. DHCP automatically assigns IP addresses to devices as they connect to the network, saving you the trouble of manually assigning each one. This approach is scalable and reduces the risk of IP address conflicts, making it ideal for growing networks. By utilizing DHCP, you also free up time and reduce errors associated with manual configuration.

    Optimizing IP Address Allocation

    Efficient IP address allocation plays a major role in ensuring a network runs smoothly. It’s crucial to allocate IP addresses wisely, especially when managing both IPv4 and IPv6 addresses. One way to do this is through subnetting, which divides a larger network into smaller, more manageable subnetworks.

    For example, if you have a small office with 30 devices, you could set up a subnet for the main office, and one for guest Wi-Fi, making it easier to manage and separate traffic. Subnetting allows you to optimize address usage and reduce the likelihood of running out of IP addresses in a given subnet.

    Another key decision is whether to use static IPs or dynamic IPs. Static IPs are fixed and are often used for servers, printers, or devices that need a consistent IP address for access. Dynamic IPs, assigned by DHCP, are better for devices that don’t require a permanent address, such as mobile devices or laptops that frequently connect and disconnect from the network. By balancing these two allocation methods, you can ensure efficient use of your address space without overcomplicating management.

    Monitoring IP Address Usage to Prevent Conflicts

    Monitoring IP address usage is essential to preventing conflicts, which can disrupt network communication. An IP address conflict happens when two devices are assigned the same IP address, causing connection issues. To monitor and detect conflicts, you can use basic tools like the ping command or more advanced network management software.

    For example, using the ping command to check if a particular IP address is already in use is a simple method:

    ping 192.168.1.100

    If the address is already in use, the ping will return a response, indicating that the address is active. This helps you verify that an IP is free before assigning it to a device.

    For larger networks, keeping track of IP addresses through your router’s management interface or using IP management tools will provide a more comprehensive view. Regular monitoring can prevent duplicate assignments and ensure your network stays healthy. Additionally, setting up alerts for IP conflicts can automatically notify you when such issues occur, helping to resolve them promptly.


    By following these best practices for IP address management, you can optimize your network’s performance, prevent conflicts, and secure your network. Understanding the IP address definition, types of IP addresses (like IPv4 vs. IPv6), and how to allocate and monitor them effectively is key to ensuring that your network remains reliable and secure.

    How to Future-Proof Your Network with Proper IP Address Configuration

    When setting up a network, one of the most important decisions you’ll make is how to configure your IP addresses. Understanding the IP address definition and knowing the right choices for your network can help ensure scalability, security, and long-term performance. This section will guide you through the best practices for future-proofing your network’s IP configuration, focusing on key aspects such as IPv6 adoption, scalability considerations, ongoing management, and leveraging scalable infrastructure.

    Preparing for IPv6 Adoption

    As the demand for IP addresses grows, especially with the explosion of IoT devices and connected systems, IPv6 adoption has become essential. IPv4, the previous standard, offers a limited number of IP addresses, which are increasingly scarce. In contrast, IPv6 provides a vastly larger pool of addresses, solving this shortage and ensuring that your network remains scalable for future needs.

    To prepare for IPv6, you’ll need to ensure your network devices support it. A basic example of configuring an IPv6 address might look like this:

    sudo ifconfig eth0 inet6 add 2001:0db8:85a3:0000:0000:8a2e:0370:7334/64

    This command assigns an IPv6 address to the network interface eth0, allowing your system to communicate over IPv6. By adopting IPv6, your network will be able to handle far more devices and traffic, paving the way for the future of connected technology.

    Scalability Considerations for IP Addressing

    Choosing the right IP address configuration is critical for ensuring that your network can grow without limitations. IPv6 offers an immense advantage here, as it provides a virtually unlimited number of unique addresses. This is a stark contrast to IPv4, which has a much smaller address space that is quickly running out.

    For example, IPv6 allows for address allocations in blocks such as /64, providing 18 quintillion unique IP addresses per network. This means that your network can scale effortlessly without worrying about running out of address space. If you’re expanding your network, whether it’s for additional devices or new locations, IPv6 will help you avoid the headaches of address shortages.

    Ongoing IP Address Management for Network Growth

    As your network grows, effective IP address management (IPAM) becomes crucial to maintaining performance and security. Strategies like using dynamic IP addresses through DHCP (Dynamic Host Configuration Protocol) or employing subnetting can simplify the process of managing large networks.

    For example, a basic DHCP configuration for assigning dynamic IP addresses might look like this:

    dhclient eth0

    This command automatically assigns an IP address to the network interface eth0 from the available pool, ensuring that each device on your network has a unique IP address. Regular monitoring of address usage and subnetting will help prevent address conflicts and ensure your network can scale smoothly.

    Leveraging Scalable Infrastructure for Optimized Network Growth

    A scalable infrastructure is essential for ensuring that your network can grow alongside your business needs. By integrating IPv6 and leveraging scalable network infrastructure, you can avoid the constraints of IPv4 while enhancing network efficiency and future growth potential.

    For instance, as your network expands, you may want to implement a structure where different subnets are used for different departments or services. This way, even with an expanding user base, you can manage traffic and security efficiently. With IPv6’s large address space, this becomes much easier, allowing your infrastructure to grow without being hindered by IP address limitations.

    As your network scales, consider using tools like IP address management software that can automate assignments and help maintain a structured address plan, ensuring that you stay ahead of your network’s growth.

    By adopting IPv6, properly managing your IP addresses, and preparing for future scalability, you can ensure that your network remains secure, efficient, and ready for the next generation of connected devices.

    For further reading on IP address management strategies, you can check out our IP Address Explained: Static vs Dynamic for 2025.