Category: Uncategorized

  • What Is GUI: The Complete Guide to Choosing the Best One

    What Is GUI: The Complete Guide to Choosing the Best One

    What is a GUI? An Introduction to Graphical User Interfaces

    A Graphical User Interface (GUI) is a way for people to interact with software through visual elements, such as icons, buttons, and windows, rather than relying on text-based commands. In simpler terms, it’s the part of a program that you see and interact with, making it easier and more intuitive for users to perform tasks.

    The primary goal of a GUI is to simplify user interaction by providing a more visual and accessible experience compared to command-line interfaces. With a GUI, users can click on buttons, drag windows, and view images or text in a way that is both functional and aesthetically pleasing. Whether you’re using a smartphone app or a desktop software program, you’re likely interacting with a GUI that was carefully designed to improve ease of use and accessibility.

    Key elements of a GUI include:

    • Icons: Small images that represent different applications or actions. For example, the “trash can” icon on a computer is commonly used to represent deleting files.
    • Buttons: Clickable elements that perform specific actions. These are often labeled with text such as “OK” or “Cancel” to guide the user through tasks.
    • Windows: Rectangular areas of the screen that display content such as documents, images, or tools. These can be moved, resized, and minimized, giving the user control over how they interact with the software.

    A well-designed GUI enhances the user experience by making software more accessible and reducing the learning curve for new users. For more information on the basics of GUI design, check out this Graphical User Interface (GUI) definition on Wikipedia.

    To dive deeper into GUI design principles and explore examples of effective user interfaces, visit What is a GUI? Definition, examples, and essential design tips.

    The history of GUIs and their development can be further explored in this scholarly overview of graphical user interfaces, which discusses the evolution of GUIs within human-computer interaction research.

    Key Features and Functions of a Graphical User Interface

    A Graphical User Interface (GUI) is essential in providing an interactive experience for users interacting with a device or software. But what is GUI exactly, and what makes it effective? A GUI allows users to interact with software or hardware using visual elements like icons, buttons, and menus, instead of requiring command-line text input. This section will explore the key features and functions of a GUI, including design principles, different types, and what makes them user-friendly. By the end, you’ll have a clearer understanding of how to assess and select the right GUI for your needs.

    Understanding GUI Design Principles for Better User Experience

    When it comes to GUI design, there are a few fundamental principles that ensure users can navigate systems effectively and efficiently. These include simplicity, consistency, and feedback.

    • Simplicity: A clean, straightforward interface prevents users from feeling overwhelmed. Simple designs often feature minimalistic layouts with essential functions easily accessible. For example, the Google homepage is a prime example of simplicity — it’s easy to use with just a search bar and two buttons.
    • Consistency: Consistent design ensures that similar actions or commands are represented similarly throughout the interface, reducing confusion. For instance, on most websites, the search bar is typically placed at the top or center of the screen, making it instantly recognizable.
    • Feedback: Clear feedback reassures users that their actions have been acknowledged. A loading spinner that appears when a page is loading is an example of good feedback, ensuring users are aware that the system is processing their request.

    A poor GUI might ignore these principles, making it difficult for users to navigate. For example, interfaces that bombard users with unnecessary elements or have inconsistent icons can lead to frustration.

    Different Types of GUIs: Desktop, Web, and Mobile

    When thinking about GUI systems, it’s important to understand the differences between the types of devices or platforms they support. The three most common types of GUIs are desktop, web, and mobile.

    1. Desktop GUIs: These are traditional computer interfaces, such as Windows or macOS. They often feature multiple windows, drop-down menus, and more complex controls due to the larger screen real estate. They are great for tasks requiring focused attention and multiple processes, like video editing software or development environments.
    2. Web GUIs: Accessible through a browser, web-based GUIs are often responsive, meaning they adjust to different screen sizes. Popular web-based applications like Gmail or Google Docs offer a seamless user experience across devices. One advantage of web GUIs is that they are platform-independent, meaning users can access them from any device with an internet connection.
    3. Mobile GUIs: These are designed for smartphones and tablets. Since the screen size is smaller, mobile GUIs are more focused on touch gestures like swiping and tapping. They need to be highly intuitive and responsive. For example, the Instagram app offers a streamlined design, optimized for mobile use, with clear icons and minimal text.

    Each type of GUI comes with its own set of strengths. Desktop GUIs tend to be powerful for desktop-focused tasks, web GUIs are flexible and universal, and mobile GUIs prioritize speed and ease of use on smaller screens.

    What Makes a Graphical User Interface User-Friendly?

    A user-friendly GUI is one that makes tasks simple and intuitive, offering features that enhance usability. Key elements of a user-friendly GUI include:

    • Clear Navigation: A well-organized structure allows users to find what they need quickly. For example, Amazon’s website places its menu in a consistent location, with clear categories like “Home,” “Deals,” and “Orders,” so users can easily navigate between sections.
    • Intuitive Layout: This refers to the logical arrangement of content and functions. For instance, mobile apps like WhatsApp have an intuitive layout, where users can immediately see their contacts, chats, and status updates.
    • Accessibility: A good GUI takes into account users with varying abilities. Features such as text-to-speech and customizable font sizes enhance the accessibility of an interface. For instance, Apple’s iOS includes accessibility settings that allow users to change font size or use voice control for a more inclusive experience.

    In conclusion, the design principles and features discussed above, such as clear navigation, feedback, and simplicity, are critical to creating a user-friendly GUI. Whether you’re using a desktop, web, or mobile interface, these factors enhance your experience and ensure smooth interaction with your device or application. For further insights on improving user interface designs, consider exploring resources like Jakob Nielsen and Rolf Molich’s 10 User Interface Design Guidelines.

    Comparing Different GUI Systems: What Works Best for Designers?

    When deciding on the best graphical user interface (GUI) system for a project, designers face a variety of options. Understanding what a GUI is and how different systems perform can significantly impact your design workflow. A GUI is the visual interface that allows users to interact with software or hardware through graphical icons and visual indicators, instead of text-based interfaces. Whether you’re working on a desktop application or a web-based platform, selecting the right GUI system can affect performance, user experience, and overall efficiency. In this section, we’ll explore various GUI systems, helping you determine which works best for your specific design needs. For more foundational insights into GUIs, check out our What Is GUI: The Ultimate Guide.

    How to evaluate the performance of different GUI solutions

    When evaluating different GUI solutions, it’s crucial to focus on three key factors: speed, responsiveness, and resource efficiency. A well-performing GUI should be quick to load, responsive to user input, and light on system resources.

    • Speed: The interface should load quickly and feel responsive during interaction. This ensures that users don’t experience delays or lags.
    • Responsiveness: The GUI must react instantly to user actions, whether it’s a button click or a drag-and-drop action.
    • Resource Efficiency: A GUI that consumes too much CPU or memory can slow down the application, especially in resource-constrained environments.

    To assess GUI performance, tools like Lighthouse or WebPageTest can be invaluable. These tools test performance metrics like loading time and responsiveness, providing actionable insights on how to optimize the interface. For example, you can run a test on a web application with Lighthouse by simply running:

    lighthouse https://yourwebsite.com

    This will generate a report highlighting areas for improvement, such as optimizing images or reducing JavaScript execution time. By evaluating performance through these tools, you can ensure that your GUI system provides a smooth and efficient experience.

    Understanding GUI frameworks and their impact on development

    A GUI framework is a set of tools and libraries designed to make GUI development faster and easier. These frameworks provide pre-built components like buttons, menus, and windows, so developers don’t have to build everything from scratch. Using a GUI framework can significantly speed up the development process and allow for easier customization.

    Popular GUI frameworks include Qt and GTK. Qt, for instance, is known for its cross-platform capabilities, allowing you to create applications that run on Windows, Mac, and Linux. GTK, on the other hand, is widely used in the Linux ecosystem and is known for its flexibility and open-source nature.

    By using a framework, you can build a GUI that is both functional and customizable without getting bogged down by the technical details of GUI design. For example, with Qt, you can quickly create a window with a button by writing just a few lines of code:

    QPushButton *button = new QPushButton("Click Me", parent);
    button->show();

    This simple example demonstrates how frameworks streamline the development process by providing ready-to-use components.

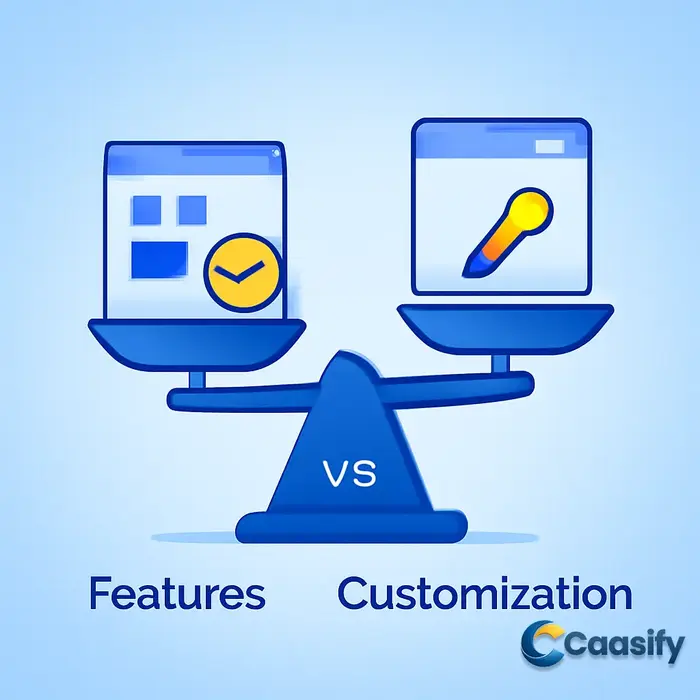
    GUI customization options and their benefits

    Customization is a significant aspect of designing a GUI, as it helps enhance user experience and usability. Common customization options include adjusting the theme, changing colors, and rearranging the layout.

    • Themes: Changing the overall theme of a GUI can improve aesthetics and align it with your brand.
    • Colors: Customizing colors can help guide users’ attention and improve accessibility.
    • Layout: You can change the layout to suit different user needs or to optimize space.

    These customization options allow you to adapt the GUI to meet specific design goals. For instance, if you were designing a banking app, you might choose a calming color scheme and simple layout to make users feel secure. Tools like Qt Designer make this customization process easier by offering drag-and-drop interfaces for changing the layout and appearance of your GUI components.

    Security considerations when implementing a GUI

    Security is a critical concern when implementing a GUI, especially when handling sensitive user data. It’s essential to consider features like data encryption and secure authentication when designing your user interface.

    • Data Encryption: Ensure that any sensitive information entered by the user, such as passwords, is encrypted both in transit and at rest.
    • Secure Authentication: Implement authentication mechanisms like multi-factor authentication (MFA) to protect user accounts.

    For example, many modern GUI frameworks provide built-in support for password masking and secure data storage. In Qt, you can easily create a password input field that masks the entered text with:

    QLineEdit *passwordField = new QLineEdit;
    passwordField->setEchoMode(QLineEdit::Password);

    This simple addition enhances the security of your application by preventing unauthorized users from seeing the password.

    Cloud-based solutions for GUI optimization: A scalable approach

    Cloud-based solutions offer significant advantages for optimizing GUIs, particularly when it comes to scaling and performance. By hosting your GUI in the cloud, you can improve load times, scale resources as needed, and ensure that users from different locations experience fast response times.

    Services like Amazon Web Services (AWS) provide cloud solutions for hosting and scaling GUIs. By using cloud resources, you can ensure that your application performs well, even under heavy usage. For example, using AWS, you can easily scale your GUI application by adding more computing power or bandwidth based on user demand, ensuring a smooth experience for all users.

    Incorporating cloud solutions also allows you to focus on developing your GUI without worrying about managing physical infrastructure. This is particularly useful for projects with fluctuating traffic or growing user bases.

    By considering these aspects, you can make an informed decision about the best GUI system for your needs, ensuring optimal performance, customization, and security.

    Choosing the Right GUI for Your Project: Factors to Consider

    When deciding which Graphical User Interface (GUI) to use for your project, it’s essential to understand key factors like scalability, performance, and customization. The right GUI can make a significant difference in how smoothly your project runs, ensuring a user-friendly experience and optimal system performance. In this section, we’ll guide you through the process of evaluating different GUI systems and selecting the one best suited to your project’s needs.

    Ensuring scalability and performance with customizable virtual machines

    Scalability and performance are critical when selecting a GUI system, especially if you expect your project to grow over time. A GUI that works well on a small scale may not perform as efficiently when the system expands. To ensure smooth operation, you need to consider how scalable and customizable the underlying virtual machine (VM) is.

    A customizable virtual machine allows you to adjust system resources like memory, CPU, and storage, which directly impacts GUI performance. For instance, if your project grows and requires more processing power or memory, a VM lets you scale resources up or down based on demand. This flexibility is especially useful when you’re working with GUI systems that need to handle heavy workloads or multiple users.

    Example: Suppose you’re developing a project that involves graphic-heavy tasks, such as video editing or 3D modeling. As your user base increases, you may experience performance issues with the GUI. By selecting a customizable virtual machine on a cloud platform like AWS or Google Cloud, you can increase the CPU or RAM as needed to keep the GUI responsive, ensuring that users continue to have a seamless experience.

    Here are some practical aspects to consider when selecting a VM for your GUI system:

    • CPU and Memory: Choose a VM that offers enough CPU cores and memory to handle the GUI’s demands, especially if you’re running complex operations or simulations.
    • Storage: Make sure there’s enough storage for all the application files and user data. Customizable VMs allow you to increase storage capacity when necessary.
    • Load Balancing: Some VM configurations offer load balancing to distribute tasks evenly across multiple servers, which is essential for performance when the number of users increases.

    A real-world example is a graphic design firm using a GUI system for rendering high-resolution images. Initially, they may only need a basic VM setup, but as the team grows and works on more complex designs, a customizable VM can scale up to support the increased processing power required, keeping the GUI responsive and efficient.

    Conclusion

    Understanding what is GUI and how to choose the right one for your project is a crucial step in creating a smooth, efficient user experience. By focusing on scalability, performance, and virtual machine customization, you can ensure that your chosen GUI system grows with your project’s needs. Whether you’re working with a small team or handling a large, complex project, selecting the right configuration will set you up for long-term success. If you’re also looking to explore the foundational elements of building a website, check out What Is a Website: The Ultimate Guide to Types and Setup.

    Optimizing Your GUI for Better User Experience and Performance

    A well-designed and optimized GUI (Graphical User Interface) is crucial for creating a seamless user experience. But what is GUI, exactly? It’s the interface through which users interact with software or hardware, often visualized through buttons, icons, and menus. Optimizing your GUI for speed, responsiveness, and usability is essential for keeping users engaged and satisfied. In this section, we’ll explore effective strategies to improve your GUI’s performance, monitor it after deployment, and troubleshoot common issues that may arise.

    Best practices for optimizing GUI for speed and responsiveness

    To enhance the speed and responsiveness of your GUI, focus on optimizing assets and minimizing unnecessary elements. Slow-loading interfaces can quickly frustrate users, so streamlining the design can make a significant difference.

    1. Minimize loading times: Reducing the size of images, videos, and other media files is one of the easiest ways to speed up your GUI. Use tools like Photoshop or online image compressors to shrink file sizes without losing quality. For images that don’t need to load immediately, consider lazy loading, where content loads only when it becomes visible on the screen.
    2. Optimize UI elements: Avoid overloading your GUI with too many components that can slow it down. Streamlining your interface by removing unnecessary elements will help improve responsiveness. Also, consider using vector graphics (SVGs) for icons, as they are lightweight and scalable.
    3. Responsive design: Your GUI should adapt seamlessly across various screen sizes and devices. This ensures a consistent user experience, whether someone is using a desktop, tablet, or smartphone. Responsive design frameworks like Bootstrap or CSS media queries can help ensure your GUI adjusts correctly to different device sizes.

    For measuring the performance of your GUI, use browser developer tools such as Google Chrome’s Developer Tools to analyze load times and identify bottlenecks. These tools provide insights into how quickly elements are loading, allowing you to spot performance issues and fix them promptly.

    User feedback loops for continuous GUI improvement

    User feedback is an essential component for refining your GUI. By continuously collecting and incorporating user insights, you can make informed improvements that enhance the overall experience.

    1. Surveys and questionnaires: Simple user surveys can help you understand how people feel about your GUI. Use tools like Google Forms or Typeform to gather feedback on areas where users face difficulties or experience delays.
    2. User testing: Conducting usability tests allows you to observe real users interacting with your GUI. You can identify pain points and areas for improvement by recording interactions and asking users to complete specific tasks. Tools like UserTesting and Lookback.io can be useful for this.
    3. Iterative design: Implementing an iterative design process means making regular updates based on user feedback. After each round of testing or feedback collection, prioritize the most significant issues and release updates accordingly.

    By establishing a feedback loop, you ensure that your GUI remains user-friendly and aligned with your audience’s needs. It’s important to track changes and improvements over time to gauge the effectiveness of the updates you’ve implemented.

    Monitoring and maintaining GUI performance after deployment

    Once your GUI is live, monitoring its performance is critical to ensure it continues running smoothly. Without regular monitoring, performance issues can slip through the cracks, affecting the user experience.

    1. Use performance monitoring tools: Tools like Google Lighthouse or WebPageTest provide in-depth performance metrics, including loading times, accessibility, and best practices. Running regular tests helps catch performance bottlenecks that can slow down your GUI.
    2. Real-time monitoring: Consider using real-time monitoring tools, such as New Relic or Pingdom, to track the performance of your GUI over time. These tools can alert you when performance metrics drop below a certain threshold, allowing you to address issues promptly.
    3. Fixing regressions: After deploying updates, keep an eye out for any regressions—unintended changes that can affect performance. Using automated testing frameworks like Selenium can help you identify issues that arise after updates.

    By regularly monitoring your GUI and addressing performance problems promptly, you ensure your interface remains fast and responsive over time.

    Troubleshooting common GUI issues and how to fix them

    Even with careful planning, GUI issues can arise. Here are some common problems and their solutions:

    1. Slow load times: If your GUI is loading slowly, check the sizes of images and other resources. Compress them using image optimization tools or use lazy loading to load content only when needed. Also, consider using a content delivery network (CDN) to serve assets faster to users across different regions.
    2. Broken elements: Occasionally, some GUI components like buttons or forms might stop working. In these cases, check the browser’s developer tools for console errors and debug them. It could be a JavaScript error or a missing resource causing the issue. Also, test the functionality on different browsers to ensure cross-browser compatibility.
    3. UI elements not displaying correctly: If UI elements are not showing up as expected, it could be due to CSS issues or conflicts. Inspect the CSS styles applied to the elements and ensure they are responsive. If there are issues with alignment, check the layout settings and adjust them as needed.

    By addressing these common issues and using the troubleshooting tips provided, you can maintain a smooth and functional GUI that provides a great user experience.


    Optimizing your GUI is an ongoing process that involves performance improvements, continuous feedback, regular monitoring, and effective troubleshooting. By following the tips and strategies outlined here, you’ll ensure your GUI delivers the speed, responsiveness, and usability that users expect. If you’re interested in understanding the broader context of how web browsers impact your GUI, check out this detailed guide on What Is A Web Browser? The Complete Guide to Choosing the Best One.

  • Web Hosting: No-Fail Solutions for Scaling Your Website in 2025

    Web Hosting: No-Fail Solutions for Scaling Your Website in 2025

    What is Web Hosting and Why It Matters for Your Website

    Web hosting is the service that allows individuals and organizations to make their websites accessible via the internet. Without web hosting, your website would not be able to live online, as hosting companies provide the infrastructure to store your website’s files and data. There are various web hosting types available, each with its own benefits depending on your website’s needs. In this section, we will explore the different types of web hosting and provide you with guidance on how to choose the right one for your website. For a broader overview, you can also visit web hosting service – Wikipedia or What Is Web Hosting? – GeeksforGeeks.

    Overview of Web Hosting Types: Shared, VPS, Dedicated, and Cloud

    When considering web hosting, it’s important to understand the main types available: shared hosting, VPS hosting, dedicated hosting, and cloud hosting. Each offers distinct features that cater to different needs.

    • Shared Hosting: This is the most common and affordable type of hosting, where multiple websites share the same server resources. It’s like renting an apartment in a building where you share the space and utilities with others. Shared hosting is ideal for small websites with low traffic.
      • Pros: Affordable, easy to set up, good for beginners.
      • Cons: Limited resources, slower performance with increased traffic.
    • VPS Hosting (Virtual Private Server): VPS hosting offers more control and resources than shared hosting. It’s like renting your own apartment in a building. You still share the server, but your space is isolated from others. This is a good option for websites with moderate traffic and growth potential.
      • Pros: More control, better performance, scalable.
      • Cons: More expensive than shared hosting, requires some technical knowledge.
    • Dedicated Hosting: In dedicated hosting, you have an entire server all to yourself. This gives you maximum control over the server and its resources. Dedicated hosting is best for large websites with high traffic.
      • Pros: High performance, full control, customizability.
      • Cons: Expensive, requires technical expertise to manage.
    • Cloud Hosting: Cloud hosting allows you to use multiple servers connected together to host your website. This offers high scalability and reliability, as resources can be allocated dynamically based on demand. Cloud hosting is a great choice for websites expecting rapid growth.
      • Pros: Scalable, reliable, flexible.
      • Cons: Can be complex to manage, pricing can vary based on usage.

    For a more in-depth comparison of hosting types, check out Types of Web Hosting Explained: Shared, VPS, Dedicated, and Cloud Hosting.

    How to Choose the Right Web Hosting Type for Your Needs

    Choosing the right web hosting type for your website depends on several factors, including the size of your site, expected traffic, and budget. Here are some basic guidelines to help you make the right choice:

    • Small Personal Websites or Blogs: If you’re just starting out with a small personal website or blog, shared hosting is likely sufficient. It’s cost-effective and easy to manage. You can always upgrade to a more powerful option as your site grows.
    • Medium-Sized Websites: For websites that are growing in size and traffic, VPS hosting might be the right choice. It offers more resources and better performance while still being affordable compared to dedicated hosting.
    • Large Websites or Businesses: If your website is large or you expect significant traffic, dedicated hosting could be the best option. It offers full control and the resources needed to handle high volumes of traffic efficiently.
    • Websites with Rapid Growth: If you’re anticipating rapid growth or need flexibility, cloud hosting is a great choice. It scales easily as your website’s traffic increases, and you only pay for the resources you use.

    In addition to these factors, you should also consider your budget and technical expertise. Shared hosting is the most budget-friendly but offers limited control, while dedicated hosting provides more power but at a higher cost. For more detailed guidance on selecting the right hosting for your needs, you can visit Types of Web Hosting: Key Differences & How to Choose One – SiteGround Academy.

    By understanding your website’s size, traffic expectations, and growth potential, you can choose the best web hosting solution that fits your needs.

    Understanding Different Types of Web Hosting Services

    When starting a website, one of the most important decisions you’ll make is choosing the right web hosting service. Web hosting is the backbone of your online presence, providing the necessary infrastructure to make your website accessible on the internet. However, not all web hosting services are created equal. There are different types, each with its own benefits and use cases. In this section, we’ll explore the main types of web hosting—shared hosting, VPS hosting, dedicated hosting, and cloud hosting—so you can better understand which one will meet your needs.

    Overview of Web Hosting Types: Shared, VPS, Dedicated, and Cloud

    There are four main types of web hosting: shared hosting, VPS hosting, dedicated hosting, and cloud hosting. Each has its own set of advantages depending on the scale and requirements of your website.

    • Shared Hosting: This is the most affordable type of web hosting. With shared hosting, your website shares a server and its resources with multiple other websites. It’s ideal for smaller websites or blogs that don’t expect heavy traffic. A common example is a personal blog or a small portfolio website. Shared web hosting explained.
    • VPS Hosting: VPS (Virtual Private Server) hosting offers more resources and control than shared hosting. While you still share a server with others, each website gets its own virtual space with dedicated resources. This is a great option for growing websites that need more power and flexibility, such as medium-sized businesses or e-commerce sites. Shared, VPS and dedicated hosting differences.
    • Dedicated Hosting: With dedicated hosting, your website has an entire server to itself. This provides maximum performance, security, and control, making it the best option for large websites or businesses that expect high traffic. For example, a large e-commerce store or a media-heavy website would benefit from dedicated hosting.
    • Cloud Hosting: Cloud hosting allows your website to be hosted on a network of interconnected servers, providing scalability and flexibility. It’s ideal for websites that anticipate growth and need the ability to handle varying traffic loads. For example, an online store with fluctuating demand might benefit from cloud hosting. Guide to different web hosting types in 2025.

    Each type of hosting suits different needs, and understanding these differences will help you make the best choice for your website.

    How to Choose the Right Web Hosting Type for Your Needs

    When deciding which web hosting type is best for your website, several factors need to be considered, such as your website’s size, expected traffic, and future growth. Here are a few tips to help you make the right decision:

    • Website Size: If you’re just starting with a small personal blog or portfolio, shared hosting might be the best choice. It’s cost-effective and perfect for low-traffic sites. For example, a simple blog with a few pages doesn’t require the power of more expensive hosting options.
    • Traffic and Growth: If you expect moderate traffic or plan to grow over time, consider VPS hosting. It’s an excellent choice for websites that need more resources but aren’t ready for the expense of dedicated hosting. A growing business site with a moderate number of visitors would do well with VPS hosting.
    • Budget: If you’re on a tight budget, shared hosting is your best option, as it offers a low-cost entry point. However, keep in mind that as your site grows, you may need to upgrade to a VPS or even dedicated hosting.
    • Scalability: For websites that may experience varying levels of traffic, cloud hosting is an excellent option. It allows you to scale resources up or down depending on your needs, making it ideal for websites with fluctuating traffic, like an online store during holiday sales.

    In summary, assess your website’s size, traffic expectations, and budget to help you choose the best hosting solution. Whether you go with shared, VPS, dedicated, or cloud hosting, ensure your choice supports your website’s current and future needs.

    How Web Hosting Works: The Basics Explained

    Understanding how web hosting works is essential for anyone looking to build a website. Whether you are starting a blog, launching an online store, or creating a portfolio, web hosting plays a critical role in making your site accessible to users around the world. At its core, web hosting is a service that stores your website’s files and makes them available to internet users. This section explains the basics of web hosting, including its key components, how it functions, and the connection between domain names, DNS, and hosting services.

    How Web Hosting Functions: Key Concepts and Components

    Web hosting refers to the service of providing storage space and access for websites on the internet. When you create a website, all its files—such as text, images, and videos—need to be stored somewhere accessible. This is where web hosting comes in. It provides the infrastructure and resources to store your site’s files on a server, which is a powerful computer that is always connected to the internet.

    Key components of web hosting include:

    • Servers: The hardware that stores your website’s files. Servers are specialized computers that handle data requests from users’ browsers.
    • Storage: Space on a server where all your website’s files, databases, and scripts are stored.
    • Bandwidth: The amount of data that can be transferred between your website and its visitors. Higher bandwidth allows more traffic and faster load times.
    • Uptime: This refers to how often your website is available to visitors. A reliable hosting provider ensures high uptime, meaning minimal downtime for your website.

    A simple example of how web hosting works can be seen when you visit a website. When you type a website’s address into your browser, the browser sends a request to the server where the website’s files are stored. The server then sends the files back to the browser, which displays them as a fully functional website.

    Different types of web hosting, such as shared hosting, VPS hosting, and dedicated servers, impact the performance and scalability of a website. Shared hosting is a cost-effective solution where multiple websites share the same server resources, making it suitable for smaller websites. VPS hosting offers more control and resources, while dedicated servers are ideal for large websites with high traffic demands. Understanding these options helps you choose the right hosting type for your needs.

    For a more in-depth explanation of how web hosting functions, you can refer to the What Is Web Hosting? – Hostinger tutorial for beginners.

    Domain Names, DNS, and the Role of Hosting in Website Accessibility

    A domain name is the address users type into their browser to access a website, like www.example.com. However, a domain name alone doesn’t store any content. It needs to be connected to a server that houses the website’s files. This is where DNS (Domain Name System) comes into play. DNS is a system that translates domain names into IP addresses, directing users to the correct server.

    Here’s how the process works:

    1. You enter a domain name in the browser.
    2. DNS looks up the domain and finds the corresponding IP address for the hosting server.
    3. The browser uses the IP address to access the hosting server and retrieve the website’s files.

    Without DNS, users would need to remember the IP address of each website, which is impractical. By connecting the domain name to the hosting server, DNS ensures that users can access websites easily by remembering simple names rather than complex numerical addresses.

    The relationship between DNS and hosting is fundamental for website accessibility. A reliable hosting provider ensures that your DNS settings are properly configured so your website is always reachable.

    To explore more about DNS and its role in web hosting, check out this guide on How web hosting works – WordPress.com.

    Shared Hosting vs. VPS Hosting: Which is Right for Your Website?

    When choosing a web hosting solution for your website, understanding the differences between shared hosting and VPS hosting is crucial. Both offer distinct benefits, but your decision depends on your website’s needs, budget, and growth potential. In this section, we’ll break down the pros and cons of each hosting option to help you determine which is the best fit for your website.

    Pros and Cons of Shared Hosting

    Shared hosting is one of the most common and affordable options for website hosting. It involves hosting multiple websites on the same server, where each website shares the server’s resources (CPU, memory, bandwidth, etc.).

    Pros of Shared Hosting:

    • Cost-effective: Shared hosting is the most budget-friendly option, making it ideal for individuals or small businesses just starting out.
    • Ease of use: Most shared hosting plans come with user-friendly control panels (like cPanel), making it easy for beginners to manage their websites.
    • Support included: Hosting providers typically offer customer support, which can help resolve common issues quickly.

    Cons of Shared Hosting:

    • Limited resources: Since multiple websites share the same server, the resources available for your website are limited. This can lead to slower performance if traffic spikes on other sites.
    • Performance issues: High traffic on one site can impact the performance of other websites on the same server, affecting site speed and reliability.
    • Less control: You don’t have full control over the server configuration, which can limit your ability to optimize performance or install custom software.

    Example: A small blog with minimal traffic would perform well with shared hosting, as the low cost and simplicity outweigh the resource limitations. However, as the blog grows and attracts more visitors, performance could suffer, and an upgrade may be necessary.

    Advantages of VPS Hosting

    VPS hosting (Virtual Private Server) offers more power and flexibility compared to shared hosting. With VPS, a physical server is divided into multiple virtual servers, each with its own dedicated resources.

    Key advantages of VPS hosting:

    • More resources: Unlike shared hosting, VPS hosting provides dedicated CPU, RAM, and bandwidth, ensuring that your website has the resources it needs to perform well, even with higher traffic.
    • Greater control: VPS users have root access to their server, allowing them to install custom software, manage configurations, and tweak performance settings.
    • Scalability: VPS hosting is more scalable, making it easier to upgrade resources (like RAM or storage) as your website grows.
    • Improved performance: With dedicated resources, your site is less likely to be affected by the traffic of other websites.

    Example: A growing e-commerce website with fluctuating traffic would benefit from VPS hosting. The ability to adjust resources and maintain performance during peak traffic times ensures a better experience for visitors and customers.

    Which Option Best Suits Your Website’s Needs: Budget, Traffic, and Growth

    When deciding between shared hosting and VPS hosting, you need to consider several factors, including your budget, expected traffic, and long-term growth.

    • Budget: Shared hosting is the most affordable option, often costing just a few dollars per month. It’s a good fit for small websites, blogs, or personal projects with limited resources and traffic. On the other hand, VPS hosting comes at a higher price point but provides greater control and resources, making it more suitable for growing websites that require more performance and flexibility.
    • Traffic: If your website is expecting low to moderate traffic, shared hosting is likely sufficient. However, if you anticipate high traffic or need to ensure consistent performance during traffic spikes, VPS hosting is a better option due to its dedicated resources.
    • Growth potential: For websites planning to scale in the future, VPS hosting offers better growth potential. As your site’s traffic increases, you can easily upgrade resources without the limitations of shared hosting.

    Example: A small personal blog can start with shared hosting, but as it grows and gains more visitors, transitioning to VPS hosting can provide better performance and scalability.

    Example of a Scalable VPS Solution: Caasify’s Customizable Virtual Machines

    For those looking for a scalable VPS hosting solution, Caasify’s customizable virtual machines offer a great option. With VPS plans designed to grow with your website, Caasify provides the flexibility to adjust resources (such as CPU, RAM, and storage) as your needs evolve.

    Benefits of Caasify’s VPS solutions:

    • Customizable resources: Choose the exact amount of CPU, memory, and storage your website requires, and easily scale up as traffic and resource demands increase.
    • Flexibility: Caasify’s VPS hosting plans are adaptable to a variety of website types, whether you’re running a small blog or a large e-commerce site.
    • Reliability: With dedicated resources, your site’s performance won’t be impacted by other websites, ensuring a smooth experience for your visitors.

    Example: A growing online store might start with a basic VPS plan on Caasify, but as sales increase and the site experiences higher traffic, the store can easily upgrade to a more powerful VPS without downtime or performance loss.

    By choosing a scalable VPS hosting solution like Caasify’s, you can ensure that your website has the resources it needs to succeed both now and in the future.

    For more detailed insights on VPS hosting, check out VPS Hosting: The Ultimate Guide to Choosing the Best Option.

    How to Choose the Right Web Hosting Provider for Your Website

    Choosing the right web hosting provider is a crucial step in building your online presence. Your web hosting service is the backbone of your website, affecting its speed, security, uptime, and overall performance. Whether you’re launching a small blog or a business site, selecting the best hosting provider can make a significant difference. In this guide, we’ll walk you through the factors to consider when choosing a web hosting provider, how to assess their reputation, and how to compare pricing and plans.

    Factors to Consider When Choosing a Hosting Provider

    When choosing a web hosting provider, there are several key factors that you should consider to ensure the provider meets your website’s specific needs.

    • Uptime: A hosting provider’s uptime is essential. You want to choose a provider that guarantees at least 99.9% uptime to ensure your site is accessible to visitors without interruptions.
    • Customer Support: Look for 24/7 customer support. As a beginner, you may need assistance with technical issues, so it’s crucial to have responsive support available.
    • Storage and Bandwidth: Depending on the type of website, you may need more storage or bandwidth. For smaller websites, shared hosting might be enough, but larger websites with more traffic could benefit from VPS or dedicated hosting.
    • Scalability: Your website may grow over time, and so should your hosting plan. Choose a provider that allows easy upgrades as your needs increase.
    • Security Features: Ensure the provider offers SSL certificates, regular backups, and other essential security measures to protect your website and its visitors.

    For example, if you’re starting a blog, shared hosting might be enough, but if you plan to scale your eCommerce store, VPS or dedicated hosting would better serve your needs due to the additional resources and performance.

    How to Assess Your Hosting Provider’s Reputation and Reliability

    Before choosing a hosting provider, it’s important to assess their reputation and reliability. This will give you confidence that your website is in good hands.

    • Check Reviews: Read customer reviews on platforms like Trustpilot or Reddit. These can provide insights into the provider’s reliability, customer support, and performance.
    • Uptime Statistics: Look for uptime guarantees and statistics from real users. Hosting providers often claim 99.9% uptime, but it’s useful to check if actual customer experiences align with these claims.
    • Industry Recognition: Some hosting providers have been recognized by industry experts. Check for awards or certifications that demonstrate the provider’s commitment to quality service.

    For instance, if a provider consistently gets high ratings on review sites and offers uptime guarantees with proven reliability, you can be more confident in their services.

    Comparing Pricing and Plans Between Hosting Providers

    Web hosting pricing can vary significantly depending on the type of hosting plan and features. It’s essential to compare plans to find one that fits your budget and requirements.

    • Shared Hosting: Shared hosting is the most affordable option, typically costing between $2 to $10 per month. It’s ideal for small websites or blogs with low to moderate traffic.
    • VPS Hosting: VPS hosting is a step up from shared hosting, with prices ranging from $20 to $80 per month. It offers more resources and control, making it suitable for medium-sized websites that require more flexibility.
    • Dedicated Hosting: Dedicated servers are the most expensive, costing anywhere from $80 to $300+ per month. These plans provide maximum resources and control, making them ideal for large websites or businesses with high traffic.
    • Cloud Hosting: Cloud hosting offers flexible pricing based on usage, starting at around $5 per month but can scale higher depending on the resources used.

    When comparing pricing, consider what features are included. For example, some providers offer free SSL certificates or free website migration, which can add value to their plans.

    By understanding the different hosting options and pricing structures, you can make a more informed decision and select a web hosting provider that meets both your needs and budget.

    Step-by-Step Guide to Setting Up Your Web Hosting

    Setting up your web hosting is a crucial first step in launching your website. Whether you are creating a personal blog or a business website, having the right hosting configuration can ensure that your site is fast, secure, and reliable. This guide will walk you through the necessary steps to get your web hosting set up and running, from preparing your domain and files to configuring DNS, FTP, and email settings. By the end of this guide, you’ll have a fully functional hosting environment ready to support your website.

    Preparing for Hosting Setup: Gather Your Domain and Files

    Before diving into the actual hosting setup, it’s essential to have your domain name and website files ready. Your domain acts as the online address for your website, while the files contain the actual content and structure that visitors will see.

    Step 1: Get Your Domain Name

    To begin, ensure that you have registered a domain name, which you can purchase from various domain registrars like GoDaddy, Namecheap, or Google Domains. Once you have your domain, keep a record of your login credentials.

    Step 2: Gather Your Website Files

    Next, you’ll need to prepare the files that make up your website. These typically include HTML files, CSS for styling, JavaScript for interactivity, and media files like images or videos. If your website uses a content management system (CMS) like WordPress, you’ll also need to gather the CMS files and database.

    Example of a basic website file structure:

    
    /website
        /images
        /css
        /js
        index.html
        about.html
    

    Step 3: Upload Your Files

    Once you have your domain and files ready, you can upload them to your hosting server. A simple way to do this is via FTP (File Transfer Protocol), which allows you to transfer files between your local computer and the server.

    FTP Command Example:

    
    ftp -i hostname username
    

    This command connects to the server using your hostname and username. Once connected, you can upload your website files to the server.

    Configuring DNS and Linking Your Domain to the Hosting Provider

    The Domain Name System (DNS) is the system that translates your domain name (e.g., example.com) into an IP address that the web hosting server can understand. Configuring your DNS correctly ensures that your domain points to the right hosting provider.

    Step 1: Obtain Your Hosting Provider’s Nameservers

    When you sign up with a hosting provider, they will typically provide you with nameserver addresses. These are essential for linking your domain to the hosting server.

    Step 2: Update Your DNS Settings

    To update your DNS settings, log into your domain registrar’s dashboard, find the DNS management section, and enter the nameservers provided by your hosting provider. It should look something like this:

    
    NS1.yourhostingprovider.com
    NS2.yourhostingprovider.com
    

    Once you’ve made the changes, it may take some time for the new settings to propagate, typically within 24–48 hours.

    Setting Up FTP, Email, and Databases for Your Website

    After linking your domain to the hosting provider, the next step is setting up FTP, email, and databases to ensure your website functions smoothly.

    Step 1: Set Up FTP

    FTP allows you to manage the files on your hosting server remotely. It is essential for uploading and maintaining your website files. To set up FTP, you will typically need to create an FTP account in your hosting control panel, where you will be given an FTP username and password.

    Once you have the login details, use an FTP client (such as FileZilla) to upload your website files.

    Example FTP Command:

    
    ftp hostname
    

    This will connect you to your server. Use the username and password provided by your hosting provider to log in, and you can begin transferring your files.

    Step 2: Set Up Email

    You can set up email addresses linked to your domain name, such as [email protected]. This can usually be done directly from your hosting provider’s control panel, where you can create and manage email accounts. Many hosting providers also offer email forwarding services, allowing you to forward emails to your personal inbox.

    Step 3: Set Up Databases

    For websites that require dynamic content (like blogs or e-commerce stores), you’ll need a database. Most commonly, this will be a MySQL database. In your hosting control panel, look for the “Databases” section and create a new MySQL database. You’ll be given a username and password to access it.

    Choosing the Right Virtual Machine Configuration for Your Website’s Growth: A Look at Caasify’s Scalable Options

    When choosing a web hosting provider, you may be offered various hosting configurations. Shared hosting works for small websites, but as your site grows, you might need a more scalable option, such as VPS (Virtual Private Server) hosting.

    What is VPS Hosting?

    VPS hosting provides more control and resources compared to shared hosting. It allows you to scale your website as it grows by adjusting server resources like CPU, RAM, and disk space. This is ideal for websites that experience growth in traffic or need more customization.

    Why Choose Scalable Hosting?

    Scalable hosting options, like those provided by Caasify, allow your website to grow without major downtime or disruptions. VPS hosting gives you the flexibility to upgrade your server configuration as needed. For instance, if your website experiences a surge in traffic, you can easily adjust the resources to handle the demand.

    If you are unsure which hosting configuration to choose, you can start with shared hosting and later upgrade to VPS hosting as your site grows. This flexibility makes VPS a solid choice for websites with the potential for expansion.

    For more information on selecting the best VPS hosting solution for your website, check out our VPS Hosting Guide: The Ultimate Guide to Choosing the Best Option.

    By following these steps, you can ensure that your web hosting setup is optimized for both performance and growth.

    Key Factors to Consider When Choosing a Web Hosting Provider

    Choosing the right web hosting service is a crucial decision for anyone looking to create a website. Your hosting provider impacts everything from website speed to security and even long-term scalability. With so many options available, it’s essential to consider factors like scalability, uptime, reliability, and security to ensure your website runs smoothly and grows over time. Here’s what you need to keep in mind when selecting a web hosting provider.

    Understanding Scalability and Growth Potential

    Scalability refers to a hosting provider’s ability to accommodate the growth of your website over time. As your site expands, you may need more resources like storage, bandwidth, and processing power. Hosting solutions such as shared hosting are ideal for small websites but can quickly become inadequate as traffic increases. In this case, upgrading to a Virtual Private Server (VPS) or even cloud hosting might be necessary.

    For example, a small blog may start on shared hosting but eventually require more flexibility and control as it gains traffic. A VPS offers dedicated resources and scalability, allowing for smoother performance as your website grows.

    Importance of Uptime and Reliability in Hosting

    Uptime refers to the amount of time a web hosting provider’s servers are fully operational. A reliable provider guarantees high uptime, ensuring that your website remains accessible to visitors. Most reputable hosting services offer uptime guarantees of at least 99.9%, meaning your site might experience no more than a few hours of downtime annually.

    For instance, if a provider promises 99.9% uptime, this translates to about 8 hours of downtime per year. Any more than that, and your site may experience significant issues with accessibility, which could affect your traffic and reputation. Understanding uptime guarantees is key when selecting a hosting provider.

    For more insights, check out The Truth About Web Hosting Uptime Guarantees.

    Security Features to Look for in Web Hosting Services

    Security is one of the most important factors when choosing a web hosting service. A secure hosting environment helps protect your website from threats like hacking, data breaches, and DDoS attacks. Key security features to look for include SSL certificates, which encrypt data transferred between the website and visitors, and DDoS protection to safeguard against distributed denial-of-service attacks.

    Many hosting providers also offer firewalls and regular backups, ensuring that your website data is safe and can be quickly restored in case of an issue. For example, SSL certificates help establish trust with visitors, showing that your site is secure for transactions or information sharing.

    For more information on hosting security, explore this Web Hosting Evaluation Checklist: 12 Key Indicators of a Reliable Service.

    By carefully evaluating scalability, uptime, and security, you can make an informed decision about the best web hosting provider for your needs.

    Optimizing Your Web Hosting for Better Performance

    When it comes to optimizing web hosting for better performance, the goal is to improve website speed, uptime, and overall reliability. A fast and stable website provides a better user experience, enhances SEO rankings, and can even improve conversion rates. Whether you’re using shared hosting, VPS hosting, or another hosting solution, there are several key configurations and optimization techniques that can help boost your site’s performance. By following these best practices, you can ensure that your hosting setup supports your website’s growing needs effectively.

    How to Optimize Your Hosting Configuration for Speed and Reliability

    Optimizing your hosting configuration begins with a few basic but impactful changes that can make a noticeable difference in your site’s speed and reliability.

    • Optimize PHP Settings: Ensure that your server is running the latest stable version of PHP, as newer versions tend to have performance improvements. Additionally, consider adjusting PHP settings like max_execution_time and memory_limit based on your site’s needs. This will help ensure that your server handles requests quickly and efficiently.

    Example: To check the current PHP version on your server, use the command:

    php -v

    This command will display the installed PHP version, allowing you to verify if it’s up-to-date.

    • Enable Faster Storage (SSD): If your hosting plan supports it, switching to an SSD (Solid State Drive) can dramatically speed up your website’s load time compared to traditional HDDs. SSDs offer faster data retrieval times, which translates to better site performance, especially for dynamic websites.
    • Server Location Matters: The physical location of your hosting provider’s servers can influence your site’s speed. Choose a provider with servers located near your target audience. A server closer to your visitors will reduce latency and improve loading times.

    By making these adjustments, you can optimize your web hosting setup to improve both speed and reliability.

    Caching, Content Delivery Networks (CDN), and Other Optimization Techniques

    Caching and Content Delivery Networks (CDNs) are two essential optimization techniques that can improve your website’s performance by reducing load times and ensuring efficient content delivery.

    • Enable Caching: Caching stores static versions of your site’s content, allowing it to load faster for returning visitors. Most hosting providers offer caching options like server-side caching or application-level caching (e.g., WordPress caching plugins). Enabling caching minimizes the need to regenerate content every time a user visits your site, which saves valuable server resources.
    • Use a Content Delivery Network (CDN): A CDN, such as Cloudflare, caches your content on servers located across multiple regions. This ensures that users access your website from a server closer to them, reducing load times and improving overall site speed. Cloudflare, for example, offers both caching and protection features for better performance.

    You can set up a CDN by integrating your website with a CDN provider. Here’s a basic guide for Cloudflare:

    1. Sign up for Cloudflare and add your site.
    2. Update your domain’s DNS settings to point to Cloudflare’s servers.
    3. Enable caching through Cloudflare’s dashboard.

    This integration will help optimize your site’s performance by ensuring faster delivery of content to users across the globe.

    Monitoring Web Hosting Performance and Ensuring Consistency

    To ensure consistent performance, it’s crucial to monitor your hosting setup regularly. Monitoring tools can help you keep track of uptime, server response times, and overall performance.

    • Use Website Performance Monitoring Tools: Tools like UptimeRobot can help you monitor your website’s uptime and alert you to any outages. This ensures that your site remains available to visitors and that issues are addressed promptly.
    • Check Server Response Time: Regularly check your server’s response time, which is the time it takes for your server to respond to a request. A slow response time can negatively impact your website’s performance. Aim for a response time under 200ms for optimal user experience.
    • Consistent Performance Reviews: Ensure that you perform regular performance reviews of your web hosting setup. Track metrics such as website load time, uptime, and server performance using tools like Google Analytics and hosting provider dashboards. If any issues arise, address them immediately to maintain consistent site performance.

    By setting up monitoring tools and reviewing performance regularly, you can identify any potential issues early on and ensure your web hosting remains reliable and fast.


    Optimizing your web hosting setup is crucial to maintaining a fast, reliable website. By focusing on configuration adjustments, leveraging caching and CDN services, and monitoring performance consistently, you can ensure your site runs smoothly and meets your audience’s needs. Whether you’re using shared hosting or VPS hosting, these steps can help improve your site’s speed and overall user experience.

    How to Monitor and Maintain Your Web Hosting Setup Over Time

    Maintaining a reliable web hosting setup is crucial for ensuring that your website performs well and remains secure over time. Regular monitoring and timely adjustments are key to keeping everything running smoothly, especially as your needs evolve. In this section, we’ll explore practical steps to monitor uptime, handle unexpected traffic spikes, maintain security, and adjust your hosting setup to continue meeting your requirements.

    Regularly Checking Uptime and Server Health

    One of the most important aspects of maintaining a web hosting setup is regularly checking the uptime and health of your server. Downtime can lead to a poor user experience and potential loss of revenue, so it’s crucial to ensure that your website is accessible at all times.

    Key steps to monitor server uptime and health:

    • Uptime Monitoring: Use tools like UptimeRobot to keep track of your website’s availability. UptimeRobot sends you an alert whenever your site experiences downtime, allowing you to react quickly.

    To set up UptimeRobot:

    1. Create a free account at UptimeRobot.
    2. Add your website’s URL and choose the monitoring frequency (every 5 minutes is standard).
    3. Set up your notification preferences to get alerts via email or SMS.
    • Health Metrics: Monitor key server metrics such as CPU usage, RAM consumption, and bandwidth. Most hosting providers offer basic server health data via their control panel. Check these metrics regularly to avoid potential performance issues.

    Example: If you notice that your CPU usage is consistently above 80%, it might be time to upgrade your hosting solution. This could mean upgrading to a VPS if you’re using shared hosting.

    By regularly monitoring these metrics, you can ensure your web hosting environment remains healthy and responsive.

    Handling Unexpected Traffic Spikes and Scalability Adjustments

    Unexpected traffic spikes can cause your website to slow down or even crash. To handle such spikes, you need a scalable hosting solution that can adjust to increasing traffic needs.

    Steps for handling traffic spikes and scalability:

    • Scalability Solutions: Consider upgrading to VPS hosting or dedicated servers for better scalability. VPS hosting, for example, allows you to adjust your resources (like CPU, RAM, and bandwidth) based on demand. If you’re on shared hosting, you may face limitations when traffic increases.

    Example: If your website suddenly experiences a surge in visitors, upgrading to a VPS hosting plan can provide the additional resources needed. You can adjust the server’s resources through your hosting provider’s control panel.

    • Upgrading Hosting Plan: If you’re using a shared hosting plan and anticipate more traffic, transitioning to VPS hosting or even dedicated hosting can help. This ensures your server has the capacity to handle increased demands.

    For more details on scaling, check out this guide on VPS Hosting: The Ultimate Guide to Choosing the Best Option.

    Monitoring traffic and ensuring your hosting setup is scalable will help you avoid performance bottlenecks during traffic surges.

    Ensuring Continued Security and Compliance with Data Protection Laws

    Security is a key concern for all web hosting setups. As your site grows, so do the threats. Ensuring continued security and compliance with data protection laws like GDPR is essential to protect both your site and your visitors’ data.

    Steps to ensure security and compliance:

    • SSL Certificates: Make sure your website is secured with SSL (Secure Sockets Layer) to encrypt data between your visitors and the server. Many hosting providers offer free SSL certificates or easy installation options through their control panel.
    • Two-Factor Authentication (2FA): Enable 2FA on your hosting account to add an extra layer of security. This makes it harder for unauthorized users to access your account.
    • Compliance with Data Laws: Stay updated with data protection laws such as GDPR or CCPA. Depending on your target audience, you may need to implement specific privacy practices to stay compliant.

    Example: If you collect customer data, ensure that your hosting setup supports secure data storage and complies with regulations like GDPR.

    Maintaining strong security practices and following legal guidelines ensures that your hosting setup is not only safe but also compliant with relevant laws.

    Using a Provider with Strong Security and Compliance Features

    Choosing a web hosting provider that offers robust security and compliance features can significantly reduce the burden of maintaining a secure hosting setup. A provider like Caasify, which is ISO 27001 certified and offers DDoS protection, provides a secure environment for your website.

    Why security features matter:

    • ISO 27001 Certification: ISO 27001 is a globally recognized standard for information security management. Choosing a hosting provider with this certification ensures that they follow best practices in securing your data.
    • DDoS Protection: DDoS attacks (Distributed Denial of Service) can overwhelm your site with traffic, making it inaccessible. Providers with built-in DDoS protection, like Caasify, can help mitigate these threats.

    Example: If you experience an influx of malicious traffic, Caasify’s DDoS protection will automatically detect and mitigate the attack, ensuring your site remains operational.

    When selecting a hosting provider, make sure they offer the necessary security and compliance features to protect your website and your data. Always verify their certifications and security measures before making a decision.


    By regularly monitoring uptime, preparing for traffic spikes, ensuring security, and choosing the right provider, you can maintain a reliable and secure web hosting setup that supports your site’s growth and longevity.

  • Vim Cheat Sheet: The Ultimate Guide to Boost Productivity

    Vim Cheat Sheet: The Ultimate Guide to Boost Productivity

    Introduction to Vim: A Powerful Tool for Boosting Productivity

    Vim is a powerful text editor that stands out for its efficiency, speed, and versatility. As an intermediate user, you may already know the basics of Vim, but a Vim cheat sheet can significantly enhance your productivity by simplifying command navigation and improving your overall workflow. Whether you’re coding, writing documentation, or handling plain text, Vim’s unique features—such as modal editing and custom configurations—can boost your productivity when used effectively. In this section, we’ll explore how mastering Vim commands and utilizing a Vim cheat sheet can help you navigate Vim more efficiently, streamline your setup, and enhance your long-term productivity.

    Key Vim Commands for Efficient Navigation

    One of the main reasons Vim is so efficient is its powerful set of commands. While it may seem overwhelming at first, a Vim cheat sheet offers a convenient way to quickly reference the most commonly used commands, helping you navigate the editor with ease. Some of the essential Vim commands that you should familiarize yourself with include:

    • :w – Saves the current file. It’s one of the most basic yet essential commands for any text editing session.
    • :q – Quits Vim. If changes have been made, Vim will prompt you to save before quitting.
    • i – Switches to insert mode, allowing you to start typing text.
    • Esc – Exits insert mode and returns to normal mode, where you can issue commands.
    • dd – Deletes the current line. It’s especially helpful for quickly removing unwanted lines.

    These commands are just a small fraction of what Vim can do, but they form the foundation of efficient navigation. As you become more familiar with Vim, you’ll rely on these commands to improve your speed and workflow.

    Customizing Your Vim Setup for Enhanced Productivity

    Vim’s true power lies in its ability to be customized to fit your workflow. By leveraging Vim’s configuration files, such as .vimrc, you can fine-tune your setup to match your specific needs. A Vim cheat sheet can help you understand the key configurations that will have the most impact on your productivity.

    Some popular configurations include:

    • Syntax highlighting: To enable syntax highlighting, add the following to your .vimrc file:
    syntax enable

    This command enables color coding for different syntax elements, making it easier to spot errors or understand code structure.

    • Line numbers: If you prefer working with line numbers, you can enable them by adding this line to your .vimrc:
    set number

    This helps you quickly reference specific lines when working on large files.

    • Auto-indentation: For programmers, having proper indentation is crucial. To enable auto-indentation, you can use:
    filetype plugin indent on

    This command ensures that Vim automatically adjusts indentation based on the file type you’re working with.

    Leveraging the Vim Cheat Sheet for Fast Learning

    One of the best ways to improve your productivity in Vim is to reference a Vim cheat sheet regularly. This cheat sheet serves as a quick guide to the most commonly used commands and configurations, allowing you to focus more on your task and less on memorizing complex commands. It’s particularly useful when you’re learning new Vim features or need a reminder on the fly.

    You can find a comprehensive and concise Vim cheat sheet at Vim Cheat Sheet – rtorr.com, which includes the most important commands and their corresponding actions. Having this cheat sheet handy will help you navigate Vim with more confidence and ease.

    Exploring Vim’s Built-In Help System

    While a Vim cheat sheet is a great reference, Vim also includes an extensive built-in help system that can provide detailed information about any command or feature. To access it, simply type:

    :help <command>

    For example, to learn more about the dd command, you can type:

    :help dd

    This command will open Vim’s documentation for dd, explaining its function in detail. The help system is an invaluable resource for diving deeper into Vim’s capabilities and troubleshooting any issues you may encounter.

    Boosting Productivity with Vim’s Features

    Vim is known for its speed, and its keyboard-centric interface allows users to navigate and edit text without ever having to touch a mouse. This can dramatically improve productivity, especially for tasks that require frequent text manipulation, such as coding or writing.

    Some Vim features that can help you increase your productivity include:

    • Search and replace: You can quickly search for and replace text using the following command:
    :%s/old_text/new_text/g

    This command searches the entire file for old_text and replaces it with new_text.

    • Macros: Vim allows you to record macros, so you can repeat a series of commands without having to type them again. To start recording a macro, press q followed by a letter (e.g., qa to record to register ‘a’). To stop recording, press q again. To play back the macro, press @a.
    • Splits and tabs: Managing multiple files is easy in Vim. You can open multiple files side by side with splits using:
    :vsp <filename>

    Or you can switch between tabs with :tabnext and :tabprev.

    By mastering these features and referencing a Vim cheat sheet, you’ll be able to navigate Vim faster, perform tasks with fewer keystrokes, and ultimately boost your productivity.

    Vim is more than just a text editor—it’s a tool that, when properly configured and used efficiently, can significantly improve your workflow. By using a Vim cheat sheet to guide you through the most essential commands, you’ll make the learning process smoother and more efficient. For a deeper dive into Vim’s capabilities, visit Vim’s official online documentation, which offers thorough explanations of all Vim features.

    In conclusion, mastering Vim’s commands and taking advantage of a Vim cheat sheet is a great way to increase your productivity, especially if you’re working on complex projects. With the right setup and knowledge, Vim can become an indispensable tool in your text editing arsenal.

    Key Vim Commands and Configurations for Streamlined Workflow

    Vim is a powerful and efficient text editor, but unlocking its full potential can be challenging for intermediate users. Whether you’re editing code, managing files, or navigating large text documents, mastering Vim’s commands and configurations can significantly boost your productivity. In this section, we will dive into key Vim commands and configurations that streamline your workflow, helping you save time and effort. For those looking for a comprehensive list of commands, a Vim cheat sheet can be a valuable reference.

    Basic Vim Commands for Beginners

    For users who are relatively new to Vim, mastering a few fundamental commands can drastically improve your text editing experience. These basic commands help with essential tasks like moving the cursor, deleting text, and undoing actions, which are crucial for an efficient workflow.

    • `i`: Insert mode. This command allows you to start typing at the cursor’s position.
      Example: Press `i` to start typing text in the middle of a file.
    • `x`: Delete a single character under the cursor.
      Example: Press `x` to remove the character under your cursor. If you want to delete multiple characters, you can repeat `x` or use a count like `5x` to delete five characters at once.
    • `dd`: Delete an entire line.
      Example: Press `dd` to delete the line where the cursor is located. If you want to delete multiple lines, you can prefix the command with a number, such as `3dd` to delete three lines.
    • `yy`: Yank (copy) a line.
      Example: Press `yy` to copy the current line. Use `p` to paste the copied line elsewhere.
    • `u`: Undo the last action.
      Example: Press `u` to undo your previous edit. To redo the change, use `Ctrl + r`.

    These commands represent some of the most common and necessary actions in Vim. Familiarity with these basic commands will help you perform routine editing tasks quickly and efficiently.

    Advanced Vim Commands for Power Users

    Once you’re comfortable with the basic commands, it’s time to explore more advanced Vim commands that can significantly enhance your workflow. These commands are designed to improve navigation, text manipulation, and file management, which is essential when dealing with larger files or projects.

    • `:w`: Save the current file.
      Example: Press `:w` to save the file you’re working on. This is one of the most frequently used commands in Vim, ensuring that your progress is saved.
    • `:q`: Quit Vim.
      Example: Press `:q` to exit Vim. If there are unsaved changes, Vim will alert you. To force quit without saving, use `:q!`.
    • `:split`: Split the window horizontally.
      Example: Press `:split` to divide your current window into two horizontal sections. This is useful when you want to compare files or edit multiple sections of the same file.
    • `/search`: Search for text within the file.
      Example: Press `/` followed by the search term to find instances of that word in the document. You can navigate between search results with `n` for next and `N` for the previous result.
    • `Ctrl + w, s`: Split the window vertically.
      Example: Use `Ctrl + w, s` to split the window vertically, allowing you to view two files side by side or work on different parts of the same file.

    For power users, these advanced commands are invaluable for managing larger files, searching through content, and editing multiple sections of a file simultaneously. You can enhance productivity by integrating them into your daily workflow.

    Understanding Vim’s Key Bindings and Shortcuts

    Vim’s key bindings and shortcuts are one of its strongest features. These bindings allow you to perform various actions with minimal keystrokes, which significantly speeds up your workflow. Understanding and memorizing these key mappings will help you navigate and edit text more efficiently.

    • `h`, `j`, `k`, `l`: Move the cursor left, down, up, and right, respectively.
      Example: Instead of using the arrow keys, you can move the cursor more efficiently with these basic key bindings. `h` moves left, `j` moves down, `k` moves up, and `l` moves right.
    • `d`: Delete text.
      Example: Press `d` followed by a movement command (e.g., `dw` to delete a word or `dd` to delete a line). This combination allows for fast text deletion without needing to navigate to the exact location.
    • `y`: Yank (copy) text.
      Example: Press `y` followed by a movement command to copy text. For example, `yw` copies a word, and `yy` copies a line.
    • `p`: Paste text.
      Example: After yanking (copying) text with `y`, press `p` to paste it at the cursor’s location.
    • `:`: Command mode for file and session management.
      Example: Use `:` to enter command mode for operations like saving (`:w`), quitting (`:q`), and opening new files (`:e filename`).

    Learning these key bindings will help you speed up your editing and reduce the reliance on the mouse or menu navigation. As you get more accustomed to these shortcuts, your workflow will become more fluid and efficient.


    By mastering these basic and advanced Vim commands, as well as understanding the key bindings, you’ll be able to navigate and edit text with greater ease. Vim is a tool built for efficiency, and by incorporating these commands into your workflow, you’ll be able to get the most out of it. For a comprehensive list of Vim commands, check out the official Vim documentation and consider keeping a Vim cheat sheet handy for quick references. By practicing these commands, you’ll quickly unlock the full potential of Vim and optimize your productivity.

    Evaluating Vim Commands: Strengths, Weaknesses, and Trade-Offs

    When working with Vim, it’s essential to understand how different commands and configurations affect your productivity. A comprehensive Vim cheat sheet can be a helpful reference, but knowing how and when to use specific commands will maximize your workflow efficiency. In this section, we’ll explore the key Vim commands and their strengths, weaknesses, and trade-offs. Whether you’re fine-tuning your setup or deciding which features to integrate into your routine, this guide will give you the insight you need.

    Vim Command Modes: Insert, Normal, and Visual Explained

    Vim operates in several modes, each with its own unique functionality. Understanding the core modes—Insert, Normal, and Visual—is crucial for efficient navigation and text manipulation.

    1. Insert Mode (i): This mode allows you to type and insert text directly. It’s where you spend most of your time when creating or modifying content. You can enter Insert Mode by pressing i from Normal Mode, which enables you to add characters. To exit Insert Mode, press Esc.

    Example:

    i

    Press i to begin typing in Insert Mode.

    1. Normal Mode (Esc): This is the default mode where you can navigate, delete, copy, and paste text. Commands like dd (delete a line) or yy (copy a line) are performed in Normal Mode. Press Esc to return to Normal Mode from any other mode.

    Example:

    dd

    Press dd in Normal Mode to delete the current line.

    1. Visual Mode (v): Visual Mode is used for selecting text. Press v to start selecting text, then use the arrow keys to expand or shrink the selection. Once the text is selected, you can manipulate it (e.g., copy, delete, or replace).

    Example:

    v

    Press v to begin selecting text in Visual Mode.

    These modes are foundational to Vim’s design and offer powerful shortcuts for efficient text editing. However, it’s important to note that the mental switch between modes can be challenging for new users. Nevertheless, mastering these modes leads to significantly faster text editing once you get comfortable.

    Comparing Vim with Other Text Editors for Programming

    When comparing Vim to other text editors, such as Sublime Text or Atom, the major difference lies in Vim’s keyboard-centric design. Unlike modern text editors that rely heavily on the mouse, Vim maximizes efficiency with powerful keyboard shortcuts.

    For instance, Vim allows you to move through your code without taking your hands off the keyboard. Using commands like w (move forward by word) or b (move backward by word) enables fast navigation. In contrast, editors like Sublime require mouse interactions for most text selection and movement.

    Example:

    w

    Press w to jump forward by one word in Normal Mode.

    Vim’s customization options also allow users to tailor the editor to their specific needs, but these options may require more effort upfront compared to the plug-and-play nature of other editors. On the other hand, once customized, Vim can significantly enhance your coding speed and productivity.

    Vim versus IDEs: Which is Better for Coding?

    Vim and integrated development environments (IDEs) like Visual Studio Code or IntelliJ IDEA cater to different use cases, each with strengths and weaknesses depending on your workflow.

    Vim shines in situations where fast, lightweight, and efficient editing is essential. It operates in a terminal, making it ideal for working over SSH or on remote systems where you need minimal overhead. Vim’s speed and resource efficiency are unmatched when it comes to quick navigation and text manipulation.

    However, IDEs like Visual Studio Code offer built-in features such as syntax highlighting, debugging tools, and autocompletion that can be invaluable when working on complex projects. IDEs provide a higher level of integration with programming languages and frameworks, making them easier for debugging and managing larger codebases.

    Example:

    :syntax on

    Enable syntax highlighting in Vim using the :syntax on command.

    If your focus is on minimal resource usage and fast text editing, Vim is the superior option. But if your project requires more integrated tools for testing, debugging, or complex project management, an IDE might be more suitable.

    Evaluating Hosting Providers for Optimal Vim Performance

    When using Vim remotely, especially over SSH, the performance of your hosting provider can significantly impact your editing experience. Slow response times or high latency can make even the most efficient commands feel sluggish.

    Different hosting providers offer varying levels of performance for SSH sessions. For instance, some services may provide faster servers with low-latency connections, ensuring Vim commands execute swiftly. On the other hand, providers with limited resources or high network latency may cause delays when using commands that involve remote file manipulation.

    Example:

    ssh user@hostname

    Log into a remote server via SSH and use Vim to edit files.

    To evaluate a hosting provider for Vim performance, consider testing latency and bandwidth using basic commands such as ping or scp before committing to a service. Providers that specialize in low-latency connections are particularly useful for remote Vim users.

    Conclusion

    Understanding Vim’s core modes and evaluating the strengths and weaknesses of its commands can significantly enhance your productivity. Whether you are deciding between Vim and another text editor, comparing it to IDEs, or considering the best hosting provider for remote usage, it’s essential to weigh each option carefully. With the right setup and mindset, Vim can become an indispensable tool in your programming toolkit. For more information on optimizing your Vim experience, explore additional resources like the Vim Undo Redo: A Complete Guide to Error-Free Workflow.

    Customizing Vim to Fit Your Unique Workflow

    Customizing Vim to match your workflow can significantly boost your productivity and make your experience with the editor more efficient. As a versatile text editor, Vim allows you to tweak nearly every aspect of its operation, from key mappings to scripts, ensuring that it serves your personal needs. This section explores practical ways to optimize Vim for your use, including how to tailor its configuration, key mappings, and scripts, as well as how cloud hosting can further enhance your setup. Whether you’re a developer, sysadmin, or writer, customizing Vim can streamline your tasks and help you achieve more with less effort. Let’s dive into how you can start customizing your Vim setup today.

    How to Customize Vim for Your Workflow

    Customizing Vim begins with understanding how small adjustments to its configuration can have a big impact on your workflow. The .vimrc file is your primary tool for making these changes, and it is here that you’ll configure your preferences. This file is where you can set up everything from basic appearance tweaks to more functional configurations that optimize your daily tasks.

    To get started, open or create the .vimrc file in your home directory with the following command:

    vim ~/.vimrc

    Once you have the file open, you can begin adding customizations. Here are a few simple examples:

    • Set line numbers: This helps you quickly navigate large files.
      set number
    • Enable syntax highlighting: Useful for developers to visually distinguish code syntax.
      syntax on
    • Set tab width: Define the number of spaces per tab to ensure consistent indentation.
      set tabstop=4
      set shiftwidth=4
      set expandtab

    Each of these tweaks will make your Vim environment feel more tailored to your needs. As you become more comfortable with Vim, you can start to experiment with more advanced configurations. But remember, customization is a gradual process; start small and focus on the changes that matter most to you.

    Improving Vim’s Usability with Custom Key Mappings

    One of the best ways to enhance your productivity with Vim is through custom key mappings. Vim’s default key bindings may not always align with your workflow, so mapping commands to more intuitive keys can save time and reduce frustration. This is especially important if you perform certain actions frequently.

    To customize your key mappings, you’ll modify the .vimrc file. For example, if you often delete a word and want to map it to a simpler key combination, you can add the following mapping:

    nnoremap dw dwi

    This command maps the dw key sequence (delete word) to a new, faster sequence: dwi (delete word under the cursor).

    Another common customization is remapping the jj key sequence to exit insert mode, which many users find more natural than the default Esc key:

    inoremap jj <Esc>

    These key mappings help streamline your workflow and reduce the cognitive load required to remember complex Vim commands. Start with a few key bindings for your most-used actions, and expand your mappings as you become more comfortable with Vim’s powerful customization options.

    Streamlining Your Vim Workflow with Custom Scripts

    Vim’s ability to run custom scripts can automate repetitive tasks, saving you time and energy. These scripts can range from simple commands that automate file management tasks to more complex operations that adjust Vim’s behavior based on specific conditions.

    For example, let’s say you frequently need to search for files. A simple script to search for a specific term within the current directory can be added to your .vimrc:

    command! -nargs=1 SearchFiles :execute 'grep -r' <args> .

    Now, when you type :SearchFiles keyword, Vim will run a grep search for the term “keyword” in the current directory.

    Another useful script could be a function to automatically back up files before editing. This can be easily added as:

    function! BackupBeforeEditing()
        execute 'write ' . expand('%:p') . '.bak'
    endfunction
    autocmd BufRead * call BackupBeforeEditing()

    This script automatically creates a backup file whenever a new file is opened. Custom scripts like these can greatly improve your productivity by reducing manual steps.

    Choosing a Cloud Hosting Provider for Your Vim Setup

    Cloud hosting can further enhance your Vim configuration, especially when it comes to syncing your .vimrc file and other settings across multiple devices. A cloud-based setup allows you to access your customized Vim environment from any machine, ensuring a seamless workflow no matter where you are.

    Popular cloud hosting providers, such as GitHub and Dropbox, allow you to sync your configuration files easily. To store your .vimrc in a cloud service, you can use the following setup with Git:

    1. Create a Git repository to store your configuration files:
      git init ~/.vim-config
      cd ~/.vim-config
      git remote add origin https://github.com/yourusername/vim-config.git
    2. Add your .vimrc and other important configuration files:
      cp ~/.vimrc ~/.vim-config/
      git add .
      git commit -m "Initial commit of Vim configuration"
      git push origin master
    3. On any new machine, simply clone the repository and symlink the .vimrc:
      git clone https://github.com/yourusername/vim-config.git ~/.vim-config
      ln -s ~/.vim-config/.vimrc ~/.vimrc

    This method ensures that your customized Vim setup is available wherever you go, providing a consistent and productive experience across different devices.

    By using cloud hosting, you can avoid the hassle of manually copying configuration files and instead focus on making your Vim setup even more efficient.


    Customizing Vim for your workflow involves setting up the right key mappings, scripts, and hosting solutions. As you refine your configuration, remember that a personalized setup will improve your productivity over time. Start with simple changes like key mappings and .vimrc edits, and as you grow more comfortable, explore adding scripts and integrating cloud hosting to optimize your Vim environment. If you’re interested in exploring Vim’s other capabilities, check out our article on Vim Undo Redo: A Complete Guide to Error-Free Workflow.

    A solid Vim configuration is an investment that pays off by making your day-to-day tasks smoother and faster, giving you more time to focus on what matters.

    Optimizing Vim for Long-Term Use: Tips for Continuous Improvement

    Vim is an incredibly powerful text editor that can significantly boost productivity once mastered. However, to ensure long-term effectiveness, continuous optimization is key. In this section, we’ll cover strategies and practical tips for refining your Vim setup over time, helping you maintain peak productivity. Whether you’re using Vim on a local machine or a cloud virtual machine (VM), optimizing Vim is a journey of iterative improvements. Here’s how to get the most out of Vim in the long run, focusing on macros, performance, and enhancing your workflow with plugins.

    Maximizing Efficiency with Vim Macros

    Vim macros are a powerful feature that can automate repetitive tasks, saving you time and enhancing your productivity. A macro in Vim allows you to record a sequence of commands and then replay them whenever needed. This feature is particularly useful when performing tasks like editing multiple lines, formatting text, or making repetitive changes.

    How to Record and Use Macros:

    1. Start Recording a Macro:
      • Press q followed by a register key (e.g., a) to begin recording. For example, pressing qa starts recording into register a.
    2. Perform the Task:
      • Execute the sequence of commands you want to automate. For instance, you could move to a specific line, delete some text, and insert new content.
    3. Stop Recording:
      • Press q again to stop recording the macro.
    4. Play Back the Macro:
      • Press @a to execute the macro stored in register a. You can repeat it with @@ for the last executed macro.

    Real-World Example:

    • Suppose you’re editing a list of items, and each line starts with a bullet -. If you want to replace the bullet with a numbered list, record a macro to perform the action (e.g., move to the start of the line, insert a number, and move to the next line). Once recorded, you can replay the macro across multiple lines to automate this task.

    After Migration: How to Optimize Vim for Long-Term Use

    Once you’ve migrated to a new system or environment, optimizing Vim’s performance should be one of your top priorities. Migrating Vim may include updating your configuration, adjusting plugins, and refining your setup for better speed and responsiveness.

    Configuring Vim for Optimal Performance:

    1. Optimize .vimrc:
      • Review your ~/.vimrc file for any settings that could affect performance. For example, disable features you don’t use or that slow down Vim, such as the swap file:
      • set noswapfile

        This reduces disk I/O and improves speed, particularly on large files.

    2. Use Performance-Enhancing Plugins:
      • Plugins like vim-sensible can be useful for optimizing Vim’s default settings. You may also consider using vim-plug for managing plugins efficiently, as it minimizes load times by loading plugins on demand.
    3. Benchmarking Performance:
      • You can benchmark Vim’s startup time before and after optimization using a command like:
      • vim --startuptime vimlog.txt

        This generates a log file (vimlog.txt) that details how long each part of the startup process took. Use this to identify and eliminate bottlenecks.

    By optimizing your configuration and refining your plugins, you can significantly improve Vim’s performance and maintain a smooth workflow post-migration.

    Continuous Improvement in Your Vim Setup

    Vim is highly customizable, and your setup can always be improved. Continuous refinement is crucial to keeping your environment responsive and aligned with your needs.

    Ways to Continuously Improve Your Vim Setup:

    1. Review and Adjust Your Configuration Regularly:
      • As you use Vim more, you’ll discover new features and workflows that can make you more productive. Keep your .vimrc file up to date with these insights. For example, tweak your key mappings or add new commands to streamline your workflow.
    2. Explore New Plugins:
      • Plugins can significantly enhance your Vim experience. Start with a lightweight plugin manager like vim-plug, which allows you to easily install and manage plugins. Over time, add tools like nerdtree for file navigation or ale for asynchronous linting.
    3. Refine Custom Commands:
      • Custom commands in your .vimrc can help improve your workflow. For instance, if you regularly open a specific set of files, create a command like:
      • command OpenDocs :e ~/Documents/*.md

        This opens all Markdown files in your Documents folder with one command.

    4. Incremental Performance Tweaks:
      • Regularly check Vim’s performance using the --startuptime command and review plugin load times. Remove unused or slow-loading plugins to ensure that your setup remains responsive.

    By keeping an eye on new tools, tweaking your .vimrc, and continuously experimenting with configurations, you can achieve continuous improvement and keep Vim efficient.

    Optimizing Your Vim Setup on Cloud VMs for Enhanced Scalability and Performance

    When running Vim on cloud VMs, there are several specific optimizations you can apply to improve both scalability and performance, especially in low-latency environments. Cloud-based environments often have resource constraints, so it’s essential to fine-tune your Vim setup to minimize resource usage.

    Cloud-Specific Vim Optimizations:

    1. Memory and CPU Settings:
      • For cloud VMs, configuring Vim to use less memory and CPU is crucial, especially if you’re working in resource-limited environments. You can adjust settings like:
      • set lazyredraw

        This prevents Vim from redrawing the screen during certain operations, improving performance, especially when working with large files.

    2. Lightweight Plugins:
      • Cloud environments may not have the same resources as local setups, so opt for lightweight plugins that offer high functionality with minimal overhead. For example, ctrlp.vim for fuzzy file searching is more efficient than heavier alternatives.
    3. Network Optimizations:
      • If you’re working remotely, latency can be an issue. Consider disabling or adjusting plugins that require constant network access, such as those that sync files over the internet. You can disable certain features temporarily by adding checks in your .vimrc:
      • if !exists("g:loaded_fugitive")
          Plug 'tpope/vim-fugitive'
        endif
    4. Benchmarking Performance on Cloud VMs:
      • Just like on local machines, you can benchmark Vim’s performance on cloud VMs. Use the same --startuptime flag to measure startup times and identify any bottlenecks specific to your cloud configuration.

    By following these cloud-specific tweaks, you can enhance Vim’s performance and ensure your setup scales efficiently, even when working on virtual machines.

    In summary, continuous improvement in your Vim setup is essential for long-term productivity. By optimizing your .vimrc, leveraging macros, experimenting with plugins, and fine-tuning your setup for cloud environments, you can ensure that Vim remains a powerful tool throughout your development career. For a deeper dive into Vim commands and features, check out our Vim Undo Redo: A Complete Guide to Error-Free Workflow.

    Choosing the Right Vim Setup: Aligning Configuration with Your Needs

    When setting up Vim to suit your needs, choosing the right configuration is essential for optimizing productivity. A customized Vim setup can significantly improve your workflow, allowing you to work more efficiently and comfortably. In this section, we will explore how to tailor your Vim configuration, select productivity-enhancing plugins, and manage multiple projects effortlessly. By the end, you will have a clear path to align your Vim setup with your work habits and preferences.

    Choosing the Right Vim Configuration for Your Needs

    Configuring Vim to match your workflow is crucial for an efficient setup. One of the first steps in this process is modifying your .vimrc file, which holds most of your configuration settings. Some common configurations include line numbering, auto-indentation, and syntax highlighting. These settings enhance the visibility and readability of your code, making it easier to work.

    A basic .vimrc setup might look like this:

    set number           " Enable line numbers
    set tabstop=4        " Set tab width to 4 spaces
    set shiftwidth=4     " Set indentation width to 4 spaces
    set expandtab        " Convert tabs to spaces
    syntax enable        " Enable syntax highlighting

    Here’s what each line does:

    • set number: Displays line numbers in the editor, making it easier to navigate large files.
    • set tabstop=4 and set shiftwidth=4: Set the width of a tab to 4 spaces, which is a common convention in many programming languages.
    • set expandtab: Ensures that tabs are converted to spaces, which helps maintain consistency across different editors and platforms.
    • syntax enable: Turns on syntax highlighting for better readability.

    By modifying these configurations in your .vimrc, you can tailor Vim to suit your coding style. If you prefer visual cues or want to work in a more structured environment, adjusting these options can drastically enhance your workflow.

    Vim Plugins to Enhance Productivity

    Vim plugins are a powerful way to extend Vim’s functionality and improve your workflow. Many plugins are designed to boost productivity by adding features that streamline repetitive tasks or enhance navigation. For example, the nerdtree plugin allows you to easily navigate your project’s file structure from within Vim.

    To install the nerdtree plugin using a popular Vim plugin manager, such as vim-plug, you would add the following line to your .vimrc:

    Plug 'preservim/nerdtree'

    After adding the line, run :PlugInstall within Vim to install the plugin. Once installed, you can open the file tree by typing :NERDTreeToggle. This opens a sidebar that shows your project files, making navigation quick and intuitive.

    Other useful plugins include:

    • fzf: A fuzzy finder for faster file and content search.
    • coc.nvim: Adds intelligent autocompletion and linting support.

    Installing and configuring these plugins can significantly speed up your workflow, especially in larger projects. For a more efficient Vim setup, try integrating these plugins to enhance file navigation and code completion.

    Configuring Vim for Efficient Project Management

    Managing multiple files and projects within Vim can be challenging without the right configuration. Thankfully, Vim offers features like buffers, windows, and tabs to help you keep your projects organized. You can have several files open simultaneously, each in its own buffer, and easily switch between them.

    Here’s a basic setup for handling multiple files:

    • Use tabs for each project or task:
      :tabnew myfile.txt   " Open a new tab with a file

      Each tab acts like a separate workspace, allowing you to group files together based on projects.

    • Split your windows for side-by-side editing:
      :split myfile2.txt   " Split window horizontally and open another file
      :vsplit myfile3.txt  " Split window vertically for side-by-side comparison

    By using these window and buffer management commands, you can easily navigate between files without losing focus. Organizing your workspace with tabs and splits allows you to work on multiple parts of a project at once, improving your efficiency.

    For a more advanced setup, consider using Vim’s session management features. You can save your workspace configuration (open files, windows, etc.) with the :mksession command and reload it later with :source. This feature is perfect for returning to the same project setup after a break.

    By combining these strategies with the right Vim configuration, you can make project management in Vim as smooth and efficient as possible.


    By aligning your Vim configuration with your needs, installing helpful plugins, and implementing efficient project management techniques, you can create a Vim setup that enhances your productivity. Whether you are working on small scripts or large projects, a customized Vim configuration will allow you to maintain focus and maximize your efficiency.

    For a more comprehensive reference on basic Vim configurations, check out the Vim Configuration Guide, or get a quick overview of essential commands with this Vim Cheat Sheet.

    Advanced Vim Tips: Enhancing Performance for Large Files and Complex Projects

    Working with large files and complex codebases in Vim can sometimes be frustrating due to slow performance and inefficient navigation. A vim cheat sheet can help streamline your workflow, but mastering a few advanced performance tips will take your productivity to the next level. In this section, we’ll dive into key techniques for optimizing Vim’s performance when dealing with large files and navigating complex projects. Whether you’re writing large scripts or maintaining massive repositories, these strategies will make a noticeable difference in your workflow.

    Optimizing Vim Performance for Large Files

    When working with large files, Vim’s responsiveness can be impacted, especially when it needs to handle complex syntax highlighting, search operations, or file swapping. Fortunately, there are several Vim commands that can help alleviate these issues.

    • Disable syntax highlighting: Use the command :set syntax=off to turn off syntax highlighting. This prevents Vim from continuously processing and rendering complex syntax rules, which can slow down performance on large files.
    • Use lazyredraw: The :set lazyredraw command helps by telling Vim not to update the screen while executing commands, which can significantly boost performance, particularly when dealing with large files. It allows Vim to redraw the screen only when necessary, reducing the load during operations like searches or substitutions.
    • Disable swap files: Swap files can be useful for crash recovery, but they also contribute to performance overhead when working with large files. Use :set noswapfile to disable swap files, speeding up your editing process.
    • Turn off backups: Vim’s backup system creates backup files, which can be unnecessary in many cases, especially when working with huge files. Use :set nobackup and :set nowritebackup to turn off backups and write backups, helping improve performance.

    These settings are essential for improving Vim’s responsiveness. By reducing unnecessary operations, you’ll be able to navigate and edit large files with less lag and frustration.

    Vim for Managing Large Codebases: Tips and Tricks

    Managing large codebases in Vim requires a set of advanced navigation and search techniques that make handling complex projects efficient. Here are a few tips for boosting Vim’s performance in such environments.

    • Efficient Searching: Instead of manually opening files to find specific code, use the :grep or :vimgrep commands to search through large codebases. For example, running :vimgrep /function_name/ **/*.js will search for function_name across all .js files in the current directory and its subdirectories. This command reduces the need to open multiple files and speeds up the process of locating specific code sections.
    • Faster Navigation: For navigating large files or directories, consider using the :tags command. If you have a tags file generated by ctags, you can jump to function definitions quickly with Ctrl-] and return to the previous location with Ctrl-T. This helps keep your workflow smooth and efficient, particularly in large codebases where jumping between functions is frequent.
    • Splitting Files: Another approach to managing large codebases in Vim is to work with multiple file splits. Use the :vsp command to open files in a vertical split or :sp for horizontal splits. This allows you to view and edit multiple parts of your codebase simultaneously without losing context.

    Using these strategies, you’ll streamline your workflow and improve your productivity when dealing with large projects in Vim.

    Performance Tuning for Vim on Different Operating Systems

    Optimizing Vim’s performance isn’t just about tweaking settings within Vim itself; the underlying operating system also plays a role. Here’s how to fine-tune Vim for different operating systems:

    • Linux: On Linux systems, Vim can benefit from adjustments to your file system settings. For example, enabling relativenumber in conjunction with file indexing can significantly reduce the time spent searching and navigating through large files. Additionally, Vim performs better on ext4 file systems compared to other file systems like NTFS, so ensure you’re using a performant file system for large files.
    • macOS: On macOS, memory usage can sometimes become an issue when editing large files. Adjusting Vim’s :set maxmem=10000 can help optimize memory usage by limiting the amount of memory Vim uses, thus avoiding slowdowns on larger files. You may also want to tweak the system’s virtual memory settings to ensure smooth operation when handling large datasets.
    • Windows: Windows users can experience performance bottlenecks with Vim, especially when dealing with file systems like FAT32 or older NTFS versions. Using a tool like Cygwin or WSL (Windows Subsystem for Linux) can improve Vim’s speed on Windows by providing a more UNIX-like environment. Additionally, turning off file system indexing can reduce lag when searching through large files.

    Each operating system has its own quirks, but with these targeted optimizations, you’ll get a smoother Vim experience regardless of your platform.

    By implementing these advanced Vim tips for large files, codebases, and operating system tuning, you’ll be well on your way to a more efficient and responsive Vim setup. Whether you’re editing large datasets or managing complex projects, these strategies are crucial for enhancing Vim’s performance in your daily workflow. For further details on optimizing Vim for large files, check out Faster loading of large files (Vim Tips Wiki).

    Troubleshooting Common Vim Setup Issues and How to Resolve Them

    Setting up Vim can sometimes be a bumpy road, especially when you encounter issues like missing dependencies, plugin conflicts, or incorrect configurations. A Vim cheat sheet can be a valuable tool during this process, providing quick access to essential commands and configuration tips. This section will guide you through resolving common Vim setup issues, ensuring you have a smooth Vim experience.

    Troubleshooting Common Vim Setup Issues

    When setting up Vim, several common issues might arise, including missing dependencies, incorrect configurations, or plugin conflicts. Here’s how you can troubleshoot and resolve them:

    Issue: Missing Dependencies

    One common setup problem occurs when Vim is missing certain dependencies that can affect its functionality. For example, if you’re using a Vim version that lacks GTK support, you may encounter issues with GUI features. To resolve this, you can install the missing dependencies using your system’s package manager.

    For example, on Ubuntu, you can run:

    sudo apt install vim-gtk3

    This command installs Vim with GTK3 support, which is required for GUI-based features. After installation, restart Vim to check if the issue is resolved.

    Issue: Plugin Conflicts

    If you’ve installed several plugins and Vim isn’t behaving as expected, there might be conflicts between them. The quickest way to identify and resolve conflicts is by checking your .vimrc file. You can comment out sections related to plugins and gradually uncomment them to identify which plugin is causing the issue.

    To comment out a plugin section in .vimrc, simply add a " before the line, like this:

    " Plugin 'junegunn/fzf.vim'

    Once you’ve identified the conflicting plugin, check its documentation for any special setup requirements or compatibility issues. In many cases, adjusting the order of plugin loading or updating the plugin can resolve the conflict.

    For more detailed troubleshooting steps, refer to the Vim Tips Wiki – Troubleshooting section.

    How to Set Up Vim for Web Development

    Vim is an excellent choice for web development, thanks to its powerful editing capabilities and extensive plugin ecosystem. Here’s how you can set up Vim for web development, starting with basic configuration and key plugins.

    Step 1: Configure Syntax Highlighting

    To make Vim more suitable for web development, you’ll want to enable syntax highlighting for HTML, CSS, JavaScript, and other web languages. You can add the following lines to your .vimrc to enable basic syntax highlighting:

    syntax enable
    filetype plugin on

    This ensures that Vim recognizes different file types and applies syntax highlighting appropriately.

    Step 2: Install Useful Plugins

    Vim’s plugin ecosystem offers many tools that enhance web development. For example, the vim-javascript plugin provides improved JavaScript syntax highlighting and indentation. To install it, you can add the following to your .vimrc:

    Plugin 'pangloss/vim-javascript'

    If you’re setting up Vim for web development, using a Vim cheat sheet can be helpful for quickly accessing key Vim commands to navigate and edit code. For example, gg moves the cursor to the beginning of the file, while G moves it to the end.

    For more plugin suggestions and configuration, consider checking out Troubleshooting Steps for When a Vim Plugin Is Not Working.

    Vim’s Compatibility with Version Control Systems

    Vim can integrate seamlessly with version control systems like Git, making it an ideal choice for developers working with source code. To set up Git support in Vim, the vim-fugitive plugin is one of the most popular choices.

    Step 1: Install vim-fugitive

    Add the following line to your .vimrc to install the vim-fugitive plugin:

    Plugin 'tpope/vim-fugitive'

    This plugin provides a powerful Git interface within Vim, allowing you to run Git commands directly from within the editor.

    Step 2: Use Git Commands in Vim

    Once vim-fugitive is installed, you can use several useful commands to interact with Git. For example, to check the status of your Git repository, you can run:

    :Git status

    This command will display the current state of your Git repository inside Vim. You can also stage changes, commit, and even view the Git log—all without leaving the editor.

    For additional Git setup instructions, refer to “sudo: vim: command not found” – Diagnosis and Solution.

  • Create Windows Live USB: The Complete Guide to Setup and Optimization

    Create Windows Live USB: The Complete Guide to Setup and Optimization

    Introduction: What is a Windows Live USB and Why It’s Useful

    A Windows Live USB allows you to run a full version of Windows directly from a USB drive, without needing to install it on the host machine. This setup provides a portable and flexible way to access Windows on any compatible device, making it particularly useful for troubleshooting, recovery, or simply using a familiar Windows environment across multiple devices. In this section, we’ll walk through the steps to create a Windows Live USB, explore its benefits, and explain why it’s a valuable tool for anyone needing a portable, bootable version of Windows.

    Prepare Your System and Ensure Compatibility

    Before creating a Windows Live USB, it’s essential to ensure your system meets the requirements and supports booting from a USB drive. Here are the key points to check:

    • USB Drive Size: The minimum recommended size for your USB drive is 8GB. For larger versions of Windows or if you plan on adding persistent storage, you may need a 16GB or larger drive.
    • System Compatibility: Make sure your system supports booting from USB. Most modern systems do, but you may need to adjust BIOS/UEFI settings to enable USB booting. To do this:
      1. Restart your computer and enter BIOS/UEFI (usually by pressing F2 or DEL during startup).
      2. Navigate to the Boot menu and set the USB drive as the first boot device.
      3. Enable Legacy Boot or UEFI Boot depending on your system’s requirements.
    • Operating System: The USB drive must be formatted in a way that supports booting, such as FAT32 for UEFI systems or NTFS for legacy BIOS. Some tools like Rufus handle these settings automatically when creating the USB.

    By ensuring compatibility, you set the foundation for a successful Windows Live USB setup. Next, you’ll need the right tool to create your bootable USB drive.

    Select the Right Tool for Your Needs

    Several tools can help you create a Windows Live USB, each with its own features. Two of the most popular options are:

    • Rufus: This lightweight tool is widely used for creating bootable USB drives. It supports creating a Windows Live USB with both legacy BIOS and UEFI boot modes. Rufus is particularly useful if you need to create a persistent live USB, allowing data and settings to be saved across reboots.
      • Pros: Fast, flexible, supports persistent storage
      • Cons: Requires a bit of technical know-how for certain settings
    • Media Creation Tool: This official Microsoft tool is primarily used to create a Windows installation USB. While it doesn’t support persistent live USB creation out-of-the-box, it’s a solid choice if you want a simple, no-fuss method for installing Windows.
      • Pros: Official tool, easy to use
      • Cons: Limited to installation purposes, lacks persistent storage support

    When selecting a tool, consider whether you need persistent storage or just want to create a basic Windows installation USB. If persistence is not necessary, Media Creation Tool is a great option for simplicity. For more advanced setups, Rufus offers more flexibility.

    Create the Windows Live USB

    Once you’ve selected your tool, the next step is to actually create the Windows Live USB. Here’s a guide using Rufus to create a bootable USB with persistent storage:

    1. Download and Install Rufus from the official website.
    2. Insert your USB drive into your computer and launch Rufus.
    3. Select your USB drive from the device dropdown list.
    4. Under Boot Selection, choose Disk or ISO image (Please select) and select your Windows ISO file.
    5. For Partition Scheme, select GPT for UEFI systems or MBR for BIOS-based systems.
    6. Under File System, select FAT32 for UEFI or NTFS for BIOS.
    7. If you want to enable persistent storage, set the Persistence slider to the desired size.
    8. Click Start to begin the process.

    This process will create a Windows Live USB that you can boot from and use across different devices. The persistent storage option allows you to save files and settings across sessions, making it a more personalized experience.

    Test Your Setup and Troubleshoot Initial Issues

    Once your Windows Live USB is created, it’s important to test it to ensure everything is working as expected. Here’s how to test your setup:

    1. Boot from USB: Insert the USB drive into a compatible device, restart it, and select the USB drive as the boot device from the BIOS/UEFI menu.
    2. If Windows loads successfully, your setup is complete. If you encounter issues, consider the following troubleshooting tips:
      • USB Not Booting: Double-check the BIOS/UEFI boot order and ensure the USB drive is set as the first boot device.
      • UEFI/BIOS Compatibility: If the USB doesn’t boot, try switching between UEFI and legacy BIOS mode in the BIOS/UEFI settings.
      • File System Errors: If you see error messages about the USB drive, make sure it’s properly formatted and supports the correct partition scheme.

    If these common issues persist, further adjustments to BIOS settings or using different tools may be necessary. For additional assistance, you can consult resources like Tom’s Hardware on creating bootable Windows USBs or GeeksforGeeks on creating bootable USB drives.

    By following these steps, you should be able to successfully create a Windows Live USB and troubleshoot any initial issues that arise.

    Step-by-Step Guide: How to Create a Windows Live USB

    Creating a Windows Live USB is a practical way to run Windows directly from a USB drive without installing it on your system. Whether you need a portable system for troubleshooting or simply want to carry your Windows environment wherever you go, setting up a Live USB is an efficient solution. This guide will walk you through the process, comparing the most common tools for creating a Windows Live USB and offering practical tips to ensure optimal configuration for your needs.

    Overview of Available Tools for Creating a Windows Live USB

    To create a Windows Live USB, you’ll need to choose the right tool for the job. Several utilities can help you turn a USB drive into a Windows bootable device, each offering unique features and compatibility options. Some of the most popular tools include:

    • Rufus: A widely-used tool for creating bootable USB drives, including Windows Live USBs. It’s fast, easy to use, and supports both UEFI and BIOS systems.
    • WinToUSB: A tool specifically designed for creating a Windows installation or portable Windows system on a USB drive. It provides options for creating a fully functional Windows environment on the USB.
    • MediaCreationTool: A Microsoft tool that helps you download and install Windows on a USB drive. Though mainly for installing Windows, it can also be used to create a Live USB in certain configurations.

    Each of these tools can effectively create a Windows Live USB, but they differ in user experience, options, and additional features.

    Pros and Cons of Each Tool for Windows Live USB Creation

    Understanding the pros and cons of each tool will help you select the best one for your needs. Here’s a breakdown of the tools mentioned:

    Rufus

    Pros:

    • Quick and efficient with minimal setup.
    • Supports a variety of bootable media, including UEFI and BIOS.
    • Lightweight and free.

    Cons:

    • Does not offer a fully portable Windows system like WinToUSB.
    • Requires manual configuration for advanced setups.

    WinToUSB

    Pros:

    • Specifically designed for creating portable Windows systems on USB.
    • Supports both Windows installation and Live USB creation.
    • Simple interface with step-by-step guidance.

    Cons:

    • Free version has some limitations, especially for advanced features.
    • Slightly slower than Rufus due to its specialized setup process.

    MediaCreationTool

    Pros:

    • Official Microsoft tool, ensuring reliability.
    • Easy-to-use interface for downloading and installing Windows.

    Cons:

    • Primarily designed for installation, not for creating a portable Windows environment.
    • Limited control over partitioning and drive formatting.

    Choosing the Right Tool Based on Your Technical Expertise and Requirements

    When selecting the right tool for creating your Windows Live USB, it’s important to consider your technical expertise and specific requirements. Here’s a guide to help you choose the best option:

    • If you’re a beginner: Go with MediaCreationTool. Its simplicity makes it ideal for those with limited technical knowledge. It’s perfect for creating a Windows installation USB, but with some tweaks, it can be used for creating a basic Live USB setup.
    • If you’re intermediate or need advanced options: Rufus is a great choice. It’s fast, highly compatible, and allows more customization, which can be useful for creating a bootable USB on both UEFI and BIOS systems.
    • If you need a fully portable Windows environment: WinToUSB is your best bet. It’s tailored specifically for creating fully functional Windows systems on USB drives, ideal if you want a complete portable setup for personal use or troubleshooting.

    Consider Cloud-Based Virtual Machines for Testing and Optimizing Your Setup

    For testing and optimizing your Windows Live USB setup, consider using cloud-based virtual machines. Cloud platforms like Amazon Web Services (AWS) and Microsoft Azure provide virtual machines where you can test your Live USB configuration without needing a physical system. This can help you fine-tune your setup before deploying it on a physical USB drive.

    Using a cloud-based VM offers several advantages:

    • Cost-efficient: You can test configurations without purchasing additional hardware.
    • Quick setup: Cloud environments can be spun up instantly, allowing rapid testing.
    • No hardware limitations: Test different configurations and ensure compatibility with various setups.

    To use a cloud-based VM, simply create an instance on a platform like AWS or Azure, upload your Windows Live USB, and test the configuration as you would on a physical system. This process can help you ensure that the setup works smoothly before you rely on it in real-world scenarios.

    By leveraging these cloud-based tools, you can optimize your Windows Live USB setup with minimal effort and ensure everything works as expected before you make it your primary solution.

    In conclusion, whether you’re creating a Windows Live USB for troubleshooting, portability, or other uses, choosing the right tool is essential. By understanding the tools available and selecting the one that fits your technical expertise, you’ll be on your way to a successful setup. For further guidance, check out this guide on website setup to ensure your other tech setups are just as smooth.

    Comparison of Top Tools for Creating a Windows Live USB

    When it comes to creating a Windows Live USB, there are several tools available, each with its own strengths and weaknesses. The right tool for you will depend on your needs, technical expertise, and the specific features you’re looking for. In this section, we’ll compare the most popular tools for creating a Windows Live USB, including Rufus, Windows To Go, and Diskpart, and help you decide which one suits your requirements best.

    Overview of Available Tools for Creating a Windows Live USB

    There are several reliable tools that can help you create a Windows Live USB. Some of the most commonly used options include:

    • Rufus: A popular and easy-to-use tool for creating bootable USB drives. It supports UEFI and legacy BIOS systems, making it versatile for various hardware configurations.
    • Windows To Go: This official Microsoft solution allows you to create a portable version of Windows that can run from a USB drive. It’s ideal for enterprise environments but may not be available on all Windows editions.
    • Diskpart: A built-in command-line tool that allows users to manually format and prepare a USB drive for bootable Windows installations. It’s more advanced and requires familiarity with command-line tools.

    For example, using Rufus to create a bootable USB is straightforward: you select your ISO file, choose the USB drive, and click “Start.” It handles most of the setup automatically, making it suitable for beginners and intermediate users.

    Pros and Cons of Each Tool for Windows Live USB Creation

    Each tool for creating a Windows Live USB has its own set of advantages and disadvantages, depending on your requirements and skill level.

    • Rufus
      • Pros:
        • Easy to use with a simple, intuitive interface.
        • Supports both UEFI and legacy BIOS, offering great compatibility.
        • Very fast when compared to other tools.
      • Cons:
        • Limited customization options for advanced users.
        • May not work as expected with certain older versions of Windows.
    • Windows To Go
      • Pros:
        • Official Microsoft solution designed specifically for creating a portable Windows environment.
        • Supports enterprise-grade security and management tools.
        • Ensures better performance and integration with Windows-based systems.
      • Cons:
        • Only available on Windows 10/11 Enterprise or Education editions.
        • Requires certified USB drives, limiting flexibility in hardware choices.
    • Diskpart
      • Pros:
        • Flexible and powerful, offering complete control over USB creation.
        • Can be used for custom setups, including partitioning and formatting.
        • Works on any Windows version.
      • Cons:
        • Requires command-line knowledge, which might be intimidating for some users.
        • Time-consuming compared to automated tools like Rufus.

    For example, Rufus is great for someone who needs a quick, no-fuss solution, while Diskpart might be more suited for users who require a deeper level of customization.

    Choosing the Right Tool Based on Your Technical Expertise and Requirements

    The right tool for creating a Windows Live USB depends largely on your technical expertise and the complexity of your needs.

    • Beginner or Intermediate Users: If you’re looking for an easy and fast solution, Rufus is the best option. Its simple interface and wide compatibility make it a great choice for most users.
      • Use Case: Creating a personal, bootable Windows USB drive for troubleshooting or system recovery.
    • Advanced Users or Enterprises: If you’re comfortable with command-line tools and need more customization, Diskpart gives you complete control over the creation process.
      • Use Case: Custom setups with multiple partitions or specific formatting requirements.
    • Enterprise or Official Use: Windows To Go is ideal for businesses that need to deploy a secure and reliable portable Windows environment for employees.
      • Use Case: Setting up a corporate environment where Windows needs to be run from a USB drive with full security and management features.

    Cloud-Based Virtual Machines for Streamlined Windows Live USB Setup

    Cloud-based virtual machines (VMs) can offer a more streamlined and efficient way to set up a Windows Live USB. Using services like Microsoft Azure or Amazon EC2, you can create a virtualized environment, set up Windows, and then transfer the setup to your USB drive. This approach is particularly useful for advanced users or IT professionals looking to create multiple Live USBs efficiently.

    For example, setting up a Windows VM in Microsoft Azure allows you to install the necessary tools, configure the system, and then use the VM to prepare your USB without needing local resources. Once done, you can download the image or create a bootable USB from the cloud environment, minimizing the time and resources required for setup.

    This method is ideal for users who need to deploy consistent, professional-grade setups across multiple machines. For more information on the benefits of cloud-based VM setups, check out this guide on cloud computing.

    Conclusion

    Choosing the right tool to create a Windows Live USB depends on your specific needs and technical abilities. Rufus is perfect for quick, straightforward setups, while Diskpart offers flexibility for those with advanced requirements. Windows To Go shines in enterprise environments that demand security and efficiency. Finally, leveraging cloud-based virtual machines can streamline the process for those looking for a professional, scalable approach.

    Choosing the Right USB Drive Size for Your Windows Live Setup

    When you decide to create a Windows Live USB, one of the most important considerations is selecting the right USB drive size. The size of the USB drive plays a crucial role in how effectively you can use the Live USB, as well as how much software and data you can store on it. A larger USB drive can provide more flexibility, but choosing the right size depends on your specific usage needs. In this section, we will guide you through the key factors to consider when determining the optimal USB size for your Windows Live setup.

    Understanding the Requirements for USB Size

    To begin, it’s essential to understand the basic requirements for the size of your USB drive when creating a Windows Live USB setup. The USB drive size directly influences the storage capacity available for Windows files, applications, and personal data.

    Minimum and Recommended USB Sizes

    For most Windows Live setups, the minimum recommended USB size is 16GB. This is sufficient for the basic installation of Windows, including system files and a few lightweight applications. However, for more extensive use, such as running multiple programs or storing large files, it’s better to opt for a 64GB USB drive.

    Here’s a breakdown of typical USB size recommendations for various use cases:

    • 16GB USB Drive: Sufficient for basic Windows Live setups, including the operating system and a small number of lightweight applications.
    • 32GB USB Drive: Offers more space for additional software, but still limited for larger applications or data.
    • 64GB USB Drive: Ideal for running more substantial applications, games, or for those who need to store more files for portability.
    • 128GB or larger USB Drive: Best for advanced setups that require heavy software use, such as video editing tools or other memory-intensive applications.

    How USB Size Affects Performance and Usage

    The size of your USB drive doesn’t just affect how much data you can store—it can also influence the overall performance of your Live USB setup. Larger USB drives generally offer faster read/write speeds, especially if you’re using modern USB 3.0 or USB 3.1 devices. Additionally, having more space allows for a more comfortable experience when running applications from your Live USB, as it reduces the likelihood of running out of storage space during use.

    For example, while a 16GB USB drive might be enough for basic tasks like web browsing or office work, a 64GB USB drive is much better suited for running more complex software like design or development tools.

    How to Choose Between Different USB Sizes Based on Your Usage

    Selecting the right USB drive size largely depends on how you intend to use the Windows Live setup. Different usage scenarios will require different amounts of storage. Below, we provide guidance on how to choose the appropriate USB size for your specific needs.

    For Basic Use (Web Browsing, Word Processing, Light Tasks)

    If you plan to use your Windows Live USB for basic activities such as web browsing, word processing, and other light tasks, a 16GB USB drive should be sufficient. This size will comfortably fit the Windows operating system and a few lightweight applications without any issues.

    For Moderate Use (Multimedia, Office Applications, Light Gaming)

    If your Windows Live USB will be used for activities such as light multimedia work, office applications, or even a bit of casual gaming, consider going for a 32GB or 64GB USB drive. A 32GB drive offers more room for additional applications and personal files, while a 64GB drive ensures you have enough space for running multiple programs and storing larger files like photos and videos.

    For Intensive Use (Development, Video Editing, Heavy Applications)

    For more intensive tasks such as software development, video editing, or running larger applications, a 64GB USB drive or larger is recommended. A 64GB drive provides ample space for operating system files, several large applications, and plenty of data. If you frequently work with large files or need to install complex software, opting for a 128GB or larger USB drive will ensure that your Live USB setup remains performant and spacious.

    By choosing the correct size based on your intended use, you can ensure that your Windows Live USB setup remains functional and efficient. If you’re unsure about your needs, it’s generally a good idea to opt for a larger size, such as a 64GB drive, to ensure you have enough flexibility for future software and file storage needs.

    Configuring and Optimizing Your Windows Live USB for Performance

    To make the most of your Windows Live USB, it’s essential to optimize it for better speed, responsiveness, and overall usability. By adjusting key settings within Windows and configuring the USB drive, you can improve the performance of your portable operating system setup. In this section, we’ll explore how to configure your Windows Live USB to deliver the best performance tailored to your needs.

    Configuring Windows for Optimal USB Performance

    When configuring your Windows Live USB for optimal performance, you need to make certain system adjustments to ensure that the USB drive is used as efficiently as possible. One of the most important settings is ReadyBoost, a feature that helps speed up read and write operations by using the USB drive as additional memory cache.

    To enable ReadyBoost:

    1. Insert your Windows Live USB into your computer.
    2. Right-click on the USB drive in File Explorer and select Properties.
    3. Go to the ReadyBoost tab.
    4. Select Use this device and adjust the space allocated for ReadyBoost.
    5. Click OK to apply the changes.

    By enabling ReadyBoost, your USB drive acts as an additional layer of cache, speeding up access to frequently used files, improving overall responsiveness. This is particularly beneficial for systems with limited RAM, but it can also enhance general performance.

    Another key setting for optimizing performance is using the NTFS file system. If you’ve used FAT32 for compatibility reasons, switching to NTFS can allow larger file transfers and improve read/write performance. You can reformat the USB drive to NTFS by right-clicking it in File Explorer, selecting Format, and choosing NTFS as the file system.

    These settings help to improve USB performance by reducing the time it takes to access files and boosting the system’s overall responsiveness.

    Maximizing Speed and Responsiveness of Your Windows Live USB

    To maximize the speed and responsiveness of your Windows Live USB, ensuring it operates at its full potential, focus on utilizing USB 3.0 for faster data transfer speeds. If your USB drive supports USB 3.0, make sure to enable its performance mode within Windows.

    Here’s how to enable USB 3.0 performance mode:

    1. Open Device Manager and expand the Universal Serial Bus Controllers section.
    2. Locate your USB 3.0 controller, right-click it, and select Properties.
    3. Under the Driver tab, ensure the Driver Version is up to date.
    4. Additionally, ensure your system settings are configured to allow for maximum throughput by enabling better performance mode.

    For an even better experience, you can benchmark the performance of your USB using tools like CrystalDiskMark. This tool allows you to test read and write speeds, helping you evaluate how well your USB drive performs under different conditions. Optimizing for USB 3.0 ensures you’re not bottlenecking the performance, especially when running resource-intensive applications.

    By focusing on USB 3.0 performance, your Live USB will respond faster, and you’ll notice quicker file access and smoother operation during use.

    Customizing the Setup for Specific Use Cases

    Customizing your Windows Live USB setup for specific use cases—whether for gaming, media consumption, or office work—can significantly improve the user experience. Each use case may require different configurations and optimizations to ensure the best performance.

    For example, if you’re using the Live USB for gaming, prioritize performance over visual effects. In Windows Settings, navigate to System > Advanced system settings > Performance and select Adjust for best performance. This disables non-essential visual effects, freeing up system resources for faster gaming performance.

    If you plan to use your Windows Live USB for media consumption, such as watching videos or editing photos, enable ReadyBoost to help speed up data access times for large media files. Additionally, using NTFS will allow for the storage and management of large files without issues.

    For office work, you can make sure your Windows Live USB is optimized for quick document processing by adjusting virtual memory settings. Increase the size of the paging file in System Properties > Advanced > Virtual Memory to provide a smoother experience when multitasking or handling large documents.

    In each case, optimizing the Windows Live USB setup based on the task at hand will ensure that it’s tuned for your specific needs, improving both speed and responsiveness.

    By configuring, optimizing, and customizing your Windows Live USB, you can achieve better performance tailored to your unique requirements. Whether you’re gaming, working, or simply consuming media, these tips will ensure your Windows Live USB setup is running at its best.

    Security Considerations for Your Portable Windows OS USB

    When you create Windows Live USB, you gain the flexibility of running a portable operating system from a USB drive. However, as with any portable data, securing it against unauthorized access is crucial. Without proper security measures, the data on your Windows Live USB could be compromised if the device is lost, stolen, or accessed by malicious individuals. In this section, we’ll explore how to protect your Windows Live USB from unauthorized access and discuss best practices for maintaining its security.

    Securing Your Windows Live USB Against Unauthorized Access

    One of the most important steps in securing your Windows Live USB is encryption. Encryption ensures that even if someone gains physical access to your USB drive, they will be unable to access the data without the correct credentials. There are several encryption tools available, but two of the most effective and widely-used options are BitLocker and VeraCrypt.

    1. BitLocker Encryption for Windows Live USB

      BitLocker is a built-in encryption tool in Windows that helps protect data by encrypting the entire drive. To enable BitLocker on your USB drive, follow these steps:

      • Insert your USB drive and open This PC.
      • Right-click on the USB drive and select Turn on BitLocker.
      • Choose a password that will be required to unlock the drive. Make sure it’s a strong, unique password.
      • Select Encrypt entire drive and then follow the prompts to complete the process.

      BitLocker will now protect the contents of your USB drive. Every time you plug the drive into a computer, it will prompt you for the password to unlock the encrypted data. For more detailed guidance on using BitLocker, refer to BitLocker drive encryption tools for removable data drives.

    2. VeraCrypt Encryption for Windows Live USB

      VeraCrypt is an open-source encryption tool that provides strong security for your USB drive. Here’s how you can use VeraCrypt to encrypt your Windows Live USB:

      • Download and install VeraCrypt from VeraCrypt official website.
      • Open VeraCrypt and click on Create Volume.
      • Select Create an encrypted file container and follow the wizard to choose a location for the encrypted volume.
      • Set up a strong password and select the encryption algorithm. AES is a widely recommended option.
      • Once the encrypted volume is created, mount it in VeraCrypt, and move your Windows Live USB contents to this encrypted volume.

      VeraCrypt offers additional layers of security, such as hidden volumes, which can help safeguard your data even if the password is compromised. To get a comprehensive guide on using VeraCrypt, check out the official beginner’s tutorial.

    In addition to encryption, it’s essential to set up password protection on the system itself and establish user access controls to prevent unauthorized users from accessing sensitive files on your Windows Live USB.

    Best Practices for Maintaining the Security of Your Setup

    Securing your Windows Live USB doesn’t stop at the initial encryption. Maintaining the security of your setup is a continuous process. By following these best practices, you can ensure that your USB remains secure over time.

    1. Regularly Update Your Encryption Tools

      It’s crucial to keep your encryption software up-to-date to protect against new vulnerabilities. Both BitLocker and VeraCrypt release updates to enhance security and patch known issues. Make it a habit to check for updates regularly and apply them as soon as they’re available.

    2. Use Strong Passwords and Multi-Factor Authentication (MFA)

      If possible, use multi-factor authentication (MFA) alongside strong passwords for additional security. For example, you can set up a password for your Windows Live USB and use an MFA tool, such as an authenticator app, for an extra layer of protection. Avoid using weak or default passwords.

    3. Periodically Check for Vulnerabilities

      Security is not a one-time effort. Periodically check your USB drive for vulnerabilities, and run security scans on the host computer to ensure there are no hidden threats. Additionally, check the encryption status to ensure no one has tampered with it.

    4. Backup Your Data Regularly

      Always keep an encrypted backup of important files on a separate, secure device. If your USB drive becomes corrupted or is lost, having a backup ensures that you don’t lose crucial data.

    5. Use Trusted Networks and Avoid Public Computers

      When using your Windows Live USB, ensure you connect only to trusted networks. Avoid accessing your data from public computers or insecure Wi-Fi connections, as these could expose your data to hacking attempts.

    By following these best practices, you will ensure that your Windows Live USB remains secure and reliable for long-term use. Remember, data protection is an ongoing responsibility, and keeping your USB drive encrypted with the latest security measures will significantly reduce the risk of unauthorized access.

    For more details on maintaining the security of your USB drive, refer to guides like How to encrypt a USB flash drive with VeraCrypt.

    Troubleshooting Common Issues with Windows Live USB Setup

    Creating a Windows Live USB can be a highly effective way to run Windows from a portable USB drive, but sometimes issues arise during the setup process. Troubleshooting these problems can be daunting, especially for intermediate users who may not have extensive experience with Windows USB setup. This section will help you identify and fix common problems that can occur during Windows Live USB creation, ensuring you successfully complete the process.

    Common Setup Problems and How to Fix Them

    When attempting to create a Windows Live USB, there are a few common issues that may prevent the setup from completing successfully. Understanding how to troubleshoot these problems will help you resolve them quickly.

    1. USB Drive Not Being Recognized

      One of the most common issues is when the USB drive is not recognized by the system during setup. This can be caused by several factors, such as an improper USB drive format or BIOS/UEFI settings.

      • Solution:
        • First, ensure your USB drive is formatted correctly. Use FAT32 for drives under 32GB, and NTFS for larger drives.
        • You can format your USB using the Disk Management tool in Windows or with a tool like Rufus, which provides an easy-to-use interface.
        • If the issue persists, check your BIOS/UEFI settings. Make sure your USB drive is listed as a boot option and that the boot mode (UEFI or BIOS) matches the configuration of your Live USB setup. For example, if your Live USB was created with UEFI support, ensure that UEFI boot mode is enabled in BIOS.
    2. Boot Failure

      Another frequent problem is boot failure, where the system fails to boot from the USB drive after the setup is completed. This issue is often related to incorrect partitioning or boot order in the BIOS/UEFI.

      • Solution:
        • Check Partition Type: Your Live USB must have the correct partition format. Most systems require the USB drive to have a GPT partition scheme for UEFI boot or MBR for legacy BIOS systems.
        • Use the following steps to check and adjust the partitioning:
          • Open Command Prompt and type diskpart.
          • Then type list disk to see all disks.
          • Select the USB drive with select disk X (replace X with the disk number).
          • Use the command clean to erase the drive and then reformat it with the appropriate partition scheme.
        • Adjust Boot Order: Enter the BIOS settings and adjust the boot priority to ensure the USB is set as the first boot device.

    How to Handle Errors and System Incompatibilities

    System incompatibilities and errors are another hurdle that users may encounter when setting up a Windows Live USB. These can arise due to missing drivers, unsupported hardware configurations, or corrupted system files. Here’s how you can resolve these issues.

    1. Driver Issues

      Sometimes, Windows may fail to detect essential hardware components, such as network or graphics drivers, when booting from a USB drive.

      • Solution:
        • You can use the Windows Recovery Environment (WinRE) to repair and update drivers. Boot from the Live USB, and when Windows loads, press Shift + F10 to open the Command Prompt.
        • From there, type devmgmt.msc to open the Device Manager. Check for any devices with missing drivers or yellow warning signs, and manually update the drivers.
        • You may need to download the appropriate drivers from the manufacturer’s website on another machine and transfer them via another USB device.
    2. Unsupported Hardware Configuration

      Another error that can arise is when the hardware configuration of the computer is not compatible with the Windows Live USB. This may include incompatible chipsets or missing BIOS/UEFI updates.

      • Solution:
        • First, check your hardware’s compatibility with Windows. Ensure that the system supports UEFI (if applicable) and that there are no firmware issues. Sometimes, updating the BIOS/UEFI version resolves these issues. You can check the motherboard or manufacturer’s website for BIOS updates.
        • If you continue to experience problems, consider using a different computer to create the Windows Live USB. Some older hardware may have trouble booting from a USB drive with certain configurations.

    By following these steps, you can effectively troubleshoot and resolve common errors during Windows Live USB creation. If problems persist, using official tools like Windows installation media or Advanced troubleshooting Windows startup problems with LiveRE can provide additional support for more complex issues.

    Maximizing the Effectiveness of Your Windows Live USB for Different Use Cases

    A Windows Live USB allows you to run a portable version of Windows directly from a USB drive. It is a versatile tool, enabling users to perform tasks such as system recovery, regular work, or even keeping a portable version of Windows for travel. When you create Windows Live USB, the system is configured to boot from the USB, allowing full access to the OS and applications without altering the host machine. In this guide, we’ll walk you through how to optimize your Windows Live USB for different use cases, focusing on system recovery, daily use, and ensuring high availability with security.

    Optimizing Your Setup for System Recovery

    To maximize the effectiveness of your Windows Live USB for system recovery, it’s essential to incorporate recovery tools and ensure the setup is reliable in critical situations. When preparing a USB for system recovery, the focus is on ensuring a smooth boot process and access to key repair utilities.

    1. Choose the Right Recovery Tools: Incorporate tools like Macrium Reflect or Acronis True Image, which allow you to back up your system and restore it if needed. Both programs can run from a bootable USB and provide an easy interface for recovering from a failed system.
    2. Enable Windows Recovery Environment (WinRE): You can integrate WinRE onto your Windows Live USB setup. To do this, use the following steps:
      • Open Command Prompt as an administrator and type:
        reagentc /enable
      • This command ensures the Windows Recovery Environment is enabled on your USB.
      • Afterward, you can access various repair options, like Startup Repair and System Restore, directly from your Live USB setup.
    3. Ensure Reliable Booting: Use tools like Rufus or WinToUSB to create a reliable bootable USB. Both tools allow for Windows installations directly onto the USB stick and ensure that it will boot on most machines. When using WinToUSB, you can directly clone an existing system or install a clean version of Windows to your USB for easy recovery in case of an emergency.

    By optimizing the Live USB with recovery tools, you can ensure that you are prepared for any system failures and can restore your machine with minimal downtime.

    Making Your Windows Live USB Suitable for Regular Use

    For those who want to use their Windows Live USB for regular work, the setup should be optimized for speed, portability, and ease of use. Here’s how to adapt your Windows Live USB for everyday tasks:

    1. Install Essential Software: You can install your everyday programs, such as web browsers, text editors, and productivity software, directly onto the Live USB. Since the setup allows for running a full version of Windows, you can carry your preferred software without needing to install them on each machine you use.
    2. Improve Performance: To boost performance, use a high-speed USB 3.0 drive or better. The faster the USB drive, the quicker the system will boot and run. If you plan to use this setup for regular tasks, such as browsing or document editing, ensure that the drive is at least 16GB in size with sufficient free space to accommodate your programs and data.
    3. Persistent Data Storage: By default, Windows Live USB setups do not save changes once you reboot. To make your USB suitable for regular use, set up persistent storage. This allows data such as files, settings, and installed programs to be retained across sessions. Tools like WinToUSB support persistent partitions, which are essential for carrying your work files and settings from one computer to another.

    By ensuring that the Windows Live USB has all the tools and software you need for regular tasks, you’ll have a powerful and portable workstation available at your fingertips.

    Maintaining High Availability and Security with Cloud Hosting

    To maintain the high availability and security of your Windows Live USB, it’s important to integrate cloud-based solutions. By leveraging cloud hosting, you can ensure that your data is secure, accessible, and recoverable, regardless of where you are.

    1. Cloud Backups: Use cloud services like Google Drive, OneDrive, or Dropbox to keep a backup of important files. These services allow for easy file access and syncing between your Live USB and other devices, ensuring that your files are always up to date. By automatically syncing data, you minimize the risk of losing critical information in case your USB becomes damaged or lost.
    2. Cloud-Based Recovery: For enhanced security, consider setting up cloud-based recovery options. Services such as Acronis Cloud Backup allow you to store an image of your system in the cloud. In case of a failure, you can quickly restore your Windows Live USB from the cloud to a new USB or even another computer.
    3. Encryption and Security: To protect your sensitive data on the Live USB, enable encryption on both the USB drive and cloud storage. BitLocker can be used to encrypt the USB, ensuring that unauthorized access is prevented. Additionally, consider using two-factor authentication (2FA) for cloud storage accounts to further secure your files.

    By integrating cloud hosting solutions with your Windows Live USB, you can ensure that your data is always available, secure, and protected, which is crucial for both personal and professional use.


    For additional information on integrating cloud services into your setup, consider reading about What Is Cloud Computing: The Ultimate Guide to Benefits & Types.

  • VPS for Developers: The Ultimate Guide to Custom Environments

    VPS for Developers: The Ultimate Guide to Custom Environments

    Why VPS Hosting is Essential for Developers: Flexibility and Control

    VPS for developers offers a unique combination of flexibility, control, and scalability that is crucial for modern development projects. Whether you’re building custom development environments, managing databases, or running specialized software, VPS hosting enables developers to tailor their servers to their exact needs. This section will explore the key benefits and use cases of VPS hosting for developers, focusing on why its flexibility is essential for effective software development.

    Introduction to VPS Hosting for Developers: Key Benefits and Use Cases

    VPS hosting provides developers with the freedom to create customized environments that match their specific project needs. Unlike shared hosting, where resources are limited and pre-configured, a VPS gives developers the autonomy to configure server resources such as CPU, RAM, and storage. This allows for a more efficient development process, as developers can allocate resources based on the demands of their projects.

    Some of the key benefits of VPS for developers include:

    • Complete Control: You have full root access, enabling you to install and configure any software required for your development.
    • Scalability: VPS hosting can easily scale as your project grows, allowing you to adjust resources like CPU, RAM, and bandwidth without downtime.
    • Customizable Environments: You can create custom development environments for specific programming languages, frameworks, and applications.
    • Enhanced Performance: With dedicated resources, VPS hosting offers faster performance compared to shared hosting, which is ideal for testing and running resource-heavy applications.

    A common use case for VPS in software development is setting up a dedicated environment for building web applications. For example, developers can host a Node.js or Python application on a VPS, where they can fully customize the environment with all the necessary dependencies. This level of control ensures that developers are not restricted by the limitations of shared hosting.

    For a deeper dive into the flexibility and control VPS offers developers, you can explore more about VPS for Developers: flexibility, control, and reliability.

    VPS Hosting for Software Development: Why Flexibility is Essential

    The flexibility of VPS hosting is especially important when it comes to software development. Developers often need to tailor their environments to specific frameworks, programming languages, and tools. With VPS hosting, you can configure the server to meet the requirements of your development stack, from web applications to machine learning projects.

    One of the key benefits of VPS for software development is the ability to allocate resources based on your project’s needs. For instance, if you’re running a Python/Django application, you may require more RAM and CPU to handle complex computations. With a VPS, you can adjust these resources as necessary, ensuring that your application runs efficiently.

    Here’s an example: A developer working on a PHP-based web application might set up a VPS with the following configurations:

    sudo apt update && sudo apt upgrade
    sudo apt install apache2 php php-mysql

    This command installs Apache and PHP on your server. It’s ideal for setting up a basic web server where you can develop PHP applications. This configuration can be adjusted as the project grows or the need for additional resources arises.

    The flexibility to install specific development tools like Docker, Git, or database servers further enhances your ability to create custom workflows. Additionally, VPS hosting allows you to run testing environments where you can simulate production-level conditions, ensuring the stability of your applications before deployment.

    If you are interested in learning more about the scalability and resource allocation options available with VPS hosting, check out The ultimate guide to VPS hosting: performance, security & scalability.

    In conclusion, VPS for developers offers unmatched flexibility, allowing developers to configure and scale their hosting environments to meet specific project demands. Whether you’re working on a small web application or a large-scale enterprise project, a VPS provides the control and scalability necessary to achieve optimal performance and productivity.

    Key Factors to Consider When Choosing a VPS for Software Development

    When selecting a VPS for developers, several crucial factors can influence the success of your development projects. Whether you’re building small applications or large-scale systems, understanding key elements like performance, security, and scalability is vital. By focusing on these areas, you can optimize your development environment and ensure the VPS you choose supports your project needs efficiently. This section will break down the most important considerations, providing you with actionable insights on how to pick the best VPS configuration for your software development needs.

    Understanding VPS Performance Factors: CPU, RAM, and Storage Considerations

    Performance is a primary concern when choosing a VPS for developers, as it directly impacts the efficiency of your development environment. The three main components that influence VPS performance are CPU, RAM, and storage.

    • CPU (Central Processing Unit): The CPU is the brain of your VPS, affecting how quickly tasks are processed. For software development, the more powerful the CPU, the faster the code can be compiled, and the smoother the development environment will run. If you’re working with resource-intensive applications or running multiple processes simultaneously, you’ll need a high-performance CPU.
    • RAM (Random Access Memory): RAM determines how much data your VPS can handle at once. More RAM allows for more simultaneous processes, which is especially important for development environments that need to handle multiple tasks, such as running a local database while compiling code. Insufficient RAM can slow down performance, especially when running large applications or multiple containers.
    • Storage: The type of storage—SSD or HDD—matters significantly. SSDs are faster and more reliable than HDDs, which results in quicker file access and a more responsive development environment. As your projects grow, SSD storage becomes increasingly important for handling large files and databases.

    To choose the right configuration, consider the size and complexity of your project:

    • For small projects or testing environments, a VPS with 2-4 GB RAM, a 2-core CPU, and 40-50 GB SSD storage should be sufficient.
    • For larger projects or production environments, consider a VPS with 8-16 GB RAM, 4-8 cores, and 100-200 GB SSD storage.

    Balancing performance with cost is essential. While a high-performance VPS might seem appealing, it’s important to choose a configuration that meets your needs without overpaying for resources you won’t fully utilize. For more detailed information on choosing the right VPS resources, you can check out this VPS resources guide.

    Security Features to Look for in VPS Hosting: Protecting Your Development Environment

    Security is another critical factor when selecting a VPS for developers, as it ensures the integrity of your development environment and the protection of your code. Here are the key security features to consider:

    • Firewalls: A robust firewall protects your VPS from unauthorized access by blocking malicious traffic. Look for a VPS hosting provider that includes a pre-configured firewall, or allows you to configure one to suit your needs. Firewalls help prevent attacks such as DDoS and brute-force attempts.
    • DDoS Protection: Distributed Denial of Service (DDoS) attacks can overwhelm your VPS with excessive traffic. Opt for a VPS provider that offers built-in DDoS protection, ensuring your development environment remains online and accessible even during an attack.
    • SSL Certificates: SSL certificates encrypt data between your VPS and users, ensuring that sensitive information, like login credentials, is kept secure. Many VPS providers include SSL certificates in their plans, but it’s essential to ensure this feature is included or can be easily added.
    • Regular Backups: Security isn’t just about preventing attacks; it also involves being prepared for the worst. Regular backups of your development environment ensure that you can quickly recover from data loss due to accidental deletion, hardware failure, or security breaches.

    As a developer, you should prioritize securing your environment by ensuring that these features are implemented and maintained. For example, setting up a firewall on your VPS could be as simple as running a command like:

    sudo ufw enable

    This command enables the firewall on Ubuntu-based systems, protecting your VPS from unwanted connections. Additionally, ensure that your SSH keys are properly configured to prevent unauthorized logins, and always use strong passwords for any services that require them.

    For further details on the most important security features to look for in a VPS, take a look at this article on top security features for VPS hosting.

    By considering both performance and security, you can choose the best VPS for software development, ensuring that your environment is fast, scalable, and secure.

    Comparing VPS Options: Pricing, Resources, and Scalability for Developers

    When choosing the best VPS for developers, one of the most critical decisions you’ll make is selecting the right configuration based on your project’s pricing, scalability, and resource needs. Understanding these key aspects will not only help you save on costs but ensure that your chosen VPS can evolve alongside your project’s requirements. This section will explore how different VPS options compare, focusing on the essential elements that developers need to evaluate before making a decision.

    Understanding VPS Pricing Models: What Fits Your Development Needs

    VPS pricing models can vary widely, and understanding which structure best suits your project is crucial for cost management. Broadly, VPS providers offer two main pricing models: pay-as-you-go and subscription-based.

    1. Pay-As-You-Go: This model charges developers based on the resources they use, making it ideal for projects with fluctuating needs or short-term ventures. For example, a developer working on a prototype or an experimental project might opt for this flexible model to avoid paying for unused resources.
    2. Subscription-Based Pricing: With subscription-based models, you pay a fixed monthly or annual fee for a predefined set of resources. This option is typically best for long-term projects with stable needs, such as web apps or databases that require consistent resources.

    Pros and Cons:

    • Pay-As-You-Go: Flexible, cost-efficient for small projects or fluctuating workloads, but can become unpredictable for projects that see sudden growth.
    • Subscription-Based: Predictable costs, ideal for larger, more stable projects, but potentially overpaying if resource needs are lower than expected.

    For instance, a developer working on a SaaS product with steady traffic may benefit from a subscription plan, while one building a gaming server with unpredictable spikes in demand would lean toward a pay-as-you-go model.

    By understanding these models, developers can select the best VPS pricing for their needs, balancing flexibility and cost-efficiency.

    Scalability and Resources: Choosing a VPS That Grows with Your Project

    Scalability is one of the most important factors to consider when selecting a VPS. As your project grows, the VPS should be able to scale both vertically (upgrading the resources on your current server) and horizontally (adding more servers to your infrastructure).

    • Resource Allocation: VPS plans typically offer a range of resources such as CPU, RAM, and bandwidth. As a developer, you’ll need to determine how much of each your project will require. For example, a small website may require minimal CPU and memory, while a large database-driven application will need more robust resources.
    • Scaling Up: A key advantage of VPS hosting is the ability to scale easily. For instance, if you start with a small VPS with 2 GB of RAM and 1 vCPU, but as your project grows, you can upgrade to a larger plan with 8 GB of RAM and 4 vCPUs without having to migrate to a new server. This flexibility allows developers to avoid overcommitting resources from the start while ensuring they can accommodate growth.

    Example Scenario: Consider a developer who starts with a simple blogging platform. In the initial stages, they may only need 2 GB of RAM. However, as their traffic increases, they can scale up to a larger VPS, for instance, one with 4 GB of RAM and more bandwidth, ensuring that performance remains optimal as the user base grows.

    When evaluating VPS options, ensure that the provider offers simple scaling processes and enough resources to support your projected growth.

    Evaluating VPS Hosting Providers: Key Considerations for Developers

    Choosing a VPS hosting provider is not just about price and resources—it’s also about the reliability and support they offer. Developers need to consider several factors when evaluating VPS hosting providers.

    1. Reputation and Uptime: A reputable provider should guarantee high uptime (typically 99.9% or higher) to ensure your project remains accessible. Check independent reviews and provider transparency on uptime statistics.
    2. Support and Documentation: Good customer support is essential, especially if you’re managing critical development projects. Look for providers that offer 24/7 support, including live chat, email, and phone support. Additionally, ensure they provide comprehensive documentation to help you manage your VPS effectively.
    3. Performance and Speed: VPS performance can be influenced by server location, hardware quality, and network speed. For instance, a developer working on a global project might prioritize providers with servers in multiple regions for faster response times.

    Example Consideration: A developer might compare two VPS providers: one with excellent reviews, 99.99% uptime, and fast customer support, but limited regional server options. The other provider may have servers in more locations but offer slower customer support. Depending on the developer’s needs, the choice between these two might come down to whether they prioritize support or server location for performance.

    To evaluate VPS providers thoroughly, focus on factors like uptime, support, and performance. This will ensure that your VPS hosting provider can meet your long-term development needs while providing excellent service.


    In conclusion, selecting the best VPS for developers hinges on understanding the pricing models, scalability, and resources offered by different providers. By evaluating these factors and considering your project’s specific needs, you can choose the VPS that provides both flexibility and reliability. For more detailed guidance on how to choose the right VPS hosting for your development projects, check out our VPS Hosting: The Ultimate Guide to Choosing the Best Option.

    How to Select the Right VPS Configuration for Your Development Environment

    Choosing the right VPS configuration is critical for developers who need a reliable and customizable environment for their projects. Whether you’re building a Node.js application, configuring a Python environment, or working with other development stacks, the right Virtual Private Server (VPS) can significantly improve performance, scalability, and flexibility. In this guide, we will explore how to select the best VPS configurations for developers, helping you optimize resources, ensure efficiency, and choose a provider that meets your specific development needs.

    Choosing the Right VPS for Specific Development Needs: Node.js, Python, and More

    When selecting a VPS for development, it’s important to consider the requirements of your specific tech stack. Different programming languages and frameworks demand varying levels of resources. For example, Node.js applications are often lightweight but require efficient handling of I/O operations, making VPS configurations with sufficient RAM and CPU resources crucial. On the other hand, Python applications—especially those with frameworks like Django or Flask—may need more robust configurations depending on the complexity and expected load of the application.

    Node.js Example:

    For a simple Node.js environment, a VPS with 2 GB of RAM and 1 vCPU would be sufficient for small to medium projects. This configuration allows for fast, non-blocking I/O operations typical of Node.js applications. You could also opt for more RAM or vCPUs if the application is expected to handle heavy traffic or complex operations, such as real-time data processing.

    Python Example:

    Python applications may require more memory, especially when working with larger datasets or machine learning frameworks. A VPS configuration with 4 GB of RAM and 2 vCPUs would typically serve a medium-sized Python application well. If you are running heavy computation tasks or large web apps using Django or Flask, consider scaling up the resources as needed.

    Tailoring your VPS configuration to your tech stack’s needs ensures optimal performance and scalability as your development environment grows.

    Configuring Virtual Machines for Optimal Performance and Efficiency

    To optimize the performance of your VPS for development, proper configuration is key. This involves allocating the right amount of memory, CPU, and disk space to handle the demands of your specific project. Here’s how you can configure your virtual machine for the best performance:

    Memory Allocation:

    For most development environments, it’s essential to have enough RAM to avoid slowdowns. For a Node.js or Python environment, allocate at least 2–4 GB of RAM to ensure smooth operation, especially if you’re running databases or additional services like Redis or MongoDB.

    CPU Usage:

    A VPS with at least one vCPU is ideal for light to moderate development work. If your application performs complex computations, such as machine learning tasks or heavy data processing, you may want to opt for 2 or more vCPUs. This allows the virtual machine to handle multiple processes concurrently, improving performance.

    Disk Space:

    For disk space, SSD-based VPS configurations are highly recommended due to their faster read/write speeds, which improve the overall responsiveness of your development environment. Start with at least 20–30 GB of disk space and scale it as needed based on the size of your project and storage requirements.

    Additionally, consider performance monitoring tools to fine-tune resource allocation. Tools like htop or top for Linux can provide insights into CPU and memory usage, allowing you to adjust your configuration based on real-time performance data.

    Provider Options for Flexible VPS Configurations: Practical Example

    When choosing a VPS provider for your development environment, flexibility and scalability are key considerations. Several providers offer tailored VPS configurations that are ideal for developers. Some popular choices include:

    • DigitalOcean: Known for its simplicity and developer-friendly setup, DigitalOcean provides VPS hosting plans that allow you to select the right amount of CPU, RAM, and disk space based on your project’s needs.
    • Linode: Linode offers scalable VPS configurations with great support for various tech stacks, including Node.js and Python.
    • AWS EC2: AWS provides powerful and flexible VPS options that can be tailored to a wide range of development environments, making it an excellent choice for larger or more resource-intensive projects.

    For example, if you were working on a Node.js application that required scalability and flexibility, you might opt for a DigitalOcean droplet with 2 GB of RAM and 1 vCPU. This would provide a good starting point for development, with the option to scale resources up or down as needed.

    Each provider offers a range of pricing plans and configurations, so it’s essential to select one based on your project’s specific needs and future growth potential.


    By following these steps and considering these examples, you can confidently select the right VPS configuration for your development environment. Whether you’re building a lightweight Node.js app or a more complex Python project, the right VPS will enhance your workflow and ensure optimal performance. For more in-depth guidance on selecting the best VPS for developers, check out our VPS Hosting: The Ultimate Guide to Choosing the Best Option.

    Optimizing VPS Performance After Migration: Best Practices for Long-Term Success

    After migrating your development environment to a VPS, optimizing its performance is essential for ensuring long-term reliability and efficiency. As a developer, you need to keep your VPS running smoothly to support your projects and workflows. This section will cover the key metrics to monitor, strategies for ensuring long-term performance, and how to use monitoring tools effectively.

    Monitoring Your VPS: Key Metrics for Developers

    When optimizing VPS performance, it’s crucial to monitor key metrics that directly impact your server’s efficiency. As a developer, you should focus on the following metrics:

    • CPU Usage: High CPU usage can indicate inefficient processes or resource-heavy applications. It’s essential to identify which processes are consuming the most CPU time.
    • Memory Utilization: Keeping track of memory usage helps prevent issues like swapping, which can degrade server performance.
    • Disk I/O: Disk performance impacts the speed of data access. Monitoring disk I/O can help identify bottlenecks, especially for database-driven applications.
    • Network Bandwidth: Monitoring bandwidth ensures your VPS can handle the incoming and outgoing traffic without latency.

    To monitor these metrics effectively, tools like top and htop are invaluable. The top command provides real-time information about the system’s CPU, memory, and processes. For a more detailed, user-friendly interface, htop can be used:

    sudo apt install htop
    htop

    This command installs htop, which displays a color-coded list of processes, their CPU and memory usage, and more. By regularly checking these metrics, you can prevent overloading your VPS and ensure that performance remains optimal.

    Ensuring Long-Term Reliability and Performance Post-Migration

    To ensure that your VPS performs well in the long run, it’s important to address potential pitfalls that can occur after migration. Common issues like resource over-allocation or lack of resource scaling can significantly impact performance.

    • Load Balancing: If you experience spikes in traffic or resource consumption, setting up load balancing can distribute the load evenly across your VPS or multiple servers, ensuring stability.
    • Cron Jobs for Maintenance: Automating regular tasks like log rotation, disk cleanup, and backups is crucial for maintaining performance over time. Setting up cron jobs can help ensure your VPS remains optimized.

    For example, to set up a cron job for clearing temporary files every week, you can add the following to your crontab:

    crontab -e

    Then add this line to run a cleanup script every Sunday at midnight:

    0 0 * * 0 /usr/bin/cleanup_script.sh

    This cron job will run your cleanup script, ensuring that unnecessary files don’t consume disk space, which could affect VPS performance. Maintaining this routine will keep your server healthy in the long term.

    Using VPS Monitoring Tools to Enhance Development Workflow

    Using VPS monitoring tools not only helps maintain performance but can also streamline your development workflow by providing real-time insights into system health. Tools like Grafana, Nagios, and htop can be integrated into your workflow to continuously monitor VPS performance.

    For example, Grafana allows you to create dashboards that display system metrics in real time, making it easier to track resource usage and identify any issues before they escalate. To set up Grafana on your VPS:

    1. Install Grafana:
      sudo apt install grafana
    2. Start and Enable Grafana:
      sudo systemctl start grafana-server
      sudo systemctl enable grafana-server
    3. Access Grafana: Once installed and running, you can access Grafana through your browser at http://<your_vps_ip>:3000.

    Grafana will let you monitor metrics such as CPU usage, memory utilization, disk performance, and more. Integrating Grafana into your development workflow ensures you can address performance issues in real time, enhancing productivity and preventing downtime.

    By leveraging these VPS monitoring tools, you can ensure continuous performance optimization without the need for constant manual intervention. This proactive approach will significantly improve the reliability of your VPS.


    For further reading on how to select the best VPS configuration for your development environment, check out our detailed guide on VPS Hosting: The Ultimate Guide to Choosing the Best Option.

  • Blue Screen of Death (BSOD): Expert Guide to Fixing Issues

    Blue Screen of Death (BSOD): Expert Guide to Fixing Issues

    What is the Blue Screen of Death (BSOD) and Why Does It Happen?

    The Blue Screen of Death (BSOD) is a stop error screen displayed by Windows operating systems when they encounter a critical problem they cannot recover from. This error halts system operations and provides an error message indicating the cause of the crash, often displaying error codes. While BSOD can be alarming, understanding its causes and resolving the issue can help restore your system to normal. Common causes include driver conflicts, hardware failures, and system errors, which can arise from various factors such as updates or resource limitations. Let’s dive into what causes BSOD and how to begin troubleshooting these issues.

    Understanding Blue Screen of Death (BSOD) and Its Common Causes

    The Blue Screen of Death (BSOD) is an indication that something serious has gone wrong within your Windows system. When a BSOD occurs, Windows stops running to prevent further damage and shows a blue screen with an error message, often including an error code.

    Common causes of BSOD include:

    • Driver Conflicts: A common cause is outdated or incompatible drivers that conflict with the operating system or other software. For example, after updating a video card driver, you might encounter a BSOD with a message like “Stop Code: DRIVER_IRQL_NOT_LESS_OR_EQUAL.” This indicates that a conflict or malfunction has occurred between the hardware and software.
    • System Errors: These errors can be related to software, such as bugs or corrupt files, that cause the system to crash. For instance, trying to run an application that is incompatible with the current system configuration could lead to a BSOD.
    • Hardware Failures: A failing hard drive, faulty RAM, or other hardware issues may lead to a BSOD. This is especially true if there are problems with critical components like memory or storage devices. If the system detects faulty hardware during operation, it can trigger a BSOD to protect the system.
    • Memory Issues: Insufficient RAM or errors within the memory can also cause a blue screen. Running multiple heavy applications or having too many background processes can cause memory overloading, leading to a BSOD.

    Understanding these common causes can help you pinpoint why the BSOD occurs and start troubleshooting accordingly.

    The Role of System Performance in Blue Screen of Death

    System performance plays a significant role in triggering Blue Screen of Death (BSOD) errors. When the system is overloaded with too many tasks or insufficient resources, it can result in a crash. Below are some factors related to system performance that can lead to BSOD:

    • Insufficient RAM: When your system doesn’t have enough RAM to support the applications you’re running, it can cause a system crash. If you’re running memory-intensive programs, such as video editing software or multiple browser tabs, the system may trigger a BSOD to prevent further issues.
    • CPU Overload: If the CPU is under heavy load for an extended period, it can lead to instability, especially if it’s not cooling properly or if there are issues with the processor. This can cause a BSOD as Windows shuts down to avoid overheating or permanent damage.

    Regular maintenance of your system can prevent these issues. For example, running Windows Memory Diagnostic can help detect RAM problems, and checking the Task Manager for high CPU usage can help identify performance bottlenecks before they cause a BSOD. Cleaning up unnecessary files and ensuring your system is up to date with the latest drivers can help maintain smooth performance and reduce the chances of encountering a blue screen error.

    By understanding the relationship between system performance and BSOD, you can proactively manage resources and prevent crashes from happening.

    Common Causes of BSOD and How to Identify Them

    The Blue Screen of Death (BSOD) is a well-known error in Windows systems that signals a serious issue causing the computer to crash. It can be caused by several factors, ranging from hardware problems like faulty RAM to issues with device drivers or system software. Identifying the root cause of a BSOD can be challenging, but there are built-in tools in Windows that can help you troubleshoot the issue effectively. In this section, we’ll explore how to use system logs and memory diagnostics to identify the underlying problems that trigger the Blue Screen of Death.

    Using System Logs to Identify BSOD Issues

    When a BSOD occurs, Windows creates a detailed record of the event in its system logs. These logs, accessible through the Event Viewer, can help you pinpoint the exact cause of the crash, such as hardware failures or software conflicts.

    How to Use Event Viewer

    1. Open Event Viewer
      • Press Windows + R, type eventvwr.msc, and press Enter. This will open the Event Viewer window.
    2. Navigate to the Logs
      • In the left-hand panel, expand Windows Logs and click on System.
    3. Filter for BSOD Events
      • In the right panel, click on Filter Current Log. A new window will pop up where you can filter the log to show only critical events.
      • In the Event sources drop-down, select BugCheck. This source is used for BSOD errors.
    4. Look for Specific Error Codes
      • BSODs often generate error codes that indicate what caused the issue. For example:
        • 0x0000007E: Typically associated with driver problems.
        • 0x00000050: Related to memory corruption or access violations.
      • Make a note of these error codes, as they can be helpful in identifying the specific problem.

    Once you have the relevant crash logs and error codes, you can use them to search for solutions or directly address the problematic driver or hardware. For a detailed guide on locating BSOD log files, refer to Where to Find BSOD Log Files in Windows 10/11.

    How to Perform a Memory Diagnostic to Resolve BSOD

    Memory issues, particularly faulty RAM, are a common cause of the Blue Screen of Death. To troubleshoot this, Windows includes a built-in Memory Diagnostic Tool that checks for memory-related problems.

    Running the Memory Diagnostic Tool

    1. Launch the Memory Diagnostic Tool
      • Press Windows + R, type mdsched.exe, and press Enter. This will open the Windows Memory Diagnostic tool.
    2. Choose When to Run the Diagnostic
      • You will be prompted to restart your computer. Choose either Restart now and check for problems or Check for problems the next time I start my computer.
    3. Wait for the Tool to Complete
      • The tool will run a series of tests to detect memory issues. This process may take several minutes.
    4. Review the Results
      • After your computer restarts, you will see a notification with the diagnostic results. If memory issues are found, the tool will suggest solutions, such as replacing faulty RAM.

    If you need further assistance with memory diagnostics, check out How to Check Memory Problems with Windows Memory Diagnostic and How to Solve RAM Problems with Windows Memory Diagnostics.

    By following these steps, you can diagnose whether faulty memory is causing your BSOD. If the tool finds errors, replacing the faulty RAM can resolve the issue and restore system stability.

    How to Diagnose BSOD Issues Using System Tools and Logs

    Experiencing a Blue Screen of Death (BSOD) can be alarming, but it’s often possible to resolve the issue with the help of built-in system tools and logs. Diagnosing BSOD errors involves identifying the root cause, which could be related to hardware failure, driver issues, or system errors. In this guide, we’ll walk you through how to use Windows Event Viewer and the Memory Diagnostic tool to troubleshoot and resolve BSOD problems, making it easier for you to get your system back to normal.

    Using System Logs to Identify BSOD Issues

    One of the most effective ways to diagnose BSOD problems is by checking the system logs in the Windows Event Viewer. This tool records detailed information about system events, including critical errors that might be responsible for a BSOD.

    Here’s how you can use Event Viewer to check for BSOD-related logs:

    1. Open Event Viewer:
      • Press Win + X and select Event Viewer from the menu, or type “Event Viewer” in the Windows search bar and hit enter.
      • Once the Event Viewer opens, navigate to Windows Logs > System.
    2. Filter for BSOD Events:
      • In the right panel, click on Filter Current Log.
      • In the filter window, under the Event sources dropdown, select BugCheck. This source logs BSOD events.
      • You can also filter by Event ID (for example, 41 for critical errors), but it’s optional.
    3. Analyze the Logs:
      • After applying the filter, look for entries related to the BSOD. These entries typically include the error codes or references to drivers that may be causing the issue.
      • If you see entries that mention hardware failure, such as “Page fault in non-paged area” or “Memory management,” this may indicate a memory-related problem.
    4. Interpret the Error Codes:
      • The Event Viewer will often show an error code associated with the BSOD. You can search online for this error code to get more details about the potential causes, such as faulty drivers or hardware issues.

    For a more detailed guide on using Event Viewer, check out this article: How to use Event Viewer on Windows 10.

    By following these steps, you can uncover the underlying cause of many BSOD errors and take steps to resolve them. The Windows Event Viewer is a powerful tool that helps you track system errors and identify what went wrong during the crash.

    How to Perform a Memory Diagnostic to Resolve BSOD

    Memory issues are a common cause of BSOD errors, particularly if faulty RAM is interfering with system processes. Fortunately, Windows includes a built-in Memory Diagnostic Tool that can help you test your system’s RAM and identify potential issues.

    Follow these simple steps to run a memory diagnostic:

    1. Launch the Memory Diagnostic Tool:
      • Press Win + R, type mdsched.exe, and press Enter. This will open the Windows Memory Diagnostic tool.
      • You’ll be prompted to either restart your computer and check for problems immediately or schedule the check for the next time you restart.
    2. Run the Diagnostic:
      • Choose Restart now and check for problems. Your computer will reboot, and the diagnostic tool will automatically begin testing the RAM.
      • The process may take several minutes, depending on the size of your RAM.
    3. View the Results:
      • Once the test is complete and Windows restarts, you can view the results by opening the Event Viewer again. Go to Windows Logs > System and look for an event from the MemoryDiagnostics-Results source.
      • The log will tell you if any memory issues were detected. If no problems were found, you can be confident that your RAM is not the issue.
    4. Resolve Memory Errors:
      • If the diagnostic tool finds issues with your memory, you may need to replace faulty RAM. In some cases, reseating the RAM or ensuring that all memory sticks are properly installed might resolve the problem.

    For more detailed instructions on using the Memory Diagnostic Tool, visit this page: How to solve RAM problems with Windows Memory Diagnostics.

    By running the Memory Diagnostic Tool, you can easily identify if memory problems are the cause of the BSOD and take appropriate action, such as replacing faulty RAM.


    By using system logs and the Memory Diagnostic Tool, you can troubleshoot and resolve many common causes of BSOD errors on your computer. These built-in tools are easy to use and provide valuable insights that can guide you toward the right solution. If the issue persists after using these tools, it may indicate deeper hardware or driver problems, which may require further investigation.

    How to Troubleshoot BSOD: Software Solutions

    When encountering the Blue Screen of Death (BSOD), it’s crucial to understand that the issue could often stem from software conflicts or system errors. Troubleshooting these problems through software solutions can help you pinpoint the root cause of the system crash, whether it’s due to driver conflicts, system file corruption, or issues with certain software programs. In this section, we’ll explore the most effective software-based troubleshooting methods, ranging from built-in diagnostics to automated repair tools, to help you resolve BSOD problems efficiently.

    How to Troubleshoot Software-Based BSOD Issues

    The first step in resolving a BSOD caused by software-related issues is diagnosing the problem. Fortunately, Windows offers several built-in tools that can help pinpoint the underlying cause. Here’s how you can get started:

    1. Run Event Viewer:
      • Press Win + R, type eventvwr.msc, and hit Enter.
      • In Event Viewer, navigate to Windows Logs > System.
      • Look for critical errors around the time of the BSOD, marked with a red exclamation mark.
      • These error logs can provide insight into which software or driver caused the system crash.

      What it does: Event Viewer helps you identify critical errors related to BSODs, including specific drivers or system files that may be malfunctioning.

    2. Use Reliability Monitor:
      • Press Win + R, type perfmon /rel, and press Enter.
      • This tool provides a timeline of your system’s reliability, listing critical events like system crashes and their potential causes.
      • Look for events labeled with a “Windows Error” or “Critical Error” to identify possible software issues.

      What it does: Reliability Monitor gives you a quick overview of system stability, helping you correlate software or driver issues with the BSOD.

    3. Run System File Checker:
      • Open Command Prompt as Administrator (right-click Start > Command Prompt (Admin)).
      • Type sfc /scannow and press Enter.
      • This tool checks and repairs corrupted system files that could be causing the BSOD.

      What it does: The sfc /scannow command scans your system for corrupted files and automatically fixes any issues it finds, potentially resolving BSODs caused by system file corruption.

    4. Check for Driver Conflicts:
      • Open Device Manager by pressing Win + X and selecting Device Manager.
      • Look for any devices marked with a yellow triangle or red exclamation mark.
      • Right-click on the device and choose Update Driver to ensure you’re using the latest driver version.

      What it does: Ensures that your hardware devices have the latest drivers, which is critical for preventing conflicts that can lead to BSODs.

    By using these tools, you can easily identify software-related issues that might be causing your BSOD. Always start with these built-in solutions before moving to more advanced methods.

    The Pros and Cons of Automated BSOD Fixing Tools

    Automated BSOD fixing tools like Restoro or Advanced SystemCare offer an easy way to fix errors and prevent future BSODs. These tools scan your system for errors, fix corrupted files, and update outdated drivers—all with minimal user input. However, they come with both advantages and limitations.

    Pros:

    • Ease of Use: These tools provide a simple, user-friendly interface that allows even beginners to fix BSODs without delving into system logs or manual troubleshooting.
    • Comprehensive Scan: Automated tools can scan your entire system for various errors, including corrupted files, outdated drivers, and system inconsistencies.
    • Time-Saving: These tools can automatically perform tasks like updating drivers or repairing corrupted files, saving you time compared to manually troubleshooting each issue.

    Cons:

    • Limited Effectiveness: Automated tools may not always identify or fix the root cause of a BSOD, especially if the problem is more complex or hardware-related.
    • Possible Over-Dependence: Relying solely on automated tools may prevent users from learning how to properly diagnose BSODs or understand the underlying issues.
    • Costs: Many automated tools require a paid version to unlock full functionality, which might not be necessary for every user.

    Before opting for an automated BSOD tool, it’s important to understand its capabilities and limitations. If you’re dealing with a simple system error, these tools can be a great time-saver. However, for more complex issues, manual troubleshooting or professional assistance may be required.

    Using Customizable Virtual Machines for BSOD Prevention

    One proactive approach to prevent BSODs is by using virtual machines (VMs) to isolate potential software issues. A virtual machine allows you to run an entirely separate operating system within your current setup, which can be useful for testing software without risking your main system.

    Here’s how you can set up a basic virtual machine to help prevent BSODs:

    1. Choose a Virtual Machine Software:
      • Download and install VMware or VirtualBox (both are free for personal use).
    2. Set Up the Virtual Machine:
      • Open your chosen VM software and create a new virtual machine.
      • Follow the on-screen instructions to allocate resources (CPU, memory) and install a guest operating system, like Windows.
    3. Test Software in the Virtual Machine:
      • Once the virtual machine is set up, install and run any software that may be causing BSODs within the VM.
      • If the virtual machine experiences a crash, it won’t affect your primary operating system, preventing system-wide issues.

    By using a virtual machine, you can test problematic software in a controlled environment, isolating potential BSOD triggers. This method not only helps you avoid crashes but also allows you to debug software issues without compromising your main system’s stability.

    This strategy is particularly useful for developers or anyone who frequently installs new or experimental software. It’s an excellent way to prevent BSODs from affecting your day-to-day tasks while keeping your system safe and stable.


    By following these software-based troubleshooting methods, you can effectively address BSOD issues and prevent them from reoccurring. Whether through built-in tools like Event Viewer or automated repair software, understanding the root cause of the BSOD is the first step to finding the right solution.

    How to Check and Resolve Hardware Issues Leading to BSOD

    When your computer encounters a Blue Screen of Death (BSOD), it typically points to a critical system error, often related to hardware issues. These errors can stem from faulty components like RAM, overheating, or other hardware failures. Diagnosing and fixing these problems can be intimidating, especially for beginners. In this section, we’ll guide you through simple yet effective steps to troubleshoot hardware-related BSOD causes and help you restore your system’s stability.

    How to Troubleshoot Hardware Problems Related to BSOD

    Several hardware components could be causing a Blue Screen of Death (BSOD), including RAM issues, overheating, or complete hardware failure. Thankfully, there are straightforward ways to identify and address these problems.

    1. Test for Faulty RAM

    One of the most common causes of BSOD errors is faulty RAM. If your system’s memory is malfunctioning, it can cause crashes and system instability. To test for memory issues, you can use MemTest86, a free tool that checks for memory errors. Here’s how you can use it:

    1. Download MemTest86 from here.
    2. Create a bootable USB drive with MemTest86.
    3. Restart your computer and boot from the USB drive.
    4. The tool will automatically start testing your RAM. Let it run for a few hours for a thorough check.

    If MemTest86 detects errors, it suggests that your RAM might need replacing. For more details on testing RAM, check this guide.

    2. Check for Overheating

    Overheating is another leading cause of BSODs. Excessive heat can damage internal components and lead to system crashes. To monitor your system’s temperature, you can use HWMonitor, a simple tool that tracks the temperatures of your CPU, GPU, and other components.

    Here’s how you can use HWMonitor to check your system’s temperature:

    1. Download HWMonitor from its official site.
    2. Open the tool to view the temperature readings.
    3. If any component exceeds the recommended temperature (usually over 80°C for most CPUs), overheating could be the cause of your BSODs.

    To prevent overheating, ensure your system is well-ventilated, clean out dust from fans, and consider improving your cooling setup if temperatures remain high.

    By testing your RAM and monitoring for overheating, you can address two of the most common hardware-related causes of BSOD.

    Evaluating System Configurations to Prevent BSOD

    Preventing future BSOD issues requires ensuring that your system’s configuration is optimized and up to date. Regularly updating your drivers and running system diagnostics can help keep your system running smoothly.

    1. Update Drivers

    Outdated or incompatible drivers can lead to BSOD errors. For instance, faulty graphics or storage drivers may cause conflicts that result in system crashes. To update your drivers, follow these steps:

    1. Open the Device Manager by pressing Windows + X and selecting it from the menu.
    2. Right-click on any device with a yellow warning icon and select Update Driver.
    3. Choose Search automatically for updated driver software.
    4. Windows will search for and install any available updates.

    Alternatively, you can visit the manufacturer’s website to download the latest drivers for your hardware.

    2. Run CHKDSK to Check for Hard Drive Errors

    Another common source of BSOD errors is hard drive corruption. You can use the CHKDSK utility to check your hard drive for errors and fix them automatically. Here’s how to run CHKDSK:

    1. Open Command Prompt as an administrator (right-click the Start button and select Command Prompt (Admin)).
    2. Type the following command:
    3. chkdsk /f
    4. Press Enter. The system will schedule a scan for the next reboot. Restart your computer to let CHKDSK check and repair your hard drive.

    For more on running CHKDSK to fix hard drive errors, visit this guide.

    By ensuring your drivers are up to date and running CHKDSK for hard drive diagnostics, you can significantly reduce the likelihood of BSODs in the future. Regularly performing these checks will help maintain system stability and prevent hardware issues from causing serious crashes.

    Understanding the Role of Drivers in BSOD Errors and Fixes

    The Blue Screen of Death (BSOD) is a common error in Windows that can be caused by various system issues, with driver conflicts being one of the most frequent culprits. Drivers are essential for your hardware to communicate with the operating system, and when they malfunction, it can lead to system instability, crashes, or even a BSOD error. In this section, we’ll explore how driver conflicts contribute to BSOD errors and how you can resolve or prevent these issues through proper driver management.

    The Impact of Driver Conflicts on BSOD Errors

    Driver conflicts are a common cause of Blue Screen of Death (BSOD) errors. When a driver is outdated, incompatible, or incorrectly configured, it can lead to system crashes that result in a BSOD. For instance, if two drivers are trying to control the same hardware component or if a driver isn’t compatible with your version of Windows, the operating system may trigger a BSOD to prevent further damage.

    One common example is GPU driver conflicts. If the graphics card driver is outdated or incompatible with other drivers or the operating system itself, it can cause the system to crash, resulting in a BSOD. For example, a conflict between the Intel GPU driver and the system’s display drivers can trigger a BSOD, halting the system’s operation.

    To identify potential driver conflicts, you can use the Windows Device Manager. Here’s how:

    1. Open Device Manager: Press Windows + X and select Device Manager.
    2. Look for Errors: Check for any devices with a yellow triangle icon, which indicates a problem with the driver.
    3. Review Event Viewer Logs: You can also view the Event Viewer logs for more specific error codes related to drivers, which may help pinpoint the conflict.

    By regularly checking for these signs, you can detect and resolve driver conflicts before they lead to a BSOD error.

    Best Practices for Updating Drivers to Prevent BSODs

    One of the most effective ways to prevent BSOD errors is by keeping your drivers up to date. Outdated drivers are a leading cause of system instability and can lead to crashes if they’re not maintained. Here are the best practices for updating your drivers to avoid BSODs:

    1. Use Windows Update: Windows automatically checks for driver updates through its built-in update system. To ensure your drivers are up to date:
      • Go to Settings > Update & Security > Windows Update.
      • Click Check for Updates to see if any driver updates are available for your system.
    2. Manually Update Drivers via Device Manager:
      • Open Device Manager.
      • Right-click on the device you want to update (e.g., graphics card or network adapter) and select Update driver.
      • Choose Search automatically for updated driver software to allow Windows to find and install the latest driver.
    3. Check for Compatibility: Before updating a driver, especially if you’re using specialized hardware (e.g., graphics cards or printers), ensure the driver is compatible with your version of Windows. Compatibility issues can lead to more BSODs after an update.
    4. Rollback Drivers When Necessary: If a recent driver update causes issues, you can roll back to a previous version:
      • In Device Manager, right-click the device and select Properties.
      • Go to the Driver tab and click Roll Back Driver if the option is available.

    By following these steps, you can minimize the risk of BSODs caused by driver issues. Regularly checking for updates and ensuring compatibility will help maintain system stability.

    For more guidance on resolving BSOD errors caused by driver issues, check out these helpful resources:

    Choosing the Best Long-Term Solution for Preventing BSOD

    The Blue Screen of Death (BSOD) is a notorious error screen displayed by Windows systems when a critical failure occurs. This can happen due to a variety of factors, including hardware malfunctions, driver conflicts, or system overloads. However, with the right preventative measures, it is possible to significantly reduce the risk of encountering a BSOD in the future. In this section, we will explore several effective strategies for long-term prevention, focusing on virtual machine configurations, backup strategies, and infrastructure design. These solutions aim to help you maintain system stability, safeguard your data, and minimize the chances of encountering a BSOD in your virtualized environment.

    How to Choose the Right Virtual Machine Configuration to Prevent BSOD

    One of the most effective ways to reduce the risk of encountering a BSOD is by properly configuring your virtual machine (VM). Virtual machines, when set up with sufficient resources and optimized settings, can greatly improve stability and reduce the chances of system crashes.

    To start, make sure to allocate enough CPU and memory to your VM. If the VM is starved of resources, it can lead to system crashes or slowdowns, increasing the likelihood of a BSOD. For example, if you are running a Windows VM, ensure that the memory allocation is appropriate for the tasks you need it to perform.

    Example Configuration:

    If your VM is intended for general use, allocate at least 2 CPU cores and 4 GB of RAM. For a server VM, you may need to allocate more based on the applications you intend to run.

    # Command to set VM memory and CPU configuration in VMware
    vmware-vim-cmd vmsvc/reload VM_NAME --cpu 2 --memory 4096
    

    This command allocates 2 CPU cores and 4 GB of RAM to the specified VM, ensuring it has enough resources to operate smoothly. It’s also important to set resource limits to prevent the VM from consuming excessive system resources, which could cause instability.

    Additionally, ensure that your VM settings are optimized for error prevention. Enabling features like memory overcommit can help ensure that VMs are provided with enough virtual memory when needed, reducing the risk of errors. Also, consider enabling features like virtualized I/O to improve VM stability.

    By fine-tuning your virtual machine configuration, you can prevent many potential causes of BSOD, such as resource exhaustion and system instability.

    Selecting the Best Backup Strategy for Protecting Against BSOD

    While configuring your VM properly is an essential step in preventing BSOD, another crucial aspect of minimizing system crashes is ensuring that you have a robust backup strategy in place. A solid backup plan can protect your data from loss during a BSOD, allowing you to recover quickly and restore your system to its previous state.

    There are several backup strategies to consider, including system image backups, cloud backups, and using Windows built-in backup tools. A system image backup creates a complete snapshot of your operating system, applications, and data, ensuring you can restore your machine in case of failure.

    Example Backup Strategy:

    1. Use Windows Backup to schedule automatic backups of your system. This can be done via the built-in backup utility:
      • Go to Settings > Update & Security > Backup > Add a drive, and select your backup destination.
      • Set up a schedule to back up your system regularly, ensuring you’re always prepared for a system failure.

    Alternatively, you can use third-party software like Acronis True Image for more advanced features, such as incremental backups or cloud storage integration. These tools offer more flexibility and are ideal for users who require additional control over their backup processes.

    By regularly backing up your system, you can safeguard your data and ensure that even if a BSOD occurs, you will have a reliable method to restore your system and prevent data loss.

    Evaluating the Role of Scalable, Low-Latency Infrastructure in BSOD Prevention

    When it comes to preventing BSOD, the role of your underlying infrastructure cannot be overlooked. Scalable, low-latency infrastructure can significantly enhance system reliability and reduce the risk of BSODs. This is particularly relevant in virtualized environments where multiple virtual machines depend on a stable and responsive infrastructure.

    A scalable infrastructure ensures that resources like CPU, memory, and storage are always available when needed, preventing overloading that could lead to crashes. Low-latency settings, such as those provided by cloud-based services, allow for faster response times, reducing the likelihood of system errors.

    Example Scalable Infrastructure:

    Consider a cloud-based setup using VMware vSphere for virtualization. By distributing workloads across multiple servers and utilizing vMotion (VMware’s live migration feature), you can maintain high availability and balance resources effectively.

    This approach minimizes downtime and reduces the risk of BSODs caused by overloaded or unresponsive systems. By using scalable, low-latency infrastructure, your virtualized environment will be more resilient to the types of system errors that typically lead to a BSOD.

    In conclusion, selecting the right infrastructure for your virtual machines and ensuring it is scalable and low-latency is an effective strategy to reduce the risk of BSOD. By pairing this with solid VM configurations and reliable backup systems, you can create a long-term solution that minimizes system crashes and keeps your virtual environment running smoothly.

    For further insights on optimizing your virtual environment, check out the Virtualization Technology: The Ultimate Guide to IT Transformation for additional tips and best practices.

    How to Use Safe Mode and Advanced Boot Options to Resolve BSOD

    When your Windows PC experiences a Blue Screen of Death (BSOD), it can be alarming. However, using Safe Mode and Advanced Boot Options can be highly effective in resolving issues caused by driver conflicts, disk errors, or corrupted system files. These tools allow you to troubleshoot and fix your system, even when Windows won’t boot normally. In this section, we’ll guide you through the process of using these recovery options to resolve BSOD issues.

    How to Fix BSOD Using Safe Mode and Advanced Boot Options

    Safe Mode is a powerful tool that can help you resolve the Blue Screen of Death (BSOD) caused by software or hardware issues. It starts Windows with only the essential files and drivers, which can help you troubleshoot system problems without interference from unnecessary programs. Here’s how to use Safe Mode and Advanced Boot Options to fix a BSOD:

    1. Enter Advanced Boot Options

      To access Safe Mode, you first need to boot into Advanced Boot Options. Follow these steps:

      • Restart your PC.
      • As your computer starts, press F8 (for Windows 7) or Shift + F8 (for Windows 8/10) to bring up the Advanced Boot Options menu. If this doesn’t work, you may need to access this menu through the Windows Recovery Environment (WinRE).
    2. Select Safe Mode

      In the Advanced Boot Options menu, use the arrow keys to select Safe Mode and press Enter. You’ll see a list of drivers and services loading, but only the essentials required to troubleshoot your system will be loaded.

    3. Run Startup Repair

      Once in Safe Mode, if your BSOD is caused by a corrupted file or driver, you can run Startup Repair to fix boot issues. Here’s how:

      • Open the Start menu and type “Startup Repair” in the search bar.
      • Select Startup Repair from the options and follow the on-screen instructions to scan and fix startup issues.

      You can also check for disk errors by running the chkdsk command in Safe Mode:

      chkdsk /f

      This command will scan and attempt to fix any disk errors that might be contributing to your BSOD.

    4. Perform a System Restore

      If you suspect that the BSOD is caused by a recent update or a faulty driver, you can use System Restore to roll back to a previous point when your system was functioning correctly. To do this:

      • Open Control Panel > Recovery > Open System Restore.
      • Follow the prompts to choose a restore point before the BSOD occurred.
    5. Use System Configuration to Disable Problematic Drivers

      If a driver is causing the BSOD, you can use the System Configuration tool in Safe Mode to disable it:

      • Press Windows + R, type msconfig, and hit Enter.
      • In the Boot tab, check the box next to Safe Boot and then click Apply.
      • Restart your system to begin troubleshooting specific drivers or software.

      By following these steps, you can effectively use Safe Mode and Advanced Boot Options to fix a BSOD caused by system file corruption or problematic drivers. These tools can help you isolate and resolve the underlying issues, allowing Windows to boot normally again.

    Monitoring System Health to Avoid Future BSODs

    Once you’ve successfully resolved the Blue Screen of Death (BSOD), it’s essential to monitor your system’s health to prevent future crashes. Regular maintenance can help you avoid common issues like driver conflicts or disk errors that lead to BSODs.

    1. Use Windows Memory Diagnostic

      To check for memory (RAM) issues, run the Windows Memory Diagnostic tool. This tool will check for errors in your RAM that could be causing system instability:

      • Press Windows + R, type mdsched.exe, and hit Enter.
      • Follow the prompts to restart your computer and check your RAM.
    2. Keep Drivers Updated

      Outdated or incompatible drivers are a common cause of BSODs. To prevent this:

      • Regularly check for driver updates via Device Manager or your device manufacturer’s website.
      • Ensure that your graphics, network, and motherboard drivers are up to date to reduce the risk of BSODs.

    By maintaining your system with regular checks and updates, you can significantly reduce the chances of encountering future Blue Screen errors.

    Optimizing System Performance After Resolving BSOD

    After resolving a Blue Screen of Death (BSOD), it’s important to take proactive steps to optimize your system’s performance and prevent future crashes. Maintaining system stability is essential to ensure smooth operation and longevity. In this section, we’ll cover practical strategies that will help you keep your system running efficiently, including routine maintenance, system monitoring, and utilizing virtual machine configurations.

    How to Optimize System Performance for Long-Term BSOD Prevention

    To prevent future BSODs and improve overall system performance, routine maintenance is essential. The key steps include performing regular disk cleanups, updating drivers, and ensuring the health of your hardware.

    1. Disk Cleanup: Cleaning up unnecessary files helps improve system performance by freeing up disk space. Windows offers a built-in tool for this:
      • Open the Start Menu and type “Disk Cleanup”.
      • Select your primary drive (usually C:) and let the tool analyze which files to remove.
      • Click OK and then Delete Files to remove temporary files, system files, and other unnecessary data.

      Performing this regularly ensures your system remains efficient by preventing clutter and freeing up valuable space.

    2. Driver Updates: Outdated drivers are a common cause of BSODs. Keeping your drivers up-to-date ensures compatibility with the latest software updates and hardware improvements. To update drivers:
      • Press Win + X and select Device Manager.
      • Expand the categories (e.g., Display adapters, Sound, video and game controllers), right-click the device, and select Update driver.
      • Choose Search automatically for updated driver software to allow Windows to find the latest version.

      Updating drivers ensures system stability and helps prevent crashes by resolving known issues.

    3. Hardware Health: Make sure your hardware is functioning properly. Regularly check the physical health of components like your hard drive and memory. You can use built-in tools such as Windows Memory Diagnostic to check for memory issues and chkdsk for disk health.

    Monitoring System Health and Optimizing Performance Post-BSOD

    Once your system is running smoothly after resolving the BSOD, ongoing monitoring is crucial for maintaining performance. Regular checks using built-in tools will help ensure the system remains healthy and prevent future disruptions.

    1. Task Manager: This is the simplest way to check if your system is running optimally. To open it:
      • Press Ctrl + Shift + Esc or right-click the taskbar and select Task Manager.
      • Under the Performance tab, monitor CPU, memory, disk, and network usage. If any component consistently runs at high usage, it may indicate an issue that requires attention.
    2. Performance Monitor: For a more detailed view of system performance, use the built-in Performance Monitor:
      • Press Win + R, type perfmon, and press Enter.
      • Use this tool to track system performance over time. Look for any irregularities, such as spikes in CPU or disk usage, which could lead to BSODs.
    3. Event Viewer: The Event Viewer allows you to check for system errors or warnings that might indicate underlying problems. To open it:
      • Press Win + X and select Event Viewer.
      • Navigate to Windows Logs > System to review any errors or critical events that could affect system performance.

    These monitoring tools are simple yet powerful ways to stay on top of your system’s health and avoid future BSODs.

    Utilizing Flexible Virtual Machine Configurations for Ongoing System Optimization

    Virtual machines (VMs) can be a valuable tool for testing and optimizing system configurations without the risk of destabilizing your main system. Setting up a virtual machine provides a safe environment where you can experiment with settings, install software, and monitor system performance.

    1. Setting Up a Virtual Machine: To create a VM on Windows, you can use the built-in Hyper-V feature or third-party software like VirtualBox. Here’s a simple guide to set up a VM:
      • Go to Control Panel > Programs > Turn Windows features on or off.
      • Enable Hyper-V and restart your computer.
      • Open Hyper-V Manager, click New, and follow the prompts to create a new virtual machine.
    2. Resource Allocation: When configuring a VM, ensure that you allocate appropriate resources to prevent overloading your system. For example, allocate sufficient CPU cores and memory to the VM but avoid over-allocating, as this could negatively impact your primary system’s performance.
    3. Testing and Optimization: Use the virtual machine to test new configurations or software updates before applying them to your main system. This can help you identify potential issues and optimize settings without risking a BSOD on your primary environment.

    By utilizing virtual machines for testing and optimization, you can maintain a stable system and avoid potential BSOD occurrences. This approach gives you flexibility in managing system performance without compromising the health of your main system.

    In conclusion, optimizing your system’s performance after resolving a Blue Screen of Death (BSOD) involves regular maintenance, monitoring system health, and leveraging virtual machines for safe experimentation. By following these practical steps, you can ensure long-term system stability and minimize the chances of future crashes.

    Conclusion: Choosing the Right BSOD Solution for Your Needs

    When dealing with a Blue Screen of Death (BSOD), the best solution depends on the underlying cause of the issue and your needs. Whether you’re looking for a quick fix to get back to work or a long-term prevention strategy to avoid future occurrences, there are several approaches to consider. In this section, we will help you navigate these options and select the most effective solution for your situation.

    Evaluating the Most Effective Solution Based on Your Situation

    The first step in resolving a Blue Screen of Death (BSOD) is to assess the root cause of the error. Various solutions can address different types of BSODs, and understanding your situation can help you choose the right approach. If the BSOD is caused by recent updates or driver issues, using driver updates through the Device Manager can quickly resolve the problem. For example, if a driver conflict is causing the BSOD, opening Device Manager, locating the malfunctioning device, and updating the driver may be enough to fix the error.

    In contrast, if the issue is related to hardware or system errors, running Windows Memory Diagnostic or performing system diagnostics may be necessary. These tools help identify underlying problems such as faulty memory or disk errors that can cause the system to crash. For a quick fix, tools like the Event Viewer can also provide insights into specific error codes and help direct you to the right solution.

    However, if the BSOD keeps occurring, it’s essential to think beyond immediate fixes. While these solutions can help temporarily resolve the issue, long-term prevention strategies should also be considered.

    Practical Tips for Long-Term BSOD Prevention

    To prevent future Blue Screen of Death (BSOD) errors, regular maintenance and proactive steps are key. One effective strategy is setting up system restore points. By creating a restore point before installing new software or updates, you can roll back your system to a stable state if issues arise. This can prevent BSODs caused by incompatible changes or faulty updates.

    Another important practice is performing disk cleanup regularly to maintain system health. By deleting temporary files, system logs, and other unnecessary data, you can reduce the chances of a system crash caused by overloaded disk space. Additionally, using system stability tools can help monitor the overall health of your system, ensuring that drivers and software are always up to date and that there are no hidden issues.

    For a more proactive approach, consider running Windows Memory Diagnostic periodically to check for memory-related errors that might trigger BSODs. Combining these habits can go a long way in preventing future crashes and maintaining a stable system.

    By following these practical tips and choosing the right solution for your specific situation, you can effectively manage and prevent BSODs in the long term. For more information on troubleshooting and fixing BSODs, you can refer to Microsoft’s official guide to resolving Blue Screen errors and other trusted resources like PCWorld’s BSOD troubleshooting tips.